Page 843 of 1500

ON-VEHICLE SERVICE
HEATER, AIR CONDITIONING AND VENTILATION55-142
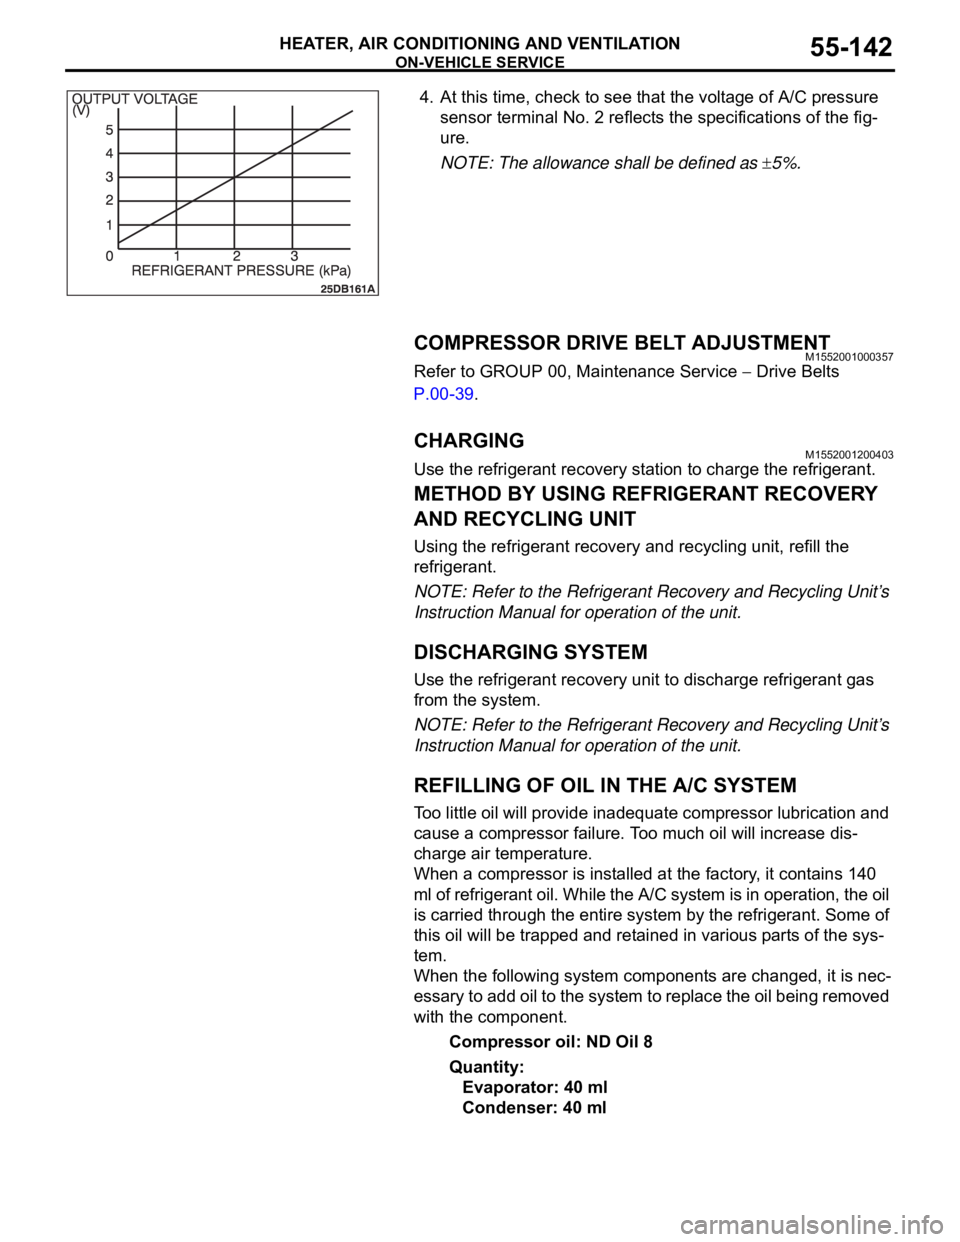
4. At this time, check to see that the voltage of A/C pressure
sensor terminal No. 2 reflects the specifications of the fig-
ure.
NOTE: The allowance shall be defined as
5%.
COMPRESSOR DRIVE BELT ADJUSTMENTM1552001000357
Refer to GROUP 00, Maintenance Service Drive Belts
P.00-39.
CHARGING M1552001200403
Use the refrigerant recovery station to charge the refrigerant.
METHOD BY USING REFRIGERANT RECOVERY
AND RECYCLING UNIT
Using the refrigerant recovery and recycling unit, refill the
refrigerant.
NOTE: Refer to the Refrigerant Recovery and Recycling Unit’s
Instruction Manual for operation of the unit.
DISCHARGING SYSTEM
Use the refrigerant recovery unit to discharge refrigerant gas
from the system.
NOTE: Refer to the Refrigerant Recovery and Recycling Unit’s
Instruction Manual for operation of the unit.
REFILLING OF OIL IN THE A/C SYSTEM
Too little oil will provide inadequate compressor lubrication and
cause a compressor failure. Too much oil will increase dis-
charge air temperature.
When a compressor is installed at the factory, it contains 140
ml of refrigerant oil. While the A/C system is in operation, the oil
is carried through the entire system by the refrigerant. Some of
this oil will be trapped and retained in various parts of the sys-
tem.
When the following system components are changed, it is nec-
essary to add oil to the system to replace the oil being removed
with the component.
Compressor oil: ND Oil 8
Quantity:
Evaporator: 40 ml
Condenser: 40 ml
Page 846 of 1500

ON-VEHICLE SERVICE
HEATER, AIR CONDITIONING AND VENTILATION55-145
LOST CHARGE
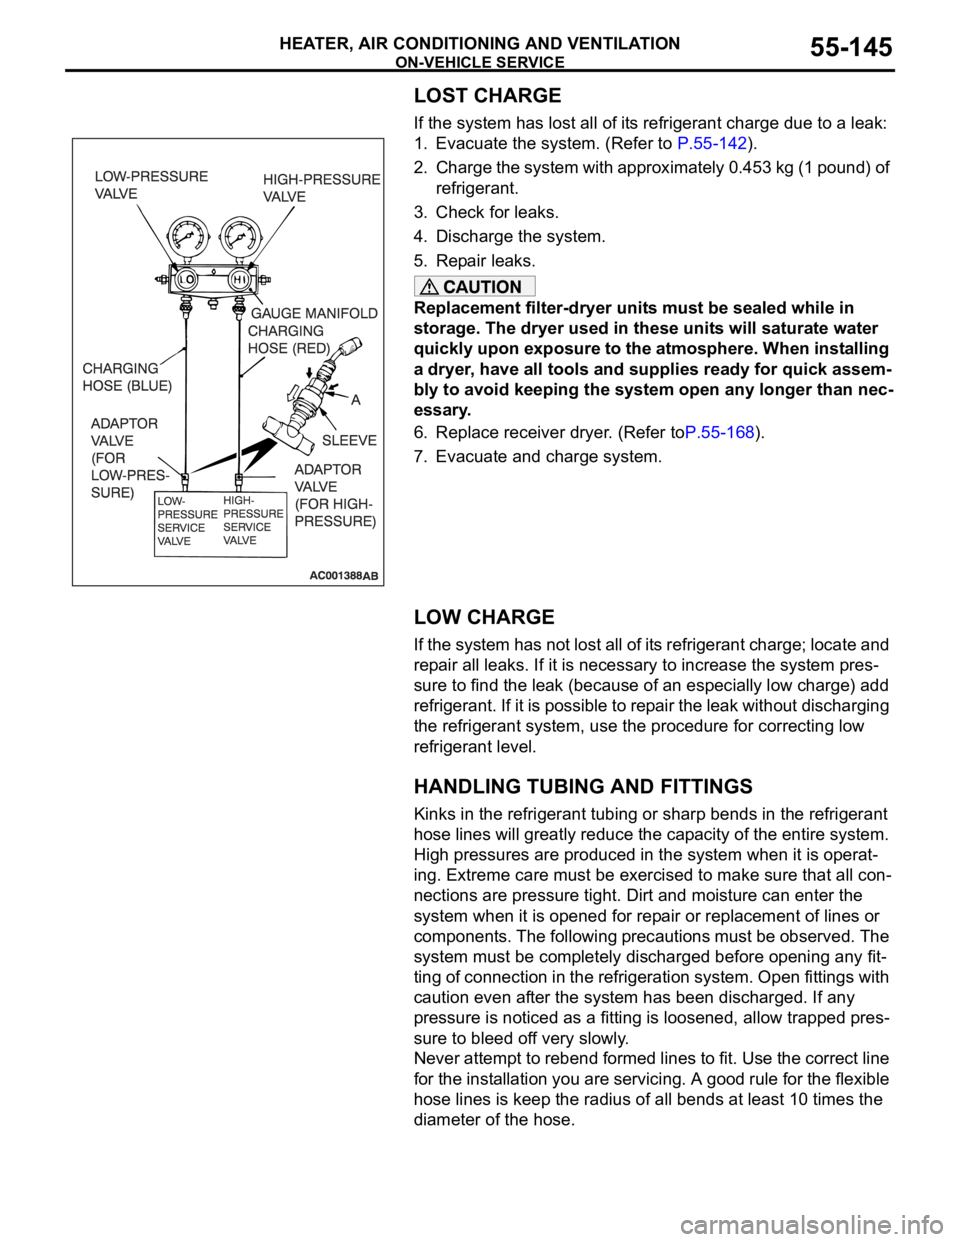
If the system has lost all of its refrigerant charge due to a leak:
1. Evacuate the system. (Refer to P.55-142).
2. Charge the system with approximately 0.453 kg (1 pound) of
refrigerant.
3. Check for leaks.
4. Discharge the system.
5. Repair leaks.
Replacement filter-dryer units must be sealed while in
storage. The dryer used in these units will saturate water
quickly upon exposure to the atmosphere. When installing
a dryer, have all tools and supplies ready for quick assem-
bly to avoid keeping the system open any longer than nec-
essary.
6. Replace receiver dryer. (Refer toP.55-168).
7. Evacuate and charge system.
LOW CHARGE
If the system has not lost all of its refrigerant charge; locate and
repair all leaks. If it is necessary to increase the system pres-
sure to find the leak (because of an especially low charge) add
refrigerant. If it is possible to repair the leak without discharging
the refrigerant system, use the procedure for correcting low
refrigerant level.
HANDLING TUBING AND FITTINGS
Kinks in the refrigerant tubing or sharp bends in the refrigerant
hose lines will greatly reduce the capacity of the entire system.
High pressures are produced in the system when it is operat-
ing. Extreme care must be exercised to make sure that all con-
nections are pressure tight. Dirt and moisture can enter the
system when it is opened for repair or replacement of lines or
components. The following precautions must be observed. The
system must be completely discharged before opening any fit-
ting of connection in the refrigeration system. Open fittings with
caution even after the system has been discharged. If any
pressure is noticed as a fitting is loosened, allow trapped pres-
sure to bleed off very slowly.
Never attempt to rebend formed lines to fit. Use the correct line
for the installation you are servicing. A good rule for the flexible
hose lines is keep the radius of all bends at least 10 times the
diameter of the hose.
Page 1086 of 1500

WINDOW GLASS
BODY42-19
>>B<
1. When replacing the windshield, temporarily set the
windshield against the body, and place a mating mark on the
windshield and body.
The primer strengthens the adhesive, so be sure to
apply it evenly around the entire circumference. How-
ever, a too thick application will weaken the adhesive.
Do not touch the coated surface.
Do not apply the primer on the remaining adhesive
because of weakening the adhesive.
2. Soak a sponge in the primer, and apply evenly to the
windshield and the body in the specified places.
3. Allow the windshield to dry for at least three minutes after
applying primer.
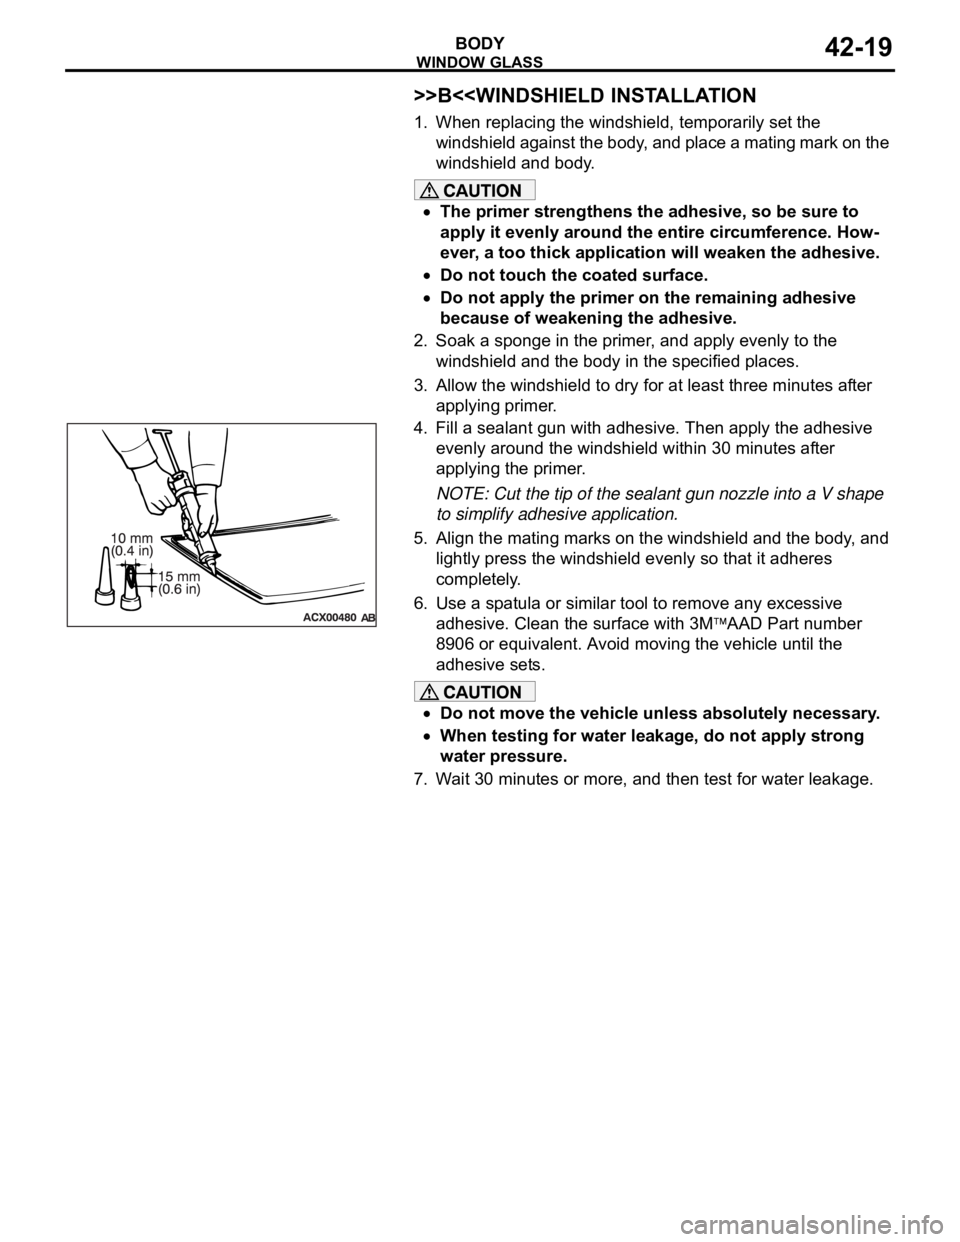
4. Fill a sealant gun with adhesive. Then apply the adhesive
evenly around the windshield within 30 minutes after
applying the primer.
NOTE: Cut the tip of the sealant gun nozzle into a V shape
to simplify adhesive application.
5. Align the mating marks on the windshield and the body, and
lightly press the windshield evenly so that it adheres
completely.
6. Use a spatula or similar tool to remove any excessive
adhesive. Clean the surface with 3M
AAD Part number
8906 or equivalent. Avoid moving the vehicle until the
adhesive sets.
Do not move the vehicle unless absolutely necessary.
When testing for water leakage, do not apply strong
water pressure.
7. Wait 30 minutes or more, and then test for water leakage.