Page 208 of 474
206 Controls in detailAutomatic climate controlRear automatic climate control panel
iWhen the rear seats are not occupied
(rear seat belts unbuckled) the rear cli-
mate control system adopts the set-
tings of the front climate control
system.
Item
1
Left center air vent, adjustable
2
Display
3
Right center air vent, adjustable
4
Thumbwheel for air distribution
5
Temperature control, right
6
Air volume (automatic, manual)
7
Temperature control, left
8
Rear climate control system on/off
Residual engine heat utilization
Warning!
G
Follow the recommended settings for heat-
ing and cooling as given in the instructions
for the front automatic climate control
(�page 192). Otherwise the windows could
fog up, impairing visibility for the driver and
endangering you and others.
Page 242 of 474
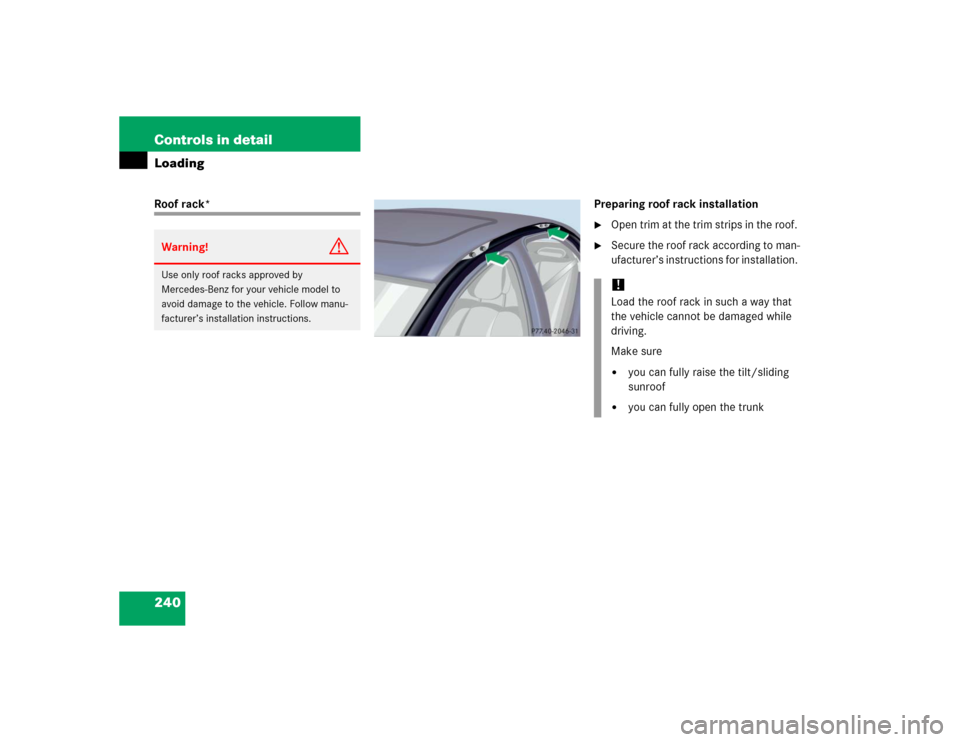
240 Controls in detailLoadingRoof rack* Preparing roof rack installation
�
Open trim at the trim strips in the roof.
�
Secure the roof rack according to man-
ufacturer’s instructions for installation.
Warning!
G
Use only roof racks approved by
Mercedes-Benz for your vehicle model to
avoid damage to the vehicle. Follow manu-
facturer’s installation instructions.
!Load the roof rack in such a way that
the vehicle cannot be damaged while
driving.
Make sure�
you can fully raise the tilt/sliding
sunroof
�
you can fully open the trunk
Page 243 of 474

241 Controls in detail
Loading
Loading instructions
The total load weight including vehicle oc-
cupants and luggage/cargo should not ex-
ceed the load limit or vehicle capacity
weight as indicated on the corresponding
placard located on the driver’s door B-pil-
lar.
Cargo tie-down hooks
Six hooks are located in the trunk.�
Carefully secure cargo by applying
even load on all hooks with rope of suf-
ficient strength to hold down the cargo.
Warning!
G
Always fasten items being carried as secure-
ly as possible.
In an accident, during hard braking or sud-
den maneuvers, loose items will be thrown
around inside the vehicle and can cause in-
jury to vehicle occupants unless the items
are securely fastened in the vehicle.
To help avoid personal injury during a colli-
sion or sudden maneuver, exercise care
when transporting cargo. Put luggage or car-
go in the trunk if possible. Do not pile lug-
gage or cargo higher than the seat backs.
Do not place anything on the rear-window
shelf.
Never drive vehicle with trunk open. Deadly
carbon monoxide (CO) gases may enter ve-
hicle interior resulting in unconsciousness
and death.
Page 256 of 474

254 Controls in detailUseful featuresTelephone*
Radio transmitters, such as a portable tele-
phone or a citizens band unit, should only
be used inside the vehicle if they are con-
nected to an antenna that is installed on
the outside of the vehicle.
The external antenna must be approved by
Mercedes-Benz. Please contact an autho-
rized Mercedes-Benz Center for informa-
tion on the installation of an approved
external antenna. Refer to the radio trans-
mitter operation instructions regarding use
of an external antenna.You can take and place telephone calls us-
ing thes andt buttons on the
steering wheel. To carry out other tele-
phone functions, use the control system
(
�page 143).
See separate operating manual for instruc-
tions on how to use the telephone.
Warning!
G
Never operate radio transmitters equipped
with a built-in or attached antenna (i.e. with-
out being connected to an external antenna)
from inside the vehicle while the engine is
running. Doing so could lead to a malfunc-
tion of the vehicle’s electronic system, pos-
sibly resulting in an accident and/or serious
personal injury.
Warning!
G
Please do not forget that your primary re-
sponsibility is to drive the vehicle. A driver’s
attention to the road must always be
his/her primary focus when driving. For
your safety and the safety of others, we rec-
ommend that you pull over to a safe location
and stop before placing or taking a tele-
phone call.
If you choose to use the telephone
1 while
driving, please use the hands-free device
and only use the telephone when road,
weather and traffic conditions permit. Some
jurisdictions prohibit the driver from using a
cellular telephone while driving a vehicle.
Only operate the COMAND (Cockpit Man-
agement and Data System)
1 if road, weather
and traffic conditions permit.
Bear in mind that at a speed of just 30 mph
(approximately 50 km/h), your vehicle is
covering a distance of 44 feet (approximate-
ly 14 m) every second.
1Observe all legal requirements.
Page 258 of 474

256 Controls in detailUseful featuresSystem self-check
Initially, after switching on ignition, mal-
functions are detected and indicated (the
indicator lamps in the SOS button, the
Roadside Assistance button• and the
Information button¡ stay on longer
than ten seconds or do not come on). The
messageTELE AID MALFUNCTION
DRIVE TO WORKSHOP!appears for approximately ten seconds in
the multifunction display.Emergency calls
An emergency call is initiated
automatically following an accident in
which the emergency tensioning devices
(ETDs) or air bags deploy.
An emergency call can also be initiated
manually by opening the cover next to the
interior rear view mirror labeled SOS, then
briefly pressing the button located under
the cover. See (
�page 257) for
instructions on initiating an emergency call
manually.
Once the emergency call is in progress, the
indicator lamp in the SOS button will begin
to flash. The message
CONNECTING CALL
appears in the multifunction display and
the audio system is muted. When the con-
nection is established, the message
CALL
CONNECTED
appears in the multifunction
display. All information relevant to the
emergency, such as the location of the ve-
hicle (determined by the GPS satellite loca-
tion system), vehicle model, identification
number and color are generated.
iThe Tele Aid system utilizes the cellular
network for communication and the
GPS (Global Positioning System) satel-
lites for vehicle location. If either of
these signals are unavailable, the Tele
Aid system may not function and if this
occurs, assistance must be summoned
by other means.
Warning!
G
If the indicator lamps in the SOS button, in
the Roadside Assistance button and/or in
the Information button do not come on dur-
ing the system self-check, or if any of these
indicators remain illuminated continuously
in red and/or the message TELE AID MALFUNCTION
DRIVE TO WORKSHOP!is displayed in the multifunction display af-
ter the system self-check, a malfunction in
the system has been detected.
If a malfunction is indicated as outlined
above, the system may not operate as ex-
pected. Have the system checked at the
nearest Mercedes-Benz Center as soon as
possible.
Page 269 of 474

267 Controls in detail
Useful features
Step 7:�
To program the remaining two buttons,
repeat the steps above starting with
step 3.Rolling code programming
To train a garage door opener (or other roll-
ing code devices) with the rolling code fea-
ture, follow these instructions after
completing the “Programming” portion
(steps 1 through 6) of this text. (A second
person may make the following training
procedures quicker and easier.)
Step 8:
�
Locate “training” button on the garage
door opener motor head unit.
Exact location and color of the button
may vary by garage door opener brand.
Depending on manufacturer, the “train-
ing” button may also be referred to as
“learn” or “smart” button. If there is dif-
ficulty locating the transmitting button,
refer to the garage door opener opera-
tor’s manual. Step 9:
�
Press “training” button on the garage
door opener motor head unit.
The “training light” is activated.
You have 30 seconds to initiate the follow-
ing step.
Step 10:
�
Firmly press, hold for two seconds and
release the programmed integrated
signal transmitter button (2, 3
or4).
Step 11:
�
Press, hold for two seconds and re-
lease same button a second time to
complete the training process.
Some garage door openers (or other rolling
code equipped devices) may require you to
perform this procedure a third time to
complete the training.
iIf the indicator lamp1 flashes rapidly
for about two seconds and then turns
to a constant light, continue with pro-
gramming steps 8 through 12 as your
garage door opener may be equipped
with the “rolling code feature”.
��
Page 273 of 474
271 Operation
The first 1000 miles (1500 km)
Driving instructions
At the gas station
Engine compartment
Tires and wheels
Winter driving
Maintenance
Vehicle care
Page 274 of 474

The more cautiously you treat yo")
272 OperationIn the “Operation” section you will find de-
tailed information on operating, maintain-
ing and caring for your vehicle.The first 1000 miles (1500 km)
The more cautiously you treat your vehicle
during the break-in period, the more satis-
fied you will be with its performance later
on.�
Drive your vehicle during the first
1 000 miles (1 500 km) at varying but
moderate vehicle and engine speeds.
�
During this period, avoid heavy loads
(full throttle driving) and excessive en-
gine speeds (no more than
2/3 of maxi-
mum rpm in each gear).
�
Avoid accelerating by kick-down.
�
Do not attempt to slow the vehicle
down by shifting to a lower gear using
the gear selector lever.
�
Select positions3,2or1 only when
driving at moderate speeds (for hill
driving).
�
Select C as the preferred shift program
(�page 179) for the first 1000 miles
1500 km).After 1 000 miles (1 500 km) you may grad-
ually increase vehicle and engine speeds
to the permissible maximum.
All of the above instructions, as may apply
to your vehicle type, also apply when driv-
ing the first 1 000 miles (1 500 km) after
the engine or the rear differential has been
replaced.
!Additional instructions for AMG vehi-
cles:�
During the first 1 000 miles
(1 500 km), do not exceed a speed
of 85 mph (140 km/h).
�
During this period, avoid engine
speeds above 4500 rpm in each
gear.
iAlways obey applicable speed limits.
 the rear cli-
mate control system adopts the set-")

Driving instructions
At the gas station
Engine compartment
Tires and wheels
Winter driving
Maintenance
Vehicle care")