Page 238 of 474

237
Controls in detail
Power windows
� Power windows
Opening and closing the windows
The side windows are opened and closed
electrically. The switches for all the side
windows are on the driver’s door. The
switch for the passenger door is on the
passenger door.
1 Left front window
2 Right front window
Warning!
G
When closing the windows, make sure there
is no danger of anyone being harmed by the
closing procedure.
The closing of the door windows can be im-
mediately halted by releasing the switch or,
if switch was pulled past the resistance
point and released, by either pressing or
pulling the respective switch.
If the window encounters an obstruction
that blocks its path in a circumstance where
you pulled the switch past the resistance
point and released it to close the window,
the automatic reversal function will stop the
window and open it slightly.
If the window encounters an obstruction
that blocks its path in a circumstance where
you are closing the window by pulling and
holding the switch, or by pressing and hold-
ing button ‹ on the SmartKey, the auto-
matic reversal function will not operate
When leaving the vehicle, always remove the
SmartKey from starter switch, take it with
you, and lock your vehicle. Do not leave chil-
dren unattended in the vehicle, or with ac-
cess to an unlocked vehicle. Unsupervised
use of vehicle equipment can cause an acci-
dent and/or serious personal injury.
Page 240 of 474

239
Controls in detail
Power windows
Stopping windows�
Press or pull respective switch again.
Opening and closing the windows with
the SmartKey
The panorama roof with power tilt/sliding
panel* (
�page 241) will also be opened or
closed when the power windows are oper-
ated with the SmartKey.
!If the upward movement of the window
is blocked during the closing proce-
dure, the window will stop and open
slightly.
Remove the obstruction, pull the
switch again past the resistance point
and release.
If the window still does not close when
there is no obstruction, then pull and
hold the switch again. The side window
will then close without the obstruction
sensor function.
Warning!
G
Driver's door only:
If within five seconds you again pull the
switch past the resistance point and re-
lease, the automatic reversal will not func-
tion.
Warning!
G
Never operate the windows or panorama
roof with power tilt/sliding panel* if there is
the possibility of anyone being harmed by
the opening or closing procedure.
In the event that the procedure causes po-
tential danger, the procedure can be imme-
diately halted by releasing the button on the
SmartKey. To reverse direction of move-
ment, press Œ for opening or ‹ for
closing.
��
Page 258 of 474

257
Controls in detail
Useful features
Turning the swiveling cup holder inward
and sliding it in�
Turn the cup holder in the direction of
arrow
3 until it engages.
Turn the cup holder in the direction of
arrow 4 until it engages. Parcel net in front passenger footwell
A small convenience parcel net is located
in the front passenger footwell. It is for
small and light items, such as road maps,
mail, etc.
Ashtrays
Center console ashtray
1 Cover plate
2 Sliding button
3 Ashtray insert�
Briefly press the bottom of cover
plate 1.
The cover plate 1 opens
automatically.
!No objects should be in the stationary
cup holder when the swiveling cup
holder is turned inward and pushed in.
Otherwise the swiveling cup holder or
the objects could be damaged.
Warning!
G
Do not place heavy or fragile objects, or ob-
jects having sharp edges, in the parcel net.
In an accident, during hard braking or sud-
den maneuvers, they could be thrown
around inside the vehicle, and cause injury
to vehicle occupants.
Page 259 of 474

258 Controls in detailUseful featuresRemoving ashtray insert�
Secure vehicle from movement by
setting the parking brake.
�
Move the gear selector lever to
positionN (manual transmission:
second gear).
Now you have more room to take out
the ashtray insert.
�
Push sliding button 2 to the right.
The ashtray insert 3 slides out
slightly.
�
Remove the ashtray insert. Reinstalling ashtray insert
�
Push the ashtray insert
3 down into
the retainer until it engages.
�
Push down cover plate 1 to close
ashtray.
The cover plate engages.
Rear seat ashtray
1 Button
2 Ashtray insert
3 Cover
�
Pull at top of cover 3 to open ashtray. Removing ashtray insert
�
Push button
1 to disengage ashtray
insert 2 and remove it.
Reinstalling the ashtray insert
�
Push the ashtray insert 2 down into
the retainer until it engages.
�
Push at the top of cover 3 to close
ashtray.
Warning!
G
Remove front ashtray only with vehicle
standing still. Set the parking brake to
secure vehicle from movement. Move gear
selector lever to position N (manual trans-
mission: second gear). With gear selector
lever in position N (manual transmission:
second gear) turn off the engine.
Page 260 of 474
259
Controls in detail
Useful features
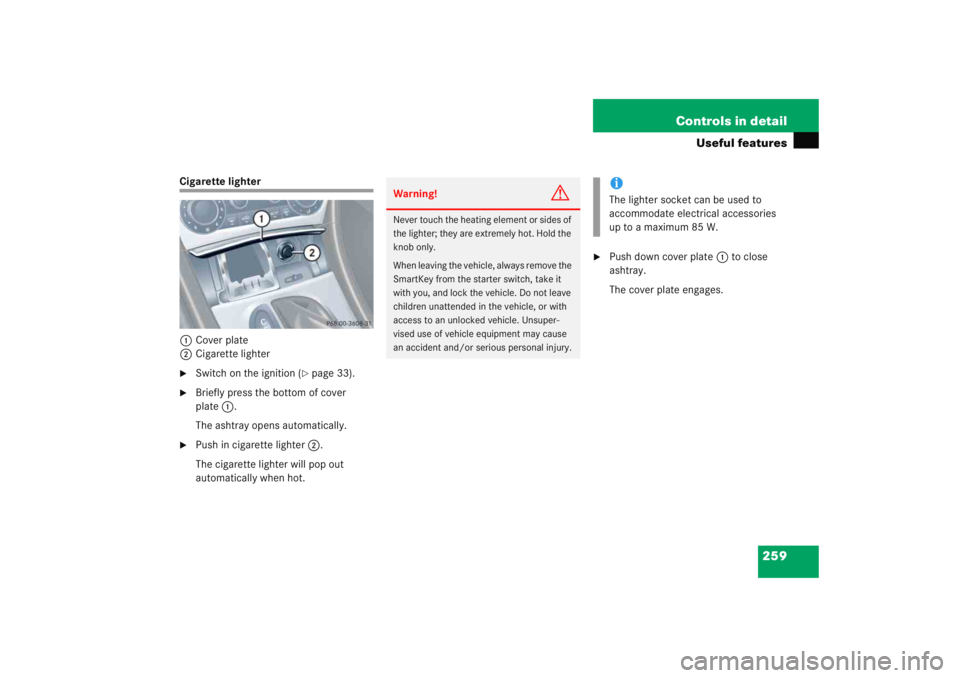
Cigarette lighter
1 Cover plate
2 Cigarette lighter�
Switch on the ignition (
�page 33).
�
Briefly press the bottom of cover
plate 1.
The ashtray opens automatically.
�
Push in cigarette lighter 2.
The cigarette lighter will pop out
automatically when hot.
�
Push down cover plate 1 to close
ashtray.
The cover plate engages.
Warning!
G
Never touch the heating element or sides of
the lighter; they are extremely hot. Hold the
knob only.
When leaving the vehicle, always remove the
SmartKey from the starter switch, take it
with you, and lock the vehicle. Do not leave
children unattended in the vehicle, or with
access to an unlocked vehicle. Unsuper-
vised use of vehicle equipment may cause
an accident and/or serious personal injury.
iThe lighter socket can be used to
accommodate electrical accessories
up to a maximum 85 W.
Page 261 of 474
.
�
Pull at top of cover 1 to open")
260 Controls in detailUseful featuresElectrical outlet
Socket in the rear passenger
compartment1 Cover
2 Electrical outlet cover
�
Switch on the ignition (
�page 33).
�
Pull at top of cover 1 to open ashtray.
�
Flip electrical outlet cover 2 to the left
and insert electrical plug (cigarette
lighter type).
Telephone*
Radio transmitters, such as a portable tele-
phone or a citizens band unit, should only
be used inside the vehicle if they are con-
nected to an antenna that is installed on
the outside of the vehicle.
The external antenna must be approved by
Mercedes-Benz. Please contact an autho-
rized Mercedes-Benz Center for informa-
tion on the installation of an approved
external antenna. Refer to the radio trans-
mitter operation instructions regarding use
of an external antenna.
iThe electrical outlet can be used to
accommodate electrical consumers
(e.g. air pump, auxiliary lamps) up to a
maximum of 180 W.
Warning!
G
Never operate radio transmitters equipped
with a built-in or attached antenna (i.e. with-
out being connected to an external antenna)
from inside the vehicle while the engine is
running. Doing so could lead to a malfunc-
tion of the vehicle’s electronic system, pos-
sibly resulting in an accident and/or serious
personal injury.
Page 284 of 474

283
Operation
Driving instructions
Winter driving instructions
The most important rule for slippery or icy
roads is to drive sensibly and to avoid
abrupt acceleration, braking and steering
maneuvers. Do not use the cruise control
system under such conditions.
When the vehicle is in danger of skidding,
move gear selector lever to position
N or,
in case of manual transmission declutch.
Try to keep the vehicle under control by
corrective steering action. Road salts and chemicals can adversely
affect braking efficiency. Increased pedal
force may become necessary to produce
the normal braking effect.
Depressing the brake pedal periodically
when traveling at length on salt-strewn
roads can bring road-salt-impaired braking
efficiency back to normal.
If the vehicle is parked after being driven
on salt-treated roads, the braking efficien-
cy should be tested as soon as possible
after driving is resumed.
For more information on winter driving, see
“Winter driving” (
�page 328).
iFor information on driving with snow
chains, see “Snow chains”
(�page 329).
Warning!
G
On slippery road surfaces, never downshift
in order to obtain braking action. This could
result in drive wheel slip and reduced vehi-
cle control. Your vehicle’s ABS will not pre-
vent this type of loss of control.
Warning!
G
Make sure not to endanger any other road
users when carrying out these braking
maneuvers.
Warning!
G
If the vehicle becomes stuck in snow, make
sure snow is kept clear of the exhaust pipe
and from around the vehicle with the engine
running. Otherwise, deadly carbon monox-
ide (CO) gases may enter vehicle interior
resulting in unconsciousness and death.
To assure sufficient fresh air ventilation,
open a window slightly on the side of the
vehicle not facing the wind.Warning!
G
The outside temperature indicator is not
designed to serve as an ice-warning device
and is therefore unsuitable for that purpose.
Indicated temperatures just above the freez-
ing point do not guarantee that the road sur-
face is free of ice.
Page 303 of 474
.
Treadwear indicators")
302 OperationTires and wheelsTread depth
Do not allow your tires to wear down too
far. Adhesion properties on wet roads are
sharply reduced at tread depths under 1/8in (3 mm).
Treadwear indicators (TWI) are required by
law. These indicators are located in six
places on the tread circumference and
become visible at a tread depth of approx-
imately
1/16
in (1.6 mm), at which point
the tire is considered worn and should be
replaced.
Recommended minimum tire tread depth:
�
Summer tires
1/8in (3 mm)
�
Winter tires
1/6in (4 mm)
1TWI (T
readW
ear I
ndicator)
The treadwear indicator appears as a solid
band across the tread. Storing tires
Cleaning tires
Warning!
G
Although the applicable federal motor safety
laws consider a tire to be worn when the
treadwear indicators (TWI) become visible at
approximately
1/16in (1.6 mm), we
recommend that you do not allow your tires
to wear down to that level. As tread depth
approaches
1/8in (3 mm), the adhesion
properties on a wet road are sharply
reduced.
Depending upon the weather and/or road
surface (conditions), the tire traction varies
widely.
!Keep unmounted tires in a cool, dry
place with as little exposure to light as
possible. Protect tires from contact
with oil, grease and gasoline.!Never use a round nozzle to power
wash tires. The intense jet of water can
result in damage to the tire.
Always replace a damaged tire.