Page 27 of 474
26 At a glanceMultifunction steering wheel
Item
Page
1
Multifunction display in
speedometer
123
Operating control
system
123
2
Selecting the submenu or
setting the volume:
Press buttonæup/to increaseçdown/to decrease
3
Telephone*:
Press buttonsto take a calltto end a call
Item
Page
4
Moving within a menu:
Press buttonjfor next displaykfor previous display
5
Menu systems:
Press buttonèfor next menuÿfor previous menu
Page 44 of 474

43
Getting started
Adjusting
The buttons are located above the exterior
lamp switch.
1 Adjustment button
2 Passenger-side exterior rear view
mirror
3 Driver’s side exterior rear view mirror
�
Switch on the ignition (
�page 33).
�
Press button 3 for the driver’s side
exterior rear view mirror or button 2
for the passenger-side exterior rear
view mirror.
�
Push adjustment button 1 up, down,
left or right according to the desired
setting.
For more information, see “Rear view mir-
rors” (
�page 167).
!If an exterior rear view mirror was forc-
ibly pushed forward (hit from the rear)
or forcibly pushed backward (hit from
the front), reposition it by applying firm
pressure until it snaps into place.
The mirror housing is now properly po-
sitioned and you can adjust the mirror
normally.
iThe memory function* (
�page 107)
lets you store the setting for the exteri-
or rear view mirrors together with the
settings for the steering wheel and seat
positions.
iAt low ambient temperatures, the mir-
rors will be heated automatically.
Page 93 of 474

92 Controls in detailLocking and unlockingFactory setting
Global unlocking�
Press buttonŒ.
All turn signal lamps flash once. The
locking knobs in the doors move up.
The anti-theft alarm system* is
disarmed.
The vehicle will lock again automatically
and reactivate the anti-theft alarm sys-
tem* within approximately 40 seconds of
unlocking if:
�
neither door nor trunk lid is opened
�
the SmartKey is not inserted in the
starter switch
�
the central locking switch is not
activated Global locking
�
Press button
‹.
With the hood, trunk and all doors
closed, all turn signal lamps flash three
times. The locking knobs in the doors
move down. The anti-theft alarm sys-
tem* is armed.
Selective setting
If you frequently travel alone, you may wish
to reprogram the SmartKey so that
pressing Œ only unlocks the driver’s
door and the fuel filler flap.
�
Press and hold buttons Œ and‹
simultaneously for about five seconds
until battery check lamp 4 flashes
twice.
The SmartKey will then function as
follows: Unlocking driver’s door and fuel filler
flap
�
Press button
Πonce.
All turn signal lamps flash once. The
locking knob in the driver’s door moves
up. The anti-theft alarm system*
disarmed.
Global unlocking
�
Press button Πtwice.
All turn signal lamps flash once. The
locking knobs in the doors move up.
The anti-theft alarm system* is
disarmed.
Page 94 of 474

93
Controls in detail
Locking and unlocking
Global locking�
Press button
‹.
With the hood, trunk and all doors
closed, all turn signal lamps flash three
times. The locking knobs in the doors
move down. The anti-theft alarm sys-
tem* is armed.
Restoring to factory setting
�
Press and hold buttons Œ and‹
simultaneously for about six seconds
until battery check lamp 4 flashes
twice. Checking the batteries
�
Press button
‹ orŒ .
Battery check lamp 4 comes on brief-
ly to indicate that the SmartKey batter-
ies are in order.
!If you can no longer lock or unlock the
vehicle with the SmartKey, then either
the batteries in the SmartKey are dis-
charged, the SmartKey is malfunction-
ing or the vehicle battery is drained.�
Check the batteries in the
SmartKey and replace them if
necessary (
�page 383).
�
Use the mechanical key to unlock
the driver’s door (
�page 377).
�
Use the mechanical key to lock the
driver’s door (
�page 379).
�
Have the vehicle battery and the
battery connections checked
(�page 401).
If the SmartKey is malfunctioning,
contact an authorized Mercedes-Benz
Center.
iIf battery check lamp 4 does not
come on briefly during check, then the
SmartKey batteries are discharged.
Replace the batteries (
�page 383).
You can obtain the required batteries
at any authorized Mercedes-Benz
Center.
iIf the batteries are checked within sig-
nal range of the vehicle, pressing
the ‹ orŒ button will lock or
unlock the vehicle accordingly.
Page 108 of 474

107
Controls in detail
Memory function*
� Memory function*
You can store up to three different settings
per SmartKey.
The following settings are saved for each
stored position:�
Driver’s seat, backrest and head
restraint position
�
Steering wheel position
�
Exterior rear view mirror positions
These key-dependent memory settings
can be deactivated if desired. For informa-
tion on key-dependent memory settings,
see “Setting key-dependency”
(
�page 149). The following settings are not
key-dependent. They are stored when
using the buttons on the passenger door:
�
Front passenger seat, backrest and
head restraint position.
!Prior to operating the vehicle, the driv-
er should check and adjust the seat
height, seat position fore and aft, and
seat backrest angle if necessary, to en-
sure adequate control, reach and com-
fort. The head restraint should also be
adjusted for proper height. See also the
section on air bags (
�page 61) for
proper seat positioning.
In addition, adjust the steering wheel to
ensure adequate control, reach, opera-
tion and comfort. Both the interior and
exterior rear view mirrors should be ad-
justed for adequate rear vision.
Fasten seat belts. Infants and small
children should be seated in a properly
secured restraint system that complies
with U.S. Federal Motor Vehicle Safety
Standards 213 and 225 and Canadian
Motor Vehicle Safety Standards 213
and 210.2.
Warning!
G
Do not activate the memory function while
driving. Activating the memory function
while driving could cause the driver to lose
control of the vehicle.
Page 125 of 474

124 Controls in detailControl systemMultifunction steering wheel
The displays in the multifunction display
and the settings in the control system are
controlled by the buttons on the multifunc-
tion steering wheel.Pressing any of the buttons on the multi-
function steering wheel will alter what is
shown in the multifunction display.
The information available in the multifunc-
tion display is arranged in menus, each
containing a number of functions or sub-
menus.
The individual functions are then found
within the relevant menu (radio or CD
operations under
AUDIO
, for example).
These functions serve to call up relevant
information or to customize the settings
for your vehicle.
1
Multifunction display in the
speedometerOperating the control system
2
Selecting the submenu or setting
the volume:
Press buttonæ up/to increaseçdown/to decrease
3
Telephone*:
Press buttonsto take a calltto end a call
4
Moving within a menu:
Press buttonjfor next displaykfor previous display
5
Menu systems:
Press buttonèfor next menuÿfor previous menu
Page 155 of 474
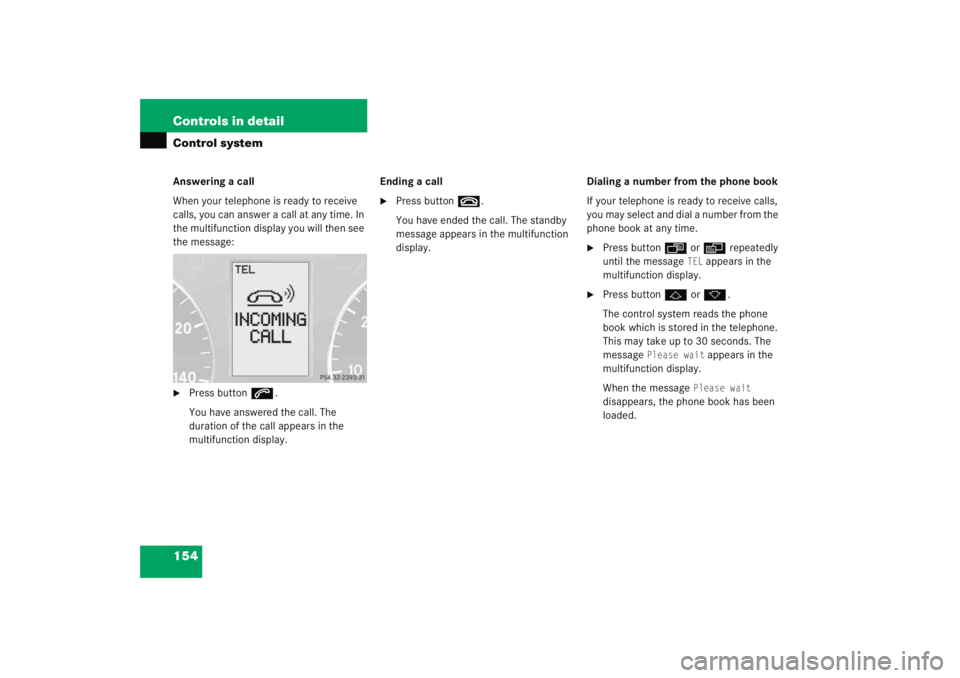
154 Controls in detailControl systemAnswering a call
When your telephone is ready to receive
calls, you can answer a call at any time. In
the multifunction display you will then see
the message:�
Press buttons.
You have answered the call. The
duration of the call appears in the
multifunction display. Ending a call
�
Press button
t.
You have ended the call. The standby
message appears in the multifunction
display. Dialing a number from the phone book
If your telephone is ready to receive calls,
you may select and dial a number from the
phone book at any time.
�
Press button
ÿ orè repeatedly
until the message
TEL
appears in the
multifunction display.
�
Press button j ork .
The control system reads the phone
book which is stored in the telephone.
This may take up to 30 seconds. The
message
Please wait
appears in the
multifunction display.
When the message
Please wait
disappears, the phone book has been
loaded.
Page 170 of 474

169
Controls in detail
Good visibility
Activating exterior rear view mirror
parking position
Follow these steps to activate the
mirror parking position so that the
passenger-side exterior rear view mirror
will be turned downward to the stored
positions.
The buttons are located above the exterior
lamp switch.
1 Driver’s side exterior rear view mirror
button
2 Passenger-side exterior rear view
mirror button
�
Make sure you stored a parking posi-
tion for the passenger-side exterior
rear view mirror (
�page 109).
�
Make sure the
Mirror set. parking
aid
function, found under the
Convenience
submenu in the control
system, is switched to
On (�page 150).
�
Switch on the ignition (
�page 33).
�
Press button 2 for the passenger-side
exterior rear view mirror.
�
Place the gear selector lever in reverse
gear R.
The passenger-side exterior rear view
mirror returns to its previously stored
driving position:�
ten seconds after you put the gear
selector lever out of position R
�
immediately once you exceed a ve-
hicle speed of approximately 6 mph
(10 km/h)
�
immediately when you press
button1 for driver’s side mirror
Sun visors
The sun visors protect you from sun glare
while driving.
1 Mounting
2 Mirror cover
3 Sun visorWarning!
G
Do not use the vanity mirror while driving.
Keep the mirrors in the sun visors closed
while vehicle is in motion. Reflected glare
can endanger you and others.