Page 112 of 328
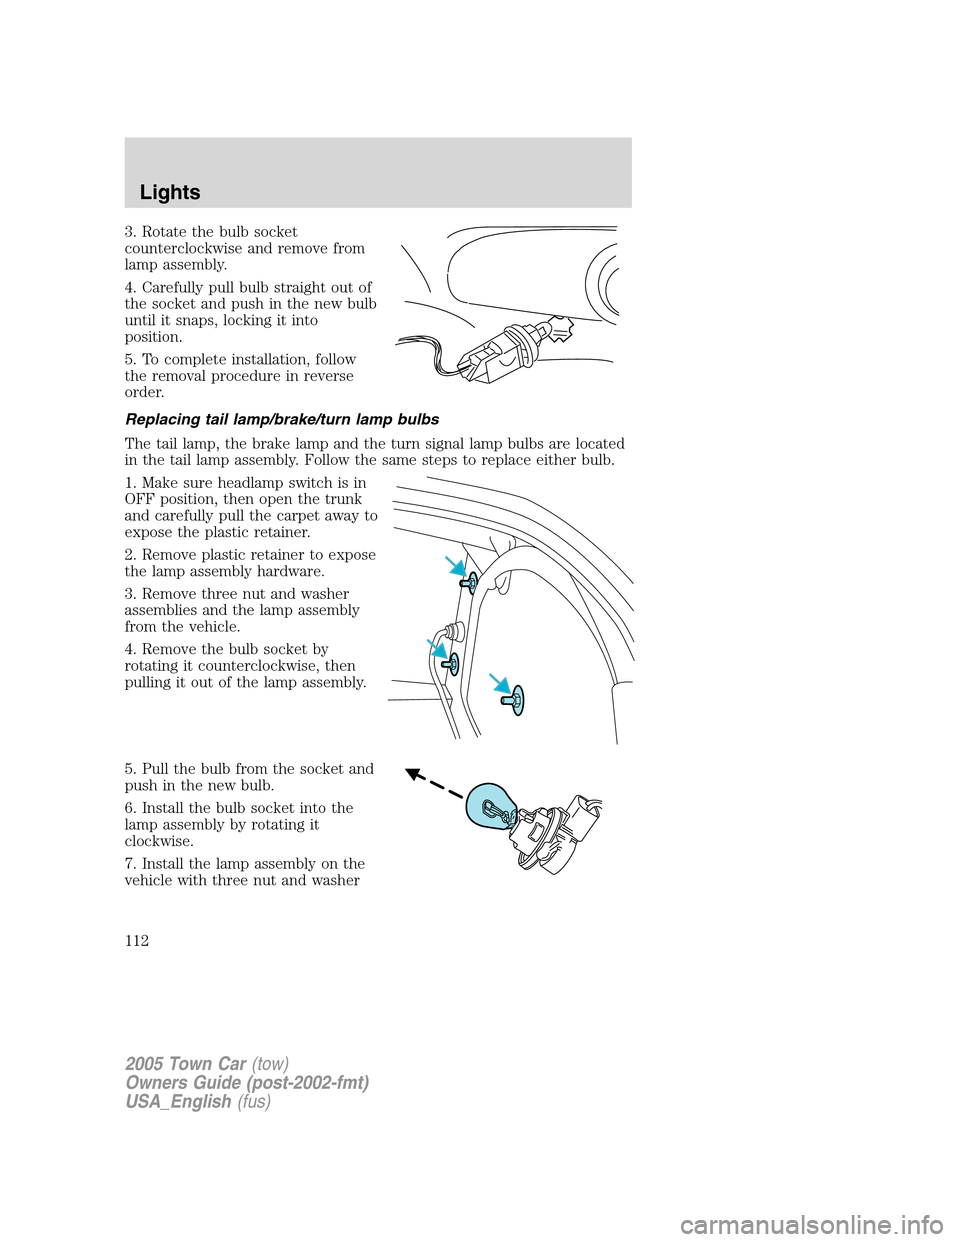
3. Rotate the bulb socket
counterclockwise and remove from
lamp assembly.
4. Carefully pull bulb straight out of
the socket and push in the new bulb
until it snaps, locking it into
position.
5. To complete installation, follow
the removal procedure in reverse
order.
Replacing tail lamp/brake/turn lamp bulbs
The tail lamp, the brake lamp and the turn signal lamp bulbs are located
in the tail lamp assembly. Follow the same steps to replace either bulb.
1. Make sure headlamp switch is in
OFF position, then open the trunk
and carefully pull the carpet away to
expose the plastic retainer.
2. Remove plastic retainer to expose
the lamp assembly hardware.
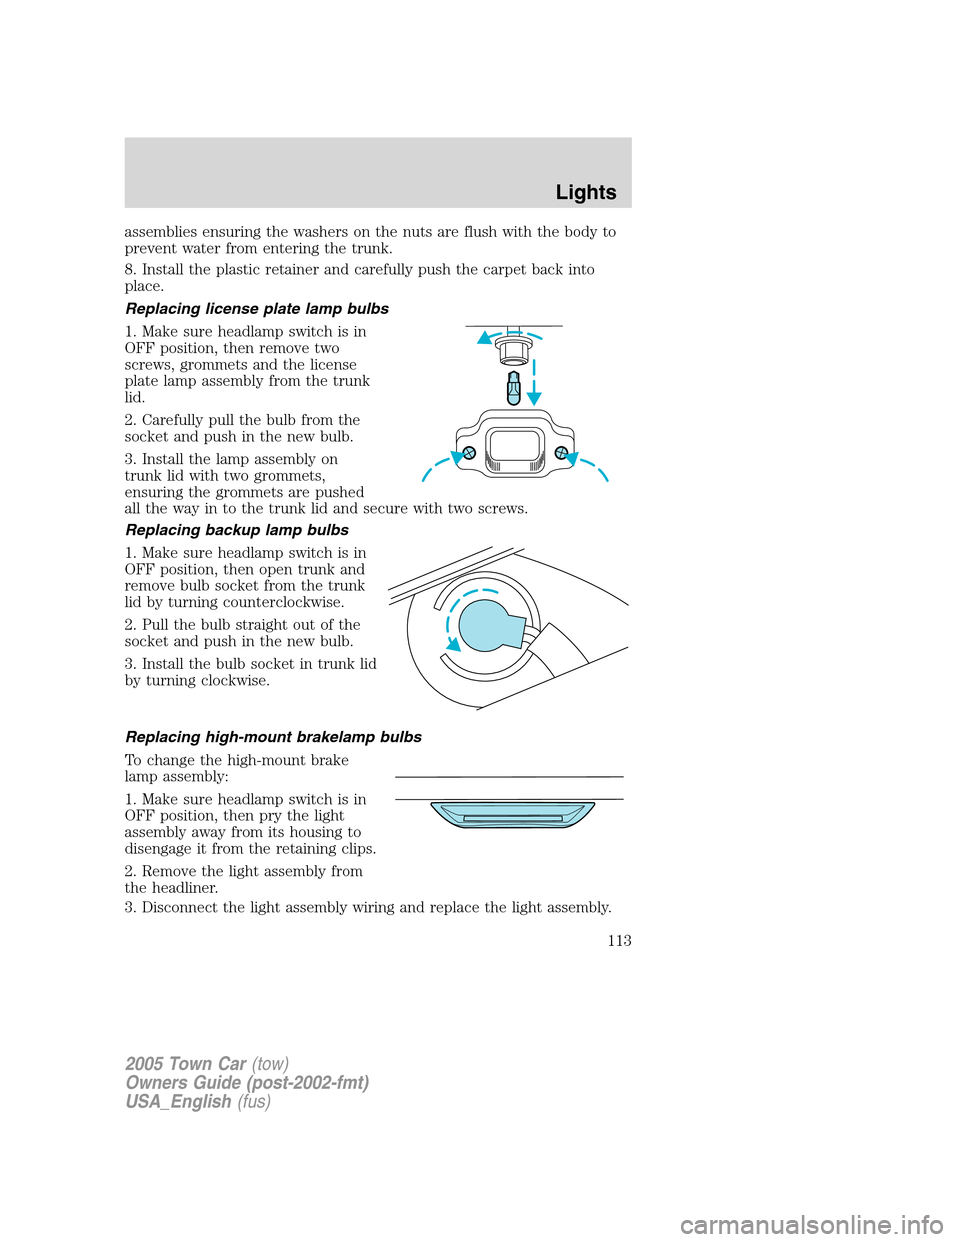
3. Remove three nut and washer
assemblies and the lamp assembly
from the vehicle.
4. Remove the bulb socket by
rotating it counterclockwise, then
pulling it out of the lamp assembly.
5. Pull the bulb from the socket and
push in the new bulb.
6. Install the bulb socket into the
lamp assembly by rotating it
clockwise.
7. Install the lamp assembly on the
vehicle with three nut and washer
2005 Town Car(tow)
Owners Guide (post-2002-fmt)
USA_English(fus)
Lights
112
Page 113 of 328
assemblies ensuring the washers on the nuts are flush with the body to
prevent water from entering the trunk.
8. Install the plastic retainer and carefully push the carpet back into
place.
Replacing license plate lamp bulbs
1. Make sure headlamp switch is in
OFF position, then remove two
screws, grommets and the license
plate lamp assembly from the trunk
lid.
2. Carefully pull the bulb from the
socket and push in the new bulb.
3. Install the lamp assembly on
trunk lid with two grommets,
ensuring the grommets are pushed
all the way in to the trunk lid and secure with two screws.
Replacing backup lamp bulbs
1. Make sure headlamp switch is in
OFF position, then open trunk and
remove bulb socket from the trunk
lid by turning counterclockwise.
2. Pull the bulb straight out of the
socket and push in the new bulb.
3. Install the bulb socket in trunk lid
by turning clockwise.
Replacing high-mount brakelamp bulbs
To change the high-mount brake
lamp assembly:
1. Make sure headlamp switch is in
OFF position, then pry the light
assembly away from its housing to
disengage it from the retaining clips.
2. Remove the light assembly from
the headliner.
3. Disconnect the light assembly wiring and replace the light assembly.
2005 Town Car(tow)
Owners Guide (post-2002-fmt)
USA_English(fus)
Lights
113
Page 114 of 328
Overhead console lamps
To remove and replace the lamps in the overhead console:
1. Make sure the headlamp switch is
in the OFF position and remove the
overhead console from the headliner
by pulling it straight down.
2. Remove the bulb socket from the
back of the lamp housing by pulling
it straight out.
3. Remove the bulb from the socket
by pulling straight out.
Install the new bulb in reverse order.
Rear courtesy/reading lamps
To replace the rear courtesy/reading lamp bulbs in the rear assist handle:
1. Make sure the headlamp control
is in the OFF position and remove
the lamp and assist handle from the
headliner by removing the two
retaining screws.
2. Disconnect the electrical
connector from the lamp assembly.
3. Remove the two screws on the
lamp assembly.
4. Pull the bulb straight out.
Install the new bulb in reverse order.
2005 Town Car(tow)
Owners Guide (post-2002-fmt)
USA_English(fus)
Lights
114
Page 116 of 328
To prolong the life of the wiper blades, it is highly recommended to
scrape off the ice on the windshield before turning on the wipers. The
layer of ice has many sharp edges and can damage the micro edge of the
wiper rubber element.
TILT STEERING WHEEL
To adjust the steering wheel:
1. Pull and hold the steering wheel
release control toward you.
2. Move the steering wheel up or
down until you find the desired
location.
3. Release the steering wheel
release control. This will lock the
steering wheel in position.
Never adjust the steering wheel when the vehicle is moving.
ILLUMINATED VISOR MIRROR (IF EQUIPPED)
Lift the mirror cover to turn on the
visor mirror lamp.
2005 Town Car(tow)
Owners Guide (post-2002-fmt)
USA_English(fus)
Driver Controls
116
Page 117 of 328
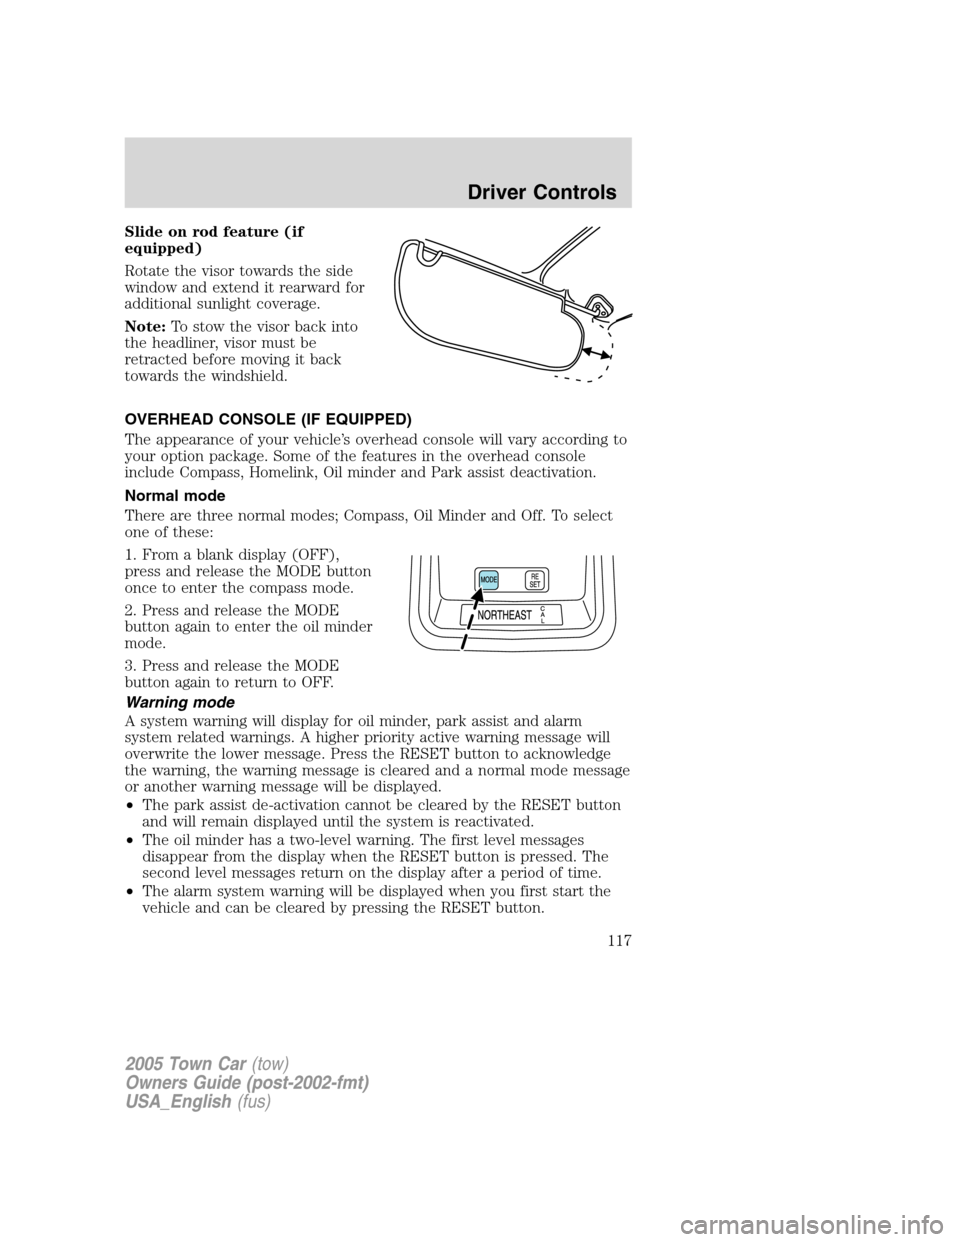
Slide on rod feature (if
equipped)
Rotate the visor towards the side
window and extend it rearward for
additional sunlight coverage.
Note:To stow the visor back into
the headliner, visor must be
retracted before moving it back
towards the windshield.
OVERHEAD CONSOLE (IF EQUIPPED)
The appearance of your vehicle’s overhead console will vary according to
your option package. Some of the features in the overhead console
include Compass, Homelink, Oil minder and Park assist deactivation.
Normal mode
There are three normal modes; Compass, Oil Minder and Off. To select
one of these:
1. From a blank display (OFF),
press and release the MODE button
once to enter the compass mode.
2. Press and release the MODE
button again to enter the oil minder
mode.
3. Press and release the MODE
button again to return to OFF.
Warning mode
A system warning will display for oil minder, park assist and alarm
system related warnings. A higher priority active warning message will
overwrite the lower message. Press the RESET button to acknowledge
the warning, the warning message is cleared and a normal mode message
or another warning message will be displayed.
•The park assist de-activation cannot be cleared by the RESET button
and will remain displayed until the system is reactivated.
•The oil minder has a two-level warning. The first level messages
disappear from the display when the RESET button is pressed. The
second level messages return on the display after a period of time.
•The alarm system warning will be displayed when you first start the
vehicle and can be cleared by pressing the RESET button.
2005 Town Car(tow)
Owners Guide (post-2002-fmt)
USA_English(fus)
Driver Controls
117
Page 119 of 328
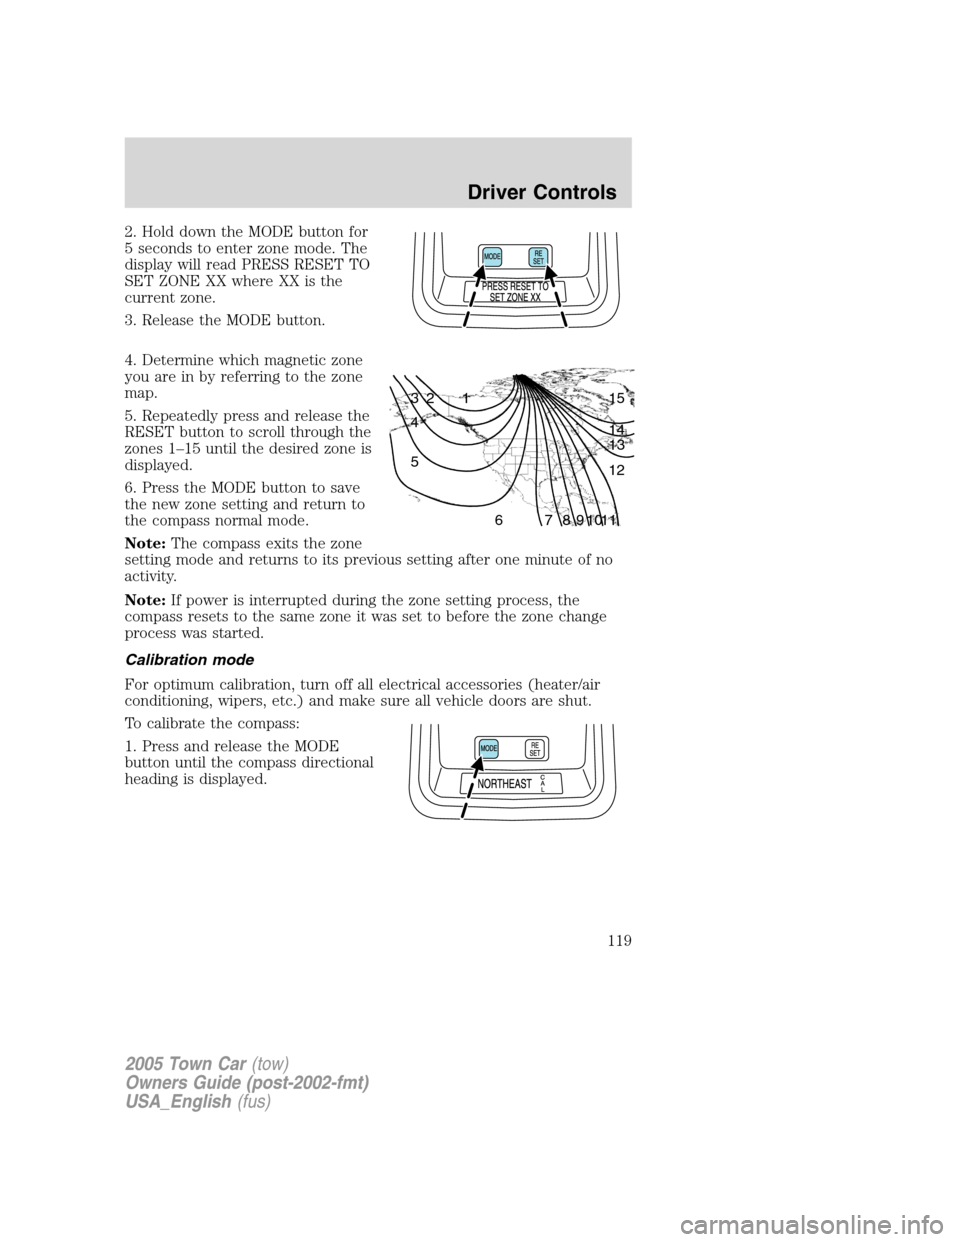
2. Hold down the MODE button for
5 seconds to enter zone mode. The
display will read PRESS RESET TO
SET ZONE XX where XX is the
current zone.
3. Release the MODE button.
4. Determine which magnetic zone
you are in by referring to the zone
map.
5. Repeatedly press and release the
RESET button to scroll through the
zones 1–15 until the desired zone is
displayed.
6. Press the MODE button to save
the new zone setting and return to
the compass normal mode.
Note:The compass exits the zone
setting mode and returns to its previous setting after one minute of no
activity.
Note:If power is interrupted during the zone setting process, the
compass resets to the same zone it was set to before the zone change
process was started.
Calibration mode
For optimum calibration, turn off all electrical accessories (heater/air
conditioning, wipers, etc.) and make sure all vehicle doors are shut.
To calibrate the compass:
1. Press and release the MODE
button until the compass directional
heading is displayed.
1 2 3
4
5
6 7 8 9 101112 13 14 15
2005 Town Car(tow)
Owners Guide (post-2002-fmt)
USA_English(fus)
Driver Controls
119
Page 120 of 328
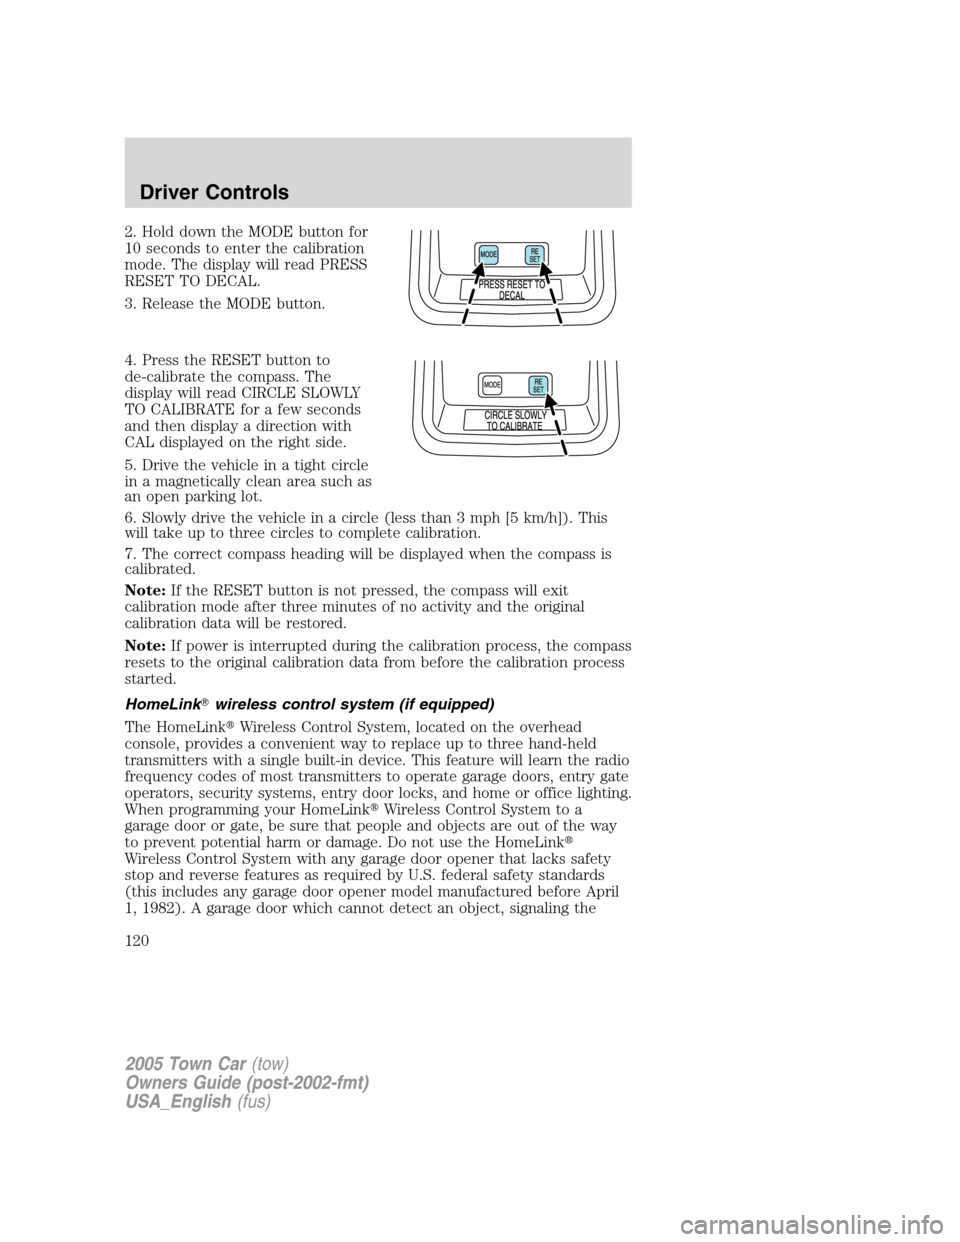
2. Hold down the MODE button for
10 seconds to enter the calibration
mode. The display will read PRESS
RESET TO DECAL.
3. Release the MODE button.
4. Press the RESET button to
de-calibrate the compass. The
display will read CIRCLE SLOWLY
TO CALIBRATE for a few seconds
and then display a direction with
CAL displayed on the right side.
5. Drive the vehicle in a tight circle
in a magnetically clean area such as
an open parking lot.
6. Slowly drive the vehicle in a circle (less than 3 mph [5 km/h]). This
will take up to three circles to complete calibration.
7. The correct compass heading will be displayed when the compass is
calibrated.
Note:If the RESET button is not pressed, the compass will exit
calibration mode after three minutes of no activity and the original
calibration data will be restored.
Note:If power is interrupted during the calibration process, the compass
resets to the original calibration data from before the calibration process
started.
HomeLink�wireless control system (if equipped)
The HomeLink�Wireless Control System, located on the overhead
console, provides a convenient way to replace up to three hand-held
transmitters with a single built-in device. This feature will learn the radio
frequency codes of most transmitters to operate garage doors, entry gate
operators, security systems, entry door locks, and home or office lighting.
When programming your HomeLink�Wireless Control System to a
garage door or gate, be sure that people and objects are out of the way
to prevent potential harm or damage. Do not use the HomeLink�
Wireless Control System with any garage door opener that lacks safety
stop and reverse features as required by U.S. federal safety standards
(this includes any garage door opener model manufactured before April
1, 1982). A garage door which cannot detect an object, signaling the
2005 Town Car(tow)
Owners Guide (post-2002-fmt)
USA_English(fus)
Driver Controls
120
Page 124 of 328
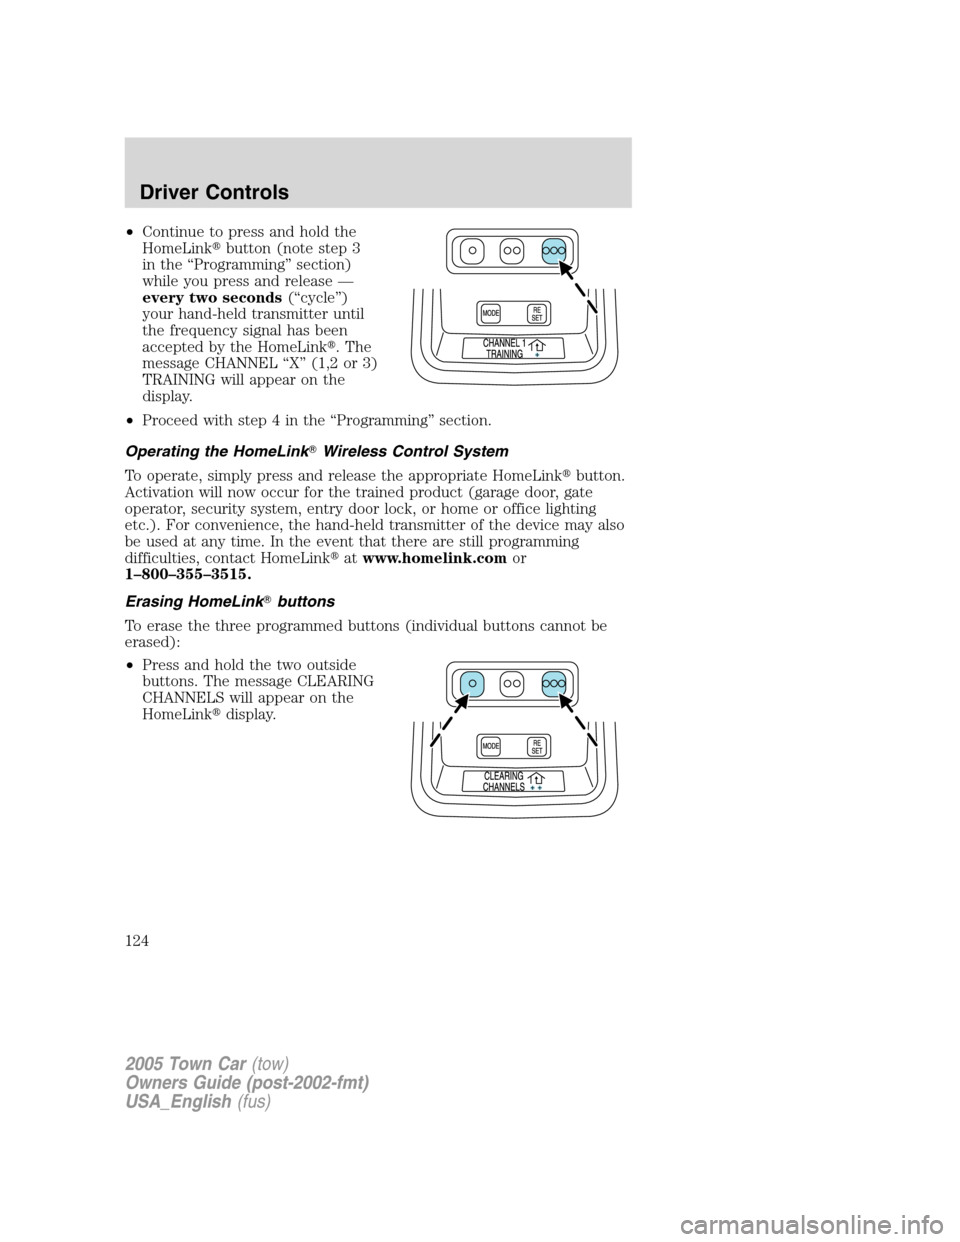
•Continue to press and hold the
HomeLink�button (note step 3
in the “Programming” section)
while you press and release —
every two seconds(“cycle”)
your hand-held transmitter until
the frequency signal has been
accepted by the HomeLink�. The
message CHANNEL “X” (1,2 or 3)
TRAINING will appear on the
display.
•Proceed with step 4 in the “Programming” section.
Operating the HomeLink�Wireless Control System
To operate, simply press and release the appropriate HomeLink�button.
Activation will now occur for the trained product (garage door, gate
operator, security system, entry door lock, or home or office lighting
etc.). For convenience, the hand-held transmitter of the device may also
be used at any time. In the event that there are still programming
difficulties, contact HomeLink�atwww.homelink.comor
1–800–355–3515.
Erasing HomeLink�buttons
To erase the three programmed buttons (individual buttons cannot be
erased):
•Press and hold the two outside
buttons. The message CLEARING
CHANNELS will appear on the
HomeLink�display.
2005 Town Car(tow)
Owners Guide (post-2002-fmt)
USA_English(fus)
Driver Controls
124