Page 102 of 328
6.:Distributes air through the windshield defroster vents and the
side window demisters.
7.
:Distributes air through the windshield defroster vents, the side
window demisters and floor vents.
8.
:Distributes air through the floor vents.
9.
:Distributes air through the instrument panel vents and the floor
vents.
10.
:Distributes air through the instrument panel vents.
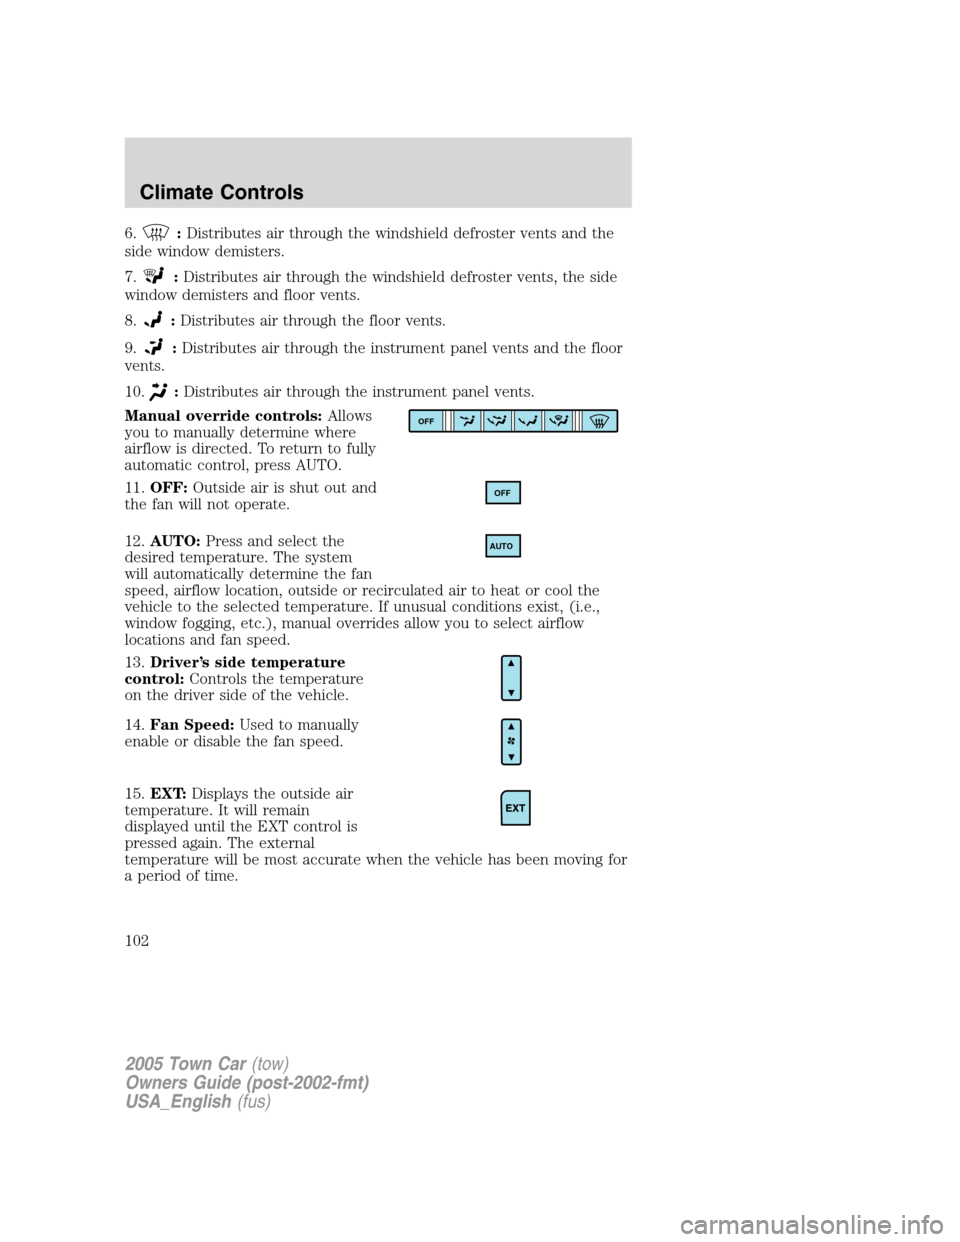
Manual override controls:Allows
you to manually determine where
airflow is directed. To return to fully
automatic control, press AUTO.
11.OFF:Outside air is shut out and
the fan will not operate.
12.AUTO:Press and select the
desired temperature. The system
will automatically determine the fan
speed, airflow location, outside or recirculated air to heat or cool the
vehicle to the selected temperature. If unusual conditions exist, (i.e.,
window fogging, etc.), manual overrides allow you to select airflow
locations and fan speed.
13.Driver’s side temperature
control:Controls the temperature
on the driver side of the vehicle.
14.Fan Speed:Used to manually
enable or disable the fan speed.
15.EXT:Displays the outside air
temperature. It will remain
displayed until the EXT control is
pressed again. The external
temperature will be most accurate when the vehicle has been moving for
a period of time.
OFF
OFF
AUTO
2005 Town Car(tow)
Owners Guide (post-2002-fmt)
USA_English(fus)
Climate Controls
102
Page 103 of 328
16.Temperature conversion:
Press to toggle between Fahrenheit
and Celsius temperature on the
DEATC display only. The set point
temperatures in Celsius will be displayed in half-degree increments.
OPERATING TIPS
•To reduce fog build up on the windshield during humid weather, place
the air flow selector in the
position.
•To reduce humidity build up inside the vehicle: do not drive with the
recirculation control on or the system turned off.
•Do not put objects under the front seats that will interfere with the
airflow to the back seats.
•Remove any snow, ice or leaves from the air intake area at the base of
the windshield.
To aid in side window defogging/demisting in cold weather:
1. Select
.
2. Select A/C.
3. Adjust the temperature control to maintain comfort.
4. Set the fan to the highest speed.
5. Direct the outer instrument panel vents towards the side windows.
To increase airflow to the outer instrument panel vents, close the vents
located in the middle of the instrument panel.
Do not place objects on top of the instrument panel as these
objects may become projectiles in a collision or sudden stop.
2005 Town Car(tow)
Owners Guide (post-2002-fmt)
USA_English(fus)
Climate Controls
103
Page 104 of 328
REAR CONSOLE CLIMATE CONTROLS (IF EQUIPPED)
•TEMP:Press to increase or
decrease airflow temperature.
•FAN:Press to increase or
decrease the fan speed.
REAR WINDOW DEFROSTER
The rear defroster control is located
on the instrument panel.
Press the rear defroster control to
clear the rear window of thin ice
and fog. A small LED will illuminate
when the rear defroster is activated.
The ignition must be in the ON position to operate the rear window
defroster.
The defroster turns off automatically after a predetermined amount of
time or when the ignition is turned to the OFF position. To manually
turn off the defroster, press the control again.
Do not use razor blades or other sharp objects to clean the inside
of the rear window or to remove decals from the inside of the
rear window. This may cause damage to the heated grid lines and
will not be covered by your warranty.
R
2005 Town Car(tow)
Owners Guide (post-2002-fmt)
USA_English(fus)
Climate Controls
104
Page 105 of 328
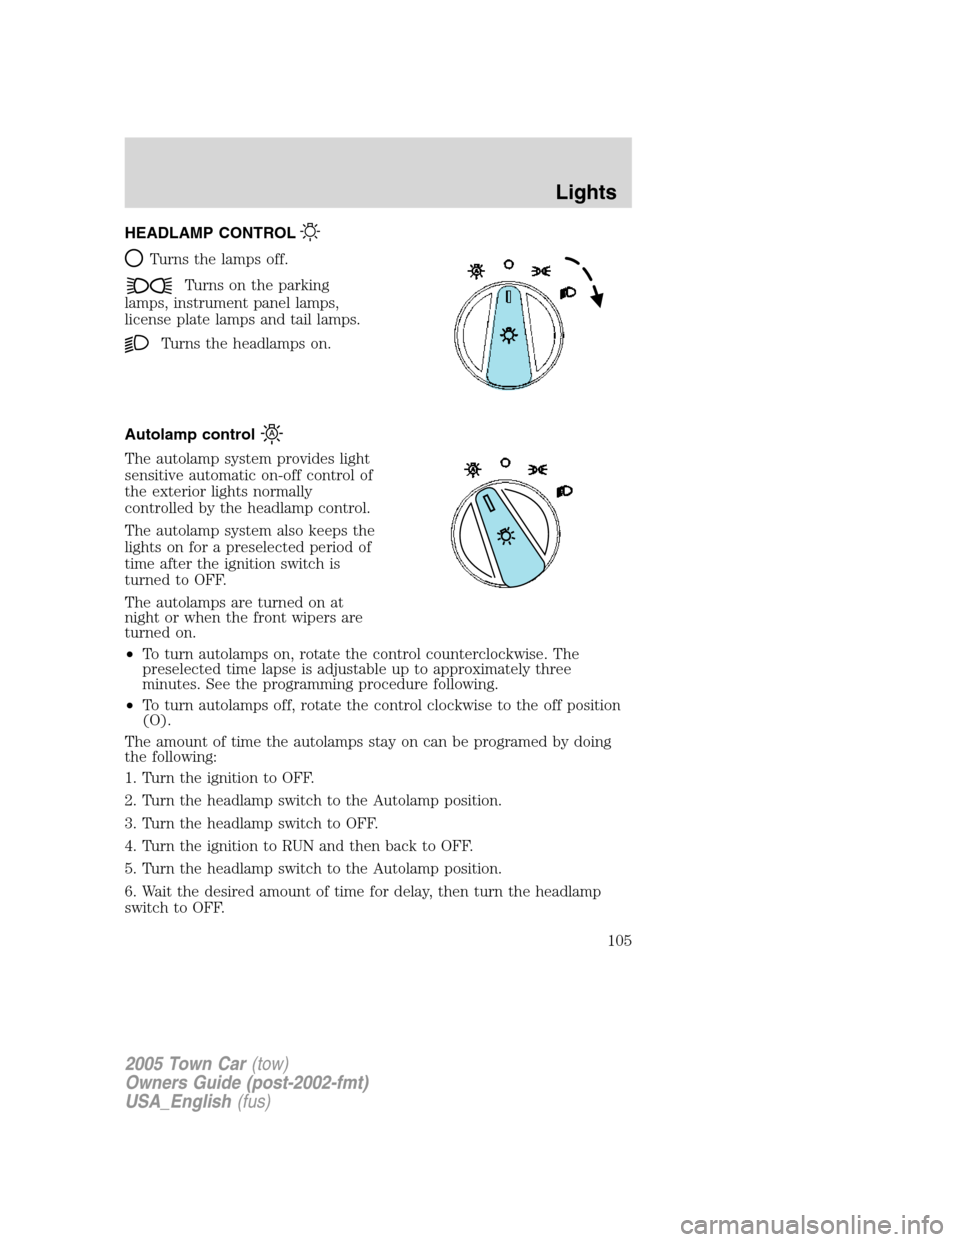
HEADLAMP CONTROL
Turns the lamps off.
Turns on the parking
lamps, instrument panel lamps,
license plate lamps and tail lamps.
Turns the headlamps on.
Autolamp control
The autolamp system provides light
sensitive automatic on-off control of
the exterior lights normally
controlled by the headlamp control.
The autolamp system also keeps the
lights on for a preselected period of
time after the ignition switch is
turned to OFF.
The autolamps are turned on at
night or when the front wipers are
turned on.
•To turn autolamps on, rotate the control counterclockwise. The
preselected time lapse is adjustable up to approximately three
minutes. See the programming procedure following.
•To turn autolamps off, rotate the control clockwise to the off position
(O).
The amount of time the autolamps stay on can be programed by doing
the following:
1. Turn the ignition to OFF.
2. Turn the headlamp switch to the Autolamp position.
3. Turn the headlamp switch to OFF.
4. Turn the ignition to RUN and then back to OFF.
5. Turn the headlamp switch to the Autolamp position.
6. Wait the desired amount of time for delay, then turn the headlamp
switch to OFF.
2005 Town Car(tow)
Owners Guide (post-2002-fmt)
USA_English(fus)
Lights
105
Page 107 of 328
PANEL DIMMER CONTROL
Use to adjust the brightness of the
instrument panel during headlight
and parklamp operation.
•Rotate the thumbwheel from left
to right to brighten the
instrument panel.
•Rotate the thumbwheel from right
to left to dim the instrument
panel.
During full daylight, the instrument panel will still be visible with the
headlamps operating.
Domelamp Control
The panel dimmer control also controls the domelamp operation.
•Rotate the thumbwheel fully to the right, past detent to activate the
domelamp.
•In order to turn off the domelamp, rotate the thumbwheel to the left.
AIMING THE HEADLAMPS
The headlamps on your vehicle are properly aimed at the assembly plant.
If your vehicle has been in an accident the alignment of your headlamps
should be checked by a qualified service technician.
Vertical aim adjustment
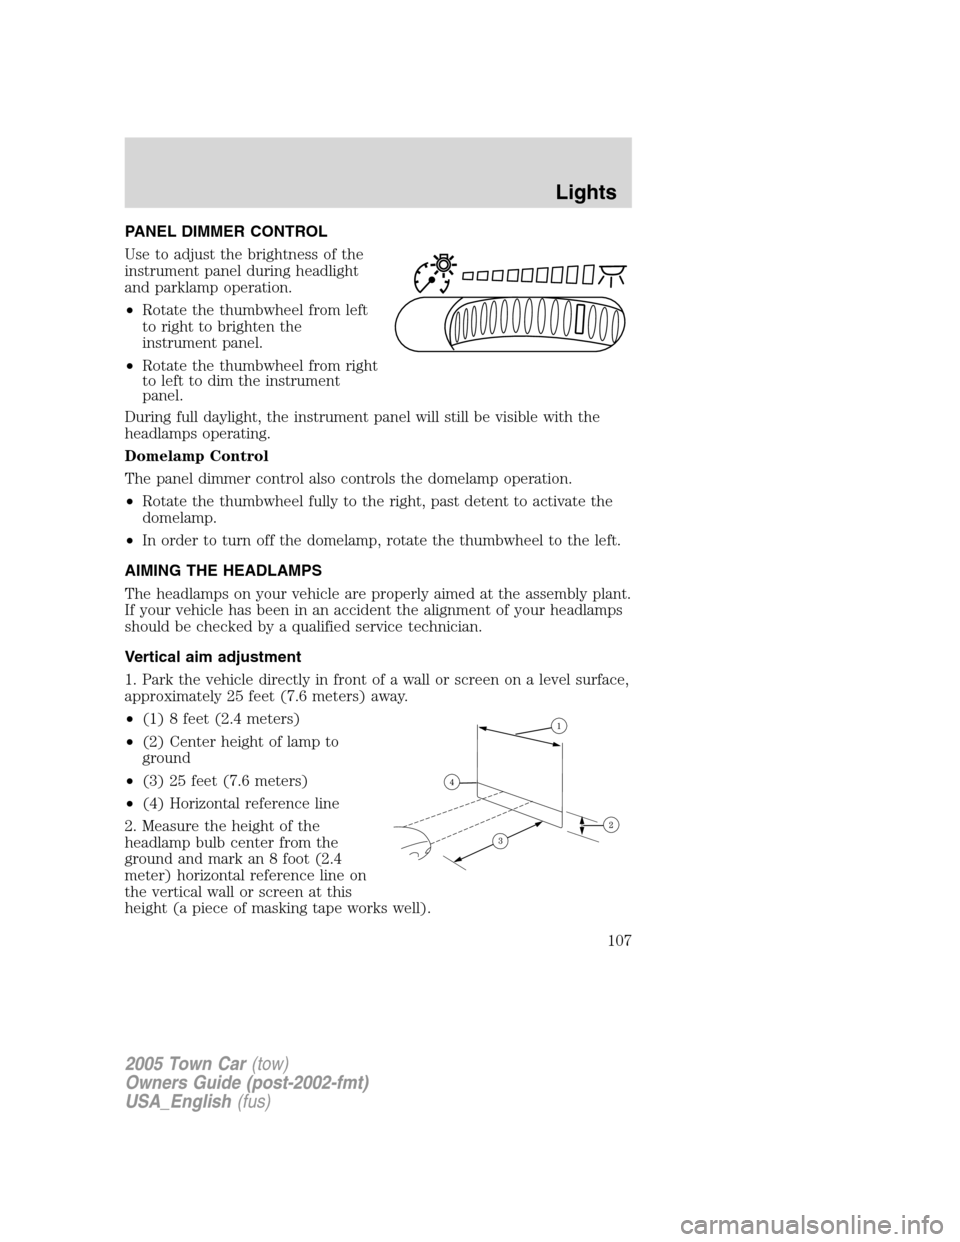
1. Park the vehicle directly in front of a wall or screen on a level surface,
approximately 25 feet (7.6 meters) away.
•(1) 8 feet (2.4 meters)
•(2) Center height of lamp to
ground
•(3) 25 feet (7.6 meters)
•(4) Horizontal reference line
2. Measure the height of the
headlamp bulb center from the
ground and mark an 8 foot (2.4
meter) horizontal reference line on
the vertical wall or screen at this
height (a piece of masking tape works well).
2005 Town Car(tow)
Owners Guide (post-2002-fmt)
USA_English(fus)
Lights
107
Page 108 of 328
3. Turn on the low beam headlamps to illuminate the wall or screen and
open the hood.
4. On the wall or screen you will
observe an area of high intensity
light. The top of the high intensity
area should touch the horizontal
reference line, if not, the beam will
need to be adjusted.
To see a clearer light pattern for
adjusting, you may want to block
the light from one headlamp while
adjusting the other.
5. Locate the vertical adjuster on
each headlamp. Usinga4mm
wrench, turn the adjuster either
clockwise (to adjust down) or
counterclockwise (to adjust up).
The horizontal edge of the brighter
light should touch the horizontal
reference line.
6. HORIZONTAL AIM IS NOT REQUIRED FOR THIS VEHICLE AND IS
NON-ADJUSTABLE.
7. Close the hood and turn off the lamps.
TURN SIGNAL CONTROL
•Push down to activate the left
turn signal.
•Push up to activate the right turn
signal.
2005 Town Car(tow)
Owners Guide (post-2002-fmt)
USA_English(fus)
Lights
108
Page 109 of 328
INTERIOR LAMPS
Map/Courtesy lamps
To turn on the map lamps, press the
map lamp control.
Rear courtesy/reading lamps
The courtesy lamp lights when:
•any door is opened.
•any of the remote entry controls
are pressed and the ignition is
OFF.
With the ignition key in the ACC or
ON position, the reading lamp can
be turned on by pressing the rocker
control.
BULBS
Headlamp Condensation
The headlamps are vented to equalize pressure. When moist air enters
the headlamp(s) through the vents, there is a possibility that
condensation can occur. This condensation is normal and will clear
within 45 minutes of headlamp operation.
Replacing exterior bulbs
Check the operation of all the bulbs frequently.
2005 Town Car(tow)
Owners Guide (post-2002-fmt)
USA_English(fus)
Lights
109
Page 111 of 328
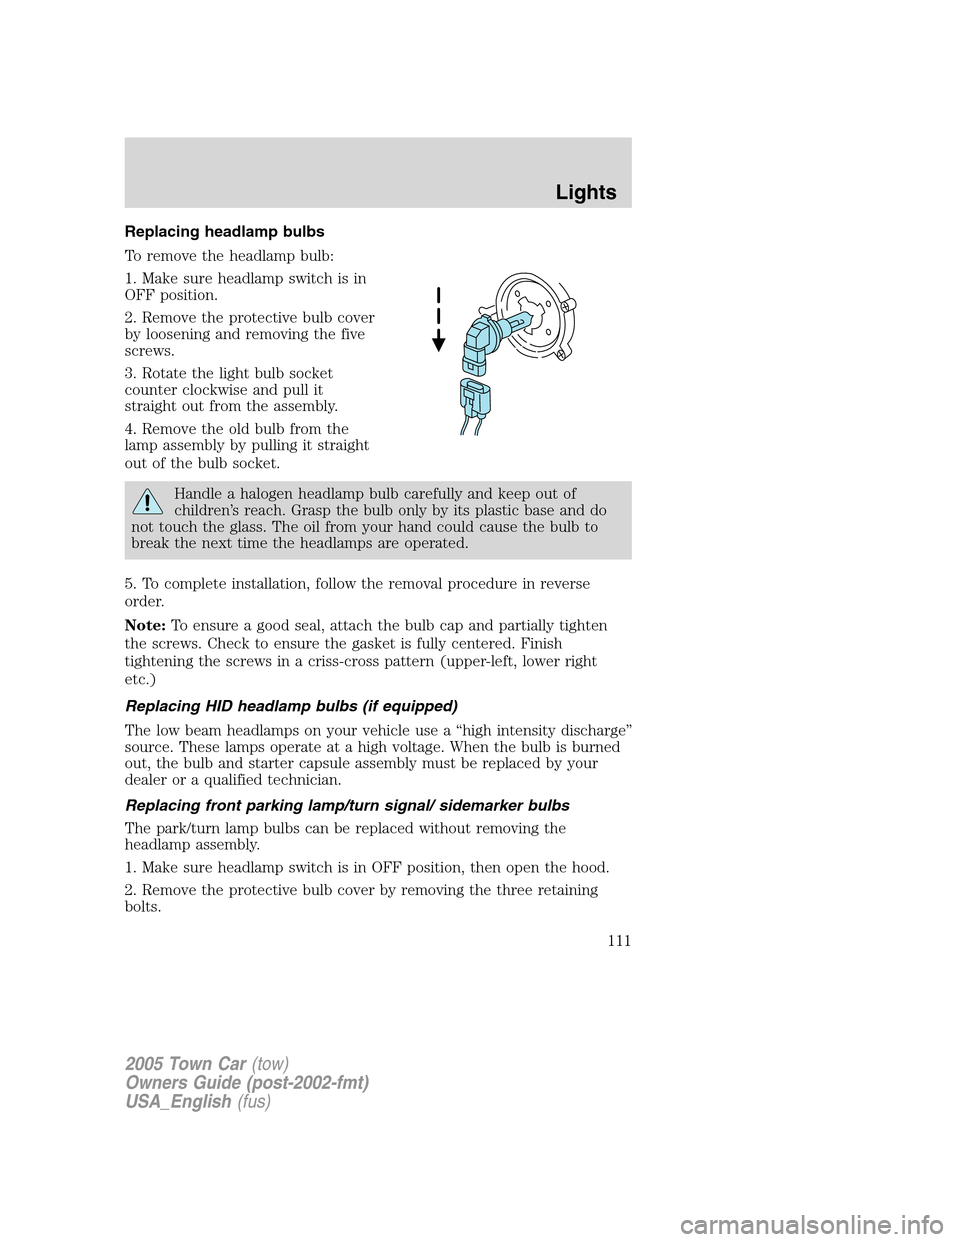
Replacing headlamp bulbs
To remove the headlamp bulb:
1. Make sure headlamp switch is in
OFF position.
2. Remove the protective bulb cover
by loosening and removing the five
screws.
3. Rotate the light bulb socket
counter clockwise and pull it
straight out from the assembly.
4. Remove the old bulb from the
lamp assembly by pulling it straight
out of the bulb socket.
Handle a halogen headlamp bulb carefully and keep out of
children’s reach. Grasp the bulb only by its plastic base and do
not touch the glass. The oil from your hand could cause the bulb to
break the next time the headlamps are operated.
5. To complete installation, follow the removal procedure in reverse
order.
Note:To ensure a good seal, attach the bulb cap and partially tighten
the screws. Check to ensure the gasket is fully centered. Finish
tightening the screws in a criss-cross pattern (upper-left, lower right
etc.)
Replacing HID headlamp bulbs (if equipped)
The low beam headlamps on your vehicle use a “high intensity discharge”
source. These lamps operate at a high voltage. When the bulb is burned
out, the bulb and starter capsule assembly must be replaced by your
dealer or a qualified technician.
Replacing front parking lamp/turn signal/ sidemarker bulbs
The park/turn lamp bulbs can be replaced without removing the
headlamp assembly.
1. Make sure headlamp switch is in OFF position, then open the hood.
2. Remove the protective bulb cover by removing the three retaining
bolts.
2005 Town Car(tow)
Owners Guide (post-2002-fmt)
USA_English(fus)
Lights
111