2005 LINCOLN TOWN CAR brake light
[x] Cancel search: brake lightPage 8 of 328
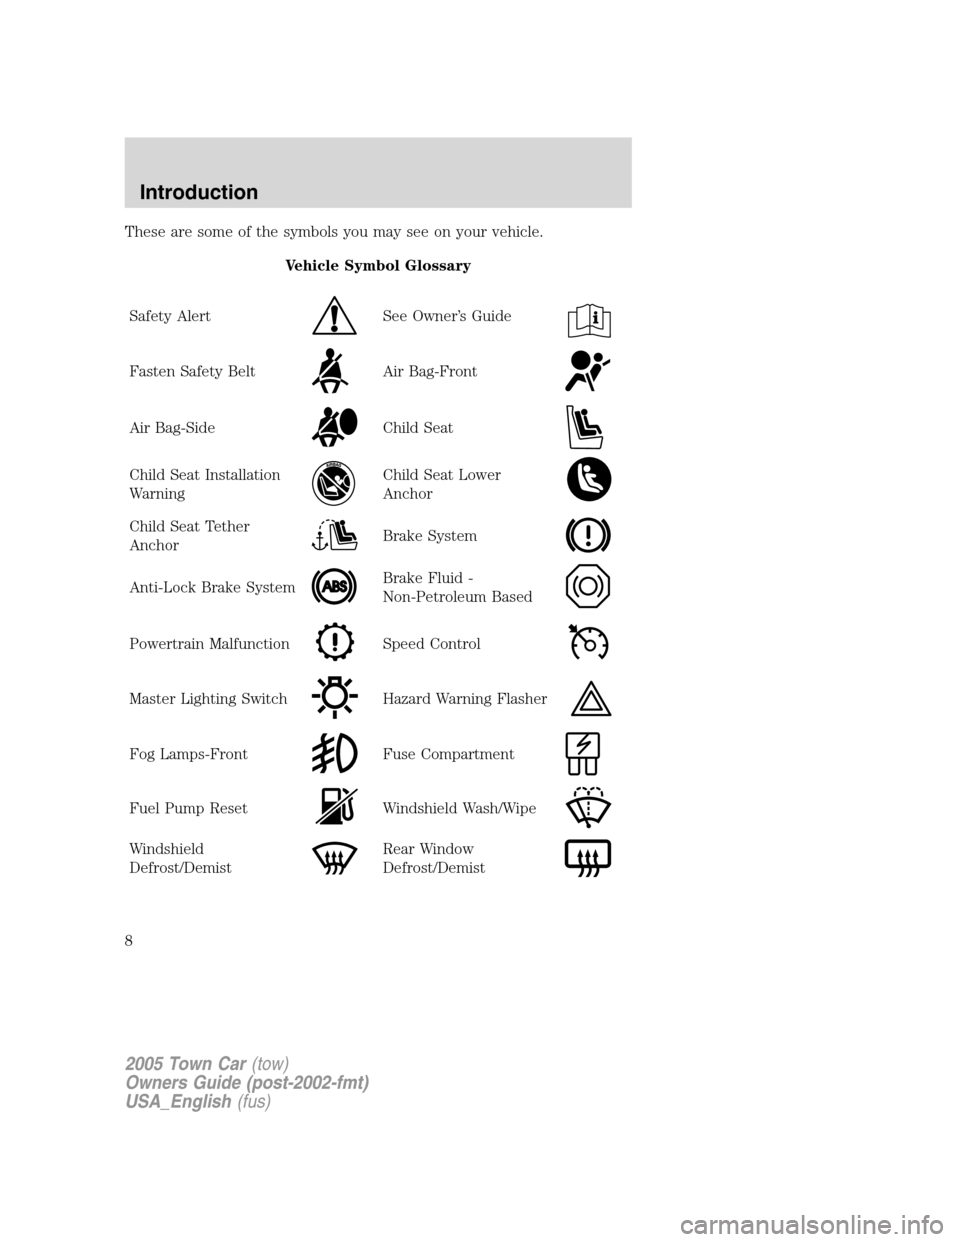
These are some of the symbols you may see on your vehicle.
Vehicle Symbol Glossary
Safety Alert
See Owner’s Guide
Fasten Safety BeltAir Bag-Front
Air Bag-SideChild Seat
Child Seat Installation
WarningChild Seat Lower
Anchor
Child Seat Tether
AnchorBrake System
Anti-Lock Brake SystemBrake Fluid -
Non-Petroleum Based
Powertrain MalfunctionSpeed Control
Master Lighting SwitchHazard Warning Flasher
Fog Lamps-FrontFuse Compartment
Fuel Pump ResetWindshield Wash/Wipe
Windshield
Defrost/DemistRear Window
Defrost/Demist
2005 Town Car(tow)
Owners Guide (post-2002-fmt)
USA_English(fus)
Introduction
8
Page 11 of 328
defaulted to a ’limp-home’ operation. Report the fault to a dealer at the
earliest opportunity.
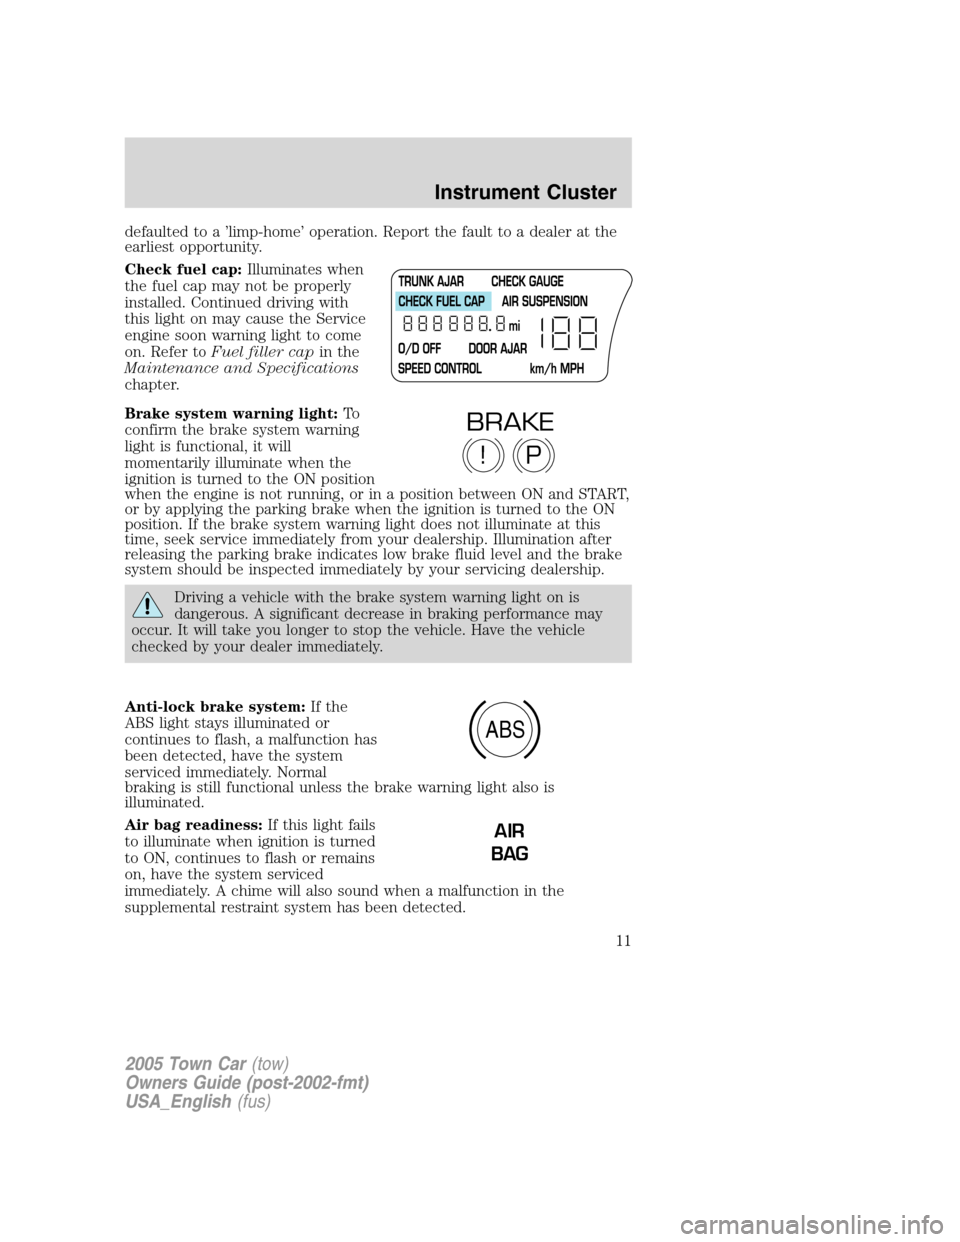
Check fuel cap:Illuminates when
the fuel cap may not be properly
installed. Continued driving with
this light on may cause the Service
engine soon warning light to come
on. Refer toFuel filler capin the
Maintenance and Specifications
chapter.
Brake system warning light:To
confirm the brake system warning
light is functional, it will
momentarily illuminate when the
ignition is turned to the ON position
when the engine is not running, or in a position between ON and START,
or by applying the parking brake when the ignition is turned to the ON
position. If the brake system warning light does not illuminate at this
time, seek service immediately from your dealership. Illumination after
releasing the parking brake indicates low brake fluid level and the brake
system should be inspected immediately by your servicing dealership.
Driving a vehicle with the brake system warning light on is
dangerous. A significant decrease in braking performance may
occur. It will take you longer to stop the vehicle. Have the vehicle
checked by your dealer immediately.
Anti-lock brake system:If the
ABS light stays illuminated or
continues to flash, a malfunction has
been detected, have the system
serviced immediately. Normal
braking is still functional unless the brake warning light also is
illuminated.
Air bag readiness:If this light fails
to illuminate when ignition is turned
to ON, continues to flash or remains
on, have the system serviced
immediately. A chime will also sound when a malfunction in the
supplemental restraint system has been detected.
P!
BRAKE
ABS
AIR
BAG
2005 Town Car(tow)
Owners Guide (post-2002-fmt)
USA_English(fus)
Instrument Cluster
11
Page 110 of 328
Using the right bulbs
Replacement bulbs are specified in the following chart. Headlamp bulbs
must be marked with an authorized “D.O.T.” for North America and an
“E” for Europe to assure lamp performance, light brightness and pattern
and safe visibility. The correct bulbs will not damage the lamp assembly
or void the lamp assembly warranty and will provide quality bulb burn
time.
Function Trade Number
Headlamp (HI beam) 9005
Headlamp (LOW beam)* H7
Park and turn lamp (front) 3457 AK
Sidemarker (front) 168
Backup lamp 3156 K
Stop, tail, turn and sidemarker lamp (rear) 3157 K
Cornering lamp 3156 K
License plate lamp 168
High-mount brakelamp - Stop** 20 (LEDS)
Luggage compartment lamp 212-2
Map lamp 906
Visor vanity lamp - Slide on Rail system
(SOR)37
Rear grab handle reading lamps 578
Door courtesy lamp 904
Glove compartment 194
All replacement bulbs are clear in color except where noted.
To replace all instrument panel lights - see your dealer.
* For vehicles with HID lamps, see your dealer for service.
**When replacing the center high mount stop lamp, see your dealer for
replacement bulbs.
Replacing the interior bulbs
Check the operation of all bulbs frequently.
2005 Town Car(tow)
Owners Guide (post-2002-fmt)
USA_English(fus)
Lights
110
Page 112 of 328
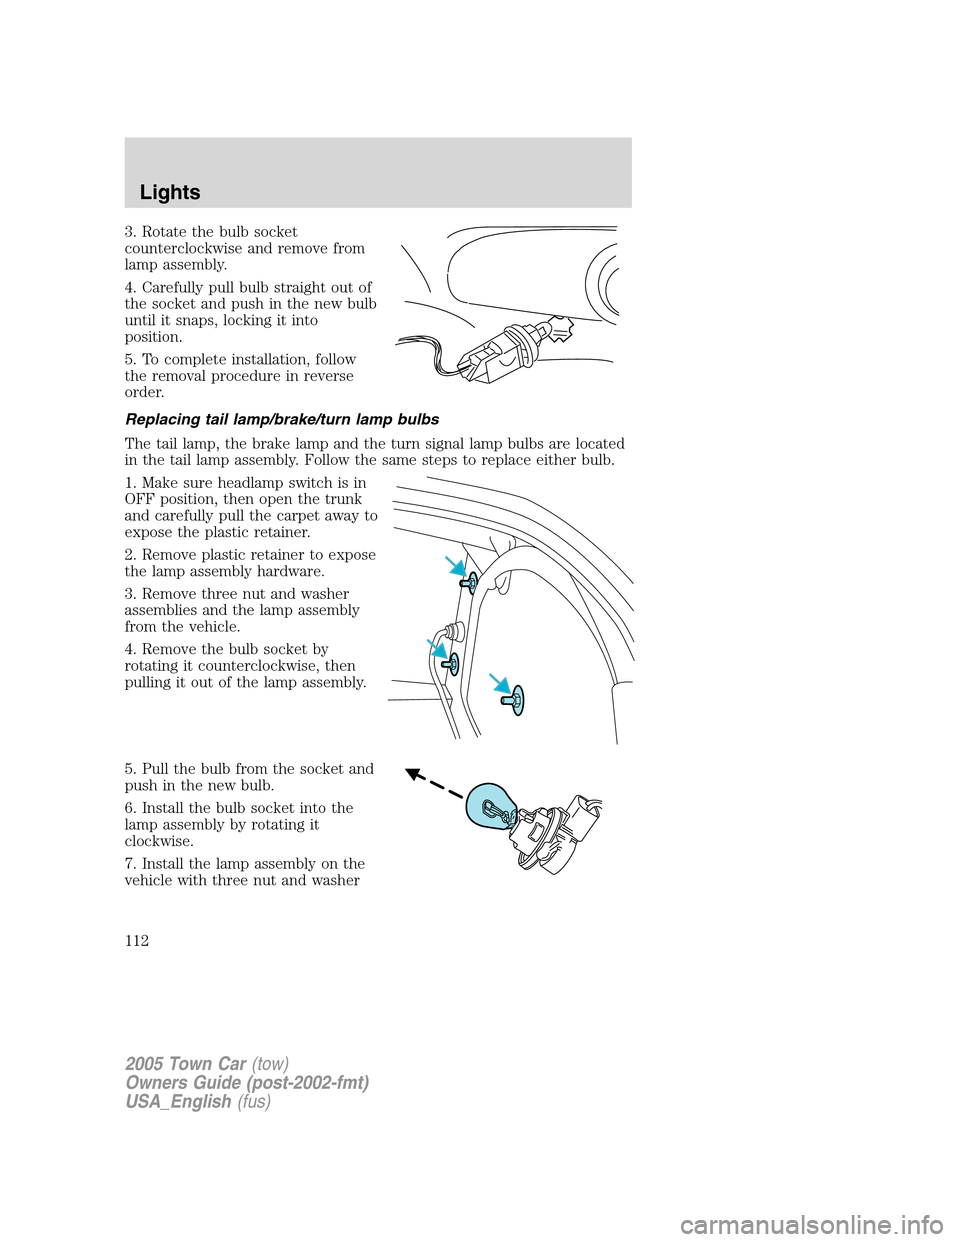
3. Rotate the bulb socket
counterclockwise and remove from
lamp assembly.
4. Carefully pull bulb straight out of
the socket and push in the new bulb
until it snaps, locking it into
position.
5. To complete installation, follow
the removal procedure in reverse
order.
Replacing tail lamp/brake/turn lamp bulbs
The tail lamp, the brake lamp and the turn signal lamp bulbs are located
in the tail lamp assembly. Follow the same steps to replace either bulb.
1. Make sure headlamp switch is in
OFF position, then open the trunk
and carefully pull the carpet away to
expose the plastic retainer.
2. Remove plastic retainer to expose
the lamp assembly hardware.
3. Remove three nut and washer
assemblies and the lamp assembly
from the vehicle.
4. Remove the bulb socket by
rotating it counterclockwise, then
pulling it out of the lamp assembly.
5. Pull the bulb from the socket and
push in the new bulb.
6. Install the bulb socket into the
lamp assembly by rotating it
clockwise.
7. Install the lamp assembly on the
vehicle with three nut and washer
2005 Town Car(tow)
Owners Guide (post-2002-fmt)
USA_English(fus)
Lights
112
Page 113 of 328
assemblies ensuring the washers on the nuts are flush with the body to
prevent water from entering the trunk.
8. Install the plastic retainer and carefully push the carpet back into
place.
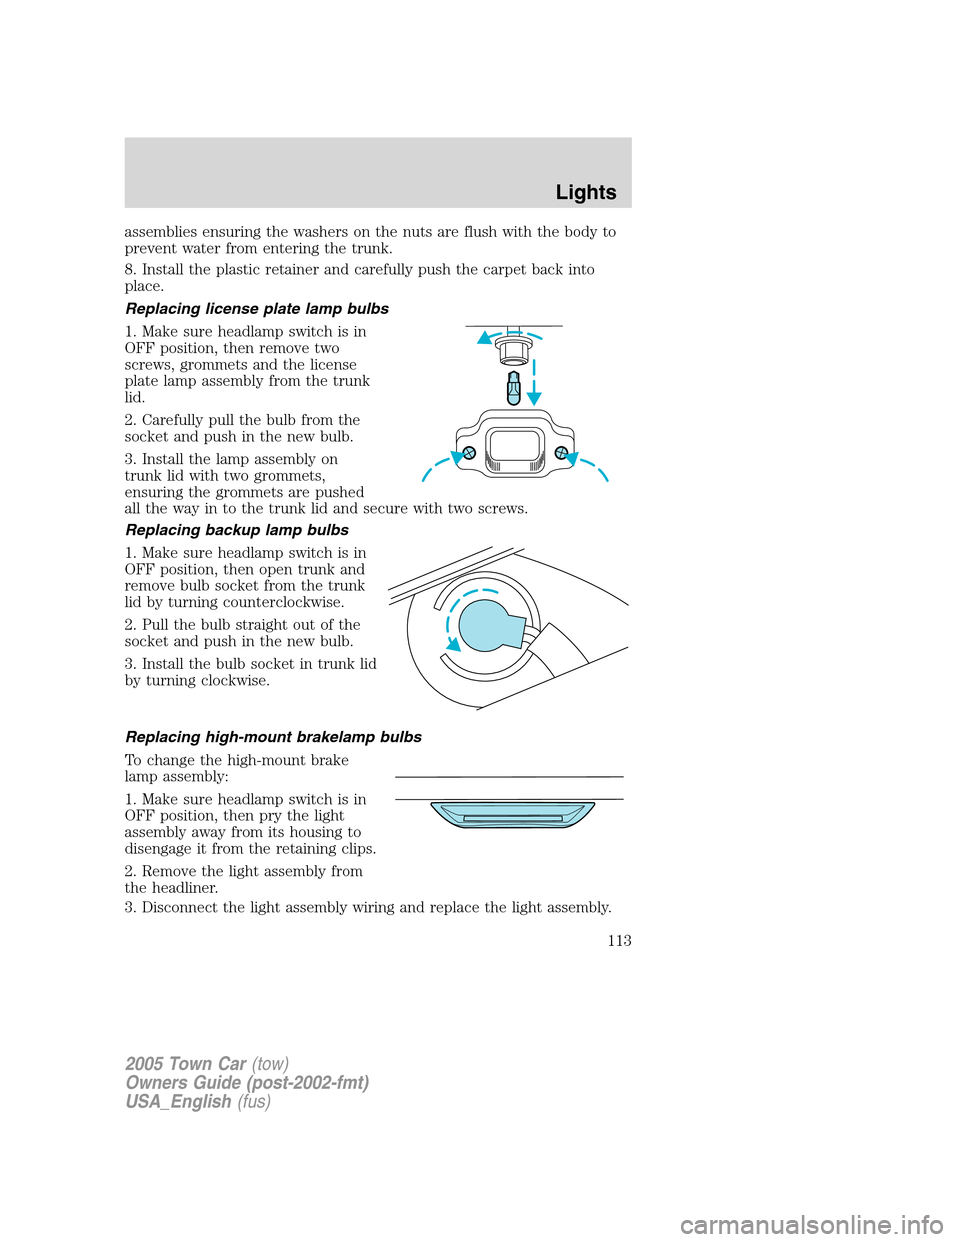
Replacing license plate lamp bulbs
1. Make sure headlamp switch is in
OFF position, then remove two
screws, grommets and the license
plate lamp assembly from the trunk
lid.
2. Carefully pull the bulb from the
socket and push in the new bulb.
3. Install the lamp assembly on
trunk lid with two grommets,
ensuring the grommets are pushed
all the way in to the trunk lid and secure with two screws.
Replacing backup lamp bulbs
1. Make sure headlamp switch is in
OFF position, then open trunk and
remove bulb socket from the trunk
lid by turning counterclockwise.
2. Pull the bulb straight out of the
socket and push in the new bulb.
3. Install the bulb socket in trunk lid
by turning clockwise.
Replacing high-mount brakelamp bulbs
To change the high-mount brake
lamp assembly:
1. Make sure headlamp switch is in
OFF position, then pry the light
assembly away from its housing to
disengage it from the retaining clips.
2. Remove the light assembly from
the headliner.
3. Disconnect the light assembly wiring and replace the light assembly.
2005 Town Car(tow)
Owners Guide (post-2002-fmt)
USA_English(fus)
Lights
113
Page 231 of 328
•Another example for your vehicle with 1400 lb. (635 kg) of cargo and
luggage capacity. You decide to go golfing. Is there enough load
capacity to carry you, 4 of your friends and all the golf bags? You and
four friends average 220 lb. (99 kg) each and the golf bags weigh
approximately 30 lb. (13.5 kg) each. The calculation would be: 1400 –
(5 x 220) – (5 x 30) = 1400 – 1100 – 150 = 150 lb. Yes, you have
enough load capacity in your vehicle to transport four friends and
your golf bags. In metric units, the calculation would be: 635 kg — (5
x 99 kg) — (5 x 13.5 kg) = 635 — 495 — 67.5 = 72.5 kg.
•A final example for your vehicle with 1400 lb. (635 kg) of cargo and
luggage capacity. You and one of your friends decide to pick up
cement from the local home improvement store to finish that patio
you have been planning for the past 2 years. Measuring the inside of
the vehicle with the rear seat folded down, you have room for 12-100
lb. (45 kg) bags of cement. Do you have enough load capacity to
transport the cement to your home? If you and your friend each weigh
220 lb. (99 kg), the calculation would be: 1400 – (2 x 220) – (12 x
100) = 1400 – 440 – 1200 = – 240 lb. No, you do not have enough
cargo capacity to carry that much weight. In metric units, the
calculation would be: 635 kg — (2 x 99 kg) — (12 x 45 kg) = 635 —
198 — 540 = —103 kg. You will need to reduce the load weight by at
least 240 lb. (104 kg). If you remove 3-100 lb. (45 kg) cement bags,
then the load calculation would be:
1400 – (2 x 220) – (9 x 100) = 1400 – 440 – 900 = 60 lb. Now you
have the load capacity to transport the cement and your friend home. .
In metric units, the calculation would be: 635 kg — (2 x 99 kg) — (9
x 45 kg) = 635 — 198 — 405 = 32 kg.
The above calculations also assume that the loads are positioned in your
vehicle in a manner that does not overload the Front or the Rear Gross
Axle Weight Rating specified for your vehicle on the Certification label
found on the edge of the driver’s door.
TRAILER TOWING
Your vehicle is classified as a light duty towing vehicle. Do not tow a
trailer until your vehicle has been driven at least 2,000 miles (3,200 km).
Towing a trailer places an additional load on your vehicle’s engine,
transmission, brakes, tires and suspension. Inspect these components
carefully after towing.
Your loaded trailer should weigh no more than 2,000 lb. (907 kg).Do
not exceed the GVWR specified on the certification label.
2005 Town Car(tow)
Owners Guide (post-2002-fmt)
USA_English(fus)
Tires, Wheels and Loading
231
Page 233 of 328
Trailer lamps
Trailer lamps are required on most towed vehicles. Make sure all running
lights, brake lights, turn signals and hazard lights are working. See your
dealer or trailer rental agency for proper instructions and equipment for
hooking up trailer lamps.
Driving while you tow
When towing a trailer:
•Turn off the speed control. The speed control may shut off
automatically when you are towing on long, steep grades.
•Consult your local motor vehicle speed regulations for towing a trailer.
•To eliminate excessive shifting, use a lower gear. This will also assist
in transmission cooling. (For additional information, refer to
Understanding the gearshift positions of the 4–speed automatic
transmissionin theDriving chapter.
•Anticipate stops and brake gradually.
•Do not exceed the GCWR rating or transmission damage may occur.
Servicing after towing
If you tow a trailer for long distances, your vehicle will require more
frequent service intervals. Refer to yourScheduled Maintenance
Informationfor more information.
Trailer towing tips
•Practice turning, stopping and backing up before starting on a trip to
get the feel of the vehicle trailer combination. When turning, make
wider turns so the trailer wheels will clear curbs and other obstacles.
•Allow more distance for stopping with a trailer attached.
•If you are driving down a long or steep hill, shift to a lower gear. Do
not apply the brakes continuously, as they may overheat and become
less effective.
•The trailer tongue weight should be 10–15% of the loaded trailer
weight.
•After you have traveled 50 miles (80 km), thoroughly check your
hitch, electrical connections and trailer wheel lug nuts.
•To aid in engine/transmission cooling and A/C efficiency during hot
weather while stopped in traffic, place the gearshift lever in P (Park).
•Vehicles with trailers should not be parked on a grade. If you must
park on a grade, place wheel chocks under the trailer’s wheels.
2005 Town Car(tow)
Owners Guide (post-2002-fmt)
USA_English(fus)
Tires, Wheels and Loading
233
Page 239 of 328
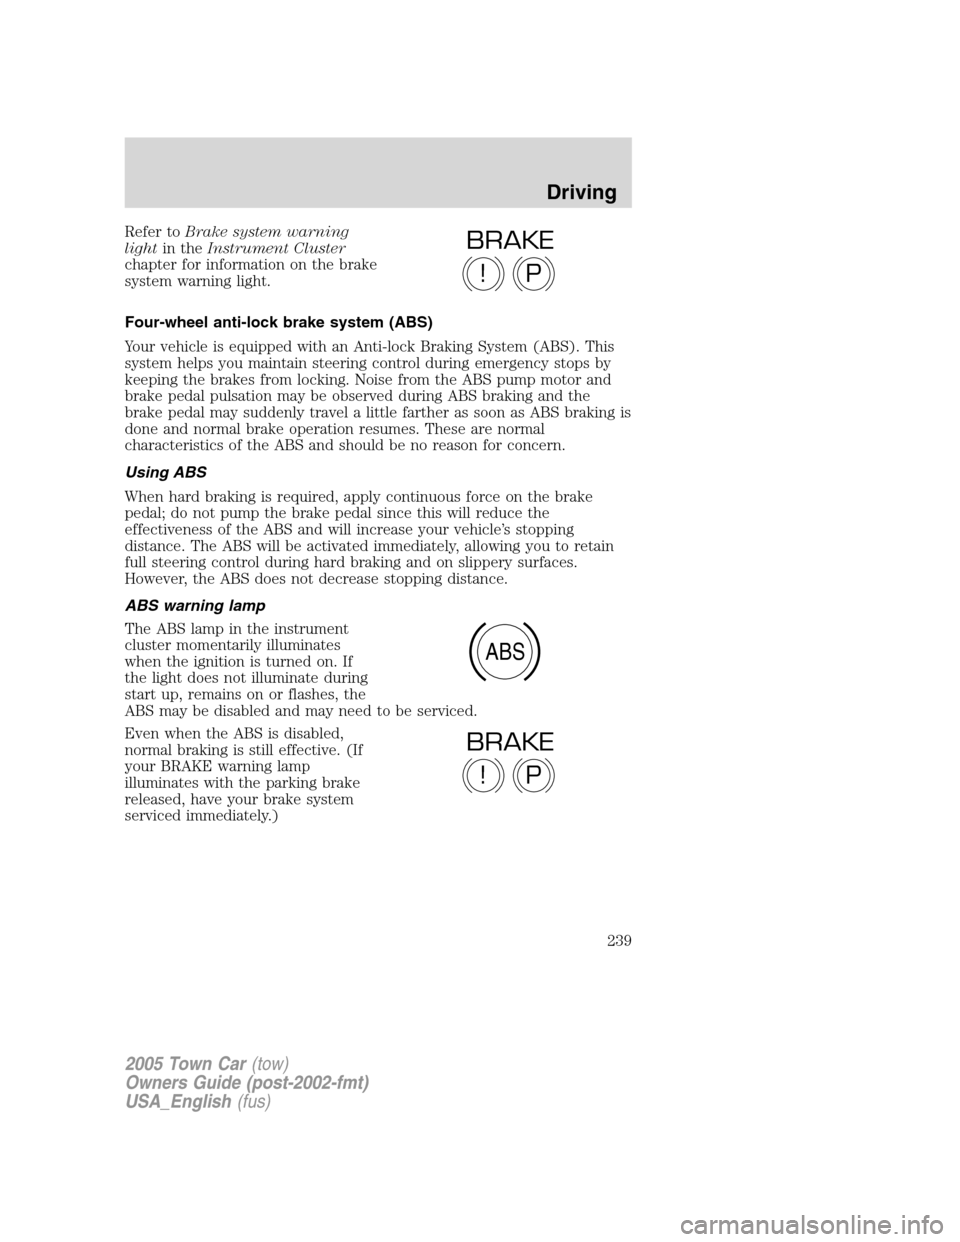
Refer toBrake system warning
lightin theInstrument Cluster
chapter for information on the brake
system warning light.
Four-wheel anti-lock brake system (ABS)
Your vehicle is equipped with an Anti-lock Braking System (ABS). This
system helps you maintain steering control during emergency stops by
keeping the brakes from locking. Noise from the ABS pump motor and
brake pedal pulsation may be observed during ABS braking and the
brake pedal may suddenly travel a little farther as soon as ABS braking is
done and normal brake operation resumes. These are normal
characteristics of the ABS and should be no reason for concern.
Using ABS
When hard braking is required, apply continuous force on the brake
pedal; do not pump the brake pedal since this will reduce the
effectiveness of the ABS and will increase your vehicle’s stopping
distance. The ABS will be activated immediately, allowing you to retain
full steering control during hard braking and on slippery surfaces.
However, the ABS does not decrease stopping distance.
ABS warning lamp
The ABS lamp in the instrument
cluster momentarily illuminates
when the ignition is turned on. If
the light does not illuminate during
start up, remains on or flashes, the
ABS may be disabled and may need to be serviced.
Even when the ABS is disabled,
normal braking is still effective. (If
your BRAKE warning lamp
illuminates with the parking brake
released, have your brake system
serviced immediately.)
P!
BRAKE
ABS
P!
BRAKE
2005 Town Car(tow)
Owners Guide (post-2002-fmt)
USA_English(fus)
Driving
239