Page 277 of 354

69
In case of an emergency
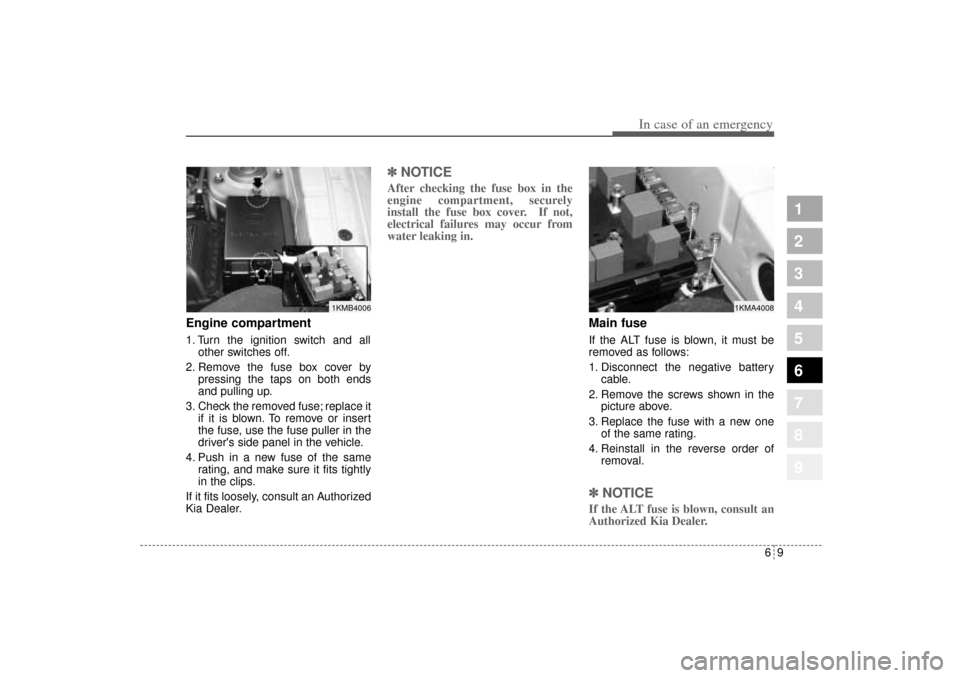
Engine compartment1. Turn the ignition switch and all
other switches off.
2. Remove the fuse box cover by
pressing the taps on both ends
and pulling up.
3. Check the removed fuse; replace it
if it is blown. To remove or insert
the fuse, use the fuse puller in the
driver's side panel in the vehicle.
4. Push in a new fuse of the same
rating, and make sure it fits tightly
in the clips.
If it fits loosely, consult an Authorized
Kia Dealer.
✽ ✽
NOTICEAfter checking the fuse box in the
engine compartment, securely
install the fuse box cover. If not,
electrical failures may occur from
water leaking in.
Main fuseIf the ALT fuse is blown, it must be
removed as follows:
1. Disconnect the negative battery
cable.
2. Remove the screws shown in the
picture above.
3. Replace the fuse with a new one
of the same rating.
4. Reinstall in the reverse order of
removal.✽ ✽
NOTICEIf the ALT fuse is blown, consult an
Authorized Kia Dealer.
1
2
3
4
5
6
7
8
9
1KMB4006
1KMA4008
KM CAN (ENG) 6.qxd 9/13/2004 4:47 PM Page 9
Page 281 of 354
613
In case of an emergency
1
2
3
4
5
6
7
8
9
Power connector fuseYour vehicle is equipped with a
power connector fuse to prevent bat-
tery discharge if your vehicle is
parked without being operated for
prolonged periods. Use the following
procedures before parking the vehi-
cle for prolonged period.
1. Turn off the engine.
2. Turn off the headlights and tail
lights.
3. Open the driver’s side panel cover
and pull up the “P/CONN 30A”.
✽ ✽
NOTICE• If the power connector fuse is
pulled up from the fuse panel, the
warning chime, audio, clock and
interior lamps, etc., will not oper-
ate. Some items must be reset after
replacement. (Refer to “Items to
be reset···.” on page 7-37)
• Even though the power connector
fuse is pulled up, the battery can
still be discharged by operation of
the headlights or other electrical
devices.
1KMA4005
Power connector fuse
KM CAN (ENG) 6.qxd 9/13/2004 4:47 PM Page 13
Page 295 of 354
1
2
3
4
5
6
7
8
9
Battery / 7-31
Tires and wheels / 7-34
Lubricant specifications / 7-49
Exterior care / 7-51
Interior care / 7-55
Maintenance
1
2
3
4
5
6
7
8
9KM CAN (ENG) 7.qxd 9/13/2004 4:47 PM Page 2
Page 302 of 354

79
Maintenance
1
2
3
4
5
6
7
8
9
At least monthly: Check coolant level in the coolant
recovery reservoir.
Check the operation of all exterior
lights, including the stoplights, turn
signals and hazard warning flash-
ers.
Check the inflation pressures of all
tires including the spare.
At least twice a year
(i.e., every Spring and Fall) : Check radiator, heater and air con-
ditioning hoses for leaks or da-
mage.
Check windshield washer spray
and wiper operation. Clean wiper
blades with clean cloth dampened
with washer fluid.
Check headlight alignment.
Check muffler, exhaust pipes,
shields and clamps.
Check the lap/shoulder belts for
wear and function.
Check for worn tires and loose
wheel lug nuts.
At least once a year : Clean body and door drain holes.
Lubricate door hinges and checks,
and hood hinges.
Lubricate door and hood locks and
latches.
Lubricate door rubber weather-
strips.
Check the air conditioning system
before the warm weather season.
Check the power steering fluid
level.
Inspect and lubricate automatic
transaxle linkage and controls.
Clean battery and terminals.
Check the brake fluid level.
KM CAN (ENG) 7.qxd 9/13/2004 4:47 PM Page 9
Page 304 of 354
711
Maintenance
1
2
3
4
5
6
7
8
9
ENGINE COMPARTMENT
1KMB5001
1. Power steering fluid reservoir
2. Engine oil filler cap
3. Brake fluid reservoir
4. Air cleaner
5. Fuse box
6. Negative battery terminal
7. Radiator cap
8. Positive battery terminal
9. Auto transaxle oil dipstick
(if equipped)
10. Engine oil dipstick
11. Engine coolant reservoir
12. Windshield washer fluid reser-
voir
� �
2.0L Gasoline Engine
KM CAN (ENG) 7.qxd 9/13/2004 4:47 PM Page 11
Page 305 of 354
Maintenance12 7
1
2
3
4
5
6
7
8
9
1KMB7015
1. Power steering fluid reservoir
2. Engine oil filler cap
3. Brake fluid reservoir
4. Air cleaner
5. Fuse box
6. Negative battery terminal
7. Radiator cap
8. Positive battery terminal
9. Auto transaxle oil dipstick
(if equipped)
10. Engine coolant reservoir
11. Engine oil dipstick
12. Windshield washer fluid reser-
voir � �
2.7L Gasoline Engine
KM CAN (ENG) 7.qxd 9/13/2004 4:47 PM Page 12
Page 324 of 354

731
Maintenance
1
2
3
4
5
6
7
8
9
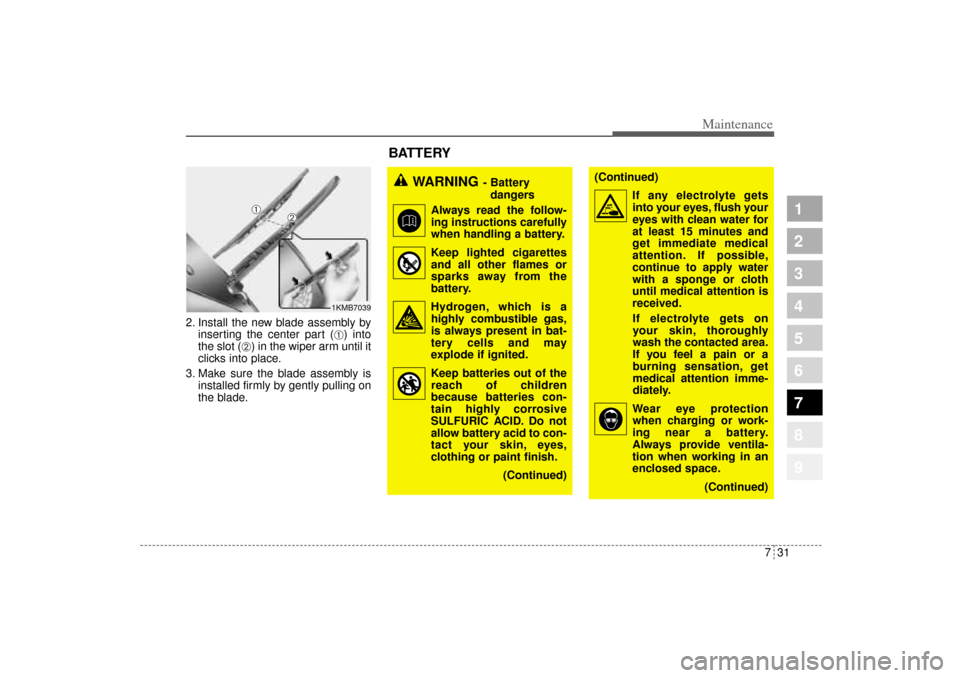
2. Install the new blade assembly by
inserting the center part (
➀) into
the slot (
➁) in the wiper arm until it
clicks into place.
3. Make sure the blade assembly is
installed firmly by gently pulling on
the blade.
WARNING
- Battery
dangers
Always read the follow-
ing instructions carefully
when handling a battery.
Keep lighted cigarettes
and all other flames or
sparks away from the
battery.
Hydrogen, which is a
highly combustible gas,
is always present in bat-
tery cells and may
explode if ignited.
Keep batteries out of the
reach of children
because batteries con-
tain highly corrosive
SULFURIC ACID. Do not
allow battery acid to con-
tact your skin, eyes,
clothing or paint finish.
(Continued)
(Continued)
If any electrolyte gets
into your eyes, flush your
eyes with clean water for
at least 15 minutes and
get immediate medical
attention. If possible,
continue to apply water
with a sponge or cloth
until medical attention is
received.
If electrolyte gets on
your skin, thoroughly
wash the contacted area.
If you feel a pain or a
burning sensation, get
medical attention imme-
diately.
Wear eye protection
when charging or work-
ing near a battery.
Always provide ventila-
tion when working in an
enclosed space.
(Continued)
1KMB7039
BATTERY
➀
➁
KM CAN (ENG) 7.qxd 9/13/2004 4:47 PM Page 31
Page 325 of 354

Maintenance32 7
1
2
3
4
5
6
7
8
9
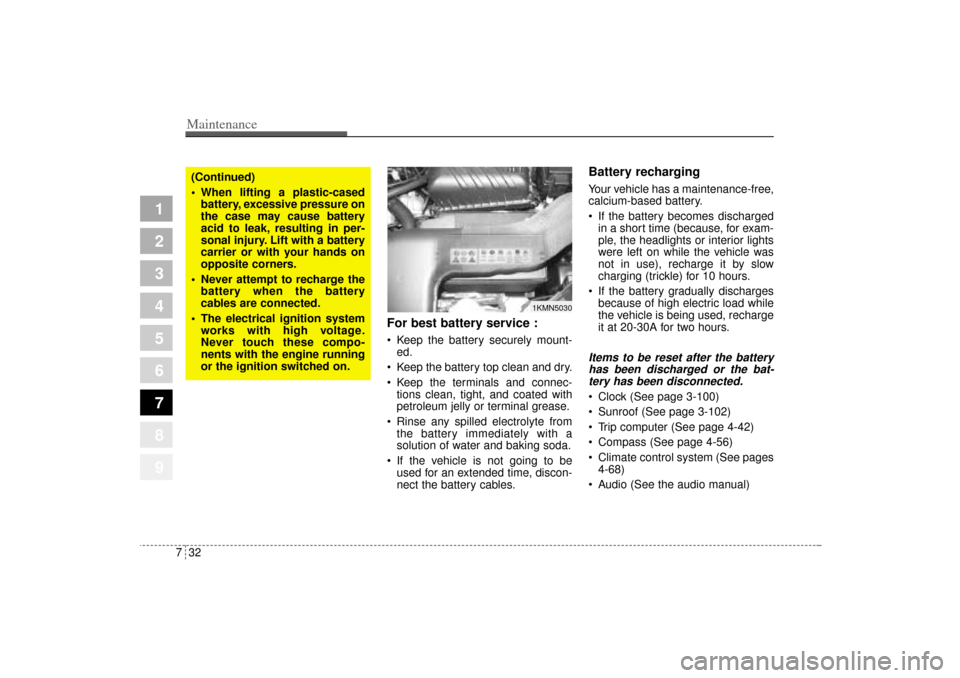
For best battery service : Keep the battery securely mount-
ed.
Keep the battery top clean and dry.
Keep the terminals and connec-
tions clean, tight, and coated with
petroleum jelly or terminal grease.
Rinse any spilled electrolyte from
the battery immediately with a
solution of water and baking soda.
If the vehicle is not going to be
used for an extended time, discon-
nect the battery cables.
Battery recharging Your vehicle has a maintenance-free,
calcium-based battery.
If the battery becomes discharged
in a short time (because, for exam-
ple, the headlights or interior lights
were left on while the vehicle was
not in use), recharge it by slow
charging (trickle) for 10 hours.
If the battery gradually discharges
because of high electric load while
the vehicle is being used, recharge
it at 20-30A for two hours.Items to be reset after the battery
has been discharged or the bat-
tery has been disconnected. Clock (See page 3-100)
Sunroof (See page 3-102)
Trip computer (See page 4-42)
Compass (See page 4-56)
Climate control system (See pages
4-68)
Audio (See the audio manual)
1KMN5030
(Continued)
When lifting a plastic-cased
battery, excessive pressure on
the case may cause battery
acid to leak, resulting in per-
sonal injury. Lift with a battery
carrier or with your hands on
opposite corners.
Never attempt to recharge the
battery when the battery
cables are connected.
The electrical ignition system
works with high voltage.
Never touch these compo-
nents with the engine running
or the ignition switched on.
KM CAN (ENG) 7.qxd 9/13/2004 4:47 PM Page 32