Page 75 of 354
Knowing your vehicle64 3
1
2
3
4
5
6
7
8
9
Always be sure that you and all vehi-
cle occupants are seated and
restrained properly (sitting upright
with the seat in an upright position,
centered on the seat cushion, with
the person’s legs comfortably
extended, feet on the floor, and wear-
ing the safety belt properly) for the
most effective protection by the
airbag and the safety belt. The “PASSENGER AIRBAG OFF”
indicator illuminates after the igni-
tion key is turned to the “ON” posi-
tion or after the engine is started. If
the front passenger’s seat is occu-
pied by very small person, the
“PASSENGER AIRBAG OFF” indi-
cator will remain illuminated. If the
front passenger’s seat is occupied
by a person of adult size, the “PAS-
SENGER AIRBAG OFF” indicator
will turn off after 6 seconds.
If the front passenger's seat is
unoccupied, the “PASSENGER
AIRBAG OFF” indicator will turn
off, however the front passenger's
airbag will not deploy in frontal
crashes.
If the “PASSENGER AIRBAG OFF”
indicator illuminates, the front pas-
senger’s airbag will not deploy in
frontal crashes.
If the “PASSENGER AIRBAG OFF”
indicator is not illuminated, the
front passenger’s airbag will deploy
in frontal crashes.
WARNING
Even though your vehicle is
equipped with the occupant
classification system, do not
install a child restraint system
in the front passenger's seat.
The infant/child could be
severely injured or killed by an
airbag deployment in case of an
accident. A child restraint sys-
tem must never be placed in the
front seat. Children who are too
large for child restraint systems
should always occupy the rear
seat and use the available
lap/shoulder belts. Children are
afforded the most safety in the
event of an acident when they
are restrained by a proper
restraint system in the rear seat.
KM CAN (ENG) 3 (~112).qxd 9/13/2004 4:50 PM Page 64
Page 91 of 354
Knowing your vehicle80 3
1
2
3
4
5
6
7
8
9
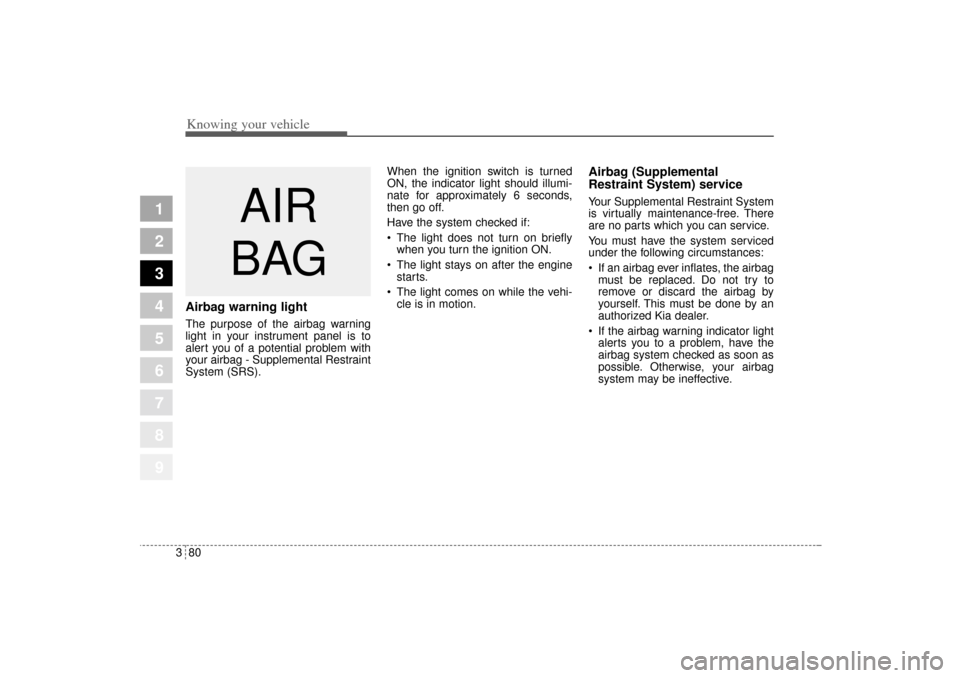
Airbag warning lightThe purpose of the airbag warning
light in your instrument panel is to
alert you of a potential problem with
your airbag - Supplemental Restraint
System (SRS).When the ignition switch is turned
ON, the indicator light should illumi-
nate for approximately 6 seconds,
then go off.
Have the system checked if:
The light does not turn on briefly
when you turn the ignition ON.
The light stays on after the engine
starts.
The light comes on while the vehi-
cle is in motion.
Airbag (Supplemental
Restraint System) service Your Supplemental Restraint System
is virtually maintenance-free. There
are no parts which you can service.
You must have the system serviced
under the following circumstances:
If an airbag ever inflates, the airbag
must be replaced. Do not try to
remove or discard the airbag by
yourself. This must be done by an
authorized Kia dealer.
If the airbag warning indicator light
alerts you to a problem, have the
airbag system checked as soon as
possible. Otherwise, your airbag
system may be ineffective.
AIR
BAG
KM CAN (ENG) 3 (~112).qxd 9/13/2004 4:50 PM Page 80
Page 94 of 354
383
1
2
3
4
5
6
7
8
9
Knowing your vehicle
Opening the hood:1. Pull the release lever on the lower
left side of the instrument panel to
unlatch the hood. The hood
should pop open slightly.2. Go to the front of the vehicle, raise
the hood slightly, pull the second-
ary latch (
➀) inside of the hood
center and lift (➁) the hood.3. Lift the hood and hold it open with
the support rod by inserting the
free end of the rod into the slot
(
➀).
HOOD
1KMA2021
1KMA2022
1KMA2023
CAUTION
Grasp the support rod in the
area wrapped in rubber. The rub-
ber will help prevent you from
being burned by hot metal when
the engine is hot.
➀
KM CAN (ENG) 3 (~112).qxd 9/13/2004 4:50 PM Page 83
Page 95 of 354
Knowing your vehicle84 3
1
2
3
4
5
6
7
8
9
Closing the hood1. Before closing the hood, check the
following:
All filler caps in engine compart-
ment must be correctly installed.
Gloves, rags or any other com-
bustible material must be
removed from the engine com-
partment.
2. Secure the support rod in its clip.
3. Lower the hood to about 30 cm
(12 inches) height and then let it
drop to properly lock in place.
Make sure the hood is properly
locked before driving.
CAUTION
Before closing the hood, make
sure that all engine parts and
tools have been removed from
the engine area and that no
one’s hands are near the hood
opening.
Do not leave gloves, rags or
any other combustible materi-
al in the engine compartment.
Doing so may cause a heat-
induced fire.
KM CAN (ENG) 3 (~112).qxd 9/13/2004 4:50 PM Page 84
Page 96 of 354
385
1
2
3
4
5
6
7
8
9
Knowing your vehicle
1. Stop the engine.
2. To open the fuel filler lid, pull the
release lever.3. Pull the fuel filler lid out to open.
4. To remove the cap, turn the fuel
tank cap counter-clockwise.
5. Refuel as needed.
6. To install the cap, turn it clockwise
until it “clicks”. This indicates that
the cap is securely tightened.
7. Close the fuel filler lid and push it
lightly and make sure that it is
securely closed.FUEL FILLER LID
1KMA2019
1KMB2020
WARNING
- Refueling
If pressurized fuel sprays out, it
can cause serious injuries.
Always remove the fuel cap
carefully and slowly. If the cap is
venting fuel or if you hear a
hissing sound, wait until the
condition stops before com-
pletely removing the cap.
CAUTION
To avoid injury from sharp
objects, it is recommended that
protective gloves be worn if
there is a need to open the fuel
filler door manually.
KM CAN (ENG) 3 (~112).qxd 9/13/2004 4:50 PM Page 85
Page 97 of 354
Knowing your vehicle86 3
1
2
3
4
5
6
7
8
9
WARNING
Automotive fuels are flamma-
ble/explosive materials. When
refueling, please note the fol-
lowing guidelines carefully.
Failure to follow these guide-
lines may result in severe per-
sonal injury, severe burns or
death by fire or explosion.
Before refueling always note
the location of the Emergency
Gasoline Shut-Off, if available,
at the gas station facility.
Before touching the fuel noz-
zle or fuel filler cap, you
should eliminate potentially
dangerous static electricity
discharge by touching anoth-
er metal part of the front of the
vehicle, a safe distance away
from the fuel filler neck, noz-
zle, or other gas source.
(Continued)
(Continued)
Do not get back into a vehicle
once you have begun refuel-
ing. Do not touch, rub or slide
against any item or fabric
(polyester, satin, nylon, etc.)
capable of producing static
electricity. Static electricity
discharge can ignite fuel
vapors resulting in explosion.
If you must re-enter the vehi-
cle, you should once again
eliminate potentially danger-
ous static electricity dis-
charge by touching a metal
part of the vehicle, away from
the fuel filler neck, nozzle or
other gasoline source.
When using a portable fuel
container be sure to place the
container on the ground prior
to refueling. Static electricity
discharge from the container
can ignite fuel vapors causing
a fire. Once refueling has
begun, contact with the vehi-
cle should be maintained until
the filling is complete.
(Continued)
(Continued)
Use only portable fuel con-
tainers designed to carry and
store gasoline.
Do not use cellular phones
around a gas station or while
refueling any vehicle. Electric
current and/or electronic
interference from cellular
phones can potentially ignite
fuel vapors causing a fire. If
you must use your cellular
phone use it in a place away
from the gas station.
When refueling always shut
the engine off. Sparks pro-
duced by electrical compo-
nents related to the engine
can ignite fuel vapors causing
a fire. Always insure that the
engine is OFF before and dur-
ing refueling. Once refueling
is complete, check to make
sure the fuel filler cap and
door are securely closed,
before starting the engine. You
should hear 3 "clicks" when
closing the fuel cap.
(Continued)
KM CAN (ENG) 3 (~112).qxd 9/13/2004 4:50 PM Page 86
Page 98 of 354
387
1
2
3
4
5
6
7
8
9
Knowing your vehicle
✽ ✽
NOTICE• Make sure to refuel with gasoline
(unleaded fuel) only (for the gaso-
line engine vehicles).
• Check to make sure the fuel filler
cap is securely closed after refuel-
ing.
• If the fuel filler cap requires
replacement, use only a genuine
Kia cap or the equivalent specified
for your vehicle. An incorrect fuel
filler cap can result in a serious
malfunction of the fuel system or
emission control system. Correct
replacement caps are available at
authorized Kia dealers.
• Do not spill fuel on the exterior
surfaces of the vehicle. Any type of
fuel spilled on painted surfaces
may damage the paint.
• A loose fuel filler cap may cause
the “Check Engine” (Malfunction
Indicator) light in the instrument
panel to illuminate unnecessarily.
• If the fuel filler lid will not open in
cold weather because the area
around it is frozen, push or lightly
tap the lid.
(Continued)
Do not light any fire around a
gas station. DO NOT use
matches or a lighter and DO
NOT SMOKE or leave a lit cig-
arette in your vehicle while at
a gas station especially during
refueling. Automotive fuel is
highly flammable and can,
when ignited, result in explo-
sion and fire.
If a fire breaks out during refu-
eling, leave the vicinity of the
vehicle, and immediately con-
tact the manager of the gas
station or contact the police
and local fire department.
Follow any safety instructions
they provide.
KM CAN (ENG) 3 (~112).qxd 9/13/2004 4:50 PM Page 87
Page 101 of 354
Knowing your vehicle90 3
1
2
3
4
5
6
7
8
9
Outside rearview mirror heater
(if equipped) The outside rearview mirror heater is
actuated in connection with the rear
window defroster. To heat the outside
rearview mirror glass, push the but-
ton for the rear window defroster.
The rearview mirror heater (and rear
window defroster) will not operate
unless the engine is running.
The outside rearview mirror glass will
be heated for defrosting or defogging
and will give you improved rear
vision in inclement weather condi-
tions. Push the button again to turn
the heater off. The outside rearview
mirror heater automatically turns off
after 20 minutes.
Day/night rearview mirror Adjust the rearview mirror to center
on the view through the rear window.
Make this adjustment before you
start driving.
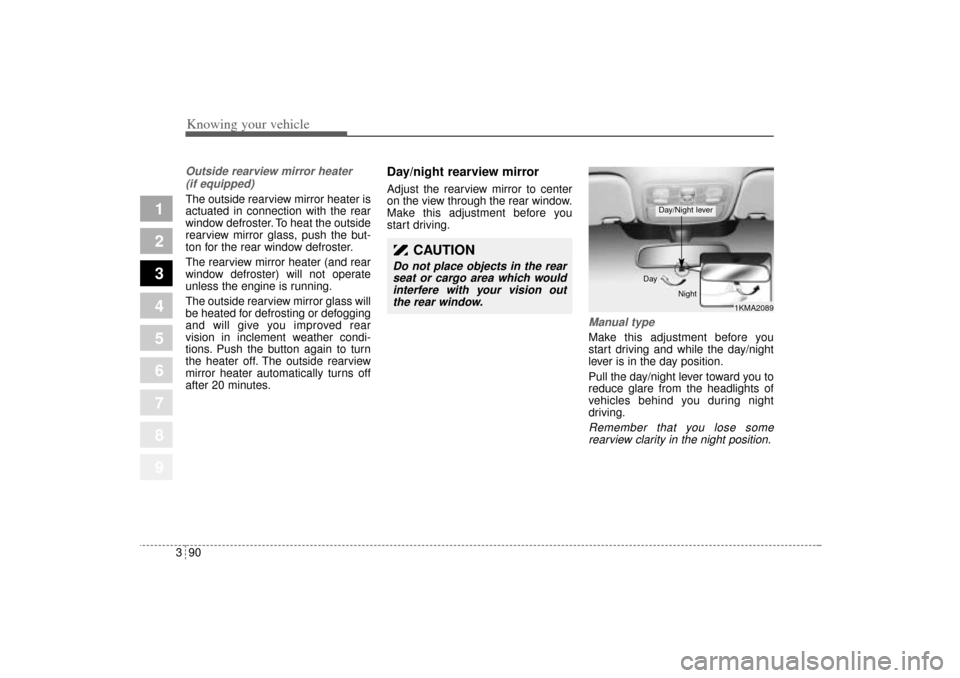
Manual type Make this adjustment before you
start driving and while the day/night
lever is in the day position.
Pull the day/night lever toward you to
reduce glare from the headlights of
vehicles behind you during night
driving.Remember that you lose some
rearview clarity in the night position.
CAUTION
Do not place objects in the rear
seat or cargo area which would
interfere with your vision out
the rear window.
1KMA2089 Day
Night
Day/Night lever
KM CAN (ENG) 3 (~112).qxd 9/13/2004 4:51 PM Page 90