Page 81 of 273
1FEATURES OF YOUR HYUNDAI70
B540C01JM-GATLUGGAGE COMPARTMENT LIGHTLuggage compartment light has a 3-position
switch. The three positions are:
o In the "DOOR" position, the luggage com-
partment light comes on when the tail gate is
opened, then goes out when it is closed.
o In the "ON" position, the light stays on at all
times.
o In the "OFF" position, the light stays off at all
times.
HHR2070
B540A01JM-AATSHOPPING BAG HOLDERS
Shopping bag holders are located in the front
console and on the backside of the rear seat.
When not in use, return it to the original position.
HJM2150
HJM2151
CAUTION:
o Do not hang a bag beyond 6 Ibs (3 kg).
It may cause damage to the shopping
bag holder.
o Return it to the original position after
using the shopping bag holder.
!
LUGGAGE COMPARTMENT
Page 86 of 273
1
FEATURES OF YOUR HYUNDAI
75
HJM2018
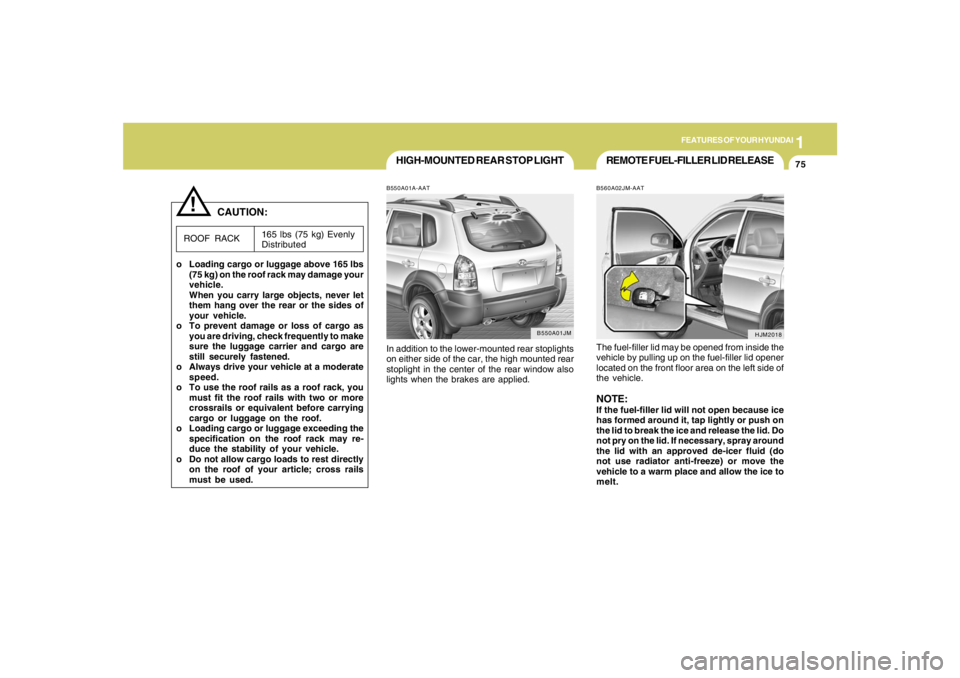
REMOTE FUEL-FILLER LID RELEASEB560A02JM-AATThe fuel-filler lid may be opened from inside the
vehicle by pulling up on the fuel-filler lid opener
located on the front floor area on the left side of
the vehicle.NOTE:If the fuel-filler lid will not open because ice
has formed around it, tap lightly or push on
the lid to break the ice and release the lid. Do
not pry on the lid. If necessary, spray around
the lid with an approved de-icer fluid (do
not use radiator anti-freeze) or move the
vehicle to a warm place and allow the ice to
melt.
!
HIGH-MOUNTED REAR STOP LIGHTB550A01A-AATIn addition to the lower-mounted rear stoplights
on either side of the car, the high mounted rear
stoplight in the center of the rear window also
lights when the brakes are applied.
B550A01JM
165 lbs (75 kg) Evenly
Distributed
ROOF RACK
CAUTION:
o Loading cargo or luggage above 165 lbs
(75 kg) on the roof rack may damage your
vehicle.
When you carry large objects, never let
them hang over the rear or the sides of
your vehicle.
o To prevent damage or loss of cargo as
you are driving, check frequently to make
sure the luggage carrier and cargo are
still securely fastened.
o Always drive your vehicle at a moderate
speed.
o To use the roof rails as a roof rack, you
must fit the roof rails with two or more
crossrails or equivalent before carrying
cargo or luggage on the roof.
o Loading cargo or luggage exceeding the
specification on the roof rack may re-
duce the stability of your vehicle.
o Do not allow cargo loads to rest directly
on the roof of your article; cross rails
must be used.
Page 87 of 273
1FEATURES OF YOUR HYUNDAI76
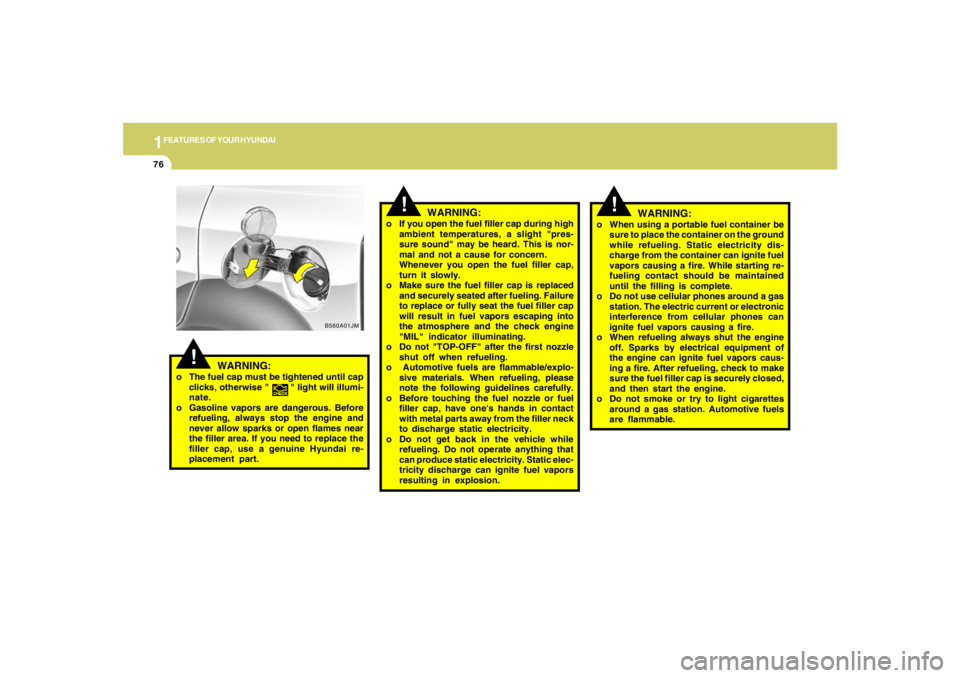
B560A01JM
!
WARNING:
o If you open the fuel filler cap during high
ambient temperatures, a slight "pres-
sure sound" may be heard. This is nor-
mal and not a cause for concern.
Whenever you open the fuel filler cap,
turn it slowly.
o Make sure the fuel filler cap is replaced
and securely seated after fueling. Failure
to replace or fully seat the fuel filler cap
will result in fuel vapors escaping into
the atmosphere and the check engine
"MIL" indicator illuminating.
o Do not "TOP-OFF" after the first nozzle
shut off when refueling.
o Automotive fuels are flammable/explo-
sive materials. When refueling, please
note the following guidelines carefully.
o Before touching the fuel nozzle or fuel
filler cap, have one's hands in contact
with metal parts away from the filler neck
to discharge static electricity.
o Do not get back in the vehicle while
refueling. Do not operate anything that
can produce static electricity. Static elec-
tricity discharge can ignite fuel vapors
resulting in explosion.
!
WARNING:
o The fuel cap must be tightened until cap
clicks, otherwise " " light will illumi-
nate.
o Gasoline vapors are dangerous. Before
refueling, always stop the engine and
never allow sparks or open flames near
the filler area. If you need to replace the
filler cap, use a genuine Hyundai re-
placement part.
!
o When using a portable fuel container be
sure to place the container on the ground
while refueling. Static electricity dis-
charge from the container can ignite fuel
vapors causing a fire. While starting re-
fueling contact should be maintained
until the filling is complete.
o Do not use cellular phones around a gas
station. The electric current or electronic
interference from cellular phones can
ignite fuel vapors causing a fire.
o When refueling always shut the engine
off. Sparks by electrical equipment of
the engine can ignite fuel vapors caus-
ing a fire. After refueling, check to make
sure the fuel filler cap is securely closed,
and then start the engine.
o Do not smoke or try to light cigarettes
around a gas station. Automotive fuels
are flammable.
WARNING:
Page 90 of 273
1
FEATURES OF YOUR HYUNDAI
79
FRONT DOOR EDGE WARNING
LIGHTB620A01S-AATA red light comes on when the front door is
opened. The purpose of this light is to assist
when you get in or out and also to warn passing
vehicles.
B620A01JM
HJM2067
STEERING WHEEL TILT LEVER!
To Adjust the Steering Wheel:1. Push the lever downward to unlock.
2. Raise or lower the steering wheel to the
desired position.
3. After adjustment, securely tighten the lever
by pulling it upward.
WARNING:
Do not attempt to adjust the steering wheel
while driving as this may result in loss of
control of the vehicle which may cause
serious injury or death.B600A01A-AAT
B580C01LZ-AATTICKET HOLDERThe ticket holder is provided on the front of the
sun visor for holding a tollgate ticket.
HJM2142
Page 92 of 273
1
FEATURES OF YOUR HYUNDAI
81
B660C01JM B660C04E-AAT
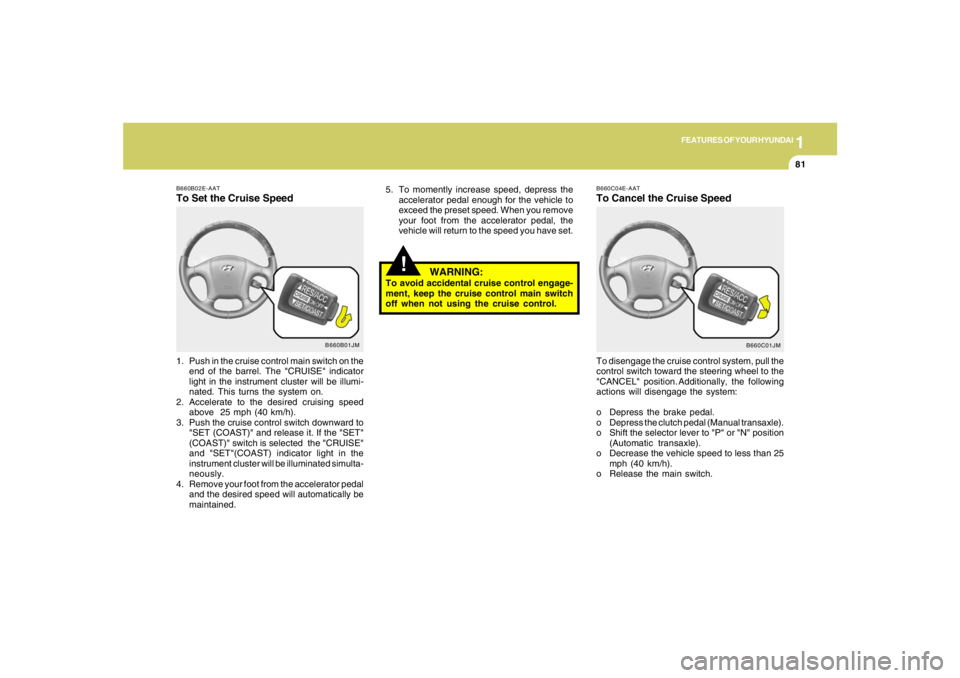
To Cancel the Cruise SpeedTo disengage the cruise control system, pull the
control switch toward the steering wheel to the
"CANCEL" position. Additionally, the following
actions will disengage the system:
o Depress the brake pedal.
o Depress the clutch pedal (Manual transaxle).
o Shift the selector lever to "P" or "N" position
(Automatic transaxle).
o Decrease the vehicle speed to less than 25
mph (40 km/h).
o Release the main switch.
!
5. To momently increase speed, depress the
accelerator pedal enough for the vehicle to
exceed the preset speed. When you remove
your foot from the accelerator pedal, the
vehicle will return to the speed you have set.
WARNING:
To avoid accidental cruise control engage-
ment, keep the cruise control main switch
off when not using the cruise control.
B660B01JM B660B02E-AAT
To Set the Cruise Speed1. Push in the cruise control main switch on the
end of the barrel. The "CRUISE" indicator
light in the instrument cluster will be illumi-
nated. This turns the system on.
2. Accelerate to the desired cruising speed
above 25 mph (40 km/h).
3. Push the cruise control switch downward to
"SET (COAST)" and release it. If the "SET"
(COAST)" switch is selected the "CRUISE"
and "SET"(COAST) indicator light in the
instrument cluster will be illuminated simulta-
neously.
4. Remove your foot from the accelerator pedal
and the desired speed will automatically be
maintained.
Page 96 of 273
1
FEATURES OF YOUR HYUNDAI
85
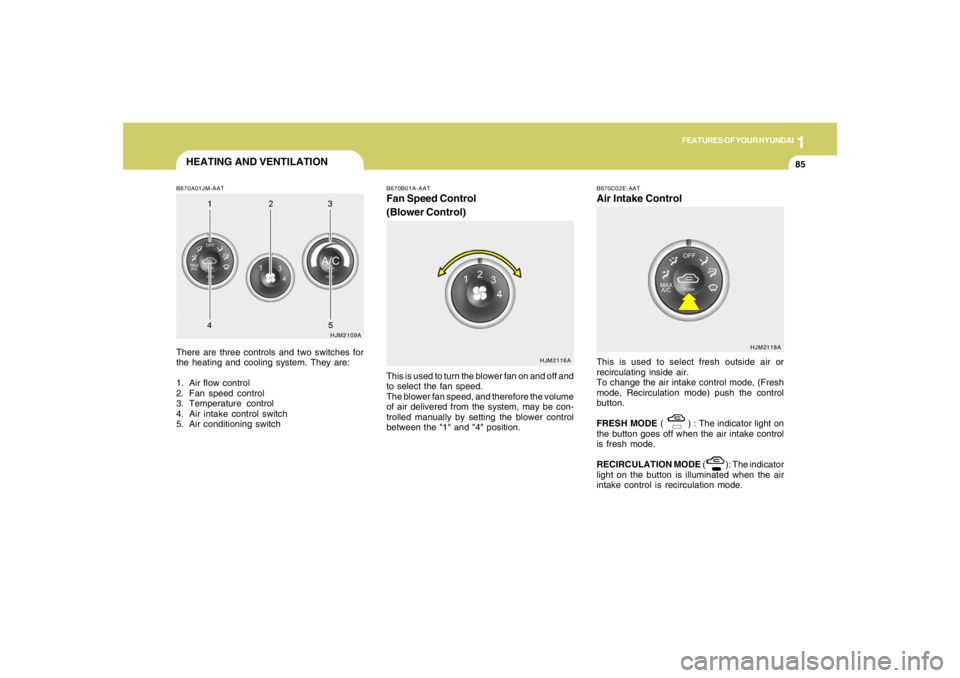
B670A01JM-AATThere are three controls and two switches for
the heating and cooling system. They are:
1. Air flow control
2. Fan speed control
3. Temperature control
4. Air intake control switch
5. Air conditioning switch
HJM2109A
HJM2116A B670B01A-AAT
Fan Speed Control
(Blower Control)This is used to turn the blower fan on and off and
to select the fan speed.
The blower fan speed, and therefore the volume
of air delivered from the system, may be con-
trolled manually by setting the blower control
between the "1" and "4" position.
HEATING AND VENTILATION
B670C02E-AATAir Intake ControlThis is used to select fresh outside air or
recirculating inside air.
To change the air intake control mode, (Fresh
mode, Recirculation mode) push the control
button.
FRESH MODE ( ) : The indicator light on
the button goes off when the air intake control
is fresh mode.
RECIRCULATION MODE ( ): The indicator
light on the button is illuminated when the air
intake control is recirculation mode.
HJM2118A
Page 103 of 273
1FEATURES OF YOUR HYUNDAI92
B740C01S-AATDehumidified HeatingFor dehumidified heating:
o Turn on the fan control switch.
o Turn on the air conditioning switch. The air
conditioning indicator light should come on at
the same time.
o Set the air intake control to the "Fresh" mode
( ).
o Set the air flow control to the "Face" ( ).
o Adjust the fan control to the desired speed.
o For more rapid action, set the fan at one of
the higher speeds.
o Adjust the temperature control to provide the
desired amount of warmth.
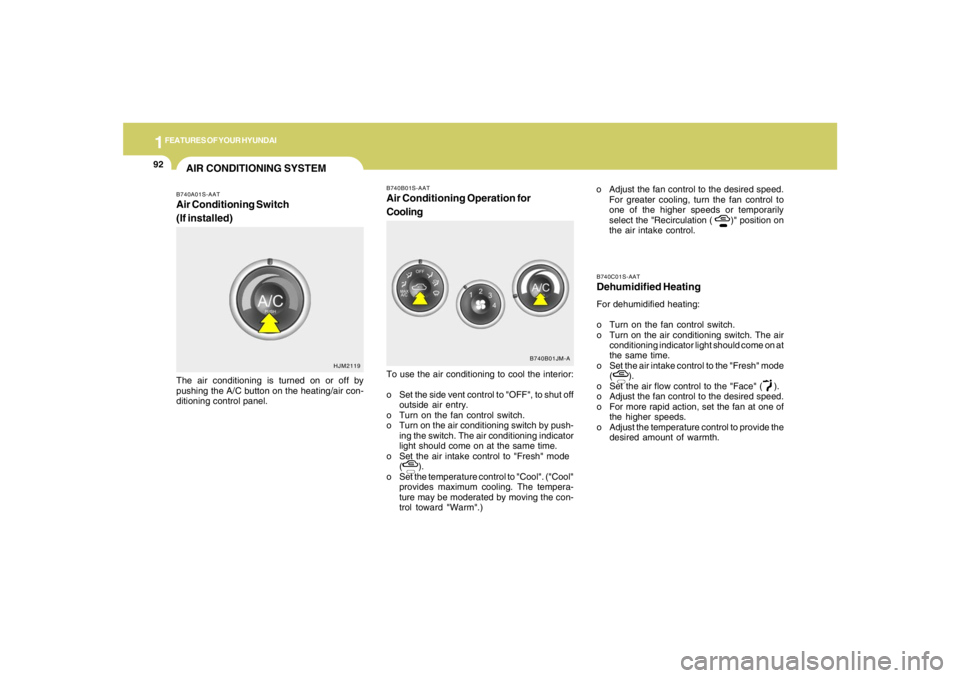
B740B01S-AATAir Conditioning Operation for
CoolingTo use the air conditioning to cool the interior:
o Set the side vent control to "OFF", to shut off
outside air entry.
o Turn on the fan control switch.
o Turn on the air conditioning switch by push-
ing the switch. The air conditioning indicator
light should come on at the same time.
o Set the air intake control to "Fresh" mode
( ).
o Set the temperature control to "Cool". ("Cool"
provides maximum cooling. The tempera-
ture may be moderated by moving the con-
trol toward "Warm".)o Adjust the fan control to the desired speed.
For greater cooling, turn the fan control to
one of the higher speeds or temporarily
select the "Recirculation ( )" position on
the air intake control.
B740B01JM-A
AIR CONDITIONING SYSTEMB740A01S-AATAir Conditioning Switch
(If installed)The air conditioning is turned on or off by
pushing the A/C button on the heating/air con-
ditioning control panel.
HJM2119
Page 106 of 273
1
FEATURES OF YOUR HYUNDAI
95
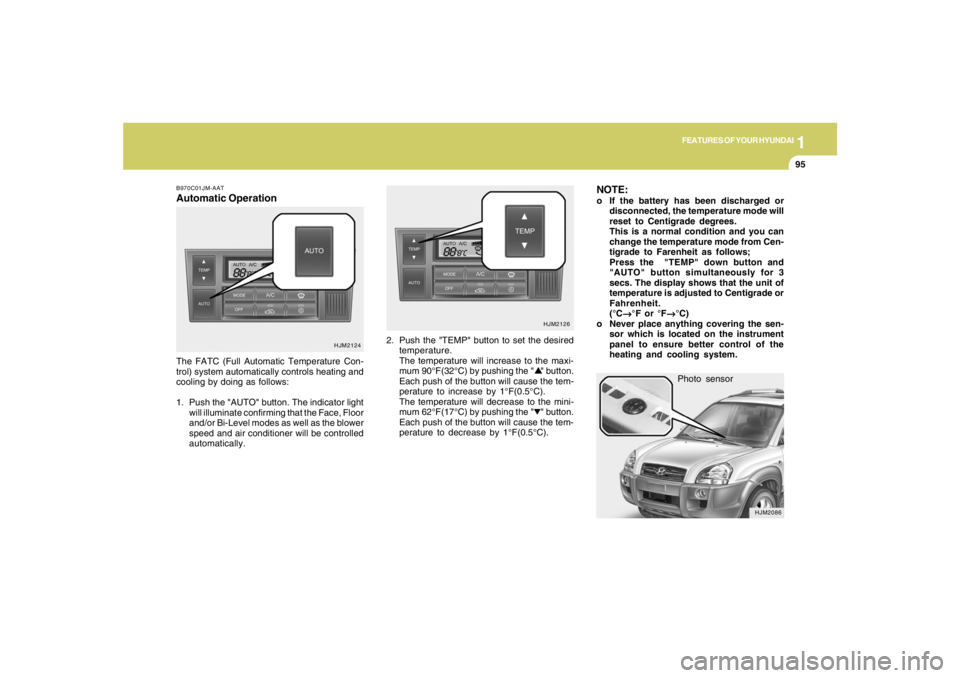
Photo sensor
HJM2086
NOTE:o If the battery has been discharged or
disconnected, the temperature mode will
reset to Centigrade degrees.
This is a normal condition and you can
change the temperature mode from Cen-
tigrade to Farenheit as follows;
Press the "TEMP" down button and
"AUTO" button simultaneously for 3
secs. The display shows that the unit of
temperature is adjusted to Centigrade or
Fahrenheit.
(°C
→ →→ →
→°F or °F
→ →→ →
→°C)
o Never place anything covering the sen-
sor which is located on the instrument
panel to ensure better control of the
heating and cooling system.
B970C01JM-AATAutomatic OperationThe FATC (Full Automatic Temperature Con-
trol) system automatically controls heating and
cooling by doing as follows:
1. Push the "AUTO" button. The indicator light
will illuminate confirming that the Face, Floor
and/or Bi-Level modes as well as the blower
speed and air conditioner will be controlled
automatically.2. Push the "TEMP" button to set the desired
temperature.
The temperature will increase to the maxi-
mum 90°F(32°C) by pushing the " " button.
Each push of the button will cause the tem-
perature to increase by 1°F(0.5°C).
The temperature will decrease to the mini-
mum 62°F(17°C) by pushing the " " button.
Each push of the button will cause the tem-
perature to decrease by 1°F(0.5°C).
HJM2124HJM2126