2005 HYUNDAI TUCSON change time
[x] Cancel search: change timePage 3 of 273
A030A01JM
OWNER'S MANUALA030A01JM-AATOperation
Maintenance
SpecificationsAll information in this Owner's Manual is current at the time of publication. However, Hyundai reserves the right to make changes at any
time so that our policy of continual product improvement may be carried out.
This manual applies to all Hyundai models and includes descriptions and explanations of optional as well as standard
equipment. As a result, you may find material in this manual that does not apply to your specific vehicle.
Page 19 of 273
1FEATURES OF YOUR HYUNDAI8
B070B01JM
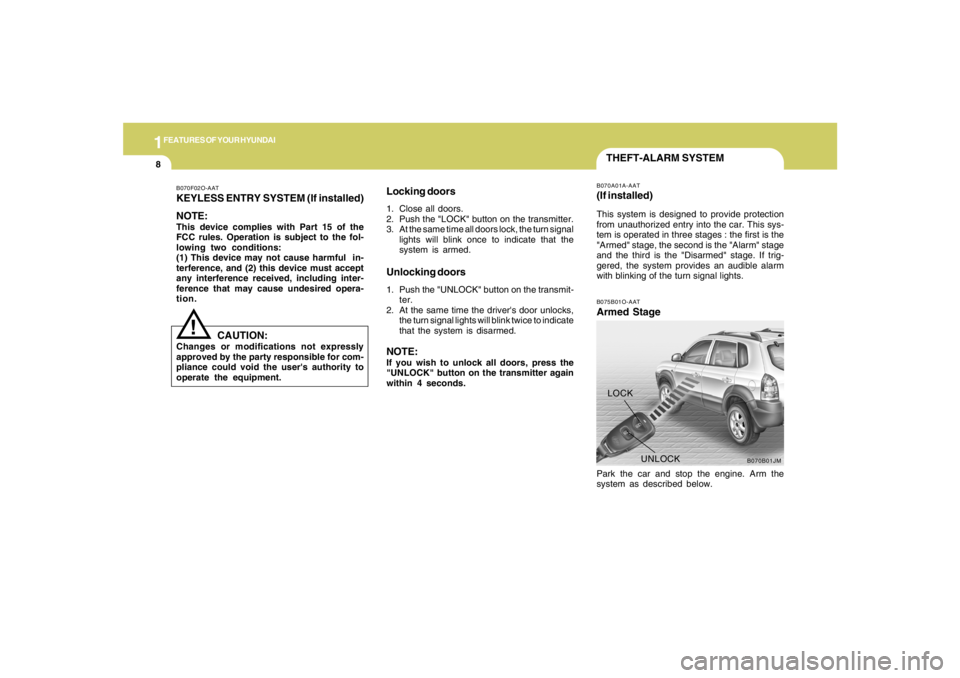
UNLOCK LOCK
THEFT-ALARM SYSTEMB075B01O-AATArmed StagePark the car and stop the engine. Arm the
system as described below.B070A01A-AAT(If installed)This system is designed to provide protection
from unauthorized entry into the car. This sys-
tem is operated in three stages : the first is the
"Armed" stage, the second is the "Alarm" stage
and the third is the "Disarmed" stage. If trig-
gered, the system provides an audible alarm
with blinking of the turn signal lights.
B070F02O-AATKEYLESS ENTRY SYSTEM (If installed)
NOTE:This device complies with Part 15 of the
FCC rules. Operation is subject to the fol-
lowing two conditions:
(1) This device may not cause harmful in-
terference, and (2) this device must accept
any interference received, including inter-
ference that may cause undesired opera-
tion.
Locking doors1. Close all doors.
2. Push the "LOCK" button on the transmitter.
3. At the same time all doors lock, the turn signal
lights will blink once to indicate that the
system is armed.Unlocking doors1. Push the "UNLOCK" button on the transmit-
ter.
2. At the same time the driver's door unlocks,
the turn signal lights will blink twice to indicate
that the system is disarmed.NOTE:If you wish to unlock all doors, press the
"UNLOCK" button on the transmitter again
within 4 seconds.
CAUTION:
Changes or modifications not expressly
approved by the party responsible for com-
pliance could void the user's authority to
operate the equipment.
!
Page 58 of 273
1
FEATURES OF YOUR HYUNDAI
47
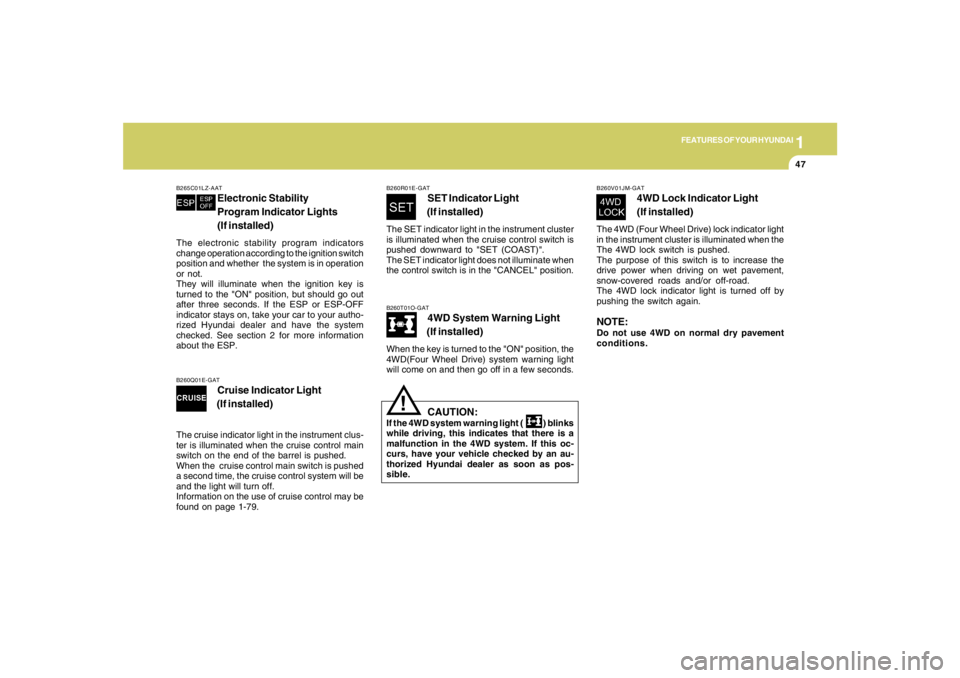
B260T01O-GAT
4WD System Warning Light
(If installed)
When the key is turned to the "ON" position, the
4WD(Four Wheel Drive) system warning light
will come on and then go off in a few seconds.
CAUTION:
If the 4WD system warning light ( ) blinks
while driving, this indicates that there is a
malfunction in the 4WD system. If this oc-
curs, have your vehicle checked by an au-
thorized Hyundai dealer as soon as pos-
sible.
!
B265C01LZ-AAT
Electronic Stability
Program Indicator Lights
(If installed)
The electronic stability program indicators
change operation according to the ignition switch
position and whether the system is in operation
or not.
They will illuminate when the ignition key is
turned to the "ON" position, but should go out
after three seconds. If the ESP or ESP-OFF
indicator stays on, take your car to your autho-
rized Hyundai dealer and have the system
checked. See section 2 for more information
about the ESP.
B260V01JM-GAT
4WD Lock Indicator Light
(If installed)
The 4WD (Four Wheel Drive) lock indicator light
in the instrument cluster is illuminated when the
The 4WD lock switch is pushed.
The purpose of this switch is to increase the
drive power when driving on wet pavement,
snow-covered roads and/or off-road.
The 4WD lock indicator light is turned off by
pushing the switch again.NOTE:Do not use 4WD on normal dry pavement
conditions.
B260R01E-GAT
SET Indicator Light
(If installed)
The SET indicator light in the instrument cluster
is illuminated when the cruise control switch is
pushed downward to "SET (COAST)".
The SET indicator light does not illuminate when
the control switch is in the "CANCEL" position.
B260Q01E-GAT
Cruise Indicator Light
(If installed)
The cruise indicator light in the instrument clus-
ter is illuminated when the cruise control main
switch on the end of the barrel is pushed.
When the cruise control main switch is pushed
a second time, the cruise control system will be
and the light will turn off.
Information on the use of cruise control may be
found on page 1-79.
Page 64 of 273
1
FEATURES OF YOUR HYUNDAI
53
B340D01A-AATHigh-beam SwitchTo turn on the headlight high beams, push the
lever forward (away from you). The High Beam
Indicator Light will come on at the same time. For
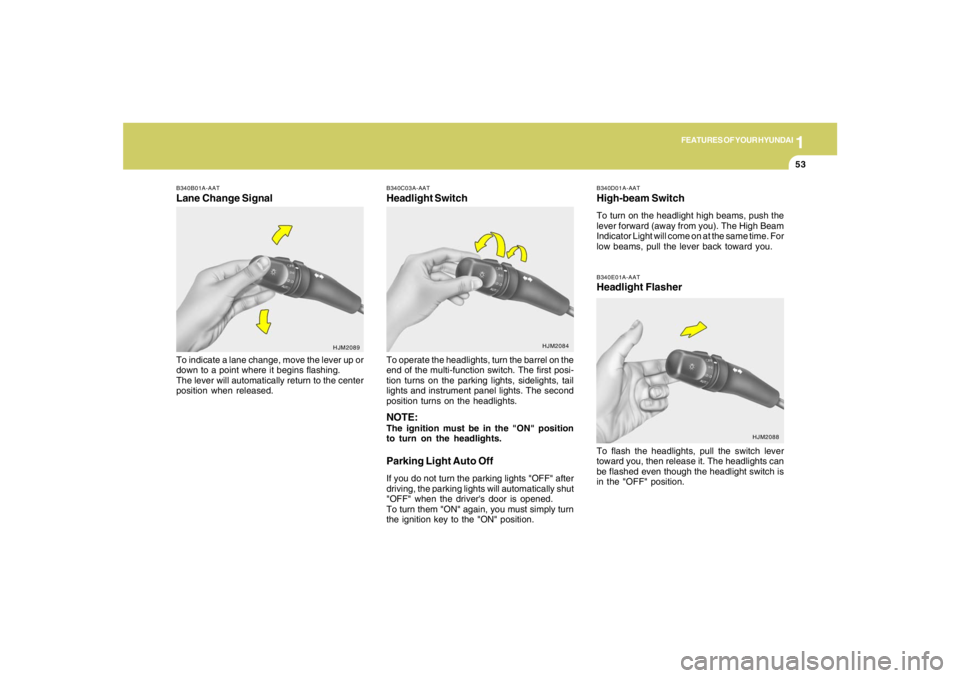
low beams, pull the lever back toward you.B340E01A-AATHeadlight FlasherTo flash the headlights, pull the switch lever
toward you, then release it. The headlights can
be flashed even though the headlight switch is
in the "OFF" position.
B340B01A-AATLane Change SignalTo indicate a lane change, move the lever up or
down to a point where it begins flashing.
The lever will automatically return to the center
position when released.
B340C03A-AATHeadlight SwitchTo operate the headlights, turn the barrel on the
end of the multi-function switch. The first posi-
tion turns on the parking lights, sidelights, tail
lights and instrument panel lights. The second
position turns on the headlights.NOTE:The ignition must be in the "ON" position
to turn on the headlights.Parking Light Auto OffIf you do not turn the parking lights "OFF" after
driving, the parking lights will automatically shut
"OFF" when the driver's door is opened.
To turn them "ON" again, you must simply turn
the ignition key to the "ON" position.
HJM2089
HJM2084
HJM2088
Page 69 of 273
1FEATURES OF YOUR HYUNDAI58
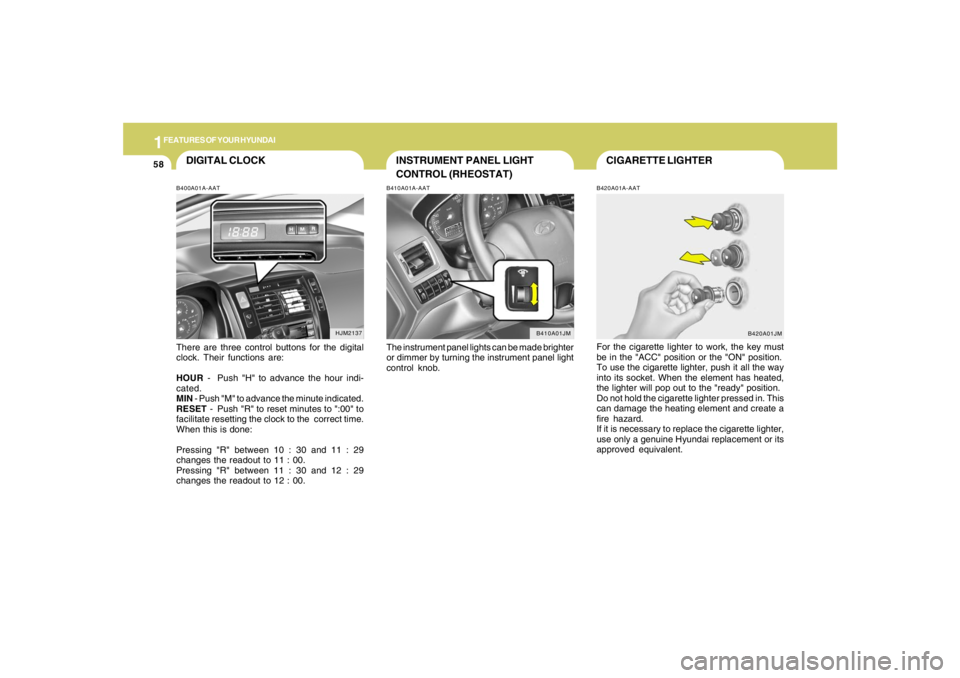
CIGARETTE LIGHTERB420A01A-AATFor the cigarette lighter to work, the key must
be in the "ACC" position or the "ON" position.
To use the cigarette lighter, push it all the way
into its socket. When the element has heated,
the lighter will pop out to the "ready" position.
Do not hold the cigarette lighter pressed in. This
can damage the heating element and create a
fire hazard.
If it is necessary to replace the cigarette lighter,
use only a genuine Hyundai replacement or its
approved equivalent.
INSTRUMENT PANEL LIGHT
CONTROL (RHEOSTAT)B410A01A-AATThe instrument panel lights can be made brighter
or dimmer by turning the instrument panel light
control knob.
DIGITAL CLOCKB400A01A-AATThere are three control buttons for the digital
clock. Their functions are:
HOUR - Push "H" to advance the hour indi-
cated.
MIN - Push "M" to advance the minute indicated.
RESET - Push "R" to reset minutes to ":00" to
facilitate resetting the clock to the correct time.
When this is done:
Pressing "R" between 10 : 30 and 11 : 29
changes the readout to 11 : 00.
Pressing "R" between 11 : 30 and 12 : 29
changes the readout to 12 : 00.
B410A01JM
HJM2137
B420A01JM
Page 140 of 273

1
FEATURES OF YOUR HYUNDAI
129
J290F02JM-GAT1. LOAD ButtonThis compact disc playing will accommodate up
to six discs.
To insert one disc do the following:
1. Press and release the LOAD Button.
2. Green light on both sides of the slot will be
illuminated and the will blink ten times on
the display.
3. Load a disc while the is blinking. Insert a
disc partway into the slot, label side up. The
player will pull the disc in.NOTE:o The disc can be only inserted while the
light is blinking.
o This CD player is suitable only for 12 cm
discs, do not use irregular shaped CDs.
When the disc is inserted, the disc will begin to
play automatically.
To insert multiple discs do the followings:
1. Press and hold the LOAD button for two
seconds or more.
You will then hear two beeps and the green
light on the both sides of the slot will be
illuminated.2. Load a disc while the is blinking. Insert
a disc partway into the slot, label side up. The
player will pull the disc in.
Once the disc is loaded, the numbers of the
vacant disc will blink on the display continu-
ously. If the next "DISC NO." is appeared on
the display with the both side of the slot
illuminated, you can then load another disc.
3. Load the remaining disc by following the same
procedures 1 and 2.
When you finished loading 6 discs, the CD
player will begin to play the last CD loaded.
4. To load more than one disc but less than six,
complete Steps 1 and 2. When you have
finished loading discs, press LOAD button to
cancel the loading function or wait for 10
seconds. The CD player will begin to play the
last CD loaded.
As each CD starts to play, the DISC number will
appear on the display.
NOTE:The disc player takes up to six discs. Do not
try to load more than six.
2. Playing CDo Press the 6CDC to start CD playback,
during radio operation or cassette tape play-
ing.
o When discs are in the CD deck, if you press
the 6CDC button the CD player will begin
playing even if the radio or cassette player
is being used.
o The CD player can be used when the ignition
switch is in either the "ON" or "ACC" position.3. EJECT Buttono When the EJECT button is pressed with
a CD loaded, the CD will eject.
o To eject all of the discs, press this button for
2 seconds or more.4.DISC Select ButtonTo select the CD you want, push "DISC
" or "DISC " to change the disc number.
Page 148 of 273
2
DRIVING YOUR HYUNDAI
2
WARNING: ENGINE EXHAUST CAN BE DANGEROUS!
C010A02JM-AATEngine exhaust fumes can be extremely dangerous. If, at any time, you smell exhaust fumes inside the vehicle, open the windows immediately.
o Do not inhale exhaust fumes.
Exhaust fumes contain carbon monoxide, a colorless, odorless gas that can cause unconsciousness and death by asphyxiation.
o Be sure the exhaust system does not leak.
The exhaust system should be checked whenever the vehicle is raised to change the oil or for any other purpose. If you hear a change
in the sound of the exhaust or if you drive over something that strikes the underneath side of the car, have the exhaust system checked
as soon as possible by your Hyundai dealer.
o Do not run the engine in an enclosed area.
Letting the engine idle in your garage, even with the garage door open, is a hazardous practice. Never run the engine in your garage
any longer than it takes to start the engine and back the car out.
o Avoid idling the engine for prolonged periods with people inside the car.
If it is necessary to idle the engine for a prolonged period with people inside the car, be sure to do so only in an open area with the air
intake set at "Fresh" and fan operating at one of the higher speeds so fresh air is drawn into the interior.
If you must drive with the tail gate open because you are carrying objects that make this necessary:
1. Close all windows.
2. Open side vents.
3. Set the air intake control at "Fresh", the air flow control at "Floor" or "Face" and the fan at one of the higher speeds.
To assure proper operation of the ventilation system, be sure the ventilation air intakes located just in front of the windshield are kept clear
of snow, ice, leaves or other obstructions.
!!
PROPOSITION 65 WARNING:
Engine exhaust and a wide variety of automobile components and parts, including components found in the interior furnishings
in a vehicle, contain or emit chemicals known to the State of California to cause cancer and birth defects and reproductive harm.
In addition, certain fluids contained in vehicles and certain products of component wear contain or emit chemicals known to
the State of California to cause cancer and birth defects or other reproductive harm.
Page 165 of 273
2
DRIVING YOUR HYUNDAI
19
o Use caution when parking on a hill. Engage
the parking brake and place the gear selec-
tor lever in "P" (automatic transaxle) or in first
or reverse gear (manual transaxle). If your
car is facing downhill, turn the front wheels
into the curb to help keep the car from rolling.
If your car is facing uphill, turn the front
wheels away from the curb to help keep the
car from rolling. If there is no curb or if it is
required by other conditions to keep the car
from rolling, block the wheels.
o Under some conditions your parking brake
can freeze in the engaged position. This is
most likely to happen when there is an ac-
cumulation of snow or ice around or near the
rear brakes or if the brakes are wet. If there
is a risk that the parking brake may freeze,
apply it only temporarily while you put the
gear selector lever in "P" (automatic) or in
first or reverse gear (manual transaxle) and
block the rear wheels so the car cannot roll.
Then release the parking brake.
o Do not hold the vehicle on the upgrade with
the accelerator pedal. This can cause the
transaxle to overheat. Always use the brake
pedal or parking brake. o Don't coast down hills with the car out of gear.
This is extremely hazardous. Keep the car
in gear at all times, use the brakes to slow
down, then shift to a lower gear so that engine
braking will help you maintain a safe speed.
o Don't "ride" the brake pedal. Resting your
foot on the brake pedal while driving can be
dangerous because it can result in the brakes
overheating and losing their effectiveness. It
also increases the wear of the brake com-
ponents.
o If a tire goes flat while you are driving, apply
the brakes gently and keep the car pointed
straight ahead while you slow down. When
you are moving slowly enough for it to be safe
to do so, pull off the road and stop in a safe
place.
o If your car is equipped with an automatic
transaxle, don't let your car creep forward.
To avoid creeping forward, keep your foot
firmly on the brake pedal when the car is
stopped.
DRIVING FOR ECONOMYC140A01A-AATYou can save fuel and get more miles from your
car if you follow these suggestions:
o Drive smoothly. Accelerate at a moderate
rate. Don't make "jack-rabbit" starts or full-
throttle shifts and maintain a steady cruising
speed. Don't race between stoplights. Try to
adjust your speed to that of the other traffic
so you don't have to change speeds unnec-
essarily. Avoid heavy traffic whenever pos-
sible. Always maintain a safe distance from
other vehicles so you can avoid unneces-
sary braking. This also reduces brake wear.
o Drive at a moderate speed. The faster you
drive, the more fuel your car uses. Driving at
a moderate speed, especially on the high-
way, is one of the most effective ways to
reduce fuel consumption.
o Don't "ride" the brake or clutch pedal. This
can increase fuel consumption and also
increase wear on these components. In
addition, driving with your foot resting on the
brake pedal may cause the brakes to over-
heat, which reduces their effectiveness and
may lead to more serious consequences.
o Take care of your tires. Keep them inflated
to the recommended pressure. Incorrect
inflation, either too much or too little, results
in unnecessary tire wear. Check the tire
pressures at least once a month.