Page 385 of 539
1CONTROLS AND EQUIPMENT
80
B650A01S-AAT Stowage Precautions
1. Do not place objects on the cargosecurity screen. Such objects may be thrown about inside the vehicle and possibly injure vehicle occu- pants during an accident or whenbraking.
2. For better fuel economy, do not
carry unnecessary weight.
3. Never allow anyone to ride in the luggage compartment. It is designedfor luggage only.
4. Try to maintain the balance of the vehicle and locate the weight as farforward as possible.CARGO SECURITY SCREEN
B640A01S-EAT (Not all models) To use the security screen, pull it out of the retractor and hook it to the anchors as illustrated. B640A01HP
!WARNING:
Avoid eye injury. DO NOT over- stretch. ALWAYS keep face andbody out of recoil path. DO NOT use when strap has visible signs of wear or damage.
Page 388 of 539
1
CONTROLS AND EQUIPMENT
83
HHP2017-1
BONNET RELEASE
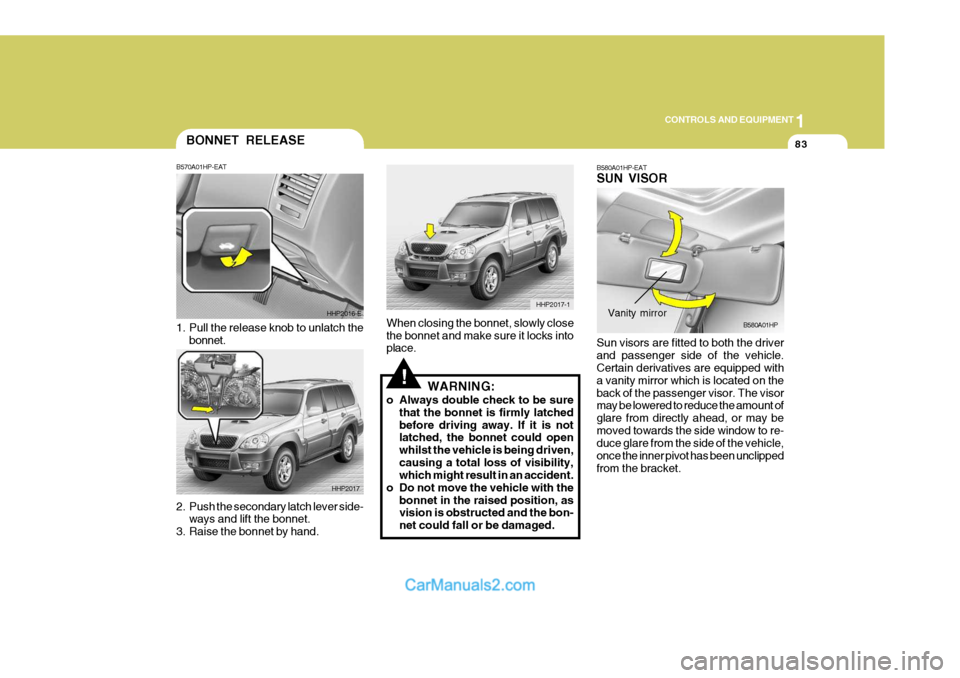
2. Push the secondary latch lever side-
ways and lift the bonnet.
3. Raise the bonnet by hand. B570A01HP-EAT
1. Pull the release knob to unlatch the
bonnet. HHP2016-E
HHP2017
!
When closing the bonnet, slowly close the bonnet and make sure it locks into place. WARNING:
o Always double check to be sure that the bonnet is firmly latched before driving away. If it is not latched, the bonnet could open whilst the vehicle is being driven,causing a total loss of visibility, which might result in an accident.
o Do not move the vehicle with the bonnet in the raised position, asvision is obstructed and the bon- net could fall or be damaged. B580A01HP-EAT SUN VISOR Sun visors are fitted to both the driver and passenger side of the vehicle. Certain derivatives are equipped with a vanity mirror which is located on theback of the passenger visor. The visor may be lowered to reduce the amount of glare from directly ahead, or may bemoved towards the side window to re- duce glare from the side of the vehicle, once the inner pivot has been unclippedfrom the bracket.B580A01HPVanity mirror
Page 390 of 539
1
CONTROLS AND EQUIPMENT
85
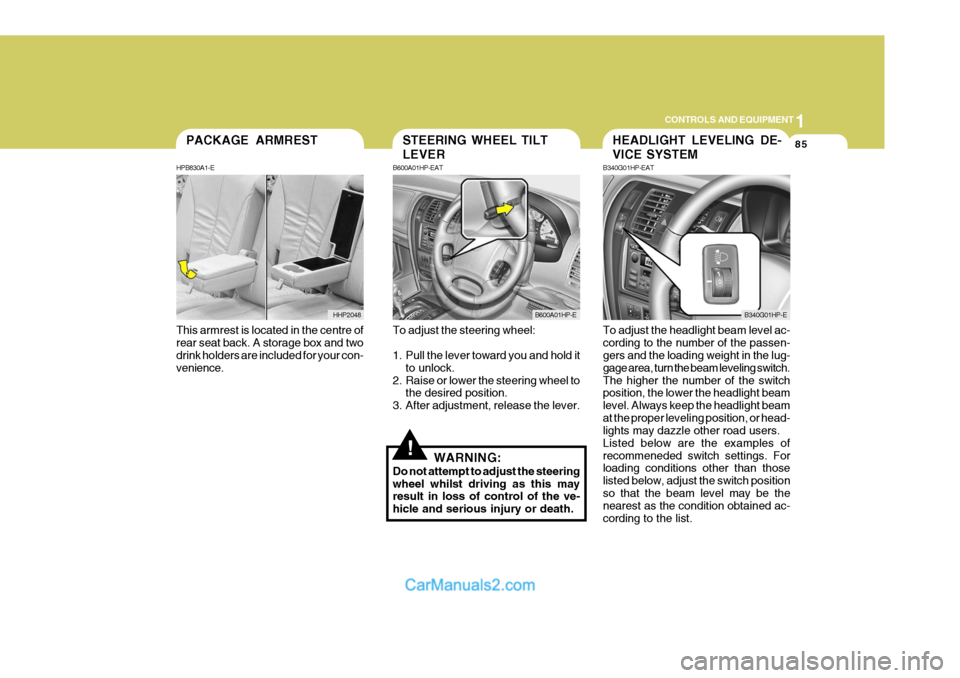
This armrest is located in the centre of rear seat back. A storage box and two drink holders are included for your con- venience.PACKAGE ARMREST
HPB830A1-E
HHP2048
!
To adjust the steering wheel:
1. Pull the lever toward you and hold it to unlock.
2. Raise or lower the steering wheel to the desired position.
3. After adjustment, release the lever.
WARNING:
Do not attempt to adjust the steering wheel whilst driving as this may result in loss of control of the ve- hicle and serious injury or death. To adjust the headlight beam level ac-cording to the number of the passen- gers and the loading weight in the lug- gage area, turn the beam leveling switch.The higher the number of the switch position, the lower the headlight beam level. Always keep the headlight beamat the proper leveling position, or head- lights may dazzle other road users. Listed below are the examples ofrecommeneded switch settings. For loading conditions other than those listed below, adjust the switch positionso that the beam level may be the nearest as the condition obtained ac- cording to the list.
STEERING WHEEL TILT LEVER
B600A01HP-EAT
B600A01HP-E
HEADLIGHT LEVELING DE- VICE SYSTEM
B340G01HP-EAT
B340G01HP-E
Page 401 of 539
1CONTROLS AND EQUIPMENT
96
The air conditioning is turned on or off by pushing the A/C button on the heat- ing/air conditioning control panel.AIR CONDITIONING SYSTEM
B740A01S-AAT Air Conditioning Switch (Not all models)
B740A01HP B740B01A-EAT Air Conditioning Operation Cooling To use the air conditioning to cool the interior:
o Set the side vent control to " ", to
shut off the outside air entry.
o Turn on the fan control switch.
o Turn on the air conditioning switch
by pushing in on the switch. The air conditioning indicator light should come on at the same time.
o Set the air intake control to the fresh air ( ) position. o Set the temperature control to "Cool".
("Cool" provides maximum cooling.The temperature may be moderated by moving the control toward "Warm".)
o Adjust the fan control to the desired speed. For greater cooling, turn thefan control to one of the higherspeeds or temporarily select the recirculate ( ) position on the air intake control.B740B01HP
Page 410 of 539
1
CONTROLS AND EQUIPMENT
105STEREO SOUND SYSTEM
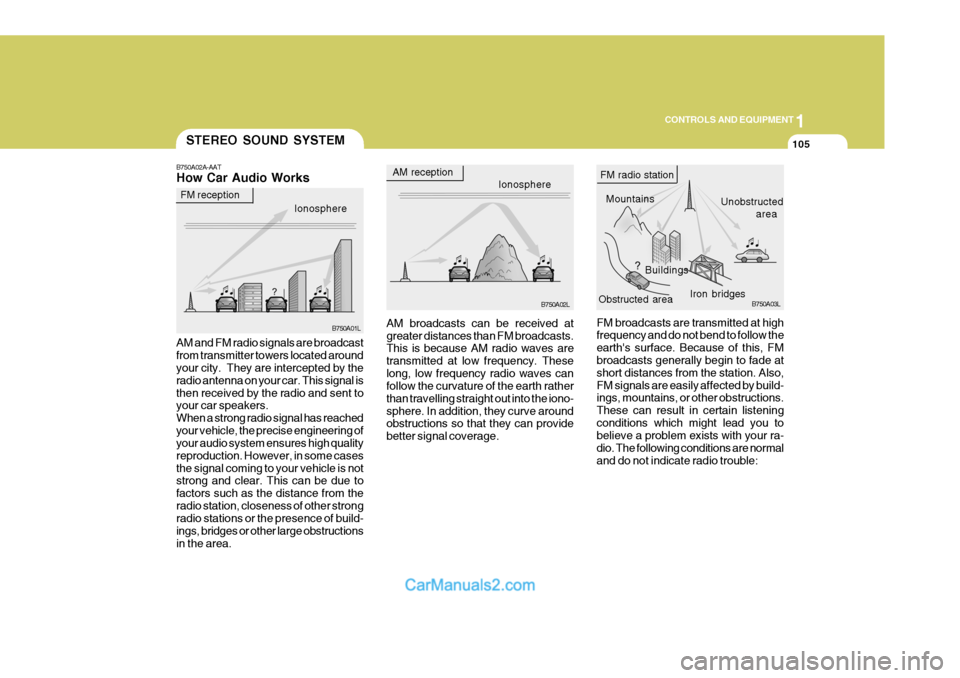
B750A02A-AAT How Car Audio Works
Ionosphere
FM reception
B750A01L
AM and FM radio signals are broadcast from transmitter towers located around your city. They are intercepted by the radio antenna on your car. This signal isthen received by the radio and sent to your car speakers. When a strong radio signal has reachedyour vehicle, the precise engineering of your audio system ensures high quality reproduction. However, in some casesthe signal coming to your vehicle is not strong and clear. This can be due to factors such as the distance from theradio station, closeness of other strong radio stations or the presence of build- ings, bridges or other large obstructionsin the area. AM broadcasts can be received atgreater distances than FM broadcasts. This is because AM radio waves are transmitted at low frequency. Theselong, low frequency radio waves can follow the curvature of the earth rather than travelling straight out into the iono-sphere. In addition, they curve around obstructions so that they can provide better signal coverage.
AM reception
Ionosphere
B750A02L
MountainsBuildings Unobstructed
area
FM radio station
B750A03L
Obstructed area Iron bridges
FM broadcasts are transmitted at high frequency and do not bend to follow the earth's surface. Because of this, FM broadcasts generally begin to fade at short distances from the station. Also,FM signals are easily affected by build- ings, mountains, or other obstructions. These can result in certain listeningconditions which might lead you to believe a problem exists with your ra- dio. The following conditions are normaland do not indicate radio trouble:
Page 414 of 539
2
Engine Exhaust Can Be Dangerous! ............................ 2-2
Before Starting the Engine ............................................ 2-3
Key Positions ................................................................ 2-4Starting ......................................................................... 2-5
Manual Transmission ................................................... 2-8
Automatic Transmission .............................................. 2-10
Four-Wheel Drive (4WD) ............................................. 2-14
Anti-Lock Brake System (ABS) ................................... 2-21
Limited-Slip Differential ................................................ 2-22
Effective Braking ......................................................... 2-22
Driving for Economy .................................................... 2-23
Smooth Cornering ........................................................ 2-24
Winter Motoring ............................................................ 2-24
Trailer and Vehicle Towi ng .......................................... 2-26
DRIVING YOUR HYUNDAI
2
Page 427 of 539
2 DRIVING YOUR HYUNDAI
14FOUR-WHEEL DRIVE (4WD)
D090A01P-GAT You can send your engine power to all front and rear wheels for maximum power. 4WD is useful when you drive in snow, mud, ice, mountainous orsandy areas where good traction is required, or when your wheels lose traction using two-wheel drive.
proximately 1,000rpm by means ofthe accelerator pedal and the selec-tor lever moved between the "D" and "R" positions to induce a rocking motion.
o Do not depress the accelerator pedal with the brakes applied and the se-lector at the "R", "D", "2" or "L"position.
o Turn the overdrive switch on for good
fuel economy and smooth driving.But if engine braking is needed in the "D" range or if repeated upshifting and downshifting between the 3rdand 4th gear is needed when climb- ing a gentle slope, it is recommended that the overdrive switch be turnedoff. Turn the overdrive switch back on immediately afterward.
!WARNING:
o Avoid high cornering speeds.
o Do not make quick steering wheel movements, such as sharp lane changes or fast, sharp turns. o Always wear your seat belts.
In a collision crash, an unbelted person is significantly more likely to die than a person wearing a seatbelt.
o The risk of rollover is greatly in- creased if you lose control of yourvehicle at highway speeds.
o Loss of control often occurs if two or more wheels drop off the road-way and the driver oversteers toreenter the roadway.
o In the event your vehicle leaves
the roadway, do not steer sharply.Instead, slow down before pulling back into the travel lanes.
o Never exceed posted speed limits.
o Excessive depressing of the accelerater pedal under the tyreslip condition such as moving outof the mud or fresh snow etc, may cause severe damage to the trans- mission. At this time, take otherway such as towing.
Page 428 of 539
2
DRIVING YOUR HYUNDAI
15
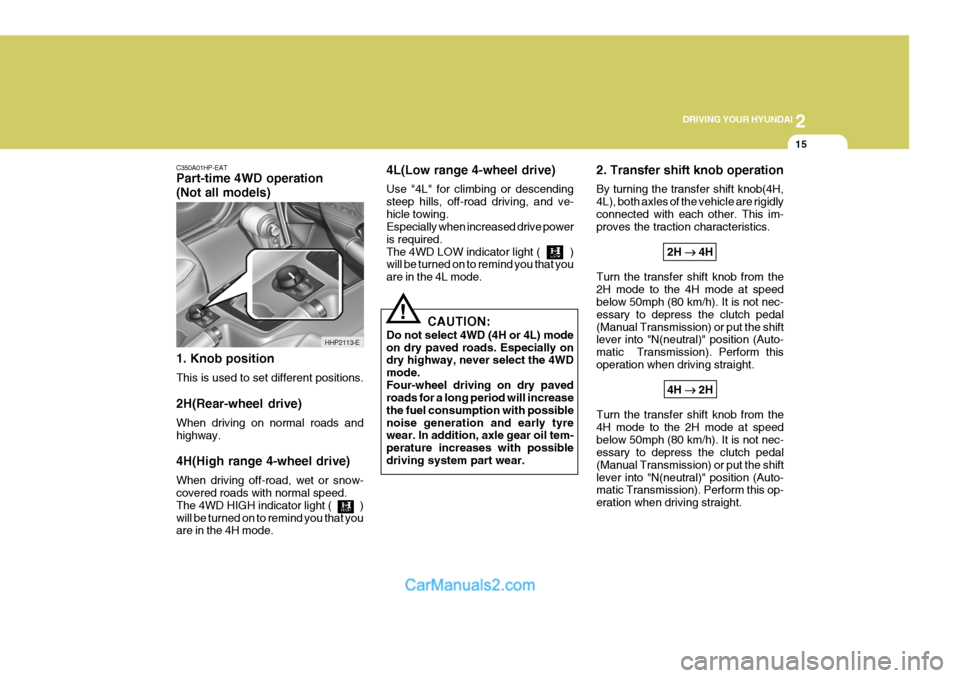
C350A01HP-EAT Part-time 4WD operation (Not all models) 1. Knob position This is used to set different positions. 2H(Rear-wheel drive) When driving on normal roads and highway. 4H(High range 4-wheel drive) When driving off-road, wet or snow- covered roads with normal speed. The 4WD HIGH indicator light ( )will be turned on to remind you that you are in the 4H mode.
!
4L(Low range 4-wheel drive) Use "4L" for climbing or descending steep hills, off-road driving, and ve-hicle towing. Especially when increased drive power is required.The 4WD LOW indicator light ( ) will be turned on to remind you that you are in the 4L mode.
2. Transfer shift knob operation By turning the transfer shift knob(4H, 4L), both axles of the vehicle are rigidlyconnected with each other. This im- proves the traction characteristics.
2H ��
��
� 4H
Turn the transfer shift knob from the 2H mode to the 4H mode at speed below 50mph (80 km/h). It is not nec- essary to depress the clutch pedal(Manual Transmission) or put the shift lever into "N(neutral)" position (Auto- matic Transmission). Perform thisoperation when driving straight. 4H ��
��
� 2H
Turn the transfer shift knob from the4H mode to the 2H mode at speedbelow 50mph (80 km/h). It is not nec- essary to depress the clutch pedal (Manual Transmission) or put the shiftlever into "N(neutral)" position (Auto- matic Transmission). Perform this op- eration when driving straight.
CAUTION:
Do not select 4WD (4H or 4L) modeon dry paved roads. Especially on dry highway, never select the 4WD mode.Four-wheel driving on dry paved roads for a long period will increase the fuel consumption with possiblenoise generation and early tyre wear. In addition, axle gear oil tem- perature increases with possibledriving system part wear.
HHP2113-E