2005 Hyundai Terracan tow
[x] Cancel search: towPage 309 of 539
1CONTROLS AND EQUIPMENT
4 RUNNING IN YOUR NEW HYUNDAI
B020A01FC-EAT PETROL ENGINE The longevity and performance of the vehicle are greatly affected by the careexercised during the first 1000 miles of motoring. Because of modern manu- facturing techniques, rigid guidelinesregarding maximum road speeds have become unnecessary. However, cer- tain precautions should be observed inorder to obtain the best possible per- formance and useful life from the ve- hicle.
1) Do not race the engine without a
load (i.e revving the engine in neu- tral).
2) During the first 500 miles the maxi-
mum engine speed should be re-stricted to 3000 rpm and gradually increased thereafter.
3) Avoid prolonged constant speed operation. The internal componentsof the engine will become more quickly run in if the operation speedis varied during the running in pe- riod. 4) Never allow the engine to labour. Use
the gearbox freely and avoid large throttle openings when the engine speed is below 1500 rpm.
5) Avoid rapid acceleration and maxi- mum throttle openings.
6) Avoid harsh braking during the first
100 miles of urban motoring or 1000 miles of motorway driving to allow the friction facings of the brake pads and shoes to bed against the discsand drums properly.
7) No trailer towing should be under-
taken during the running-in period. 1) Do not race the engine without a
load (i.e revving the engine in neu-tral).
2) During the first 600 miles the maxi-
mum engine speed should be re-stricted to 3000 rpm and gradually increased thereafter. And while driv- ing, keep under three quarters ofmaximum vehicle speed.
3) Avoid prolonged constant speed
operation. The internal componentsof the engine will become more quickly run in if the operation speed is varied during the running in pe-riod.
4) Never allow the engine to labour.
Use the gearbox freely and avoidlarge throttle openings when the engine speed is below 1500 rpm.
5) Avoid rapid acceleration and maxi-
mum throttle openings.
6) Avoid harsh braking during the first
100 miles of urban motoring or 1000 miles of motorway driving to allow the friction facings of the brake pads and shoes to bed against the discsand drums properly.
7) No trailer towing should be under-
taken during the running-in period.
B020B01FC-EAT DIESEL ENGINE The longevity and performance of the vehicle are greatly affected by the care exercised during the first 1000 miles of motoring. Because of modern manu-facturing techniques, rigid guidelines regarding maximum road speeds have become unnecessary. However, cer-tain precautions should be observed in order to obtain the best possible per- formance and useful life from the ve-hicle.
Page 314 of 539
1
CONTROLS AND EQUIPMENT
9
!WARNING:
o Before you drive away, be sure that all the doors are securely closed. It is also recommendedthat the child-protector rear door locks are in the 'lock' position so that children cannot open therear doors from inside the ve- hicle accidentally.
o Before opening the door, always look for and avoid oncoming traf- fic.
o In case of accident, the door is unlocked automatically(Not allmodels).
DOOR LOCKS
B040A02Y-EAT B040B01A-AAT
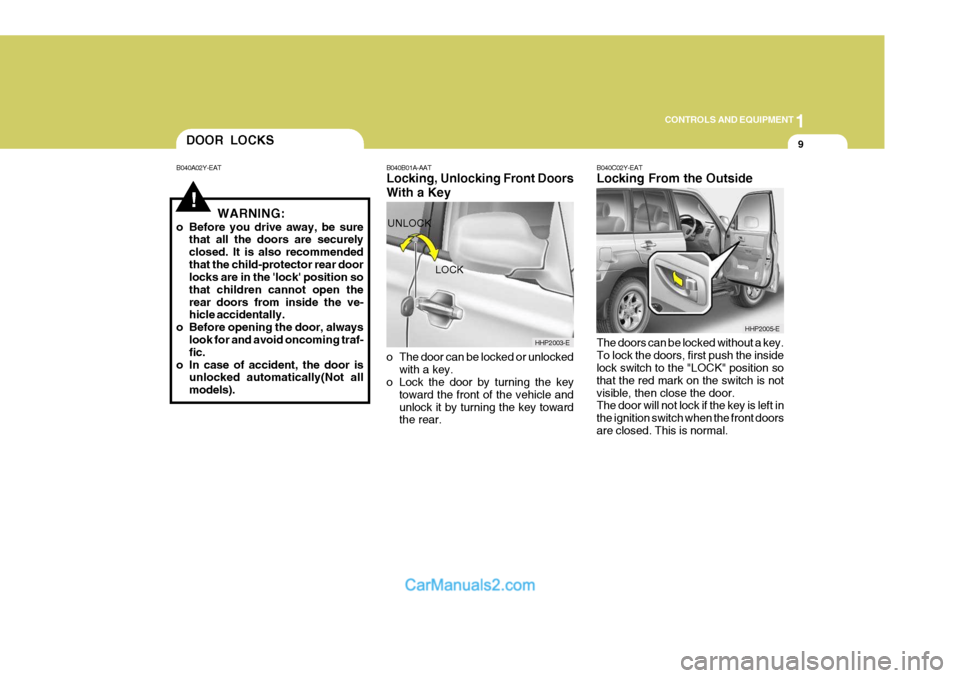
Locking, Unlocking Front Doors With a Key
o The door can be locked or unlocked
with a key.
o Lock the door by turning the key
toward the front of the vehicle and unlock it by turning the key toward the rear. B040C02Y-EAT Locking From the Outside The doors can be locked without a key. To lock the doors, first push the inside lock switch to the "LOCK" position so that the red mark on the switch is notvisible, then close the door. The door will not lock if the key is left in the ignition switch when the front doorsare closed. This is normal.
LOCK
UNLOCK
HHP2003-E
HHP2005-E
Page 316 of 539
1
CONTROLS AND EQUIPMENT
11
The child proof lock mechanism may be activated by opening the door andmoving the lever located by the door latch to the " " position. Move the lever to the " " position when normaldoor operation is desired.
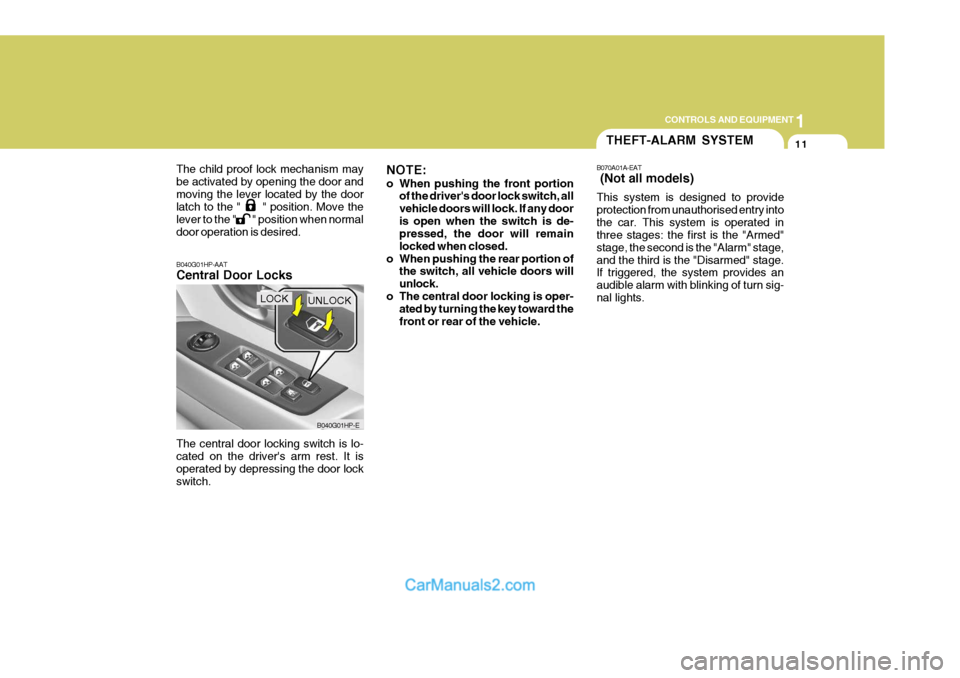
B040G01HP-AAT Central Door Locks The central door locking switch is lo- cated on the driver's arm rest. It isoperated by depressing the door lock switch.
B040G01HP-E
LOCKUNLOCK NOTE:
o When pushing the front portion
of the driver's door lock switch, all vehicle doors will lock. If any dooris open when the switch is de- pressed, the door will remain locked when closed.
o When pushing the rear portion of the switch, all vehicle doors willunlock.
o The central door locking is oper- ated by turning the key toward thefront or rear of the vehicle.
THEFT-ALARM SYSTEM
B070A01A-EAT (Not all models) This system is designed to provide protection from unauthorised entry intothe car. This system is operated in three stages: the first is the "Armed" stage, the second is the "Alarm" stage,and the third is the "Disarmed" stage. If triggered, the system provides an audible alarm with blinking of turn sig-nal lights.
Page 323 of 539
1CONTROLS AND EQUIPMENT
18
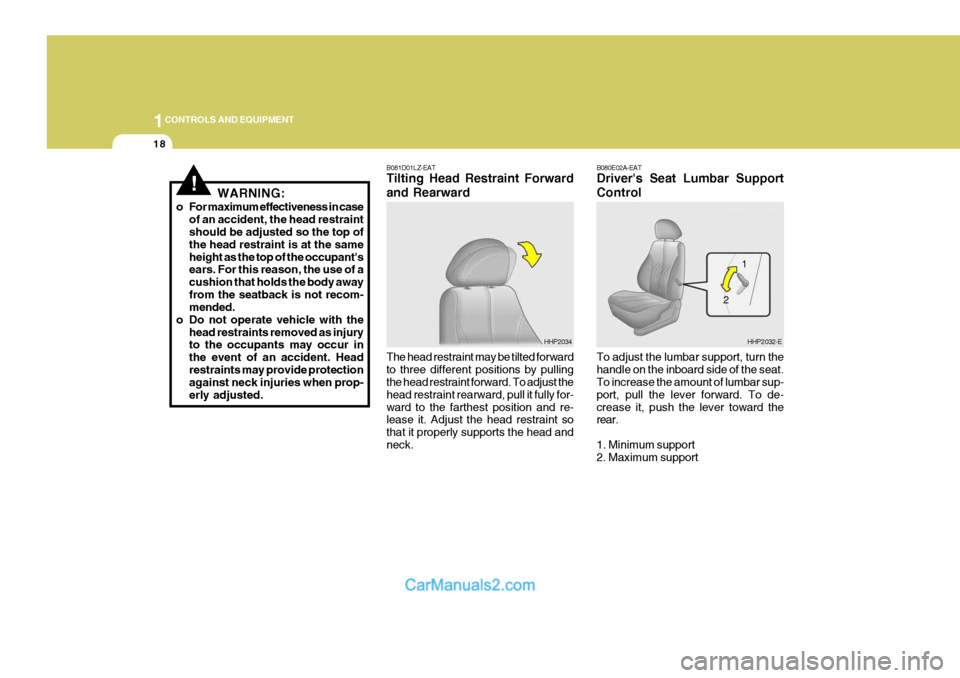
B080E02A-EAT Driver's Seat Lumbar Support Control To adjust the lumbar support, turn the handle on the inboard side of the seat. To increase the amount of lumbar sup- port, pull the lever forward. To de-crease it, push the lever toward the rear. 1. Minimum support 2. Maximum support
HHP2032-EHHP2034
!WARNING:
o For maximum effectiveness in case of an accident, the head restraint should be adjusted so the top of the head restraint is at the sameheight as the top of the occupant's ears. For this reason, the use of a cushion that holds the body awayfrom the seatback is not recom- mended.
o Do not operate vehicle with the
head restraints removed as injuryto the occupants may occur in the event of an accident. Head restraints may provide protection against neck injuries when prop-erly adjusted. B081D01LZ-EAT Tilting Head Restraint Forward and Rearward The head restraint may be tilted forward to three different positions by pulling the head restraint forward. To adjust the head restraint rearward, pull it fully for-ward to the farthest position and re- lease it. Adjust the head restraint so that it properly supports the head andneck.
1
2
Page 326 of 539
1
CONTROLS AND EQUIPMENT
21
!
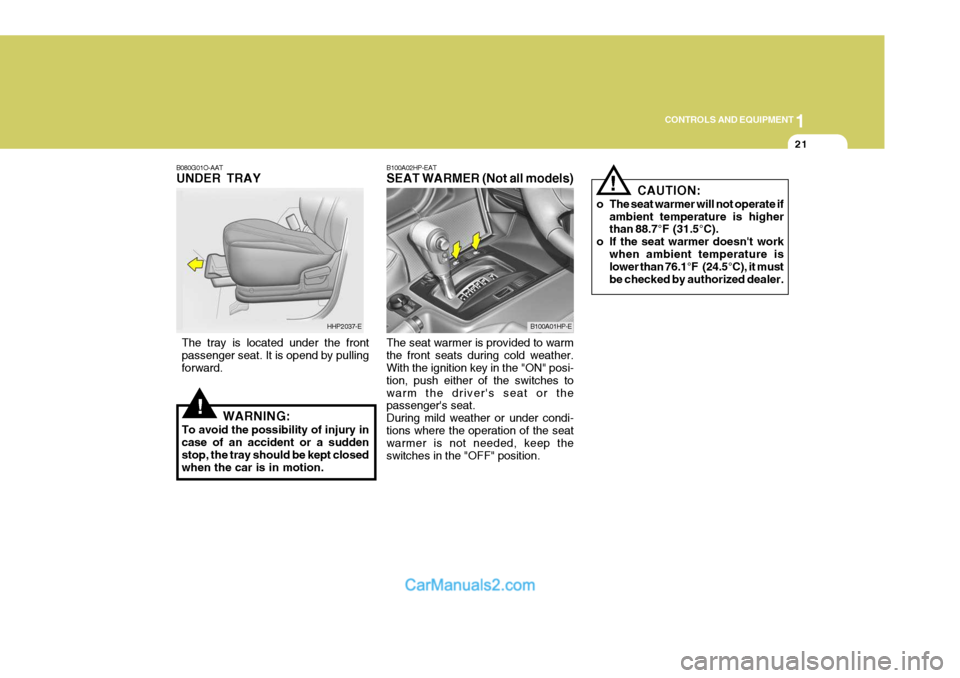
B080G01O-AAT UNDER TRAY
The tray is located under the front passenger seat. It is opend by pulling forward. WARNING:
To avoid the possibility of injury in case of an accident or a suddenstop, the tray should be kept closed when the car is in motion. B100A02HP-EAT SEAT WARMER (Not all models) The seat warmer is provided to warm the front seats during cold weather. With the ignition key in the "ON" posi- tion, push either of the switches towarm the driver's seat or the passenger's seat. During mild weather or under condi-tions where the operation of the seat warmer is not needed, keep the switches in the "OFF" position.
HHP2037-EB100A01HP-E
!
CAUTION:
o The seat warmer will not operate if ambient temperature is higher than 88.7°F (31.5°C).
o If the seat warmer doesn't work when ambient temperature islower than 76.1°F (24.5°C), it must be checked by authorized dealer.
Page 327 of 539
1CONTROLS AND EQUIPMENT
22
!
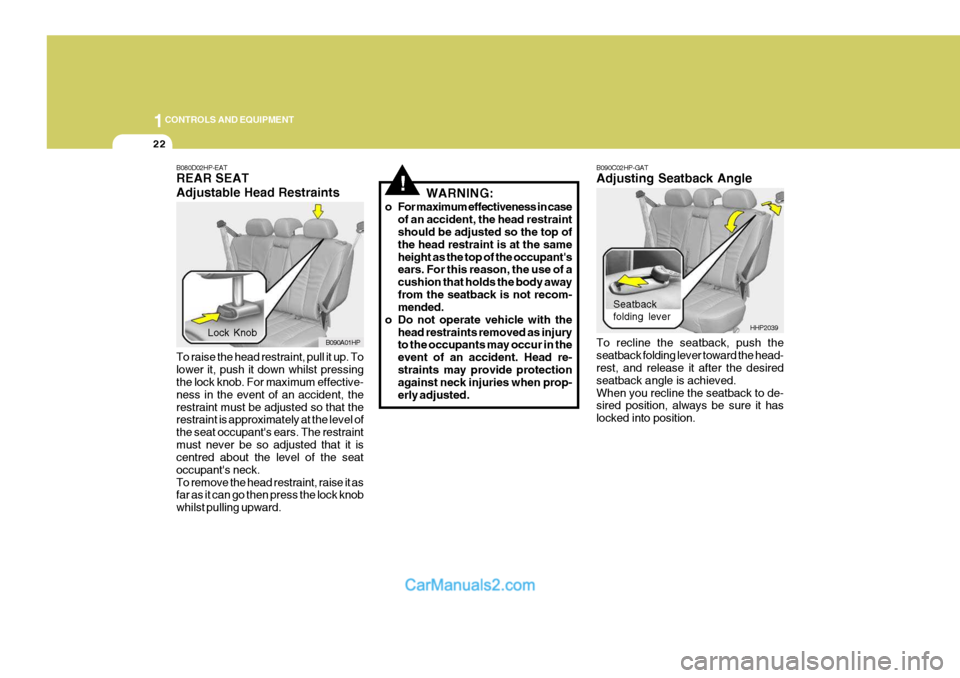
B080D02HP-EAT REAR SEAT Adjustable Head Restraints To raise the head restraint, pull it up. To lower it, push it down whilst pressing the lock knob. For maximum effective- ness in the event of an accident, therestraint must be adjusted so that the restraint is approximately at the level of the seat occupant's ears. The restraintmust never be so adjusted that it is centred about the level of the seat occupant's neck.To remove the head restraint, raise it as far as it can go then press the lock knob whilst pulling upward. WARNING:
o For maximum effectiveness in case of an accident, the head restraint should be adjusted so the top of the head restraint is at the sameheight as the top of the occupant's ears. For this reason, the use of a cushion that holds the body awayfrom the seatback is not recom- mended.
o Do not operate vehicle with the
head restraints removed as injuryto the occupants may occur in the event of an accident. Head re- straints may provide protection against neck injuries when prop-erly adjusted.
Lock Knob B090A01HP B090C02HP-GAT Adjusting Seatback Angle To recline the seatback, push the seatback folding lever toward the head- rest, and release it after the desired seatback angle is achieved.When you recline the seatback to de- sired position, always be sure it has locked into position.
Seatback folding lever
HHP2039
Page 333 of 539
1CONTROLS AND EQUIPMENT
28
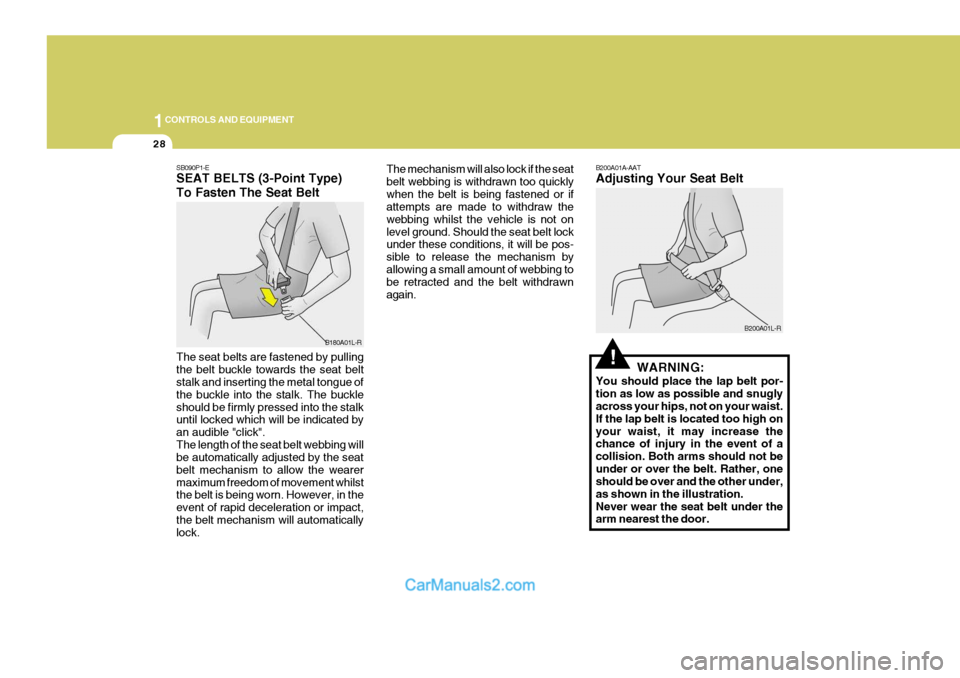
SB090P1-E SEAT BELTS (3-Point Type) To Fasten The Seat Belt The seat belts are fastened by pulling the belt buckle towards the seat belt stalk and inserting the metal tongue of the buckle into the stalk. The buckleshould be firmly pressed into the stalk until locked which will be indicated by an audible "click".The length of the seat belt webbing will be automatically adjusted by the seat belt mechanism to allow the wearermaximum freedom of movement whilst the belt is being worn. However, in the event of rapid deceleration or impact,the belt mechanism will automatically lock. The mechanism will also lock if the seat belt webbing is withdrawn too quicklywhen the belt is being fastened or if attempts are made to withdraw the webbing whilst the vehicle is not onlevel ground. Should the seat belt lock under these conditions, it will be pos- sible to release the mechanism byallowing a small amount of webbing to be retracted and the belt withdrawn again.
B180A01L-R
!
B200A01A-AAT Adjusting Your Seat Belt
WARNING:
You should place the lap belt por- tion as low as possible and snugly across your hips, not on your waist. If the lap belt is located too high onyour waist, it may increase the chance of injury in the event of a collision. Both arms should not beunder or over the belt. Rather, one should be over and the other under, as shown in the illustration.Never wear the seat belt under the arm nearest the door. B200A01L-R
Page 338 of 539
1
CONTROLS AND EQUIPMENT
33
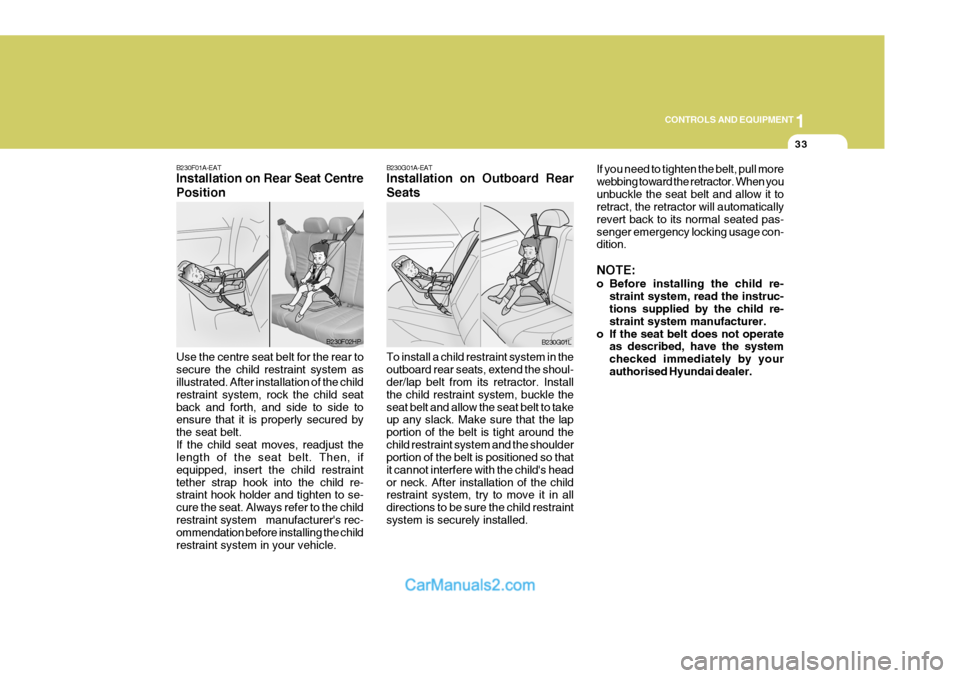
B230F01A-EAT Installation on Rear Seat Centre Position Use the centre seat belt for the rear to secure the child restraint system as illustrated. After installation of the child restraint system, rock the child seatback and forth, and side to side to ensure that it is properly secured by the seat belt.If the child seat moves, readjust the length of the seat belt. Then, if equipped, insert the child restrainttether strap hook into the child re- straint hook holder and tighten to se- cure the seat. Always refer to the childrestraint system manufacturer's rec- ommendation before installing the child restraint system in your vehicle.
B230F02HP
B230G01A-EAT Installation on Outboard Rear Seats To install a child restraint system in the outboard rear seats, extend the shoul- der/lap belt from its retractor. Install the child restraint system, buckle theseat belt and allow the seat belt to take up any slack. Make sure that the lap portion of the belt is tight around thechild restraint system and the shoulder portion of the belt is positioned so that it cannot interfere with the child's heador neck. After installation of the child restraint system, try to move it in all directions to be sure the child restraintsystem is securely installed. If you need to tighten the belt, pull morewebbing toward the retractor. When youunbuckle the seat belt and allow it to retract, the retractor will automatically revert back to its normal seated pas-senger emergency locking usage con- dition. NOTE:
o Before installing the child re-
straint system, read the instruc- tions supplied by the child re- straint system manufacturer.
o If the seat belt does not operate as described, have the systemchecked immediately by yourauthorised Hyundai dealer.
B230G01L