Page 235 of 539
6
DO-IT-YOURSELF MAINTENANCE
13
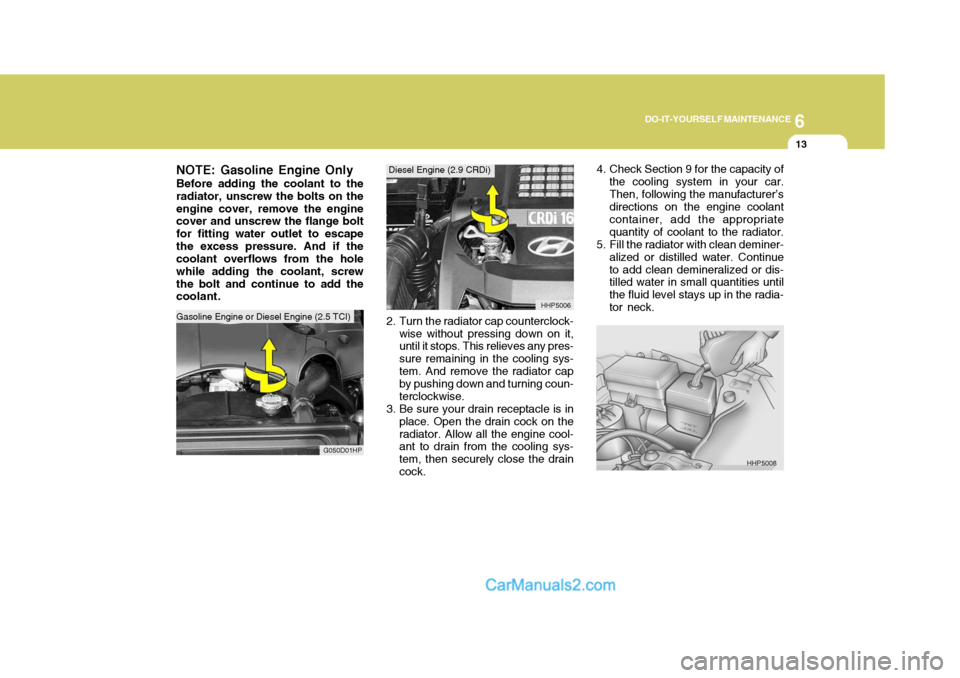
NOTE: Gasoline Engine Only Before adding the coolant to the radiator, unscrew the bolts on theengine cover, remove the engine cover and unscrew the flange bolt for fitting water outlet to escapethe excess pressure. And if the coolant overflows from the hole while adding the coolant, screwthe bolt and continue to add the coolant.
G050D01HP 2. Turn the radiator cap counterclock-
wise without pressing down on it, until it stops. This relieves any pres- sure remaining in the cooling sys- tem. And remove the radiator cap by pushing down and turning coun-terclockwise.
3. Be sure your drain receptacle is in place. Open the drain cock on theradiator. Allow all the engine cool- ant to drain from the cooling sys- tem, then securely close the draincock. HHP5006
4. Check Section 9 for the capacity of
the cooling system in your car.Then, following the manufacturer’s directions on the engine coolant container, add the appropriatequantity of coolant to the radiator.
5. Fill the radiator with clean deminer-
alized or distilled water. Continueto add clean demineralized or dis- tilled water in small quantities until the fluid level stays up in the radia-tor neck.
HHP5008
Gasoline Engine or Diesel Engine (2.5 TCI) Diesel Engine (2.9 CRDi)
Gasoline Engine or Diesel Engine (2.5 TCI)
Page 258 of 539
6 DO-IT-YOURSELF MAINTENANCE
36
!WARNING:
o Do not smoke or have any other open flame near the vehicle while bleeding the fuel system.
o Be sure to carefully clean away any fuel which spilled onto nearby parts coming out of the air bleed bolt, because suchaccumulations of fuel might ig- nite and cause a fire. G300A02HP-GAT
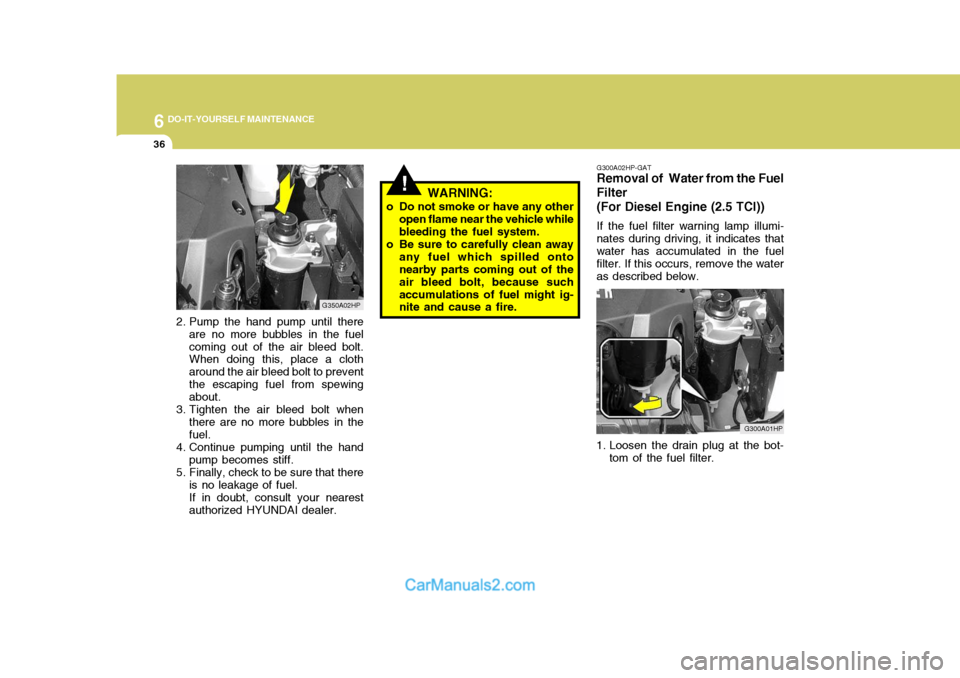
Removal of Water from the Fuel Filter (For Diesel Engine (2.5 TCI))
If the fuel filter warning lamp illumi-
nates during driving, it indicates that water has accumulated in the fuel filter. If this occurs, remove the water as described below.
G300A01HP
1. Loosen the drain plug at the bot- tom of the fuel filter.
2. Pump the hand pump until there
are no more bubbles in the fuelcoming out of the air bleed bolt. When doing this, place a cloth around the air bleed bolt to preventthe escaping fuel from spewing about.
3. Tighten the air bleed bolt when there are no more bubbles in thefuel.
4. Continue pumping until the hand pump becomes stiff.
5. Finally, check to be sure that there is no leakage of fuel. If in doubt, consult your nearestauthorized HYUNDAI dealer. G350A02HP
Page 259 of 539
6
DO-IT-YOURSELF MAINTENANCE
37
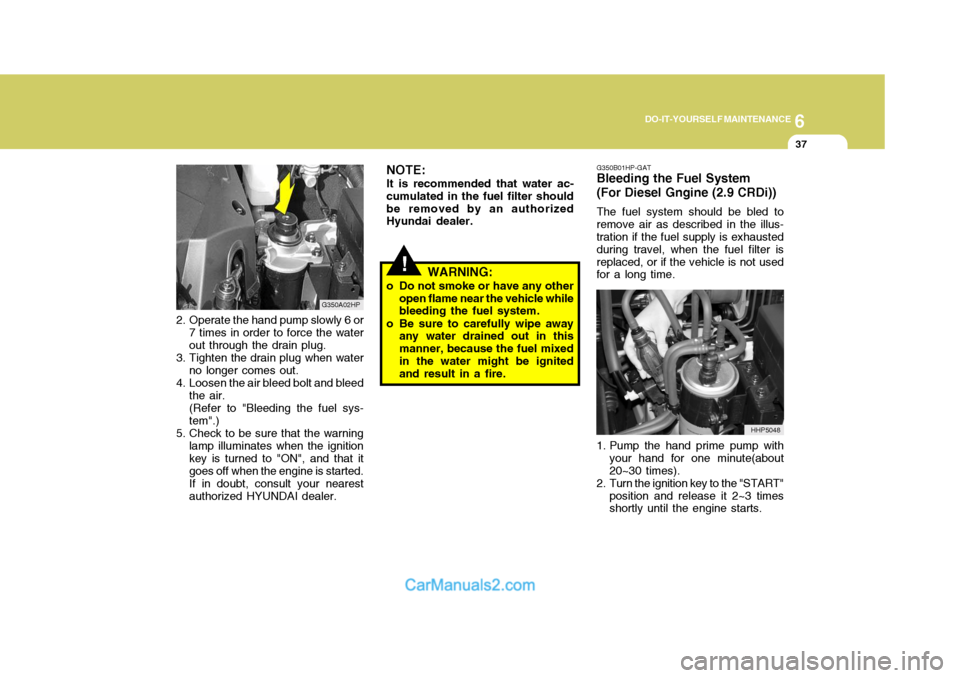
2. Operate the hand pump slowly 6 or
7 times in order to force the water out through the drain plug.
3. Tighten the drain plug when water no longer comes out.
4. Loosen the air bleed bolt and bleed the air.(Refer to "Bleeding the fuel sys-tem".)
5. Check to be sure that the warning lamp illuminates when the ignitionkey is turned to "ON", and that itgoes off when the engine is started.If in doubt, consult your nearestauthorized HYUNDAI dealer. G350A02HP
!
NOTE: It is recommended that water ac-
cumulated in the fuel filter should be removed by an authorized Hyundai dealer. G350B01HP-GAT Bleeding the Fuel System (For Diesel Gngine (2.9 CRDi)) The fuel system should be bled to remove air as described in the illus- tration if the fuel supply is exhausted during travel, when the fuel filter isreplaced, or if the vehicle is not used for a long time.
1. Pump the hand prime pump with
your hand for one minute(about 20~30 times).
2. Turn the ignition key to the "START"
position and release it 2~3 times shortly until the engine starts. HHP5048
WARNING:
o Do not smoke or have any other open flame near the vehicle whilebleeding the fuel system.
o Be sure to carefully wipe away any water drained out in this manner, because the fuel mixedin the water might be ignited and result in a fire.
Page 487 of 539
6 OWNER MAINTENANCE
10
SG050C1-E
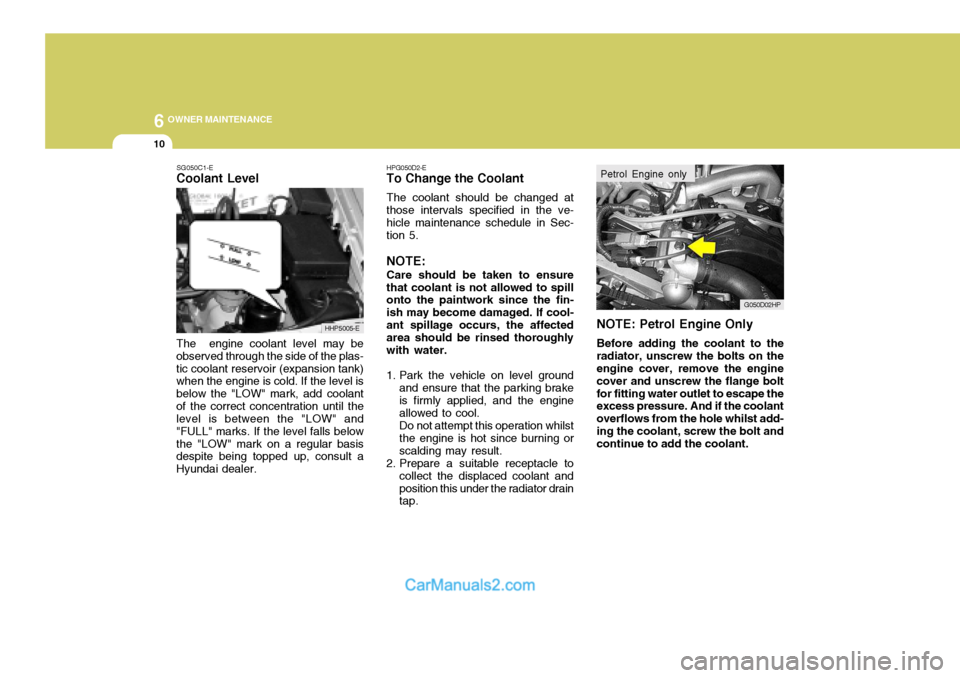
Coolant Level The engine coolant level may be observed through the side of the plas-tic coolant reservoir (expansion tank) when the engine is cold. If the level is below the "LOW" mark, add coolantof the correct concentration until the level is between the "LOW" and "FULL" marks. If the level falls belowthe "LOW" mark on a regular basis despite being topped up, consult a Hyundai dealer. HPG050D2-E
To Change the Coolant
The coolant should be changed atthose intervals specified in the ve- hicle maintenance schedule in Sec- tion 5. NOTE: Care should be taken to ensure that coolant is not allowed to spill onto the paintwork since the fin- ish may become damaged. If cool-ant spillage occurs, the affected area should be rinsed thoroughly with water.
1. Park the vehicle on level ground and ensure that the parking brake is firmly applied, and the engine allowed to cool.Do not attempt this operation whilstthe engine is hot since burning orscalding may result.
2. Prepare a suitable receptacle to
collect the displaced coolant andposition this under the radiator drain tap. NOTE: Petrol Engine Only
Before adding the coolant to the
radiator, unscrew the bolts on theengine cover, remove the engine cover and unscrew the flange boltfor fitting water outlet to escape the excess pressure. And if the coolant overflows from the hole whilst add-ing the coolant, screw the bolt and continue to add the coolant.
HHP5005-E
G050D02HP
Petrol Engine only
Page 508 of 539
6
OWNER MAINTENANCE
31
!
!
3. Check to be sure that the warning
lamp illuminates when the ignition key is turned to "ON", and that it goes off when the engine is started. If in doubt, consult your nearest authorised HYUNDAI dealer.
NOTE: It is recommended that water accu- mulated in the fuel filter should be removed by an authorised Hyundai dealer.
WARNING:
Be sure to carefully wipe away anywater drained out in this manner, because the fuel mixed in the water might be ignited and resultin a fire. Before attempting to replace a head-
light bulb, be sure the switch is turned to the "OFF" position.
The next paragraph shows how to
reach the headlight bulbs so they may be changed. Be sure to replacethe burned-out bulb with one of the same number and wattage rating.
Ensure that the replacement bulb has
the same cap configuration and watt-age as the original.
See page 6-35 for the wattage descrip-
tions.
CAUTION:
Keep the lamps out of contact with
petroleum product, such as oil, petrol, etc.
REPLACING HEADLIGHT BULBS
G260A01HP-EAT
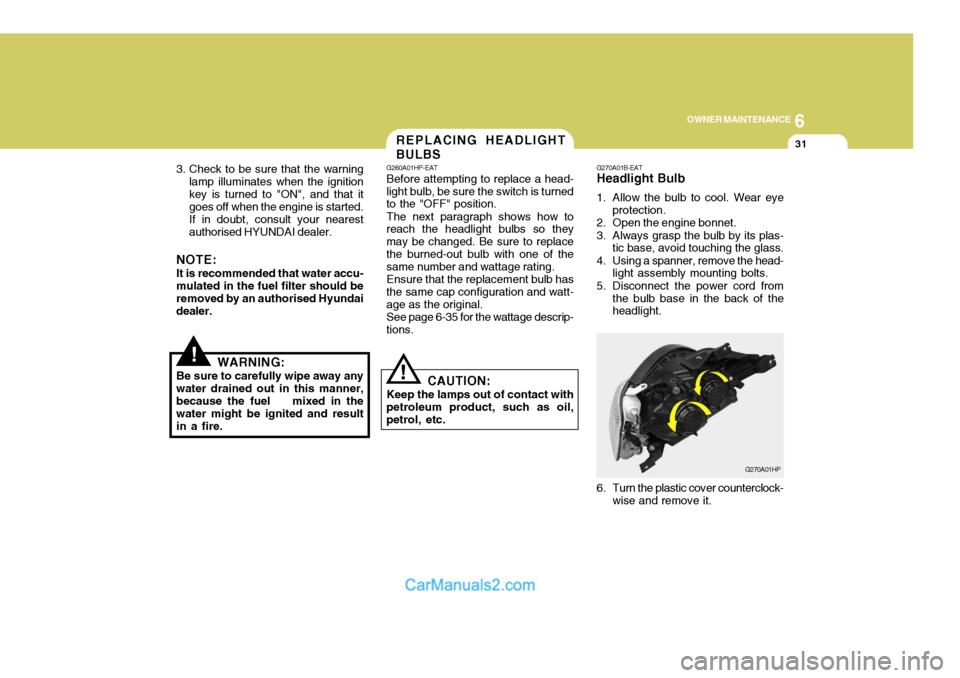
G270A01B-EAT Headlight Bulb
1. Allow the bulb to cool. Wear eye
protection.
2. Open the engine bonnet.
3. Always grasp the bulb by its plas- tic base, avoid touching the glass.
4. Using a spanner, remove the head- light assembly mounting bolts.
5. Disconnect the power cord from the bulb base in the back of the headlight.
G270A01HP
6. Turn the plastic cover counterclock- wise and remove it.