2005 Hyundai Azera warning
[x] Cancel search: warningPage 189 of 297
2
DRIVING YOUR HYUNDAI
5
!
STARTING
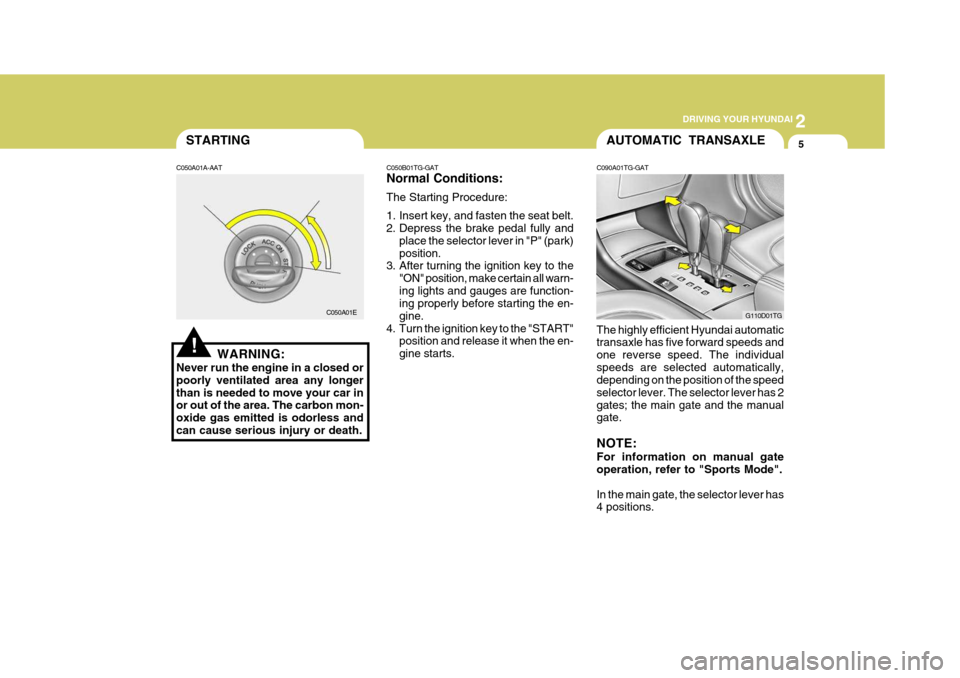
C050A01A-AAT
WARNING:
Never run the engine in a closed or poorly ventilated area any longerthan is needed to move your car in or out of the area. The carbon mon- oxide gas emitted is odorless andcan cause serious injury or death. C050B01TG-GAT Normal Conditions: The Starting Procedure:
1. Insert key, and fasten the seat belt.
2. Depress the brake pedal fully and
place the selector lever in "P" (park) position.
3. After turning the ignition key to the
"ON" position, make certain all warn-ing lights and gauges are function- ing properly before starting the en- gine.
4. Turn the ignition key to the "START" position and release it when the en-gine starts.
C050A01EAUTOMATIC TRANSAXLE
C090A01TG-GAT The highly efficient Hyundai automatic transaxle has five forward speeds and one reverse speed. The individualspeeds are selected automatically, depending on the position of the speed selector lever. The selector lever has 2gates; the main gate and the manual gate. NOTE: For information on manual gate operation, refer to "Sports Mode". In the main gate, the selector lever has 4 positions. G110D01TG
Page 194 of 297
2 DRIVING YOUR HYUNDAI
10
!!
ANTI-LOCK BRAKE SYSTEM (ABS)
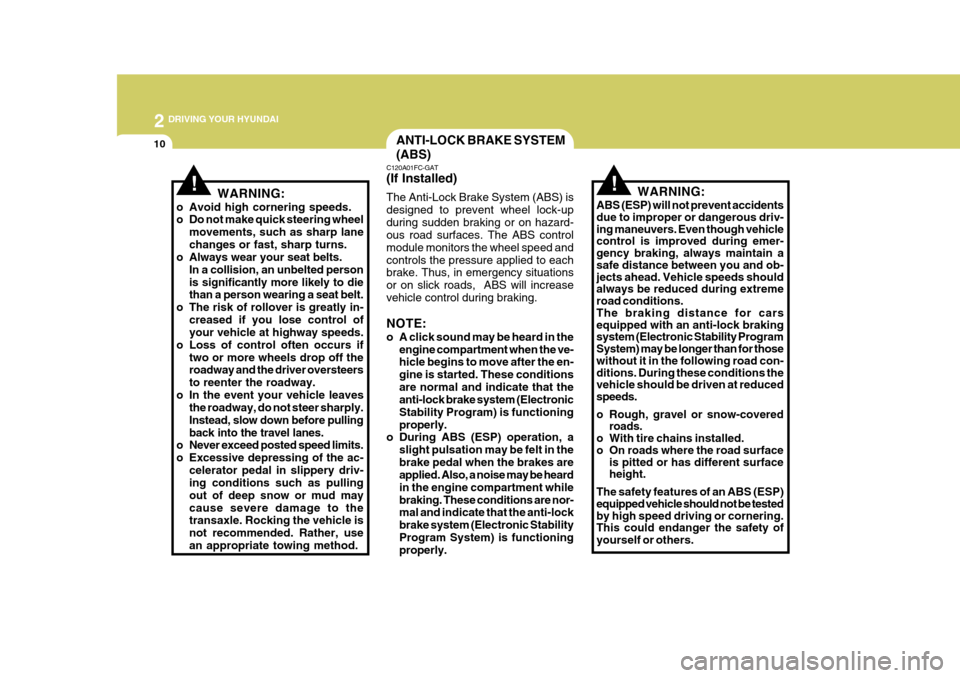
C120A01FC-GAT (If Installed) The Anti-Lock Brake System (ABS) is designed to prevent wheel lock-upduring sudden braking or on hazard- ous road surfaces. The ABS control module monitors the wheel speed andcontrols the pressure applied to each brake. Thus, in emergency situations or on slick roads, ABS will increasevehicle control during braking. NOTE:
o A click sound may be heard in the
engine compartment when the ve- hicle begins to move after the en- gine is started. These conditionsare normal and indicate that the anti-lock brake system (Electronic Stability Program) is functioningproperly.
o During ABS (ESP) operation, a
slight pulsation may be felt in thebrake pedal when the brakes are applied. Also, a noise may be heard in the engine compartment whilebraking. These conditions are nor- mal and indicate that the anti-lock brake system (Electronic StabilityProgram System) is functioning properly. WARNING:
ABS (ESP) will not prevent accidents due to improper or dangerous driv-ing maneuvers. Even though vehicle control is improved during emer- gency braking, always maintain a safe distance between you and ob- jects ahead. Vehicle speeds should always be reduced during extreme road conditions. The braking distance for cars equipped with an anti-lock braking system (Electronic Stability Program System) may be longer than for those without it in the following road con- ditions. During these conditions the vehicle should be driven at reduced speeds.
o Rough, gravel or snow-covered roads.
o With tire chains installed.
o On roads where the road surface is pitted or has different surfaceheight.
The safety features of an ABS (ESP)equipped vehicle should not be tested by high speed driving or cornering. This could endanger the safety of yourself or others.
WARNING:
o Avoid high cornering speeds.
o Do not make quick steering wheel movements, such as sharp lane changes or fast, sharp turns.
o Always wear your seat belts.
In a collision, an unbelted personis significantly more likely to die than a person wearing a seat belt.
o The risk of rollover is greatly in-
creased if you lose control ofyour vehicle at highway speeds.
o Loss of control often occurs if
two or more wheels drop off theroadway and the driver oversteers to reenter the roadway.
o In the event your vehicle leaves the roadway, do not steer sharply.Instead, slow down before pullingback into the travel lanes.
o Never exceed posted speed limits.
o Excessive depressing of the ac-
celerator pedal in slippery driv- ing conditions such as pulling out of deep snow or mud maycause severe damage to the transaxle. Rocking the vehicle is not recommended. Rather, usean appropriate towing method.
Page 195 of 297
2
DRIVING YOUR HYUNDAI
11
!
CAUTION:
Driving with varying tire or wheel size may cause the ESP system to malfunction. When replacing tires, make sure they are the same size asyour original tires. WARNING:
Electronic stability program is onlya driving aid; all normal precau- tions for driving in inclement weather and on slippery road sur-faces should be observed.!
ELECTRONIC STABILITY PROGRAM (ESP)
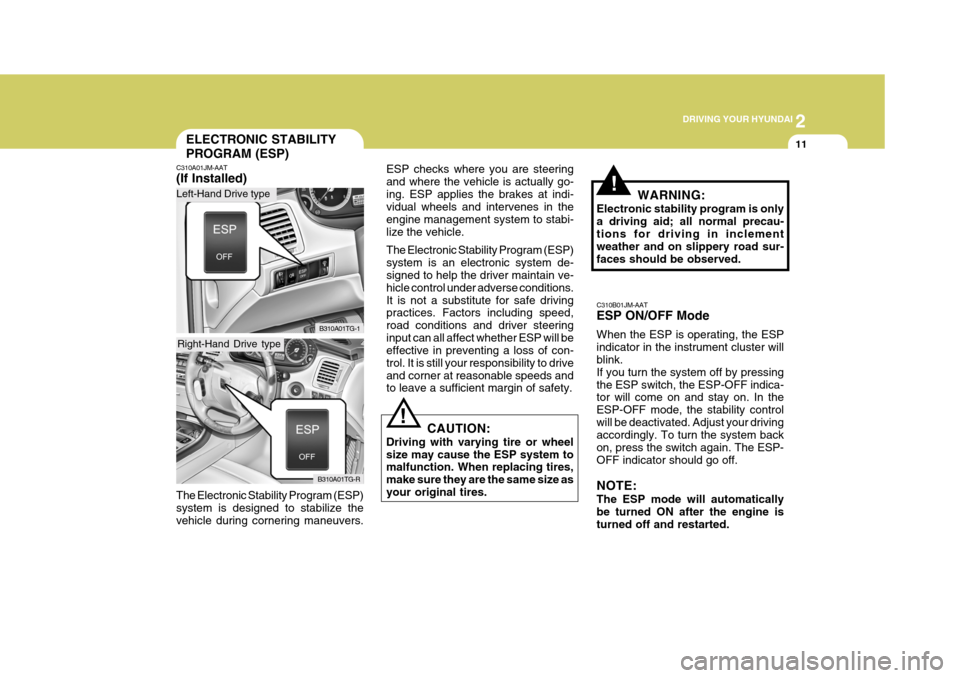
C310A01JM-AAT (If Installed) ESP checks where you are steering and where the vehicle is actually go-ing. ESP applies the brakes at indi- vidual wheels and intervenes in the engine management system to stabi-lize the vehicle. The Electronic Stability Program (ESP) system is an electronic system de- signed to help the driver maintain ve- hicle control under adverse conditions.It is not a substitute for safe driving practices. Factors including speed, road conditions and driver steeringinput can all affect whether ESP will be effective in preventing a loss of con- trol. It is still your responsibility to driveand corner at reasonable speeds and to leave a sufficient margin of safety.
B310A01TG-1
C310B01JM-AAT ESP ON/OFF Mode When the ESP is operating, the ESP indicator in the instrument cluster will blink. If you turn the system off by pressingthe ESP switch, the ESP-OFF indica- tor will come on and stay on. In the ESP-OFF mode, the stability controlwill be deactivated. Adjust your driving accordingly. To turn the system back on, press the switch again. The ESP-OFF indicator should go off. NOTE: The ESP mode will automatically be turned ON after the engine is turned off and restarted.
The Electronic Stability Program (ESP) system is designed to stabilize thevehicle during cornering maneuvers.
B310A01TG-R
Left-Hand Drive type
Right-Hand Drive type
Page 196 of 297

2 DRIVING YOUR HYUNDAI
12
C310D01JM-AAT Indicators and Warning The indicators should illuminate when the ignition key is turned to ON orSTART but should go out after three seconds. If the indicators do not illuminate, orthe ESP or ESP-OFF indicator does not go out after 3 seconds, have the vehicle checked by an authorizeddealer. Should there be any unusual condi- tions in the device while driving, ESP- OFF indicator illuminates as a warn- ing.If ESP-OFF indicator illuminates, pull your car to a safe place and stop the engine.Then, start the engine again to check if the ESP-OFF indicator goes out. If the indicator remains lit even after the engine has been started, have your car checked by an authorizedHyundai dealer.
BACK WARNING SYSTEM
C400A01P-GAT (If Installed) The back warning system assists the driver during backward movement ofthe vehicle by chiming if any object is sensed within the distance of 1200 mm (47 in.) behind the vehicle. Thissystem is only a supplemental system. Sensor
HTG2187 NOTE:
o Back warning system should only
be considered as a supplemen- tary function. The driver mustcheck the rearview.
o The audible warning signal can
be different depending on theobjects.
o The audible warning signal might
not activate in case the sensor isfrozen or stained with dirt or mud.
o There is a chance of malfunction
of the back warning system whendriving in uneven surfaces such as woods, gravel road, jagged road, or gradient.
o Do not push, or scratch the sur- face of the sensor. This will likelydamage the covering.
o The sensor system might not rec- ognize sharp objects, thick win-ter clothes or sponges whichabsorb the frequency.
o Clean dirty sensors with a soft
sponge and clean water.
o When more than two objects are sensed at the same time, the clos-est one will be recognized first.
Page 197 of 297
2
DRIVING YOUR HYUNDAI
13
!
GOOD BRAKING PRACTICES
C130A01A-AAT
WARNING:
Nothing should be carried on top of the shelf panel behind the rear seat.If there were an accident or a sudden stop, such objects could move for- ward and cause damage to the ve-hicle or injure the occupants.
o After being parked, check to be sure the parking brake is not engagedand that the parking brake indicator light is out before driving away.
o Driving through water may get the brakes wet. They can also get wet when the car is washed. Wet brakesmay can be dangerous! Your car will not stop as quickly if the brakes are wet. Wet brakes cause the carto pull to one side. To dry the brakes, apply the brakes lightly until the braking action returns to normal,taking care to keep the car under control at all times. If the braking action does not return to normal,stop as soon as it is safe to do so and call your Hyundai dealer for assistance.
o Such objects may not be detected
by the system at very close range(approximately 300 mm).
CAUTION:
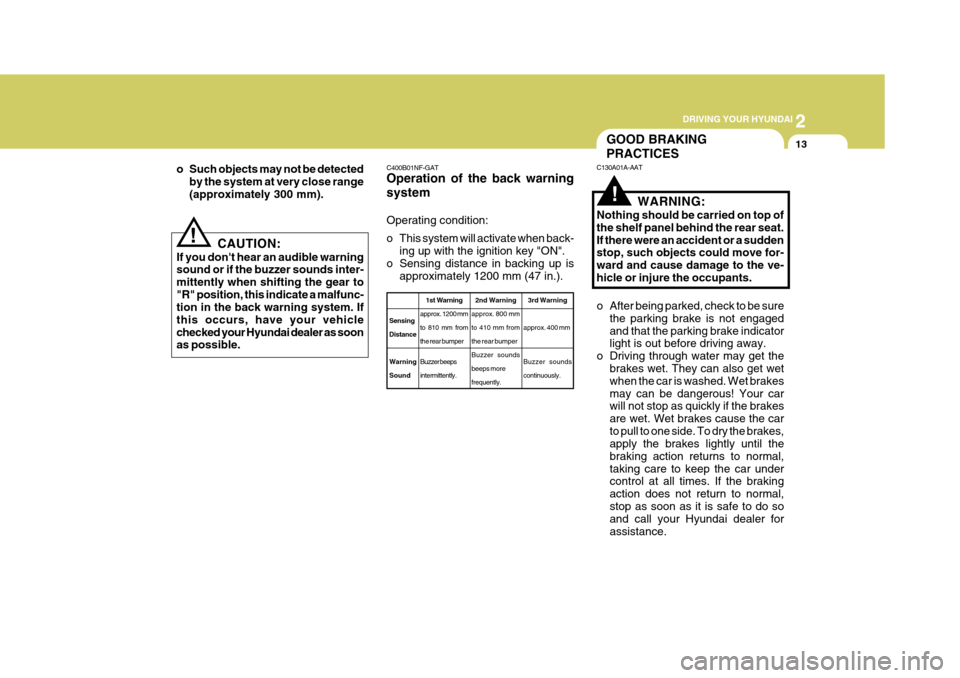
If you don't hear an audible warning sound or if the buzzer sounds inter- mittently when shifting the gear to"R" position, this indicate a malfunc- tion in the back warning system. If this occurs, have your vehiclechecked your Hyundai dealer as soon as possible. C400B01NF-GAT Operation of the back warning system Operating condition:
o This system will activate when back-
ing up with the ignition key "ON".
o Sensing distance in backing up is approximately 1200 mm (47 in.).
1st Warning
approx. 1200 mm
to 810 mm fromthe rear bumper Buzzer beeps intermittently.
SensingDistance Warning Sound 2nd Warning
approx. 800 mmto 410 mm fromthe rear bumperBuzzer soundsbeeps morefrequently. 3rd Warning
approx. 400 mm Buzzer sounds continuously.
!
Page 205 of 297
2
DRIVING YOUR HYUNDAI
21
!
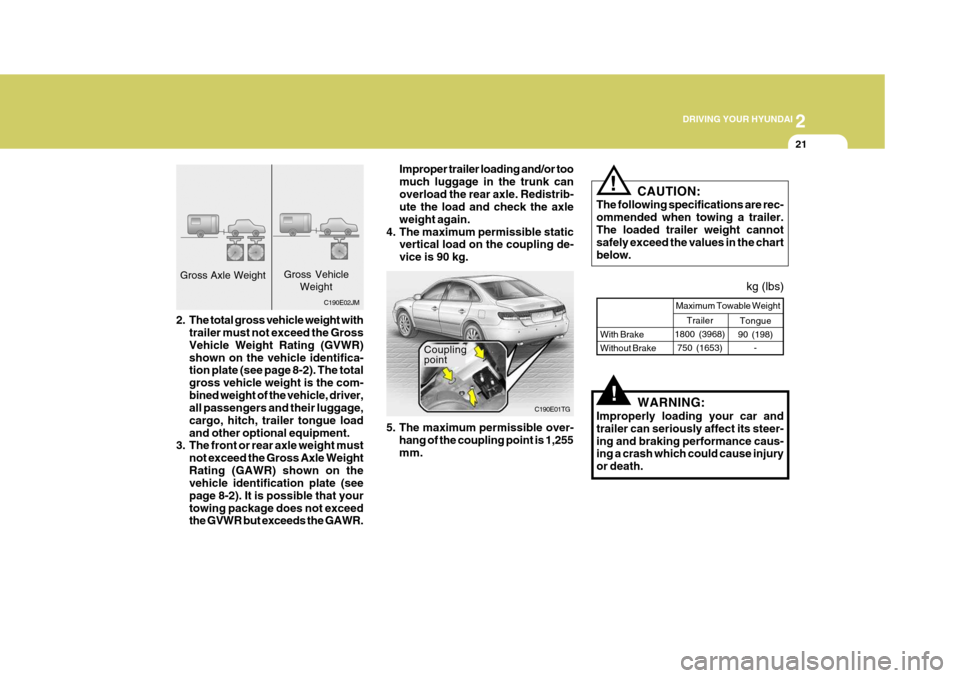
C190E02JM Improper trailer loading and/or too much luggage in the trunk canoverload the rear axle. Redistrib- ute the load and check the axle weight again.
4. The maximum permissible static vertical load on the coupling de-vice is 90 kg.
Gross Axle Weight Gross Vehicle
Weight
2. The total gross vehicle weight with trailer must not exceed the GrossVehicle Weight Rating (GVWR)shown on the vehicle identifica- tion plate (see page 8-2). The total gross vehicle weight is the com-bined weight of the vehicle, driver, all passengers and their luggage, cargo, hitch, trailer tongue loadand other optional equipment.
3. The front or rear axle weight must
not exceed the Gross Axle WeightRating (GAWR) shown on the vehicle identification plate (see page 8-2). It is possible that yourtowing package does not exceed the GVWR but exceeds the GAWR. C190E01TGkg (lbs)
CAUTION:
The following specifications are rec- ommended when towing a trailer.The loaded trailer weight cannot safely exceed the values in the chart below.
!
WARNING:
Improperly loading your car and trailer can seriously affect its steer-ing and braking performance caus- ing a crash which could cause injury or death.
Tongue
90 (198) -
With Brake Without Brake Maximum Towable Weight
Trailer
1800 (3968) 750 (1653)
5. The maximum permissible over- hang of the coupling point is 1,255 mm. Coupling point
Page 209 of 297

3 WHAT TO DO IN AN EMERGENCY
2
!
IF THE ENGINE WILL NOT START
D010A01A-AAT D010B01TG-AAT If Engine Doesn't Turn Over or Turns Over Slowly
1. Be sure the gear selector lever is in
"N" or "P" and the emergency brake is set.
2. Check the battery connections to be sure they are clean and tight.
3. Turn on the interior light. If the light
dims or goes out when you operate the starter, the battery is discharged.
4. Check the starter connections to be
sure they are securely tightened.
5. Do not push or pull the vehicle to start it. See instructions for "JumpStarting" on the following pages. D010D01A-AAT
If Engine Stalls While Driving
1. Reduce your speed gradually, keep-
ing a straight line. Move cautiously off the road to a safe place.
2. Turn on your emergency flashers.
3. Try to start the engine again. If your vehicle will not start, contact aHyundai dealer or seek other quali-fied assistance.
D010C01Y-AAT If Engine Turns Over Normally but Does Not Start
1. Check fuel level.
2. With the key in the "OFF" position,
check all connectors at ignition coils and spark plugs. Re-connect any that may be disconnected or loose.
3. Check the fuel line in the engine room.
4. If engine still refuses to start, call a Hyundai dealer or seek other quali- fied assistance.
WARNING:
If the engine will not start, do not push or pull the car to start it. Thiscould result in a collision or cause other damage. In addition, push or pull starting may cause the cata-lytic converter to be overloaded and create a fire hazard.
HTG5019
Page 210 of 297

3
WHAT TO DO IN AN EMERGENCY
3
!
JUMP STARTING
D020A02A-AAT
WARNING:
The gas produced by the battery during the jump-start operation ishighly explosive. If these instruc- tions are not followed exactly, seri- ous personal injury and damage tothe vehicle may occur! If you are not sure how to follow this proce- dure, seek qualified assistance.Automobile batteries contain sul- furic acid. This is poisonous and highly corrosive. When jump start-ing, wear protective glasses and be careful not to get acid on yourself, your clothing or on the car. o If you should accidentally get acid on
your skin or in your eyes, immedi-ately remove any contaminated cloth- ing and flush the area with clean water for at least 15 minutes. Thenpromptly obtain medical attention. If you must be transported to an emer- gency facility, continue to apply wa-ter to the affected area with a sponge or cloth.
o The gas produced by the battery
during the jump-start operation ishighly explosive. Do not smoke or allow a spark or an open flame inthe vicinity.
o The battery being used to provide
the jump start must be 12-volt. If youcannot determine that it is a 12-volt battery, do not attempt to use it for the jump start.
o To jump start a car with a discharged battery, follow this procedure ex-actly:
1. If the booster battery is installed in another vehicle, be sure the twovehicles are not touching.
2. Turn off all unnecessary lights and
accessories in both vehicles.
HTG4001
Booster battery
3. Attach the clamps of the jumper
cable in the exact location shown in the illustration. First, attach one clamp of the jumper cable to the positive (+) post or cable of thedischarged battery. Then attach the other end of the same cable to the positive (+) post or cable of thebooster battery. Next, using the other cable, attach one clamp to the negative (-) post or cable of thebooster battery. Then attach the other end of that cable to a solid metal part of the engine away from the battery.Do not connect the cable to any moving part.
4. Start the engine in the car with the booster battery and let it run for afew minutes. This will help to as- sure that the booster battery is fullycharged. During the jumping opera- tion, run the engine in this vehicle at about 2,000 rpm.
5. Start the engine in the car with the discharged battery using the normalstarting procedure. After the enginestarts, leave the jumper cables con- nected and let the engine run at fast idle or about 2,000 rpm for severalminutes.
Discharged battery