Page 97 of 164
 with ref-
erence to the North;
– longitude, latitude and height;
– visi")
The display will show the following
information fig. 99:
– compass representation indicating
the car position (in degrees) with ref-
erence to the North;
– longitude, latitude and height;
– visible satellites number;
– destination (available only with nav-
igation on);
– time of arrival and distance to des-
tination (available only with navigation
on).
Pressing “ESC” 14-fig. 1or “NAV”
18-fig. 1takes back to the main nav-
igation screen.
Atlas: enables map drawing in atlas
mode (for further details see section
“ATLAS” on the following pages).
Detour: allows the user to choose
(if possible) an alternative route to
reach the selected destination, avoid-
ing a specified portion of the current-
ly calculated route.
97
CONNECT NAV+
To activate this function, select the
route portion to be avoided fig. 100
by turning the knob 15-fig. 1and
pressing it to confirm.
The display will then show the new
distance and the time necessary to
reach the destination fig. 101.
Selecting and confirming “YES” or
“NO” by turning and pressing the knob
15-fig. 1, the user can accept or reject
the new route.
If there is no alternative route, then
the display shows “No alternative
route” fig. 102.Map: activates the map mode. The
display shows map, route (if present),
car position (town and street names),
icons of next two crosses (only if
route is present) fig. 103.
To modify the map scale, proceed as
follows:
– turn the knob 15-fig. 1and select
the required scale;
– press the knob 15-fig. 1to con-
firm.
When you approach a crossroads,
the map will be replaced with an en-
largement of the surrounding area fig.
104a(crossroads zoom function, if ac-
tuated in “map preference”).
fig. 100
F0L3131g
fig. 101
F0L3132g
Page 98 of 164

Pressing “NAV” 18-fig. 1for over
2 seconds will activate the NAV Mute
function for muting voice instructions.
To reactivate the function, press the
same key again for over 2 seconds.
Set route: defines route calculation
parameters (For further details see
section “Set route” on the following
pages). Right vertical bar icons are:
Other menus: shows a second
page of navigation menu.
Select address: lets the user select
a geographical point (through address,
directory...).
Activate RG: enables/disables route
guide. If RG is disabled, then voice
messages, cross icons and zooms are
no more available. If a route is active
when RG is disabled, it remains visible
on the map, while automatic route re-
calculation (if user leaves route) is not
active.
Volume: sets the voice instruction
volume level.
98
CONNECT NAV+
Scale: allows change of map scale.
Push on the icon key shows available
scales (100m ÷ 200km).
If the user arrives near a cross and
cross zoom function is enabled, the
system provides cross zoom as shown
in fig. 105(see paragraph “Map op-
tions”).
If the Bird View function is active, the
scale concept is no longer valid since
in this case it is considered the dis-
tance between the car and the dis-
played horizon (see paragraph “ Map
Options").
The car-horizon distance can have
the following values: 3km, 6km and 15
km fig. 104b.
fig. 102
F0L3133g
fig. 104a
F0L3135g
fig. 104b
F0L3173g
fig. 103
F0L3134g
Page 99 of 164

99
CONNECT NAV+
OTHER MENUS
Selecting and confirming “Other
menus” by rotating and pressing the
knob 15-fig. 1, takes to a second nav-
igation menu fig. 106 featuring the fol-
lowing:
Previous menu: to get back to the
previous menu.
Change display: to change map dis-
play between the following:
– Map;
– Whole route;
– Highway info;
– Graphic symbols.Delete destination: to delete cur-
rent destination.
Map options: map view parameters
setting:
– Draw map
– Draw areas
– Draw icon
– Draw RDS-TMC
– Draw wording
– Zoom intersection
– OK
Voice directory: controls naviga-
tor voice directory:
– Hear voice directory
– Delete voice directorySELECT ADDRESS
Selecting and confirming “Select ad-
dress” in the main menu by rotating
and pressing the knob 15-fig. 1will
display the screen in fig. 107.
The available icons are:
Address: to select a point through
an address.
Points of interest: to select a
“point of interest” by the relevant sub-
menu.
Last destinations: to select a point
from the list of previous destinations.
Directory: to select a point from
the navigator directory.
fig. 105
F0L3136g
fig. 106
F0L3137g
fig. 107
F0L3138g
Page 100 of 164

100
CONNECT NAV+
RDS-TMC: to select a point from
the RDS-TMC generated “list of
events”.
Home 1: to select as destination, to
delete or to display the point stored
as “Home 1”;
Home 2: to select as destination, to
delete or to display the point stored
as “Home 2”;
ADDRESS
Selecting and confirming “Address”
(from the first page of the menu) by
rotating and pressing the knob 15-
fig. 1, the display shows a submenu
with the following options: “Place
name”, “Street”, “Street number”,
“2nd street”, “Calculate route” and
“Other options” fig. 108.“Place name”
To enter the place name (destination
town), select and confirm “Place
name” by rotating and pressing the
knob 15-fig. 1, the display will show
the screen for entering the name, the
keypad, the editing box and the list of
available places.
IMPORTANTIf current place
name is available, the corresponding
description will be displayed near the
place name setting field; the user can
however change it if it is not corre-
sponding to the required point.
To input characters, select them on
the keypad by rotating the knob 15-
fig. 1, then press it to confirm.
If the combination of two characters
(alphabetical letter + symbol) is pos-
sible, the two characters are auto-matically unified into their corre-
sponding single character: for exam-
ple, if the user selects Eand then¨the
two characters are replaced with Ë.
Blank and . , - _ ‘ ( )are word sepa-
rator characters.
After selecting the place name, press
the knob 15-fig. 1to go to next page
to enter the street name; Pressing
“ESC” 14-fig. 1gets to previous
screen without setting the new place
name.
“Street”
Destination street name is obtained
after entering the place name. Select
“Street” by rotating the knob 15-fig.
1and then press it to confirm.
To input street name characters, se-
lect them on the keypad by rotating
the knob 15-fig. 1and press it to con-
firm.
fig. 108
F0L3139g
Page 101 of 164

101
CONNECT NAV+
If in place of “Street” the user spec-
ifies “C”, it means “downtown” and
so neither “Street number” and “2nd
street” must be input.
The navigation system always guide
you downtown in case of small towns.
After selecting the “Street” name,
press the knob 15-fig. 1to go to next
page to enter the street number;
Pressing “ESC” 14-fig. 1gets to pre-
vious screen without setting the street
name.
“Street number”
Destination street number is ob-
tained after entering the street name.
Select “Street number” by rotating the
knob 15-fig. 1and press it to confirm.
To input digits select them on the key-
pad by rotating the knob 15-fig. 1and
then press it to confirm.
Then, select OK using the keypad and
press the knob 15-fig. 1to confirm.“2nd street”
This option is used to enter the name
of a second street that intersects the
first entered street, so that the se-
lected destination is the intersection
between the two streets.
The second street name can be en-
tered, after entering the place name
and the first street name. Select “2nd
street” by rotating the knob 15-
fig. 1and press it to confirm.
To input the 2nd street name char-
acters, select them on the keypad by
rotating the knob 15-fig. 1and then
press it to confirm.
After selecting the “2nd street” press
the knob 15-fig. 1.
“Calculate route”
This option will activate route calcu-
lation to the required destination.
If a destination is already set, the sys-
tem will ask for confirmation before
changing destination“Other options”
– Directory
This function is used to store the se-
lected address into the navigation sys-
tem directory and to associate it to a
name for easy retrieval fig. 109.
The name to be associated with the
destination can be entered, after se-
lecting and confirming “Name” by ro-
tating and pressing the knob 15-fig. 1.
IMPORTANTWhen selecting
“Name”, remember that it is not pos-
sible to add a name already present in
the Telephone (TEL) function direc-
tory.
To enter the characters simply select
them one by one by rotating the knob
15-fig. 1and press it to confirm.
fig. 109
F0L30140g
Page 102 of 164

102
CONNECT NAV+
Then, select OK using the keypad and
press the knob 15-fig. 1.
The “Voice recognition” key allows
to associate a voice sample to a des-
tination stored in the directory. Sym-
bol “√” at the left of the key shows if
a sample has already been associated.
Selecting and confirming “Voice
recognition” will display the screen in
fig. 110:
“New voice command”: allows
recording of a new voice sample. User
is invited to pronounce twice the
name to be recorded. “Delete voice command”: allows
deletion of a previously recorded
voice sample. If there is no sample, this
key is disabled.
“Listen to voice command”: repro-
duces a previously recorded voice
sample. If there is no recorded sam-
ple, this key is disabled.
To select the required function, ro-
tate the knob 15-fig. 1and press it to
confirm.
– Home 1 and Home 2: store the
selected point in the relevant memo-
ries.If a point has already been previous-
ly stored as “Home 1” or “Home 2”,
a warning box asks the user for con-
firmation about substitution.
Pressing H1 or H2 16-fig. 1and then
the knob 15-fig. 1to confirm, will
start route calculation to the destina-
tion stored in Home 1 or Home 2.
fig. 110
F0L1410g
Page 103 of 164

103
CONNECT NAV+
POINTS OF INTEREST
This function is used to obtain a file
containing the location and informa-
tion on points of general interest such
as, for example, restaurants, museums,
stations etc., divided by category.
Selecting “Points of interest” rotat-
ing and pressing the knob 15-fig. 1,
the display will show the following
menu fig. 111:
– Near car
– Near destination
– Near address
– Name. “Near car”
“Near car” allows the user to find
the services near the current car po-
sition.
“Category” allows service category
selection in the system data-base us-
ing the keypad.
By selecting the “Service list” graph-
ic key, the display will show the list of
the available services in connection
with the specified class, and will also
indicate the name of the service, the
distance (as the crow flies), and an icon
with the direction fig. 112. The list
can be run through by turning knob
15-fig. 1: the choice can be confirmed
by pressing the knob.After selecting a “point of interest”,
the display shows the following op-
tions:
“Calculate route”: to start navigation;
“Other options”: the display will
show a screen with the following op-
tions: Directory, Home 1 and Home
2, previously described in paragraph
“Address”.
fig. 111
F0L3146g
fig. 112
F0L3147g
Page 104 of 164

104
CONNECT NAV+
“Near destination”
This function enables to find the re-
quired services near the selected des-
tination. The available options are
“Destination”, “Category” and “List of
services” fig. 113.
After selecting the destination and
selected service, information can be
obtained and the service can be lo-
cated using “Info” and “Atlas”. Select
“Calculate route” by rotating the knob
15-fig. 1and then press it to confirm
selection.“Near address”
This is used to identify the services
sought nearest to the address set. The
available options are “Category”,
“Place name”, “Street”, “Street num-
ber” and “List of services”fig. 114.
After selecting the required service,
associated information and location
may be obtained using “Info” and
“Map”. Select “OK” by rotating and
pressing the knob 15-fig. 1to confirm
selection.“Name”
Service selection by “Name” is used
to select a known service as the des-
tination by entering “Category”, “Place
name” and “Service name” fig. 115.
After confirming the selected service,
associated information and location
may be obtained using “Info” and “At-
las”. Select “Calculate route” by ro-
tating and pressing the knob 15-fig.
1to confirm selection.
fig. 113
F0L3148g
fig. 114
F0L3149g
fig. 115
F0L3150g
 1
1 2
2 3
3 4
4 5
5 6
6 7
7 8
8 9
9 10
10 11
11 12
12 13
13 14
14 15
15 16
16 17
17 18
18 19
19 20
20 21
21 22
22 23
23 24
24 25
25 26
26 27
27 28
28 29
29 30
30 31
31 32
32 33
33 34
34 35
35 36
36 37
37 38
38 39
39 40
40 41
41 42
42 43
43 44
44 45
45 46
46 47
47 48
48 49
49 50
50 51
51 52
52 53
53 54
54 55
55 56
56 57
57 58
58 59
59 60
60 61
61 62
62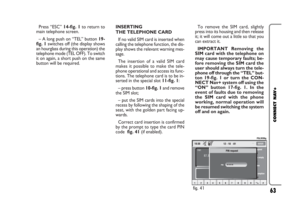 63
63 64
64 65
65 66
66 67
67 68
68 69
69 70
70 71
71 72
72 73
73 74
74 75
75 76
76 77
77 78
78 79
79 80
80 81
81 82
82 83
83 84
84 85
85 86
86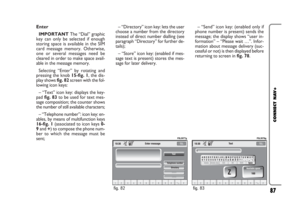 87
87 88
88 89
89 90
90 91
91 92
92 93
93 94
94 95
95 96
96 97
97 98
98 99
99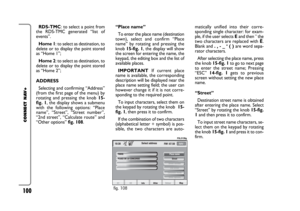 100
100 101
101 102
102 103
103 104
104 105
105 106
106 107
107 108
108 109
109 110
110 111
111 112
112 113
113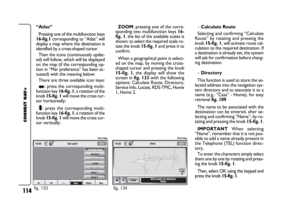 114
114 115
115 116
116 117
117 118
118 119
119 120
120 121
121 122
122 123
123 124
124 125
125 126
126 127
127 128
128 129
129 130
130 131
131 132
132 133
133 134
134 135
135 136
136 137
137 138
138 139
139 140
140 141
141 142
142 143
143 144
144 145
145 146
146 147
147 148
148 149
149 150
150 151
151 152
152 153
153 154
154 155
155 156
156 157
157 158
158 159
159 160
160 161
161 162
162 163
163