Page 63 of 165
High voltage
Touching live parts of
the ignition system with
the engine running can cause
electric shock.
Do not touch parts of the igni-
tion system when the engine
is running.
Catalytic converterIf misfiring causes unburned
fuel to enter the catalytic con-
verter, there is a danger of
overheating and damage.
For this reason, observe the
following points:
Do not run the fuel tank dry.
Do not attempt to start or
run the engine with a spark-
plug cap disconnected.
Stop the engine immediately
if it misfires.
Use only unleaded fuel.
Comply with all specified
maintenance intervals. Unburned fuel will des-
troy the catalytic con-
verter.
Note the points listed for pro-
tection of the catalytic con-
verter.
Risk of fireTemperatures at the exhaust
are high.
Flammable materials
(e.g. hay, leaves, grass,
clothing and luggage, etc.)
could ignite if allowed to
come into contact with the
hot exhaust pipe.
Do not permit flammable ma-
terials to come into contact
with the hot exhaust system.
Cooling would be
inadequate if the engine
were allowed to idle for
a lengthy period with the
motorcycle at a standstill:
overheating would result. In extreme cases, the
motorcycle could catch fire.
Do not allow the engine to
idle unnecessarily. Ride away
immediately after starting the
engine.
Tampering with the con-
trol unit of the electronic
engine-management sys-
tem
Tampering with the con-
trol unit of the electronic
engine-management system
can damage the motorcycle
and cause accidents.
Do not tamper with the
control unit of the electronic
engine-management
system.
Tampering with the con-
trol unit of the electron-
ic engine-management sys-
tem can result in mechanical
loads that the motorcycle's
561zRiding
Page 64 of 165
components are not designed
to withstand. Damage caused
in this way is not covered by
the warranty.
Do not tamper with the
control unit of the electronic
engine-management
system.ChecklistUse the following checklist
to check important functions,
settings and wear limits be-
fore you ride off.Brakes
Brake-fluid levels, front and
rear
Clutch
Clutch fluid level
Shock absorber setting and
spring preload
Tyre-tread depth and tyre
pressures Cases correctly installed
and luggage secured
At regular intervals: Engine oil level (every refuel-
ling stop)
Brake-pad wear (every third
refuelling stop)
StartingSide standYou cannot start the motor-
cycle with the side stand ex-
tended and a gear engaged.
The engine will switch itself
off if you start it with the gear-
box in neutral and then en-
gage a gear before retracting
the side stand.GearboxYou can start the engine
when the gearbox is in neutral
or if you pull the clutch with a
gear engaged. Switch on the
ignition before you pull the clutch. When the gearbox is
in neutral, the green neutral
telltale light is on and the gear
indicator in the multifunction
display shows 0.
Starting the engine
If you switch on the ig-
nition while the brakes
are applied, then start the
engine and ride off immedi-
ately, the BMW Integral ABS
remains in residual braking
function mode. Self-diagnosis
is performed as soon as the
brake levers are in their fully
released positions for the first
time. Until this completes the
ABS function is not available;
the same applies to power
assistance for the brakes.
When you start the engine,
wait for the ABS to complete
its self-diagnosis.
Switch on the ignition.
562zRiding
Page 65 of 165
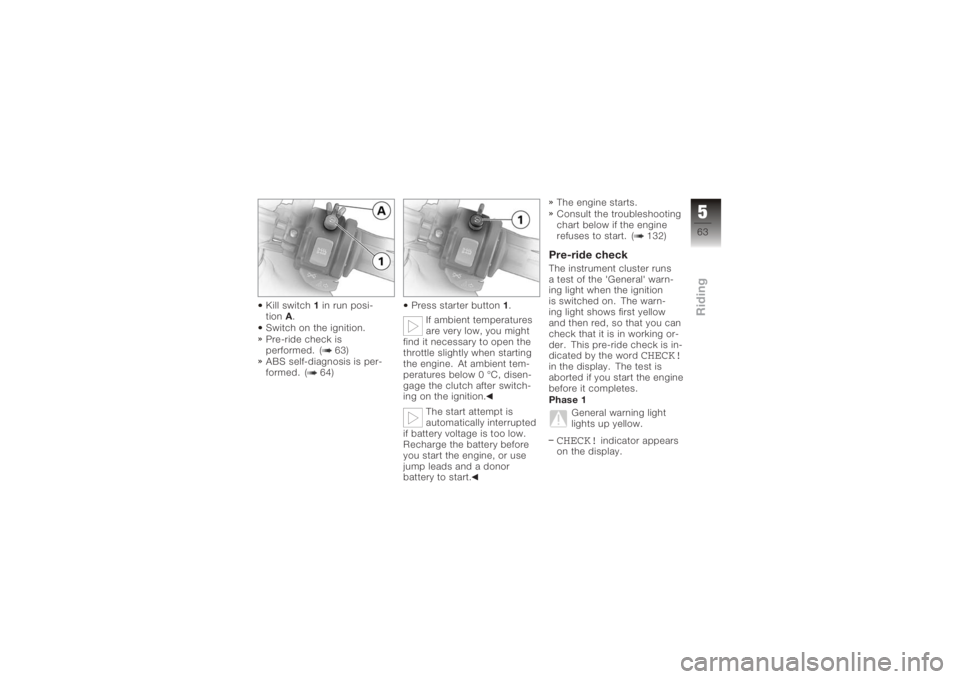
Kill switch1in run posi-
tion A.
Switch on the ignition.
Pre-ride check is
performed. ( 63)
ABS self-diagnosis is per-
formed. ( 64) Press starter button
1.
If ambient temperatures
are very low, you might
find it necessary to open the
throttle slightly when starting
the engine. At ambient tem-
peratures below 0 °C, disen-
gage the clutch after switch-
ing on the ignition.
The start attempt is
automatically interrupted
if battery voltage is too low.
Recharge the battery before
you start the engine, or use
jump leads and a donor
battery to start. The engine starts.
Consult the troubleshooting
chart below if the engine
refuses to start. ( 132)
Pre-ride checkThe instrument cluster runs
a test of the 'General' warn-
ing light when the ignition
is switched on. The warn-
ing light shows first yellow
and then red, so that you can
check that it is in working or-
der. This pre-ride check is in-
dicated by the word
CHECK!
in the display. The test is
aborted if you start the engine
before it completes.
Phase 1
General warning light
lights up yellow.CHECK!
indicator appears
on the display.
563zRiding
Page 67 of 165
The ABS warning light
does not go out until the
pull-away test completes.
Pulling awayStarting on gradientsSelect a gear.
Release the clutch lever and
both brake levers.
Switch on the ignition.
ABS pull-away testWhen you pull away, the
BMW Integral ABS checks the
ABS sensors.
ABS warning light
flashes once per
second.
The ABS warning light goes
out when the pull-away test
completes.
If an error message appears
when the pull-away test com-
pletes: See the section entitled
"Status indicators" for in-
formation on how to inter-
pret these messages.Running inThe first 1000 kmWhile running in the mo-
torcycle, vary the throttle
opening and engine-speed
range frequently. Try to do most of your rid-
ing during this initial period
on twisting, fairly hilly roads,
avoiding high-speed main
roads and highways if pos-
sible.
Exceeding the specified
engine speeds while run-
ning in will lead to increased
engine wear.
Keep to the specified engine
speeds for running in.
Do not exceed the rpm lim-
its recommended for run-
ning in.
Running-in speeds
7000 min
-1
No full-load acceleration.
Avoid low engine speeds at
full load.
Do not omit the first inspec-
tion after 500 - 1200 km.
565zRiding
Wait for ABS self-diagnosis
to complete.
Apply the brakes and disen-
gage the clutch.
Start the engine.Pre-ride check is
performed. ( 63)
Page 71 of 165
Parking your motor-
cycle
Placing motorcycle on
side stand
If the ground is soft or
uneven, there is no guar-
antee that the motorcycle will
rest firmly on the stand.
Always check that the ground
under the stand is level and
firm.
Switch off the engine.
Pull the handbrake lever.
Hold the motorcycle upright
and balanced.
Use your left foot to extend
the side stand fully (arrow). The side stand is de-
signed to support only
the weight of the motorcycle.
Do not lean or sit on the mo-
torcycle with the side stand
extended. Slowly lean the motorcycle
to the side until its weight
is taken by the stand and
dismount to the left.
If the motorcycle is on
the side stand, the sur-
face of the ground will de-
termine whether it is better to
turn the handlebars to the left
or right. However, the motor-
cycle is more stable on a level
surface with the handlebars
turned to the left than with
the handlebars turned to the
right.
On level ground, always turn
the handlebars to the left to
set the steering lock.
Turn the handlebars to full
left or right lock.
Check that the motorcycle
is standing firmly. On a gradient, the mo-
torcycle should always
face uphill; select 1st gear.
569zRiding
Page 75 of 165
Placing motorcycle on
centre stand
OA
If the ground is soft or
uneven, there is no guar-
antee that the motorcycle will
rest firmly on the stand.
Always check that the ground
under the stand is level and
firm.
Switch off the engine.
Dismount and keep your left
hand on the left handlebar
grip.
With your right hand, grip
the rear grab handle or the
rear frame.
Place your right foot on the
pin of the centre stand, and
press the stand down un-
til its curved feet touch the
ground.
Place your full body weight
on the centre stand and at the same time pull the mo-
torcycle backwards (arrow).
Excessive movements
could cause the centre
stand to retract, and the mo-
torcycle would topple in con-
sequence.
Do not lean or sit on the mo-
torcycle with the centre stand
extended.
Check that the motorcycle
is standing firmly.
573zRiding
Page 79 of 165
Brake system, generalDescending mountain
passes
There is a danger of the
brakes fading if you use
only the rear brakes when
descending mountain passes.
Under extreme conditions,
the brakes could overheat
and suffer severe damage.
Use both front and rear
brakes, and make use of the
engine's braking effect as
well.
Wet brakes
After the motorcycle has
been washed, ridden
through water or ridden in
the rain, the brake discs and
pads might be wet and the
brakes might not take effect
immediately.
Apply the brakes in good time until the brakes have dried
out.
Salt on brakes
The brakes may fail to
take effect immediately
if the motorcycle was ridden
on salt-covered roads and the
brakes were not applied for
some time.
Apply the brakes in good
time until the salt layer on the
brake discs and brake pads
has been removed.
Oil or grease on brakes
Oil and grease on the
brake discs and pads
considerably diminish braking
efficiency.
Especially after repair and
maintenance work, make
sure that the brake discs and
brake pads are free of oil and
grease.
Dirt or mud on brakes
When the motorcycle
is ridden on loose sur-
faces or muddy roads, the
brakes may fail to take effect
immediately because of dirt
or moisture on the discs or
brake pads.
Apply the brakes in good time
until the brakes have been
cleared.
Brake system with
BMW Integral ABSSensitive electronic con-
trolIt takes skill and sensitive
control of the brakes to pull
up safely on a motorcycle. If
the front brakes lock and the
wheel skids, the necessary
longitudinal and lateral stabil-
ising forces are lost, and a fall
can result. For this reason,
the rider seldom makes full
577zRiding
Page 93 of 165
Maintenance
Maintenance - general
instructions................... 92
Toolkit ........................ 92
Contents, supplementary
kit
OA
.......................... 92
Overview, supplementary kit . . . 92
Engine oil . .................... 93
Brake system, general ......... 94
Brake pads .................... 95
Brake fluid .................... 97
Clutch ....................... 100
Tyres ........................ 101
Rims . ........................ 101
Wheels . . . ................... 101
Front-wheel stand ............ 109
Rear wheel stand ............. 110 Bulbs
........................ 112
Jump starting . . .............. 118
Battery . . . .................... 119
791zMaintenance