Page 238 of 491
5-25
Audio
– CONTINUED –
light up and high-frequency noise on the tape will be
reduced for clearer sound reproduction.
*: Noise reduction system manufactured under license from
Dolby Laboratories Licensing Corporation. “Dolby” and the
double-D Symbol are trade marks of Dolby Laboratories Li-
censing Corporation. "Auto metal sensor
The cassette player automatically adjusts for metal or
CrO 2 tape.
Page 240 of 491

5-27
Audio
– CONTINUED –
NOTE
Make sure to always insert a disc with the label
side up. If a disc is inserted with the label side
down, it might be ejected or the player might shutoff. !How to insert a CD(s)
" Inserting a CD
1. Press “LOAD” button (18). If the magazine in the
player has an idle position where you can insert a disc,
the “DISC” indicator associated with the idle position
will blink.
If no indicator blinks, it means that there is no idle po-
sition in the magazine.
2. As soon as the “DISC” indicator begins to blink, the
“IN” will appear on display for a period of 15 seconds.
Insert a disc during the period. The disc will be then
automatically drawn in, and the player will begin to
play back the first number of the disc. " To insert more discs in succession, repeat Steps 1
and 2. The magazine will be loaded with discs in the
ascending order of position number.
If you do not insert any disc in 15 seconds after you
have pressed the “LOAD” button, the player will begin
to play back the first number of the last disc you have
inserted. "
The disc indicator steadily lights up if a disc is al-
ready inserted in the corresponding position of the
magazine." While the player is in the loading mode, if you press
any of the other mode buttons “FM” (1), “AM” (2) and
“TAPE” (12), the player will enter the standby mode.
Press the “CD” button (21) to start playback. " Inserting a disc in a desired position
1. Press the “LOAD” button. If the magazine in the
player has an idle position where you can insert a disc,
the “DISC” indicator associated with the idle position
will blink.
The positions in the magazine the indicator of which
steadily lights up are already loaded with discs.
2. Press the “DISC SELECT” button (26) at the posi-
tion where you want to insert a disc. The associated
“DISC” indicator will blink, and the “IN” will be dis-
played.
3. If you insert a disc during the 15-second period
while the “IN” is on display, the disc will be automati-
cally drawn in, and the player will start playback of the
disc, beginning with the first number. " To insert more discs in succession, repeat Steps 1
and 2. " While the player is in the loading mode, if you press
any of the other mode buttons “FM” (1), “AM” (2) and
Page 241 of 491

5-28
Audio
“TAPE” (12), the player will enter standby mode. Press
the “CD” button to start playback. "
Loading all the magazine (Full disc loading mode)
1. If you continue to press the “LOAD” button for more
than 1.5 seconds, the player will produce beep sound
and will enter the full disc loading mode.
2. A “DISC” indicator will blink, and the “IN” will be on
display for a period of 15 seconds. If a disc is success-
fully loaded during this period, the “DISC” indicator will
stop blinking and will steadily light.
3. When the loading of a disc is complete, the next
“DISC” indicator will blink. Then repeat Step 2.
4. When the magazine is filled with discs by repeating
Steps 2 and 3, the player will start playback of the
discs, beginning with the one inserted first.
If you fail to insert any disc during each 15-second in-
terval, the full disc loading mode will be canceled, and
the player will start playback of the disc inserted first. ! How to play back a CD or make a pause
" When there is no CD inserted:
Insert a CD by referring to “How to Insert a CD(s)”.
When a CD is loaded, the player will start playback of
the CD, beginning with the first number. "
When there are CDs loaded:
Press a desired one of the “DISC SELECT” buttons
(26) the “DISC” indicator of which steadily lights up.
The player will then start playback of the selected CD,
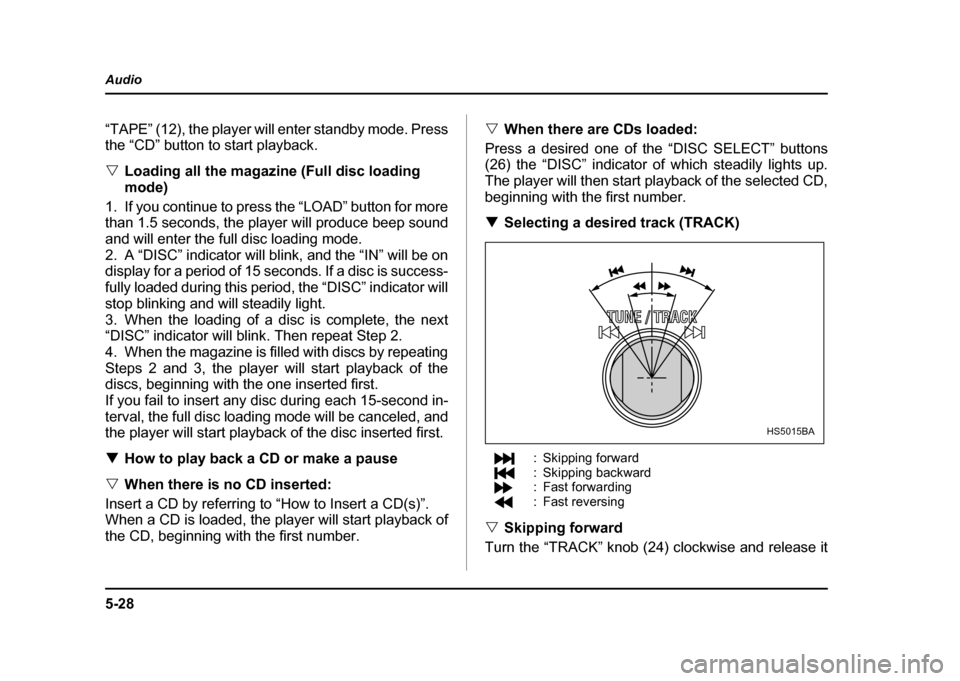
beginning with the first number. ! Selecting a desired track (TRACK)
: Skipping forward
: Skipping backward
: Fast forwarding
: Fast reversing
" Skipping forward
Turn the “TRACK” knob (24) clockwise and release it
HS5015BA
Page 245 of 491

5-32
Audio
"
Do not attempt to insert two or more discs
into the slot at a time. Doing so can cause me-
chanical damage to the CD changer." Use only music CDs identified by
am ark .
" Do not use CDs listed below which could
cause damage to the CD player. "3-inch (8 cm) compact disc.
" Any disc with a peel-off or seal on it.
" Any disc with scratches and/or dust.
" Bent disc.
" Cleaning disc.
" CD accessory. (E.g., 3-inch (8 cm) disc
adapter)
" Do not insert or remove any disc when the
automatic transmission selector lever is in the
park position; the selector lever in that position
can interfere with disc insertion or removal,
causing scratches on the disc surface (for AT
vehicles).
! To insert a disc
1. Press one of the “Disc select” buttons (3) (num-
bered from 1 to 6) for which the disc indicator light (2) is “OFF”.
The Disc indicator lights are located directly above the
corresponding “Disc select” buttons.
2. The indicator will begin blinking. The blinking will last for 15 seconds.
During this period, insert a desired disc, and the disc
will begin to play. (If any disc is not inserted during this
period, the “Disc slot” (1) door will close. Repeat step
1.)
Be sure to hold a disc with the label side (the side
where titles are printed) up.
3. To insert another disc, repeat step 1 and 2 choos-
ing a different disc select button. !
To insert six discs at a time
1. Press and hold the “Disc select” button number 1
until all disc indicators begin blinking (about 1.5 sec-
onds).
2. The indicators will blink for 15 seconds. During this
period, insert desired six discs.
3. When all discs are loaded, the first disc will begin to
play. (If no disc is inserted within this 15 seconds, the
entire disc load sequence will be canceled.) ! To remove a disc
1. Press the desired one of the “Disc select” buttons
(3) (numbered from 1 to 6) for which the disc indicator
light is on.
Page 246 of 491

5-33
Audio
– CONTINUED –
2. Press the “Eject button” (4). The selected disc will
be ejected and the indicator light will begin blinking.
3. To remove another disc, repeat step 1 and 2
choosing a different “Disc select” button.
(To remove discs when the ignition switch is in the
“Lock” position, press the “Eject” button, and the first
disc will be ejected. Press the “Eject” button again,
and the next disc will be ejected and so on. At this
time, the “Disc select” buttons are disabled.) !To remove all discs at one time
1. Press and hold the “Eject” button (4) until all “Disc”
indicators begin blinking (about 1.5 seconds), and the
first disc will be ejected.
2. When the disc is removed, the next one will be
ejected, and so on. ! To replace a playing disc with another
Simply press the desired one of “Disc select” buttons
(3) (numbered from 1 to 6) or press the “DISC select”
button on the radio unit to select the desired disc, and
the disc will begin to play. ! Disc indicators
Lit: when the corresponding storage tray is occupied
by a disc.
Blinking: Disc player is either in loading, eject or
changing mode. OFF: No disc is loaded or the ignition switch is in the
“LOCK” position. "
Open/Closed disc slot indicator
When the disc slot is open, the disc indicators on both
sides of the slot illuminate. ! Function control
Refer to CD changer control operating instructions de-
scribed in the “Type B audio set (if equipped)” section.
Page 247 of 491

5-34
Audio
Precautions to observe when han-
dling a compact disc (CD)
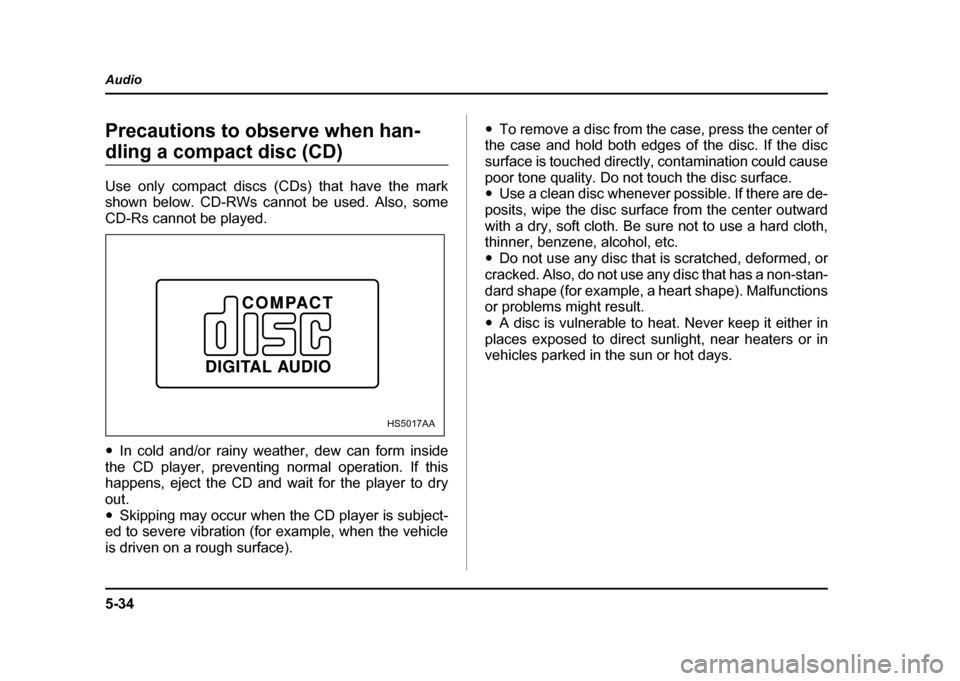
Use only compact discs (CDs) that have the mark
shown below. CD-RWs cannot be used. Also, some
CD-Rs cannot be played. "
In cold and/or rainy weather, dew can form inside
the CD player, preventing normal operation. If this
happens, eject the CD and wait for the player to dry
out." Skipping may occur when the CD player is subject-
ed to severe vibration (for example, when the vehicle
is driven on a rough surface). "
To remove a disc from the case, press the center of
the case and hold both edges of the disc. If the disc
surface is touched directly, contamination could cause
poor tone quality. Do not touch the disc surface. " Use a clean disc whenever possible. If there are de-
posits, wipe the disc surface from the center outward
with a dry, soft cloth. Be sure not to use a hard cloth,
thinner, benzene, alcohol, etc. " Do not use any disc that is scratched, deformed, or
cracked. Also, do not use any disc that has a non-stan-
dard shape (for example, a heart shape). Malfunctions
or problems might result. " A disc is vulnerable to heat. Never keep it either in
places exposed to direct sunlight, near heaters or in
vehicles parked in the sun or hot days.
HS5017AA
Page 251 of 491
6-2
Interior equipment
Interior equipmentInterior light
When leaving your vehicle, make sure the light goes
out to avoid battery discharge. !
Dome light
The dome light switch has three positions: ON: The light stays on continuously.
DOOR (middle position): The dome light comes on
when any of the doors (or the rear gate on wagon) is
opened. The light remains on for several seconds and
gradually goes out after all doors (and the rear gate on
the wagon) are closed or if the key is inserted in the ig- nition switch.
The light also can be turned on by use of the remote
keyless entry transmitter. See the “Remote keyless
entry system” in chapter 2 for detailed information.
OFF:
The light stays off.
! Cargo area light (if equipped)
DOOR: The light comes on only when the rear gate is
opened.
OFF: The light stays off.
ON
DOOR
OFF
HS6025BB
OFF
DOOR
UG6501BB
Page 252 of 491
6-3
Interior equipment
– CONTINUED –
Map light (if equipped)
Vehicle with moonroof Vehicle without moonroof
To turn on the map light, push the switch.
To turn it off, push the switch again.
When leaving the vehicle, make sure the light is turned
off to avoid battery discharge.
UG6021BA
UG6502BA