2004 SUBARU IMPREZA battery
[x] Cancel search: batteryPage 35 of 491
1-8
Seat, seatbelt and SRS airbags
terior is warmed enough or before you leave the vehi-
cle, be sure to turn the switch off.
"
There is a possibility that people with delicate
skin may suffer slight burns even at low tem-
peratures if he/she uses the seat heater for a
long period of time. When using the heater, al-
ways be sure to warn the persons concerned. " Do not put anything on the seat which insu-
lates against heat, such as a blanket, cushion,
or similar items. This may cause the seat heater
to overheat.
NOTE " Use of the seat heater for a long period of time
while the engine is not running can cause battery
discharge. " When cleaning the seat, do not use benzine,
paint thinner, or any similar materials.
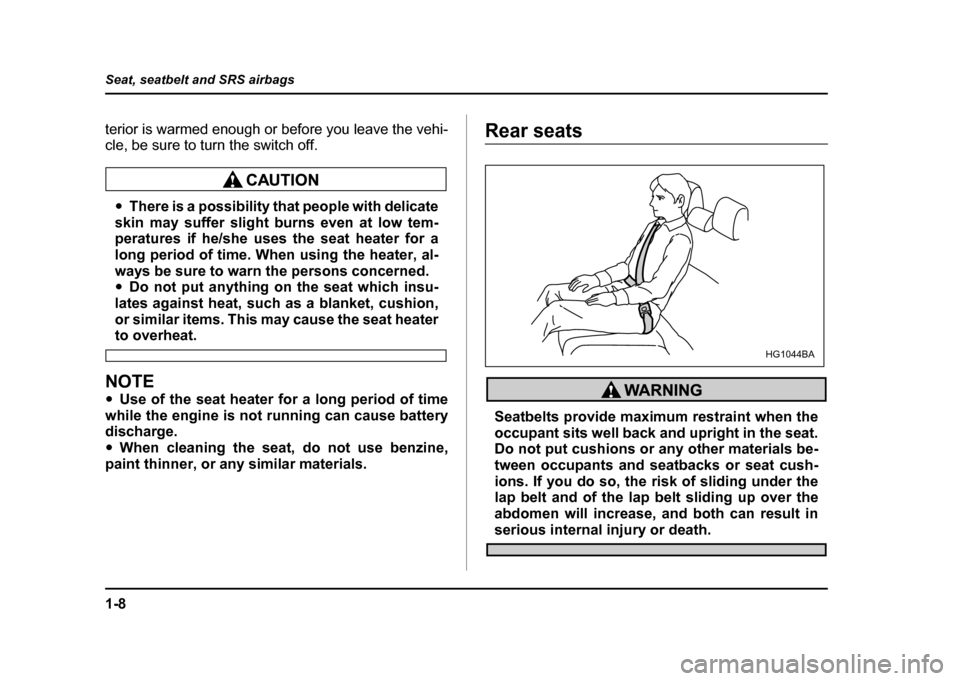
Rear seats
Seatbelts provide maximum restraint when the
occupant sits well back and upright in the seat.
Do not put cushions or any other materials be-
tween occupants and seatbacks or seat cush-
ions. If you do so, the risk of sliding under the
lap belt and of the lap belt sliding up over the
abdomen will increase, and both can result in
serious internal injury or death.
HG1044BA
Page 54 of 491

1-27
Seat, seatbelt and SRS airbags
– CONTINUED –
!Seatbelt maintenance
To clean the seatbelts, use a mild soap and lukewarm
water. Never bleach or dye the belts because this
could seriously affect their strength.
Inspect the seatbelts and attachments including the
webbing and all hardware periodically for cracks, cuts,
gashes, tears, damage, loose bolts or worn areas. Re-
place the seatbelts even if only minor damage is
found.
" Keep the belts free of polishes, oils, chemi-
cals and particularly battery acid. " Never attempt to make modifications or
changes that will prevent the seatbelt from op-
erating properly.
Front seatbelt pretensioners
The driver’s and front passenger’s seatbelts have a
seatbelt pretensioner. The seatbelt pretensioners are
designed to be activated in the event of an accident in-
volving a moderate to severe frontal collision.
The pretensioner sensor also serves as the frontal
SRS airbag sensor. If the sensor detects a certain pre-
determined amount of force during a frontal collision,
the front seatbelt is quickly drawn back in by the re-
tractor to take up the slack so that the belt more effec-
tively restrains the front seat occupant.
When a seatbelt pretensioner is activated, an operat-
HS1067BA
Page 104 of 491

2-1
2
Keys and doors
Keys ............................................................... 2-2 Key number ....................................................... 2-3
Door locks ..................................................... 2-3 Locking and unlocking from the outside ........ 2-3
Locking and unlocking from the inside .......... 2-4
Power door locking switches ...................... 2-5
Remote keyless entry system ..................... 2-6 Locking the doors ............................................. 2-7
Unlocking the doors ......................................... 2-8
Illuminated entry ............................................... 2-8
Vehicle finder function ..................................... 2-8
Sounding a panic alarm ................................... 2-9
Selecting audible signal operation .................. 2-9
Replacing the battery ....................................... 2-9
Replacing lost transmitters .............................. 2-10
Security system (if equipped) ..................... 2-14 System operation .............................................. 2-14
Arming the system ............................................ 2-15
Disarming the system ....................................... 2-17
Valet mode ......................................................... 2-17
Passive arming .................................................. 2-18
Child safety locks ......................................... 2-21
Windows ........................................................ 2-22 Power windows ................................................. 2-22
Trunk lid (Sedan) .......................................... 2-25 To open and close the trunk lid from outside 2-25
To open the trunk lid from inside .................... 2-26
To cancel the trunk lid release ........................ 2-26
Internal trunk lid release handle ...................... 2-26
Rear gate (Wagon) ........................................ 2-29 Moonroof (if equipped) ................................. 2-31
Tilt function ....................................................... 2-31
Sliding function ................................................. 2-31
Sun shades ........................................................ 2-33
Page 110 of 491
2-7
Keys and doors
– CONTINUED –
tions. Range may be reduced near sources of RF in-
terference such as power plants and radio/television
broadcasting towers.
The remote keyless entry system does not operate
when the key is inserted in the ignition switch to pre-
vent accidental lockout.
"Do not expose the transmitter to severe
shocks, such as those experienced as a result
of dropping or throwing." Do not take the transmitter apart except when
replacing the battery." Do not get the transmitter wet. If it gets wet,
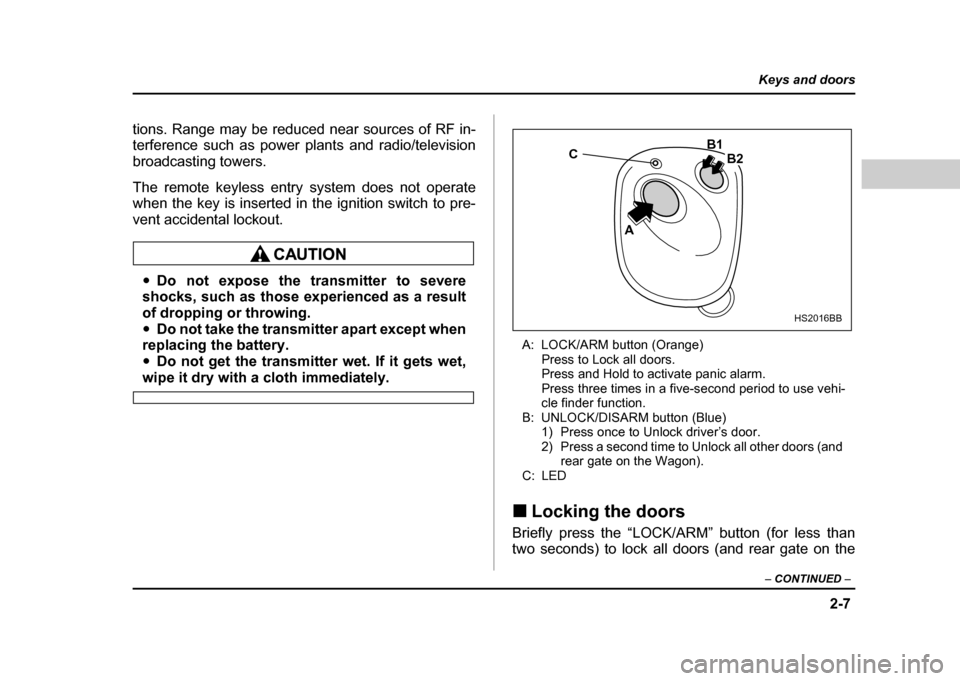
wipe it dry with a cloth immediately. A: LOCK/ARM button (Orange)
Press to Lock all doors.
Press and Hold to activate panic alarm.
Press three times in a five-second period to use vehi-
cle finder function.
B: UNLOCK/DISARM button (Blue) 1) Press once to Unlock driver’s door.
2) Press a second time to Unlock all other doors (and rear gate on the Wagon).
C: LED
! Locking the doors
Briefly press the “LOCK/ARM” button (for less than
two seconds) to lock all doors (and rear gate on the
C
A B1
B2
HS2016BB
Page 112 of 491
2-9
Keys and doors
– CONTINUED –
!Sounding a panic alarm
To activate the alarm, keep the “LOCK/ARM” button
pressed for more than two seconds .
The horn will sound and the turn signal lights will flash.
To deactivate it, press the “LOCK/ARM” button or
“UNLOCK/DISARM” button. Unless a button on the re-
mote is pressed, the alarm will be deactivated after ap-
proximately 30 seconds.
! Selecting audible signal operation
Using an electronic chirp, the system will give you an
audible signal when the doors lock and unlock. If de-
sired, you may turn the audible signal off.
To turn the audible signal off, unlock the door by
pressing the “UNLOCK/DISARM” button and then si-
multaneously depress “LOCK/ARM” and “UNLOCK/
DISARM” buttons for more than two seconds. An elec-
tronic chirp will sound two times and the turn signal
lights will flash two times to inform you that the audible
signal has been turned off.
To turn the audible signal on, unlock the door by
pressing the “UNLOCK/DISARM” button and then si-
multaneously depress “LOCK/ARM” and “UNLOCK/
DISARM” buttons for more than two seconds. An elec-
tronic chirp will sound one time and the turn signal
lights will flash one time to inform you that the audible signal has been turned on. !
Replacing the battery
When the transmitter battery begins to get weak,
transmitter range will begin to decrease and the LED
will not illuminate. Replace the battery as soon as pos-
sible.
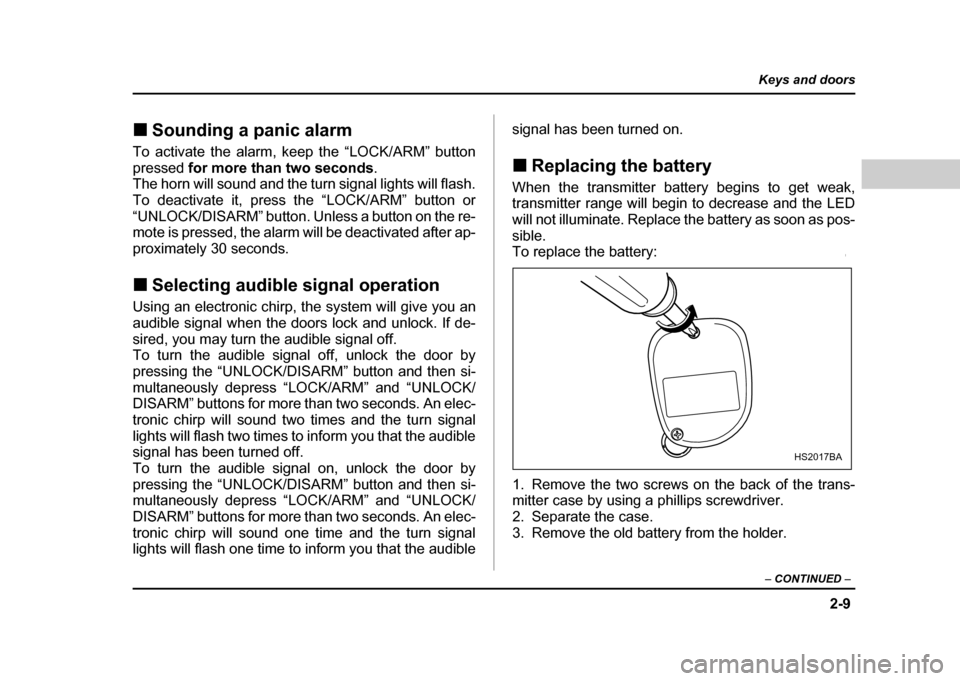
To replace the battery:
0
1. Remove the two screws on the back of the trans-
mitter case by using a phillips screwdriver.
2. Separate the case.
3. Remove the old battery from the holder.
HS2017BA
Page 113 of 491
2-10
Keys and doors
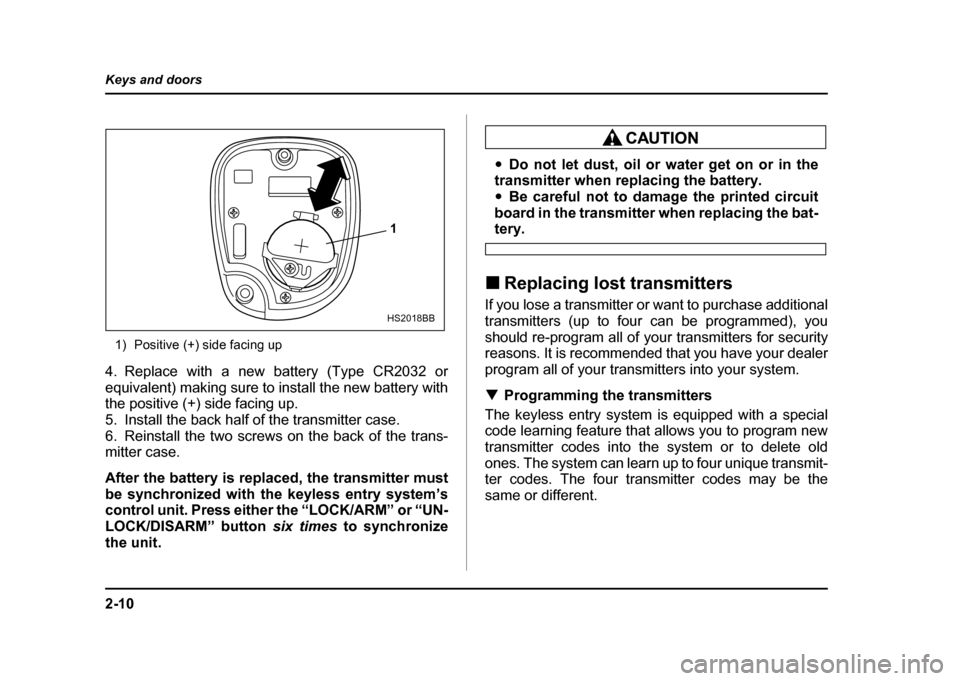
1) Positive (+) side facing up
4. Replace with a new battery (Type CR2032 or
equivalent) making sure to install the new battery with
the positive (+) side facing up.
5. Install the back half of the transmitter case.
6. Reinstall the two screws on the back of the trans-
mitter case. After the battery is replaced, the transmitter must
be synchronized with the keyless entry system’s
control unit. Press either the “LOCK/ARM” or “UN- LOCK/DISARM” button six times to synchronize
the unit.
" Do not let dust, oil or water get on or in the
transmitter when replacing the battery. " Be careful not to damage the printed circuit
board in the transmitter when replacing the bat-
tery.
! Replacing lost transmitters
If you lose a transmitter or want to purchase additional
transmitters (up to four can be programmed), you
should re-program all of your transmitters for security
reasons. It is recommended that you have your dealer
program all of your transmitters into your system. ! Programming the transmitters
The keyless entry system is equipped with a special
code learning feature that allows you to program new
transmitter codes into the system or to delete old
ones. The system can learn up to four unique transmit-
ter codes. The four transmitter codes may be the
same or different.1
HS2018BB
Page 120 of 491

2-17
Keys and doors
– CONTINUED –
7. Close the door. An electronic chirp will sound one
time, the turn signal lights will flash one time and the
indicator light will start flashing slowly (approximately
once every two seconds) to inform you that the system
has armed.
NOTE
The system can be armed even if the engine hood
and/or the windows are opened. Always make
sure that they are fully closed before arming the
system. !Disarming the system
Briefly press the “UNLOCK/DISARM” button (for less
than two seconds) on the remote transmitter. The driv-
er’s door will unlock, an electronic chirp will sound two
times, the turn signal lights will flash two times and the
indicator light will go off.
To unlock all other doors (and the rear gate on the
wagon), briefly press the “UNLOCK/DISARM” button a
second time. ! Emergency disarming
If you cannot disarm the system using the transmitter
(i.e. the transmitter is lost, broken or the transmitter
battery is too weak), you can disarm the system with-
out using the transmitter. To disarm the system:
1. Unlock the door with the key and then open the
door.
2. The alarm will sound.
3. Insert the key into the ignition switch and cycle it
from the “LOCK” to the “ON” position three (3) times
within 5 seconds
.
! Valet mode
When you choose the valet mode, the security system
does not operate. In valet mode, the remote transmit-
ter is used only for locking and unlocking the doors
(and rear gate on the wagon) and panic activation.
To enter the valet mode, open the driver’s door and
keep the “UNLOCK/DISARM” button depressed for
more than two seconds . The security system status
indicator light will continue to flash two times per sec-
ond indicating that the system is in the valet mode.
To exit valet mode, open the driver’s door and keep
the “UNLOCK/DISARM” button pressed for more
than two seconds . The indicator will stop flashing.
NOTE
If the remote transmitter is used to lock or unlock
the doors while the valet mode is selected, the
turn signal lights do not flash but an electronic
Page 123 of 491
2-20
Keys and doors
In passive mode, the system will automatically
activate the alarm but WILL NOT automatically
lock the doors. In order to lock the doors you
must either lock them as indicated in step 4
above or with the key once they have been
closed. Failure to lock the doors manually will
result in a higher security risk.
! Disarming the system
To disarm the system, briefly press the “UNLOCK/
DISARM” button on the transmitter. " Tripped sensor identification
If an electronic chirp sounds four times and the turn
signal lights flash four times when you disarm the sys-
tem, this indicates that the alarm was triggered. The
number of times the indicator light flashes indicates
what sensor caused the alarm condition.
To enter identification mode:
1. Open the driver’s door and leave it open.
2. Turn the ignition switch to the “ON” position twotimes. (“LOCK” → “ON” → “LOCK” → “ON” →
“LOCK”)
3. The indicator light will start flashing. The indicator light provides the following indications.
Flashing one time:
Any door, the rear gate or the
trunk lid has been opened.
Flashing three times: The impact sensor in the sys-
tem’s unit has been activated. This may indicate that
your vehicle has been shocked or tampered with by
some outside force and/or unauthorized person.
Flashing four times: The ignition switch has been
turned on or the battery has been disconnected.
NOTE
The battery must be reconnected before the indi-
cator light will flash.
To exit this mode, close the door and turn the ignition
switch to the “ON” position.