2004 PONTIAC BONNEVILLE Set time
[x] Cancel search: Set timePage 80 of 446
Delayed Locking
This feature lets the driver delay the actual locking of
the vehicle. When the driver’s power door lock switch or
the remote keyless entry transmitter lock button is
pressed, with the key removed from the ignition and the
driver’s door open, a chime will sound three times to
signal that the delayed locking system is active. When
all doors have been closed, the doors will lock
automatically after �ve seconds. If any door is opened
before this, the �ve-second timer will reset itself once all
the doors have been closed again.
Pressing a power door lock switch or the remote
keyless entry transmitter lock button again will override
this feature.
Personalization Programming
The delayed locking feature can be turned on or off.
If your vehicle is equipped with the Driver Information
Center (DIC), you must program this feature through the
DIC. SeeDIC Vehicle Personalization on page 3-64.If your vehicle is not equipped with remote keyless
entry, the delayed locking feature can be turned on or
off by using the following procedure:
1. Keep all doors closed, the vehicle in PARK (P) and
the ignition on throughout this procedure.
2. Press and hold the driver’s power door lock switch
in LOCK through Step 4.
3. Cycle the parking lamp switch from off to on six
times. On the sixth cycle, the doors will unlock to
con�rm that the feature has been turned on.
Your doors will remain locked if delayed locking is
off. If the doors unlock, delayed locking is on.
4. To change modes, cycle the parking lamp switch
once more. A locking action will con�rm the new
mode.
5. Release the power door lock switch.
To turn the feature off, repeat the previous procedure.
2-12
Page 81 of 446
If your vehicle is equipped with remote keyless entry,
your vehicle can be programmed to each driver’s
preference for each of the transmitters. Use the following
procedure to turn the feature off using the corresponding
transmitter:
1. Keep all doors closed, the vehicle in PARK (P) and
the ignition on throughout this procedure.
2. Press and hold the power door lock switch in LOCK
throughout this procedure. All the doors will lock.
3. Press the button with the unlock symbol on the
transmitter. The lock delay is still on and all the
doors will unlock.
4. Press the button with the unlock symbol on the
transmitter again. Lock delay is now off and all
the doors will lock.
5. Release the power door lock switch.
To turn this feature on, repeat the previous procedure.
This procedure changes the mode for only the
transmitter used to change this setting. The procedure
will need to be repeated for the second transmitter.Programmable Automatic Door
Locks
Close the doors and turn on the ignition. Every time you
move the shift lever out of PARK (P), all of the doors
will lock. And, every time you stop and move the
shift lever into PARK (P), the doors will unlock. If
someone needs to get out while you are not in
PARK (P), have that person use the manual door lock
or the power door lock switch. When the door is
closed again, it will not lock automatically. Use the
manual door lock or the power door lock switch to lock
the door again.
Personalization Programming
You can program the automatic door lock feature to
change to the following modes:
Mode 0:No automatic door lock or unlock.
Mode 1:All doors automatically lock when shifted out
of PARK (P). No automatic door unlock.
Mode 2:All doors automatically lock when shifted out
of PARK (P). Only the driver’s door automatically
unlocks when shifted into PARK (P).
2-13
Page 82 of 446
Mode 3:All doors automatically lock when shifted out
of PARK (P). All doors automatically unlock when shifted
into PARK (P).
Mode 4:All doors automatically lock when shifted out
of PARK (P). Only the driver’s door automatically
unlocks when the key is turned to OFF (DIC equipped
vehicles only).
Mode 5:All doors automatically lock when shifted out
of PARK (P). All doors automatically unlock when
the key is turned to OFF (DIC equipped vehicles only).
If your vehicle is equipped with the Driver Information
Center (DIC), you must program this feature through the
DIC. SeeDIC Vehicle Personalization on page 3-64.
If your vehicle is not equipped with remote keyless entry,
use the following procedure to change modes:
1. Keep all doors closed, the vehicle in PARK (P) and
the ignition on throughout this procedure.
2. Press and hold the driver’s power door lock switch
in LOCK through Step 3.
3. Cycle the shift lever, starting in PARK (P), out of
PARK (P) and then back into PARK (P), to
advance by one mode for each cycle.
After the �rst cycle, you will hear a door locking
action, which identi�es the current mode.4. Release the power door lock switch. The automatic
door locks will remain in the most recent mode
selected.
If your vehicle is equipped with remote keyless entry,
use the following procedure to change modes:
1. Keep all doors closed, the vehicle in PARK (P) and
the ignition on throughout this procedure.
2. Press and hold the driver’s power door lock switch
in LOCK through Step 4.
3. Press the button with the lock symbol on the
remote keyless entry transmitter. The automatic
door locks will remain in the current mode.
4. Press the button with the lock symbol on the
transmitter again. Each time the transmitter’s
lock button is pressed, the mode will advance by
one, going from 3 to 0 to 1, etc.
The door locks will cycle according to the mode
entered. Mode “0” has no feedback.
5. Release the power door lock switch. The automatic
door locks will remain in the most recent mode
selected.
This procedure changes the mode for only the
transmitter used to change this setting. The procedure
will need to be repeated for the second transmitter.
2-14
Page 119 of 446
2. Adjust the driver’s seat and lumbar position to a
safe and comfortable driving position. Adjust both
outside mirrors to suit you. SeeDIC Vehicle
Personalization on page 3-64.
3. Press and hold the MEMORY button corresponding
with your DRIVER # displayed on the DIC for longer
than three seconds. You will hear two beeps
con�rming that the seat and mirror positions have
been entered into memory.
To set the seat and mirror positions for a second driver,
follow the previous steps, but start by pressing the
unlock button on the transmitter that displays the other
DRIVER # on the DIC. Be sure to use the MEMORY
button which corresponds to the DRIVER # identi�ed by
the second transmitter.
To recall your memory positions, your vehicle must be
in PARK (P). Push and release the MEMORY button
corresponding to the desired driving position. The seat
and mirrors will move to the position previously
stored for the identi�ed driver. You will hear one beep.
To store the exit position for an easy exit, use the
following procedure:
1. First identify the DRIVER # by pressing MEMORY
button 1 or 2 or by pressing the unlock button on
the transmitter.
2. Adjust the driver’s seat to the desired exit position.3. Press and hold the EXIT button for longer than
three seconds. You will hear two beeps con�rming
that the seat exit position has been entered into
memory.
To set the exit position for a second driver, follow the
previous steps, but start by pressing the unlock
button on the transmitter that displays the other
DRIVER # on the DIC. Be sure to use the MEMORY
button which corresponds to the DRIVER # identi�ed by
the other transmitter.
To recall the exit position, your vehicle must be in
PARK (P). Push and release the EXIT button and the
seat will move to the exit position previously stored
for the current identi�ed driver. You will hear one beep.
If an exit position has not been stored for the current
identi�ed driver, the seat will move all the way back.
To stop recall movement of the seat at any time, press
the driver’s power seat control located on the outboard
side of the front seat.
Mirrors and lumbar positions will not be stored or
recalled for the exit position.
If you would like your stored driving or exit position to
be recalled when unlocking your vehicle with the
transmitter, seeDIC Vehicle Personalization on
page 3-64.
2-51
Page 122 of 446
Audio System(s).............................................3-73
Setting the Time...........................................3-73
Radio with CD..............................................3-74
Radio with Cassette and CD..........................3-86
Trunk-Mounted CD Changer.........................3-101
Theft-Deterrent Feature................................3-105
Audio Steering Wheel Controls......................3-105Radio Reception.........................................3-106
Care of Your Cassette Tape Player...............3-107
Care of Your CDs.......................................3-108
Care of Your CD Player...............................3-108
Diversity Antenna System.............................3-108
XM™ Satellite Radio Antenna System............3-109
Chime Level Adjustment...............................3-109
Section 3 Instrument Panel
3-2
Page 131 of 446
Setting Cruise Control
{CAUTION:
If you leave your cruise control on when you
are not using cruise, you might hit a button
and go into cruise when you do not want to.
You could be startled and even lose control.
Keep the cruise control switch off until you
want to use cruise control.
1. Move the cruise control switch to ON.
2. Get up to the speed you want.
3. Press the SET button.
4. Take your foot off the accelerator pedal.
Resuming a Set Speed
Suppose you set your cruise control at a desired speed
and then you apply the brake. This, of course, shuts
off the cruise control. But you do not need to reset it.
Once you are going about 25 mph (40 km/h) or
more, you can move the cruise lever to R/A
(resume/accelerate) brie�y.You will go right back up to your chosen speed and stay
there. Remember that if you hold the lever at R/A, the
vehicle will keep going faster until you release the switch
or apply the brake. So unless you want to go faster,
do not hold the lever at R/A.
Increasing Speed While Using Cruise
Control
There are two ways to go to a higher speed.
Use the accelerator pedal to get to the higher
speed. Press the SET button and then release it as
well as the accelerator pedal. You will now cruise
at the higher speed.
Move the cruise switch to R/A. Hold it there until
you get up to the speed you want, and then
release it. To increase your speed in very small
amounts, move the switch to R/A brie�y and then
release it. Each time you do this, your vehicle will go
about 1 mph (1.6 km/h) faster.
The accelerate feature will only work after you have set
the cruise control speed by pressing the SET button.
3-11
Page 132 of 446
Reducing Speed While Using Cruise
Control
There are two ways to reduce your speed while using
cruise control:
Press and hold the SET button until you get to the
speed you want, and then release it.
To slow down in very small amounts, press and
release the SET button brie�y. Each time you
do this, you will go about 1 mph (1.6 km/h) slower.
Passing Another Vehicle While Using
Cruise Control
Use the accelerator pedal to increase your speed.
When you take your foot off the pedal, your vehicle will
slow down to the cruise control speed you set earlier.
Using Cruise Control on Hills
How well your cruise control will work on hills depends
upon your speed, load and the steepness of the
hills. When going up steep hills, you may have to step
on the accelerator pedal to maintain your speed.
When going downhill, you may have to brake or shift to
a lower gear to keep your speed down. Of course,
applying the brake takes you out of cruise control. Many
drivers �nd this to be too much trouble and do not
use cruise control on steep hills.
Ending Cruise Control
There are three ways to turn off the cruise control:
Step lightly on the brake pedal.
Move the cruise switch to OFF.
Pull the multifunction lever toward the driver.
Erasing Speed Memory
When you turn off the cruise control or the ignition, your
cruise control set speed memory is erased.
3-12
Page 134 of 446
Windshield Washer
At the end of the wiper lever, there is a button. To spray
washer �uid on the windshield, push the button until
you have enough �uid to clean the windshield. The
wipers will clear the window and either stop or return to
your preset speed.
{CAUTION:
In freezing weather, do not use your washer
until the windshield is warmed. Otherwise the
washer �uid can form ice on the windshield,
blocking your vision.
A WASHER FLUID warning light will indicate if the �uid
level in the windshield washer reservoir is low. See
Low Washer Fluid Warning Light on page 3-53.
Exterior Lamps
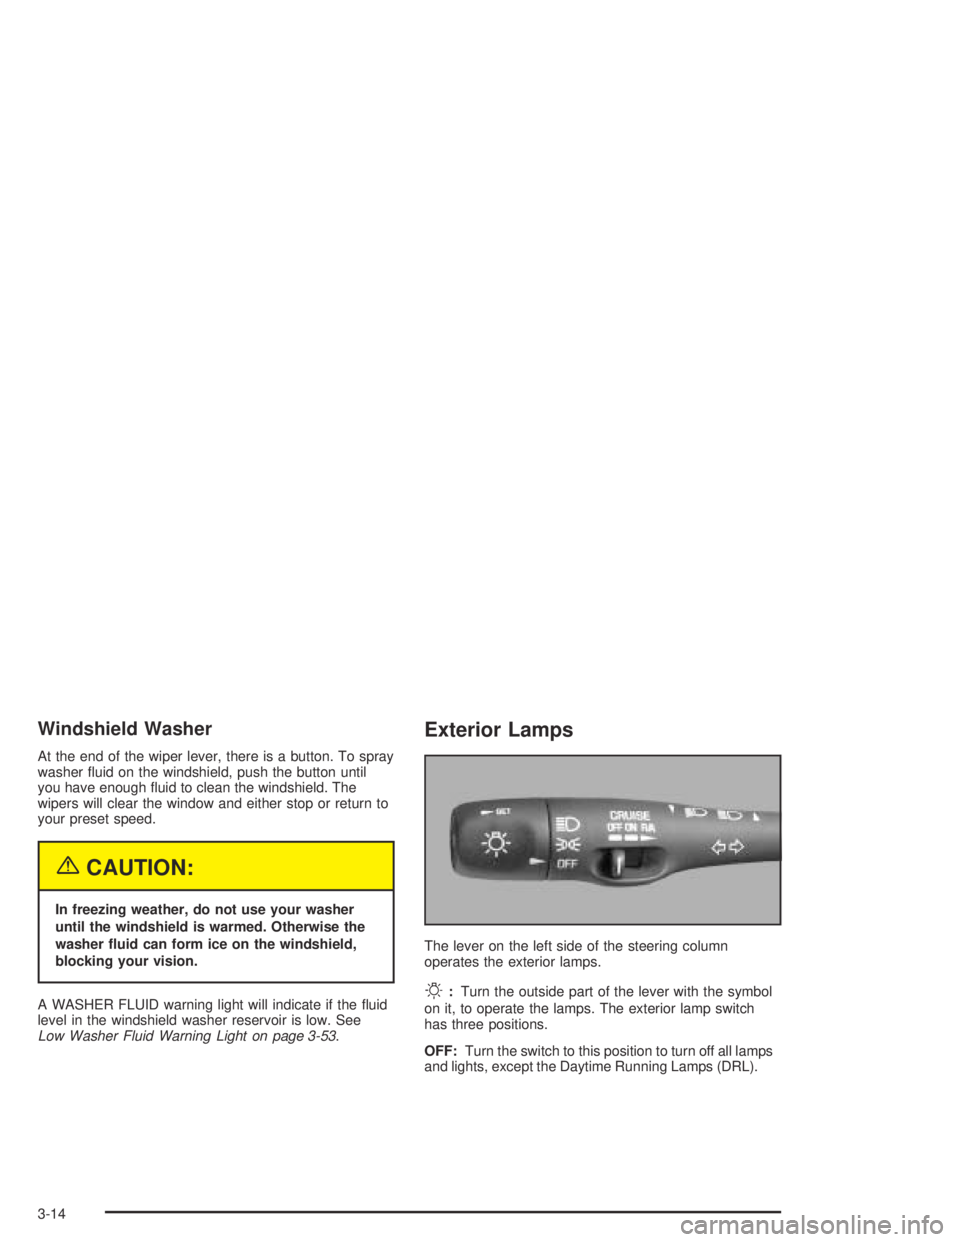
The lever on the left side of the steering column
operates the exterior lamps.
O:Turn the outside part of the lever with the symbol
on it, to operate the lamps. The exterior lamp switch
has three positions.
OFF:Turn the switch to this position to turn off all lamps
and lights, except the Daytime Running Lamps (DRL).
3-14