Page 1152 of 1833
REAR AXLE &
REAR SUSPENSION
SECTION
RA
CONTENTS
PRECAUTIONS AND PREPARATION ............................2
Precautions ..................................................................2
Preparation ..................................................................2
REAR AXLE AND REAR SUSPENSION ........................4
CHECK AND ADJUSTMENT ..........................................5
Rear Axle and Rear Suspension Parts .......................5
Rear Wheel Bearing ....................................................5
REAR AXLE .....................................................................6
Components.................................................................6
Removal .......................................................................7
Inspection.....................................................................8 Installation ....................................................................9
REAR AXLE AND REAR SUSPENSION ......................12
Removal and Installation ...........................................12
REAR SUSPENSION.....................................................13 Components...............................................................13
Coil Spring Shock Absorber ......................................14
Upper Link, Lower Link and Panhard Rod ................14
Stabilizer Bar .............................................................15
SERVICE DATA AND SPECIFICATIONS (SDS) ..........16
General Specifications ...............................................16
Inspection and Adjustment ........................................16
http://vnx.su/
Page 1153 of 1833
Precautions
IWhen installing each rubber part, final tightening must be car-
ried out under unladen condition* with tires on ground.
* Fuel, radiator coolant and engine oil full. Spare tire, jack,
hand tools and mats in designated positions.
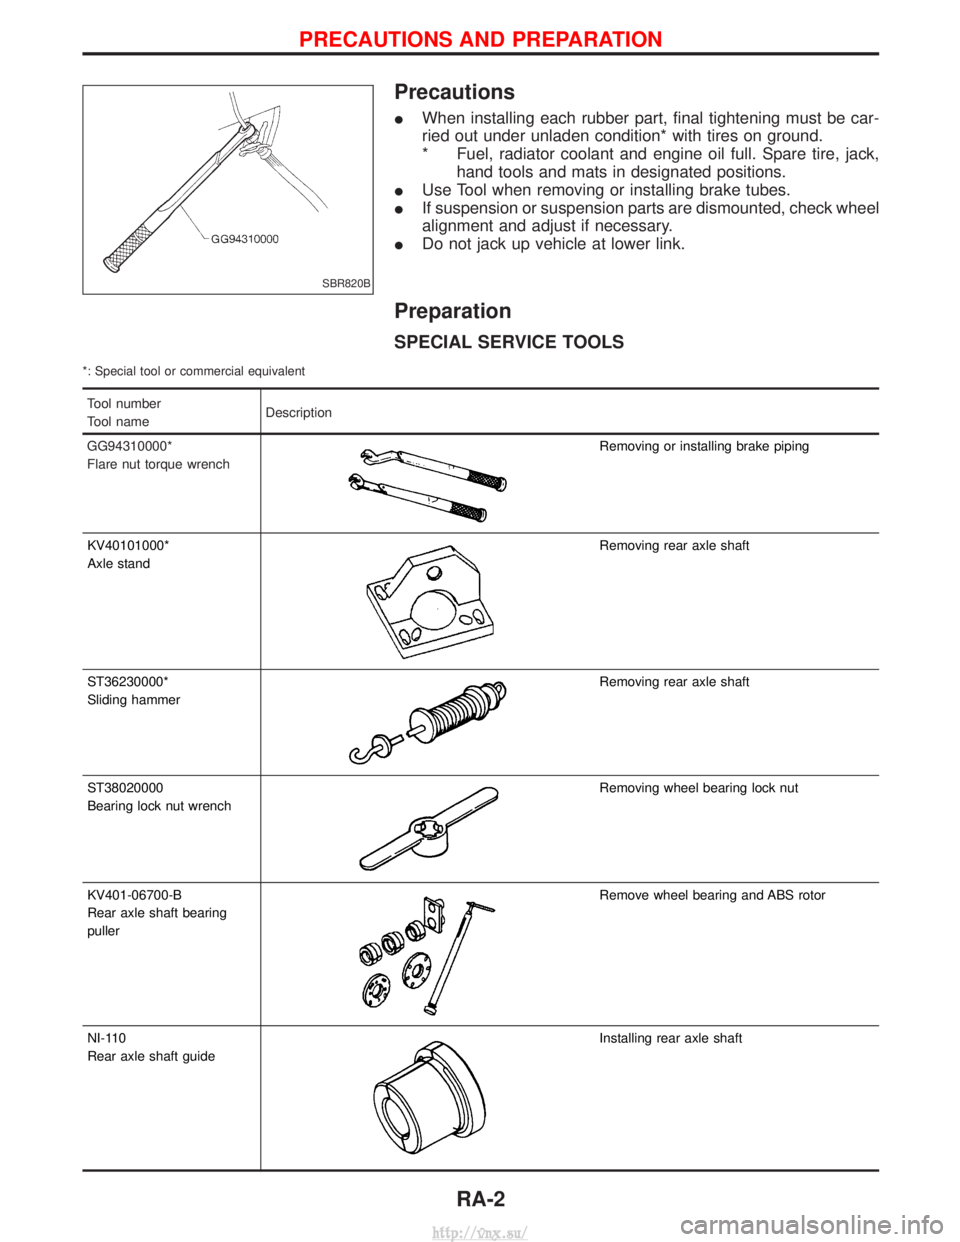
I Use Tool when removing or installing brake tubes.
I If suspension or suspension parts are dismounted, check wheel
alignment and adjust if necessary.
I Do not jack up vehicle at lower link.
Preparation
SPECIAL SERVICE TOOLS
*: Special tool or commercial equivalent
Tool number
Tool name Description
GG94310000*
Flare nut torque wrench
Removing or installing brake piping
KV40101000*
Axle stand
Removing rear axle shaft
ST36230000*
Sliding hammer
Removing rear axle shaft
ST38020000
Bearing lock nut wrench
Removing wheel bearing lock nut
KV401-06700-B
Rear axle shaft bearing
puller
Remove wheel bearing and ABS rotor
NI-110
Rear axle shaft guide
Installing rear axle shaft
SBR820B
PRECAUTIONS AND PREPARATION
RA-2
http://vnx.su/
Page 1155 of 1833
YRA008
REAR AXLE AND REAR SUSPENSION
RA-4
http://vnx.su/
Page 1156 of 1833
Rear Axle and Rear Suspension Parts
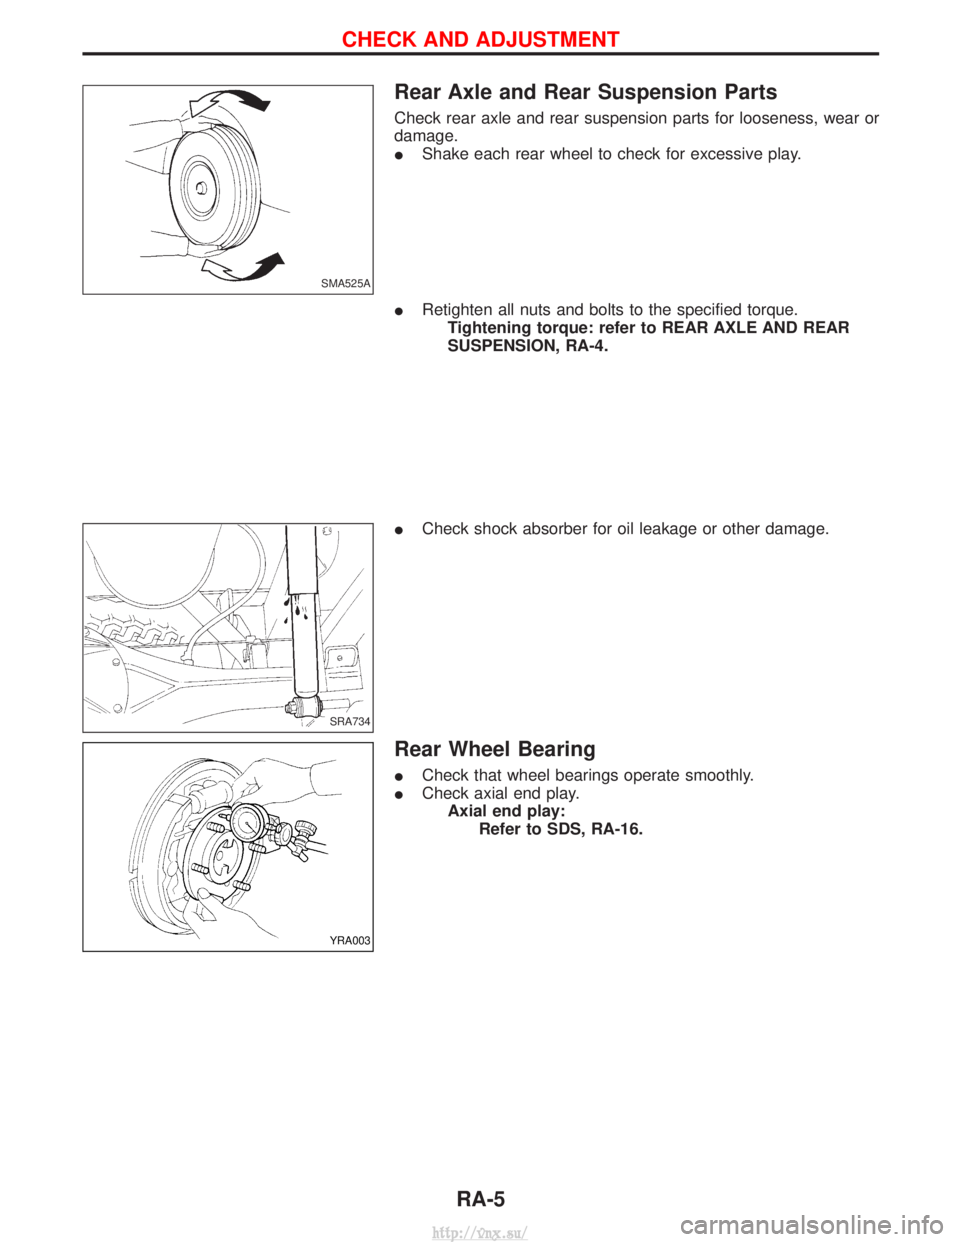
Check rear axle and rear suspension parts for looseness, wear or
damage.
IShake each rear wheel to check for excessive play.
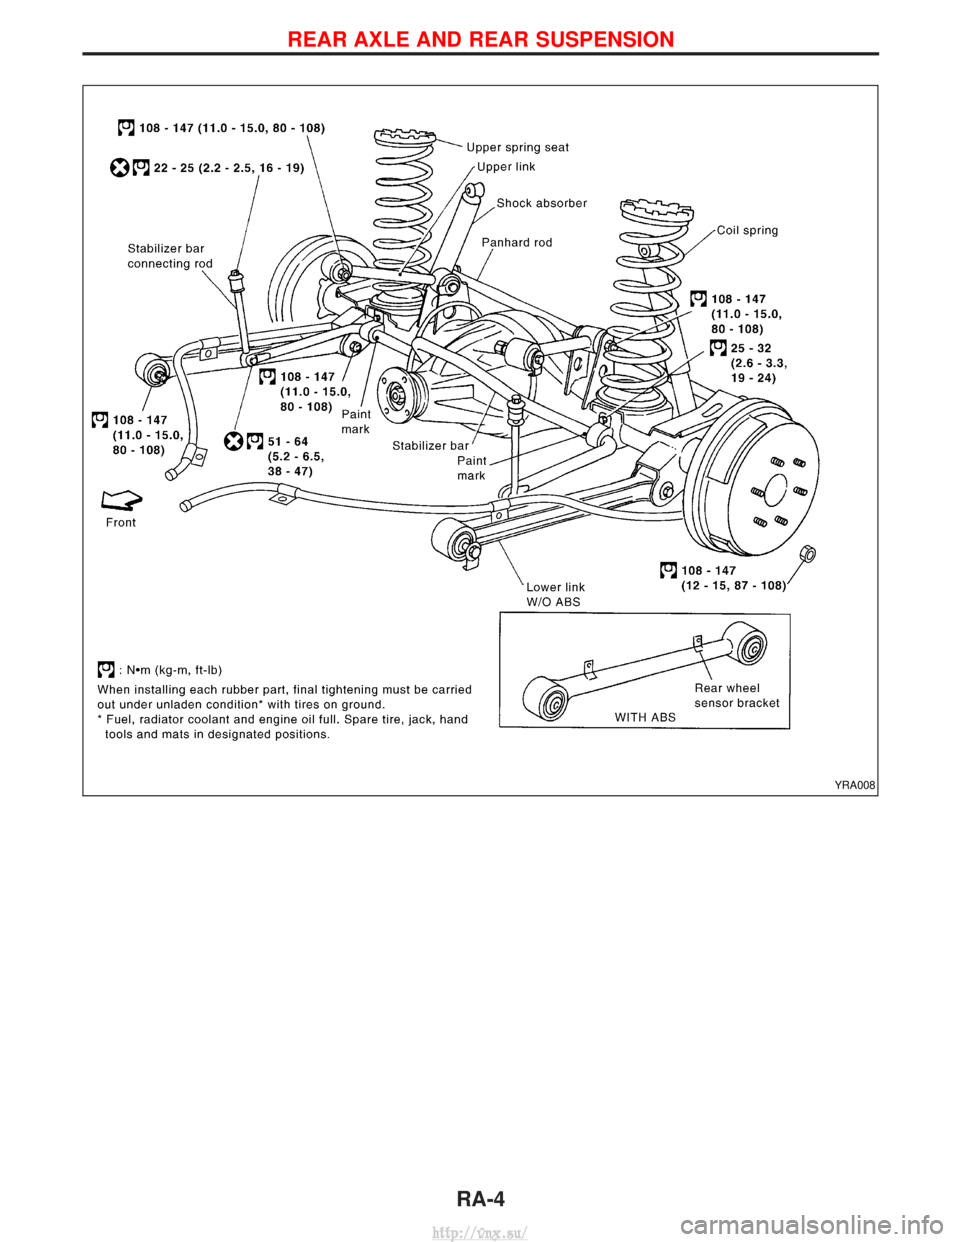
I Retighten all nuts and bolts to the specified torque.
Tightening torque: refer to REAR AXLE AND REAR
SUSPENSION, RA-4.
I Check shock absorber for oil leakage or other damage.
Rear Wheel Bearing
ICheck that wheel bearings operate smoothly.
I Check axial end play.
Axial end play: Refer to SDS, RA-16.
SMA525A
SRA734
YRA003
CHECK AND ADJUSTMENT
RA-5
http://vnx.su/
Page 1163 of 1833
Removal and Installation
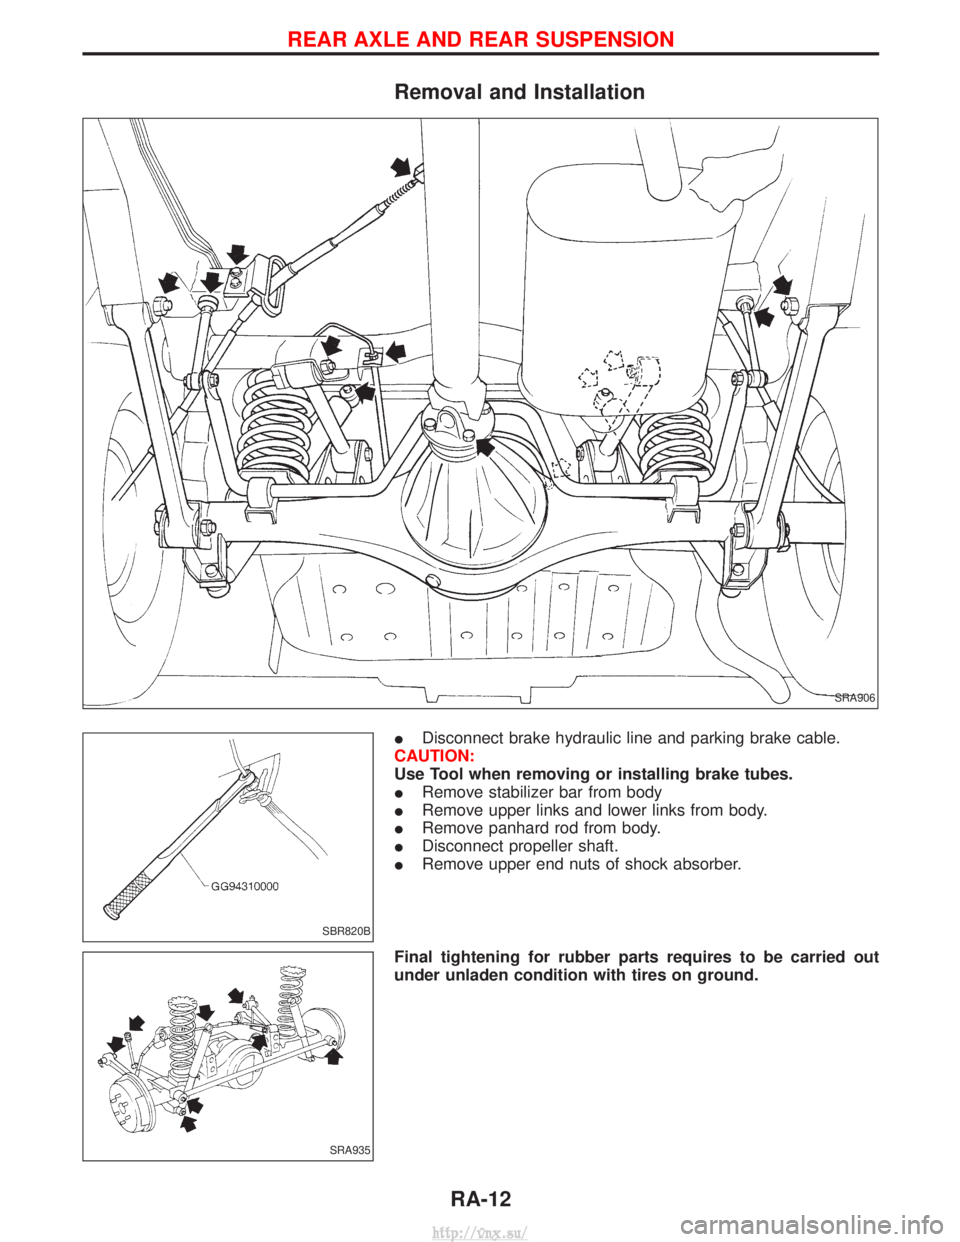
IDisconnect brake hydraulic line and parking brake cable.
CAUTION:
Use Tool when removing or installing brake tubes.
I Remove stabilizer bar from body
I Remove upper links and lower links from body.
I Remove panhard rod from body.
I Disconnect propeller shaft.
I Remove upper end nuts of shock absorber.
Final tightening for rubber parts requires to be carried out
under unladen condition with tires on ground.
SRA906
SBR820B
SRA935
REAR AXLE AND REAR SUSPENSION
RA-12
http://vnx.su/
Page 1164 of 1833
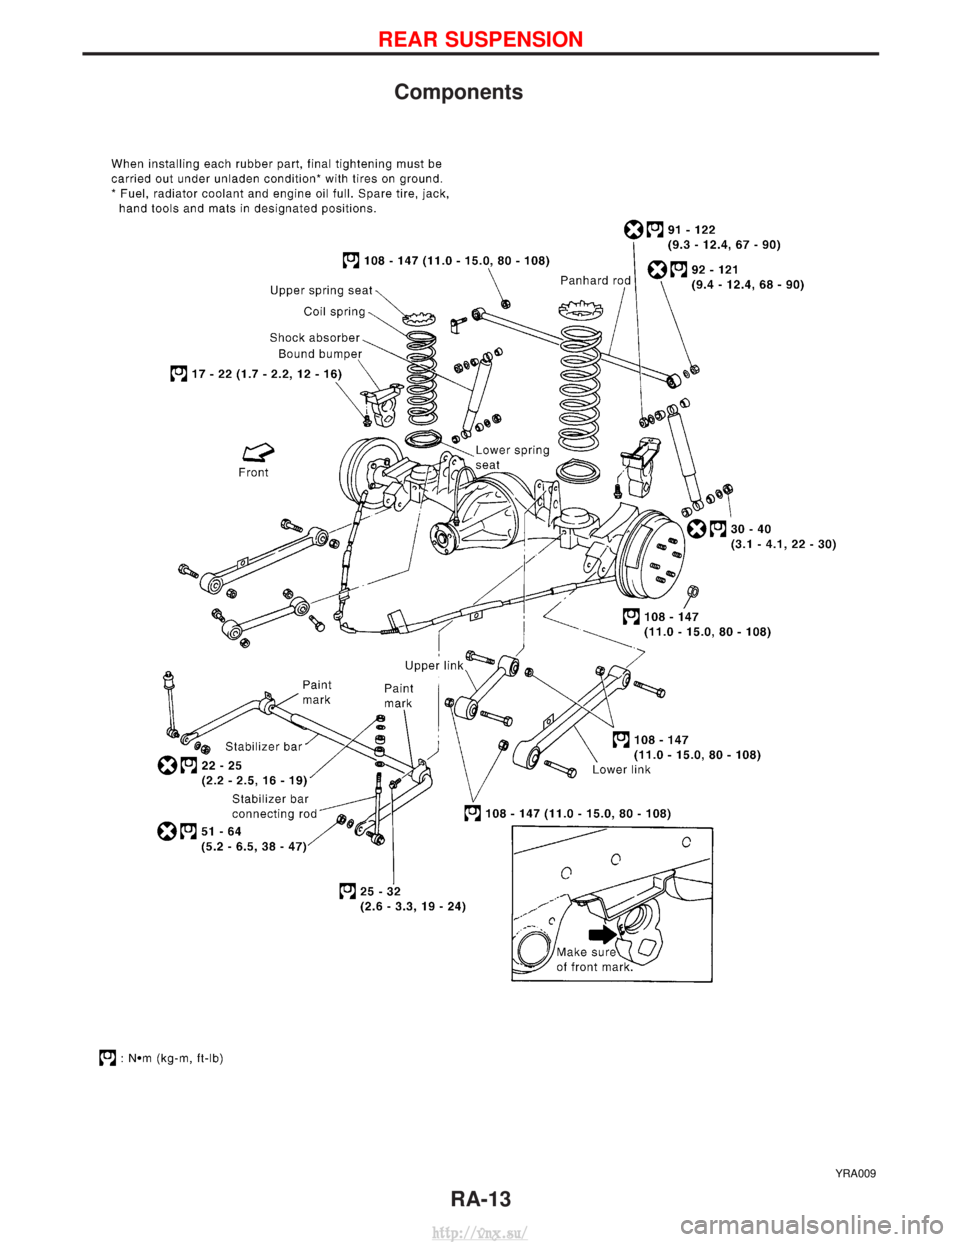
Components
YRA009
REAR SUSPENSION
RA-13
http://vnx.su/
Page 1165 of 1833
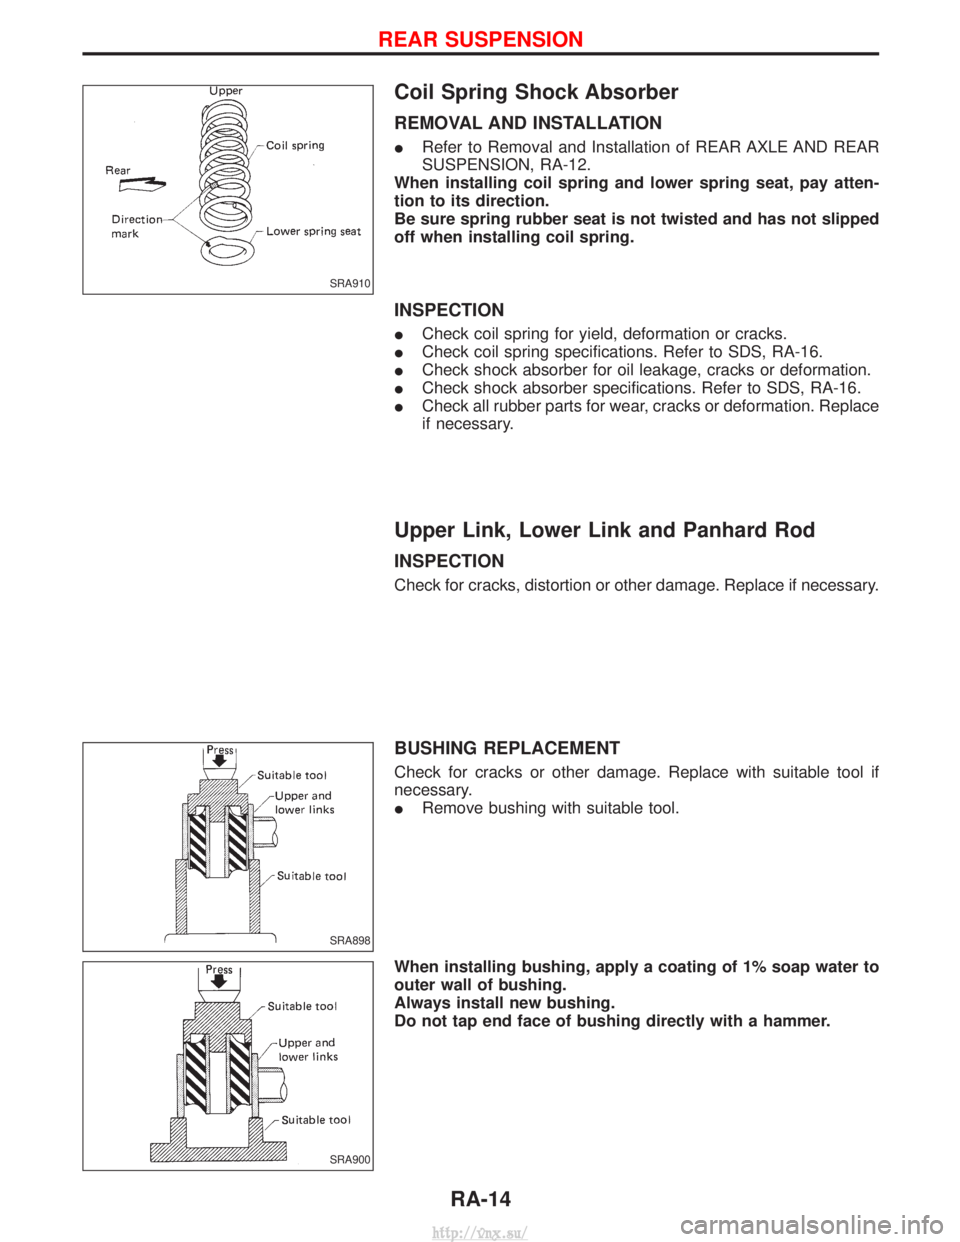
Coil Spring Shock Absorber
REMOVAL AND INSTALLATION
IRefer to Removal and Installation of REAR AXLE AND REAR
SUSPENSION, RA-12.
When installing coil spring and lower spring seat, pay atten-
tion to its direction.
Be sure spring rubber seat is not twisted and has not slipped
off when installing coil spring.
INSPECTION
I Check coil spring for yield, deformation or cracks.
I Check coil spring specifications. Refer to SDS, RA-16.
I Check shock absorber for oil leakage, cracks or deformation.
I Check shock absorber specifications. Refer to SDS, RA-16.
I Check all rubber parts for wear, cracks or deformation. Replace
if necessary.
Upper Link, Lower Link and Panhard Rod
INSPECTION
Check for cracks, distortion or other damage. Replace if necessary.
BUSHING REPLACEMENT
Check for cracks or other damage. Replace with suitable tool if
necessary.
IRemove bushing with suitable tool.
When installing bushing, apply a coating of 1% soap water to
outer wall of bushing.
Always install new bushing.
Do not tap end face of bushing directly with a hammer.
SRA910
SRA898
SRA900
REAR SUSPENSION
RA-14
http://vnx.su/
Page 1166 of 1833
INSTALLATION
When installing each link, pay attention to direction of bolts
and nuts. Refer to REAR SUSPENSION - Components, RA-13.
When installing each rubber part, final tightening must be car-
ried out under unladen condition with tires on ground.
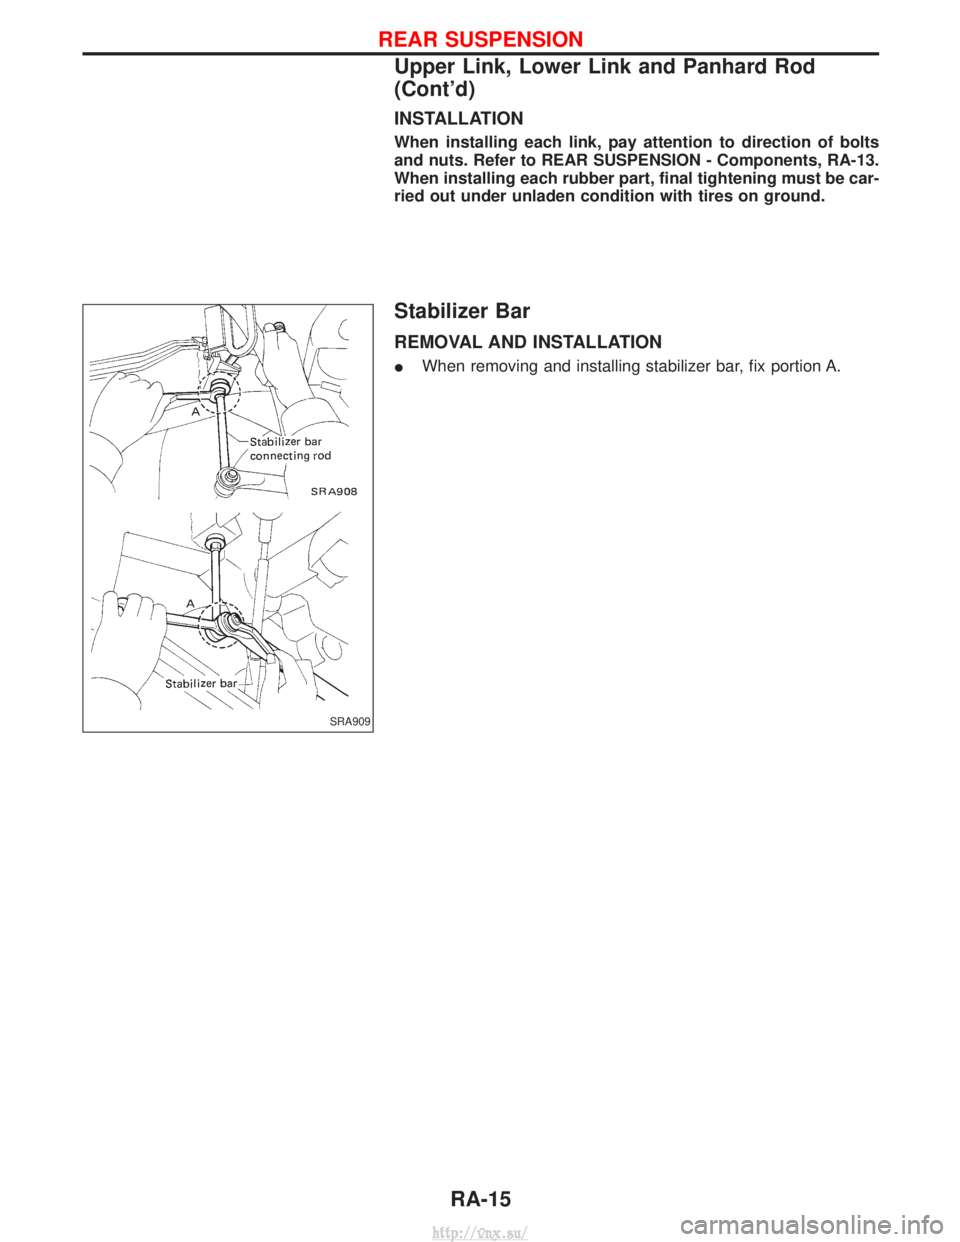
Stabilizer Bar
REMOVAL AND INSTALLATION
IWhen removing and installing stabilizer bar, fix portion A.
SRA909
REAR SUSPENSION
Upper Link, Lower Link and Panhard Rod
(Cont'd)
RA-15
http://vnx.su/