Page 171 of 418

170 Controls in detailGood visibilityWindshield wipers
For more information on the windshield
wipers, see “Windshield wipers”
(�page 50).
A rain sensor automatically controls the
windshield wipers depending on how wet
the windshield is.
�
Switch on ignition.
�
Set wiper switch to position I
(�page 50).
After the initial wipe, pauses between
wipes are automatically controlled by the
rain sensor.
Headlamp cleaning system
The switch is located on the left side of the
dashboard.
1Headlamp washer switch�
Switch on ignition.
�
Press switch1.
The headlamps are cleaned with a
high-pressure water jet.
For information on filling up the washer
reservoir, see “Windshield washer system
and headlamp cleaning system”
(
�page 269).
iIntermittent wiping is interrupted when
the vehicle is at a standstill and a door
is opened.
!Do not leave windshield wipers in inter-
mittent setting when vehicle is taken to
an automatic car wash or during wind-
shield cleaning. Wipers will operate in
the presence of water sprayed on the
windshield, and wipers may be dam-
aged as a result.
The switch should not be left in inter-
mittent setting as the wipers will wipe
the windshield once every time the en-
gine is started. Dust that accumulates
on the windshield might scratch the
glass and/or damage the wiper blades
when wiping occurs on a dry wind-
shield.
Page 173 of 418
172 Controls in detailGood visibilityAdjusting the vanity mirror�
Slide the mirror to the left or to the
right.
Images in the mirror appear in normal
size or larger, depending on the posi-
tion of the mirror.
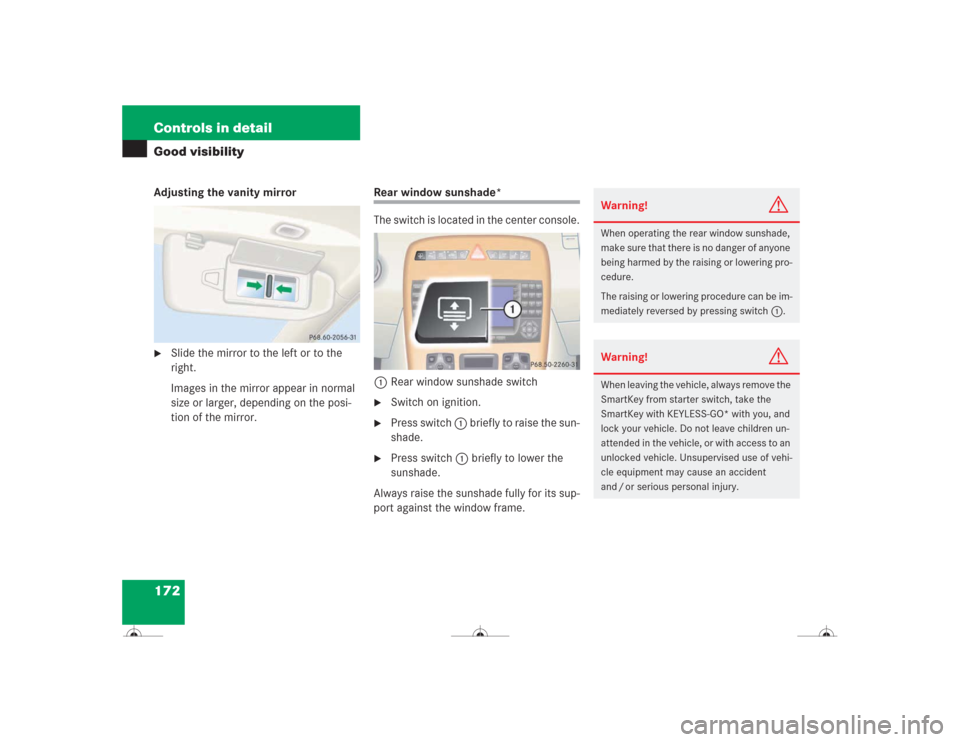
Rear window sunshade*
The switch is located in the center console.
1Rear window sunshade switch�
Switch on ignition.
�
Press switch 1 briefly to raise the sun-
shade.
�
Press switch 1 briefly to lower the
sunshade.
Always raise the sunshade fully for its sup-
port against the window frame.
Warning!
G
When operating the rear window sunshade,
make sure that there is no danger of anyone
being harmed by the raising or lowering pro-
cedure.
The raising or lowering procedure can be im-
mediately reversed by pressing switch1.Warning!
G
When leaving the vehicle, always remove the
SmartKey from starter switch, take the
SmartKey with KEYLESS-GO* with you, and
lock your vehicle. Do not leave children un-
attended in the vehicle, or with access to an
unlocked vehicle. Unsupervised use of vehi-
cle equipment may cause an accident
and / or serious personal injury.
Page 185 of 418
184 Controls in detailAutomatic climate controlDeactivating�
Press buttonT (
�page 175).
The indicator lamp on buttonT
goes out.
The residual heat is automatically turned
off:
�
when the ignition is switched on
�
after about 30 minutes
�
if the battery voltage dropsVentilated storage compartment
(except CL 55 AMG)
The storage compartment under the front
armrest (
�page 222) can be ventilated
when the automatic air conditioning is
switched on. The switch is located inside
the storage compartment in the front. The
air temperature is about the same as that
of the center air vents.
The air volume is dependent on the setting
of:
�
Air distribution control
�
Air volume control
�
Air vents in the dashboard
The air temperature is about the same as
that of the dashboard air vents. It cannot
be regulated separately.Switching ventilation on
�
Open the storage compartment in front
of the armrest, see “Storage compart-
ment below the front armrest”
(�page 222)
�
Push upper portion of switch.
Switching ventilation off
�
Open the storage compartment in front
of the armrest, see “Storage compart-
ment below the front armrest”
(�page 222)
�
Push lower portion of switch.
iHow long the system will provide heat-
ing depends on the coolant tempera-
ture and the temperature set by the
operator. The blower will run at speed
setting1 regardless of the air
distribution control setting.
!Do not obstruct the air vent in the stor-
age compartment.iThe compartment can get very warm
due to its confined space. When storing
heat sensitive objects in the compart-
ment, close the air vent while heating
the passenger compartment.
Page 188 of 418
187 Controls in detail
Power windows
�
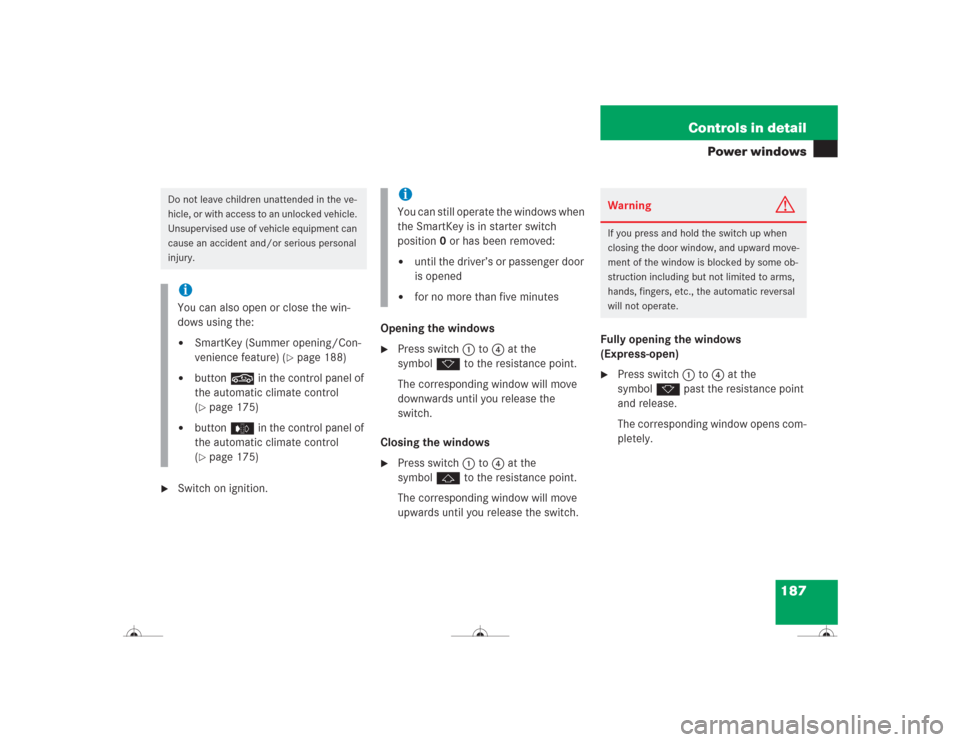
Switch on ignition.Opening the windows
�
Press switch1 to 4 at the
symbolk to the resistance point.
The corresponding window will move
downwards until you release the
switch.
Closing the windows
�
Press switch1 to 4 at the
symbolj to the resistance point.
The corresponding window will move
upwards until you release the switch.Fully opening the windows
(Express-open)
�
Press switch1 to 4 at the
symbolk past the resistance point
and release.
The corresponding window opens com-
pletely.
Do not leave children unattended in the ve-
hicle, or with access to an unlocked vehicle.
Unsupervised use of vehicle equipment can
cause an accident and/or serious personal
injury.iYou can also open or close the win-
dows using the:�
SmartKey (Summer opening/Con-
venience feature) (
�page 188)
�
button, in the control panel of
the automatic climate control
(�page 175)
�
buttone in the control panel of
the automatic climate control
(�page 175)
iYou can still operate the windows when
the SmartKey is in starter switch
position0 or has been removed:�
until the driver’s or passenger door
is opened
�
for no more than five minutes
Warning
G
If you press and hold the switch up when
closing the door window, and upward move-
ment of the window is blocked by some ob-
struction including but not limited to arms,
hands, fingers, etc., the automatic reversal
will not operate.
Page 191 of 418
190 Controls in detailPower windows
Synchronizing the power windows
The power window must be resynchro-
nized each time �
after the battery has been disconnect-
ed.
�
if the power windows cannot be fully
opened (Express-open) or closed
(Express-close).Synchronizing
�
Switch on ignition.
�
Press the power window switches at
the symbolj until the side win-
dows are closed.
Hold the switches for approximately
one second.
The power windows are synchronized.
If potential danger exists, proceed as fol-
lows:�
Release the lock button.
�
Pull on the door handle and hold firmly.
The side windows and the
sliding / pop-up roof will open for as long
as the door handle is held but the door
not opened.
��
Page 193 of 418
192 Controls in detailSliding / pop-up roof
�
Switch on ignition.
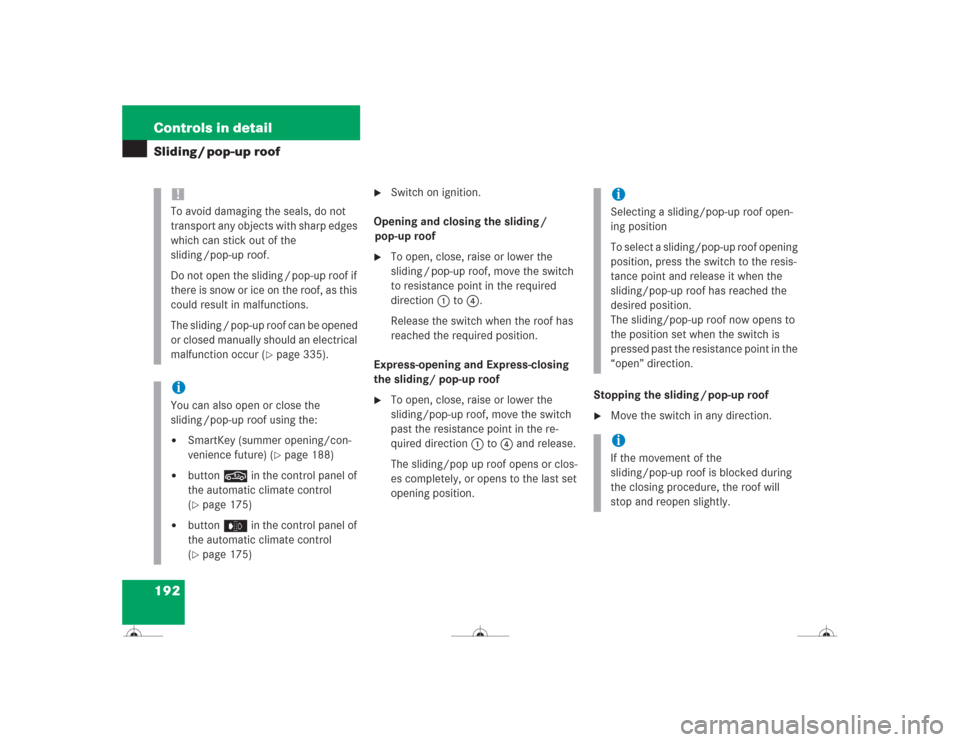
Opening and closing the sliding /
pop-up roof
�
To open, close, raise or lower the
sliding / pop-up roof, move the switch
to resistance point in the required
direction1to4.
Release the switch when the roof has
reached the required position.
Express-opening and Express-closing
the sliding/ pop-up roof
�
To open, close, raise or lower the
sliding/pop-up roof, move the switch
past the resistance point in the re-
quired direction1to4 and release.
The sliding/pop up roof opens or clos-
es completely, or opens to the last set
opening position.Stopping the sliding / pop-up roof
�
Move the switch in any direction.
!To avoid damaging the seals, do not
transport any objects with sharp edges
which can stick out of the
sliding /pop-up roof.
Do not open the sliding / pop-up roof if
there is snow or ice on the roof, as this
could result in malfunctions.
The sliding / pop-up roof can be opened
or closed manually should an electrical
malfunction occur (
�page 335).
iYou can also open or close the
sliding /pop-up roof using the:�
SmartKey (summer opening/con-
venience future) (
�page 188)
�
button, in the control panel of
the automatic climate control
(�page 175)
�
buttone in the control panel of
the automatic climate control
(�page 175)
iSelecting a sliding/pop-up roof open-
ing position
To select a sliding/pop-up roof opening
position, press the switch to the resis-
tance point and release it when the
sliding/pop-up roof has reached the
desired position.
The sliding/pop-up roof now opens to
the position set when the switch is
pressed past the resistance point in the
“open” direction.iIf the movement of the
sliding/pop-up roof is blocked during
the closing procedure, the roof will
stop and reopen slightly.
Page 195 of 418
194 Controls in detailSliding / pop-up roofClosing the sliding/pop-up roof with
KEYLESS-GO* (Convenience feature)
The power window (
�page 186) will also
be closed when the sliding/pop-up roof is
operated with KEYLESS-GO.
�
Press and hold lock button at door
(�page 57) until the sliding / pop-up
roof and the side windows are closed.
Synchronizing the sliding / pop-up roof
The power sliding / pop-up roof must be re-
synchronized each time after:�
the battery has been disconnected
�
the sliding / pop-up roof has been
closed manually
�
the sliding / pop-up roof does not open
smoothly
�
a malfunction
Synchronizing
�
Switch on ignition.
�
Press and hold the switch in
direction1 until the sliding/pop-up
roof is fully raised at the rear.
Hold the switch for approximately one
second.
The sliding/pop-up roof is synchro-
nized.
Warning!
G
When closing the windows and the
sliding /pop-up roof, make sure that there is
no danger of anyone being harmed by the
closing procedure.
The sliding/pop-up roof will not automati-
cally reopen if blocked during convenience
closing.
If potential danger exists, proceed as fol-
lows:�
Release the lock button.
�
Pull on the door handle and hold firmly.
The side windows and the
sliding / pop-up roof will open for as long
as the door handle is held but the door
not opened.
Page 215 of 418

214 Controls in detailDriving systemsParktronic system* (Parking assist)
The Parktronic system is an electronic aid
designed to assist the driver during park-
ing maneuvers. It visually and audibly indi-
cates the relative distance between the
vehicle and an obstacle.
The Parktronic system is automatically ac-
tivated when you switch on the ignition
and release the parking brake. The Park-
tronic system deactivates at speeds over
11 mph (18 km/h). At lower speeds the
Parktronic system turns on again.The Parktronic system monitors the sur-
roundings of your vehicle with six sensors
in the front bumper and four sensors in the
rear bumper.
1Sensors in the front bumperWarning!
G
The Parktronic is a supplemental system. It
is not intended to, nor does it replace, the
need for extreme care. The responsibility
during parking and other critical maneuvers
always rests with the driver.
Special attention must be paid to objects
with smooth surfaces or low silhouettes
(e.g. trailer couplings, painted posts, or road
curbs). Such objects may not be detected by
the system and can damage the vehicle.
The operational function of the Parktronic
system can be affected by dirty sensors, es-
pecially at times of snow and ice, see
“Cleaning the Parktronic system sensors”
(�page 287).
Interference caused by other ultrasonic sig-
nals (e.g. working jackhammers or the air
brakes of trucks) can cause the system to
send erratic indications, and should be tak-
en into consideration.
Warning!
G
Make sure that no persons or animals are in
the area in which you are maneuvering. You
could otherwise injure them.