Page 81 of 418
80 Safety and SecurityDriving safety systems
For more information, see “Practical hints”
(�page 295).Switching off the ESP
To improve the vehicle's traction, turn off
the ESP in driving situations where it would
be advantageous to have the drive wheels
spin and thus cut into surfaces for better
grip such as:
�
starting out on slippery surfaces and in
deep snow in conjunction with snow
chains
�
in sand or gravel
Warning!
G
The ESP cannot prevent the natural laws of
physics from acting on the vehicle, nor can
it increase the traction afforded. The ESP
cannot prevent accidents, including those
resulting from excessive speed in turns, or
hydroplaning. Only a safe, attentive, and
skillful driver can prevent accidents. The ca-
pabilities of an ESP equipped vehicle must
never be exploited in a reckless or danger-
ous manner which could jeopardize the us-
er’s safety or the safety of others.iDistronic* is switched off when ESP is
activated.
!Because of the ESP’s automatic opera-
tion, the engine and ignition must be
shut off (SmartKey in starter switch
position0 or1 or KEYLESS-GO
start/stop button* in position0 or1)
when:�
the parking brake is being tested on
a brake test dynamometer
�
the vehicle is being towed with the
front/rear axle raised
Active braking action through the ESP
may otherwise seriously damage the
brake system.
The ESP will only function properly if
you use wheels of the recommended
tire size (
�page 365).
Warning!
G
The ESP should not be switched off during
normal driving other than in the circum-
stances described below. Disabling of the
system will reduce vehicle stability in stan-
dard driving maneuvers.iDistronic* cannot be activated when
the ESP has been deactivated.
Page 85 of 418
84 Safety and SecurityAnti-theft systemsTow-away alarm
Once the tow-away alarm is armed, a visual
and audible alarm will be triggered when
someone attempts to raise the vehicle.Arming tow-away alarm
When you lock your vehicle, the tow-away
alarm is automatically armed after about
30 seconds.
When you unlock your vehicle, the
tow-away protection disarms automatical-
ly.
Disarming tow-away alarm
To prevent triggering the tow-away alarm,
switch off the tow-away alarm feature be-
fore towing the vehicle, or when parking on
a surface subject to movement, such as a
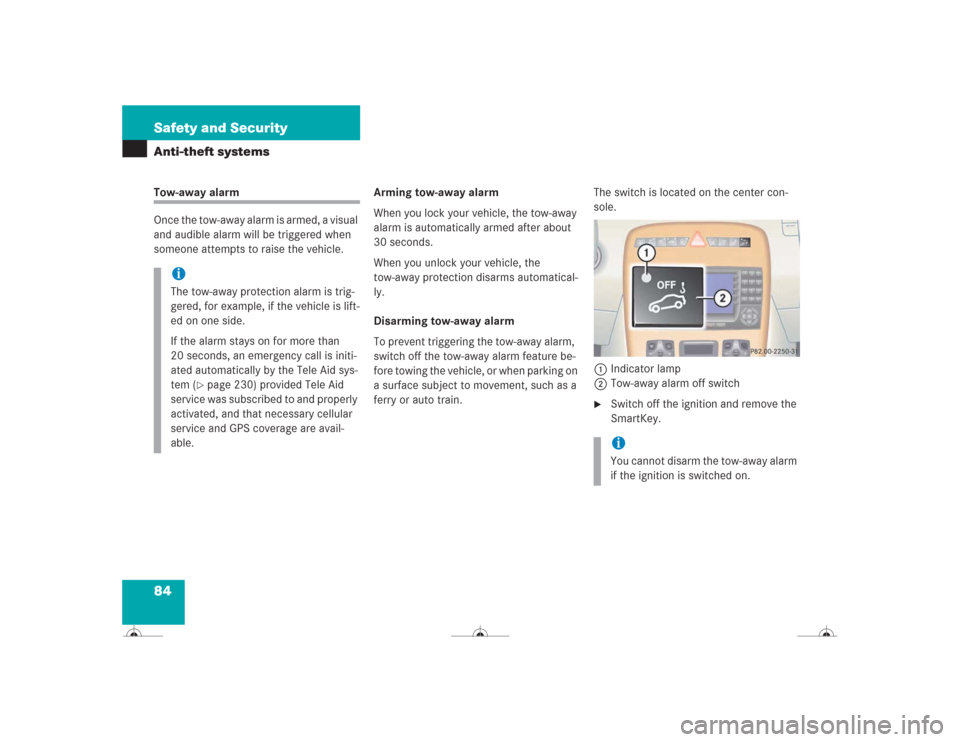
ferry or auto train.The switch is located on the center con-
sole.
1Indicator lamp
2Tow-away alarm off switch
�
Switch off the ignition and remove the
SmartKey.
iThe tow-away protection alarm is trig-
gered, for example, if the vehicle is lift-
ed on one side.
If the alarm stays on for more than
20 seconds, an emergency call is initi-
ated automatically by the Tele Aid sys-
tem (
�page 230) provided Tele Aid
service was subscribed to and properly
activated, and that necessary cellular
service and GPS coverage are avail-
able.
iYou cannot disarm the tow-away alarm
if the ignition is switched on.
Page 106 of 418
105 Controls in detail
Locking and unlocking
Power closing assist for doors and trunk lid
Power closing assist for doors�
Press the doors gently past the initial
engage position into the lock.
The doors close automatically.
Power closing assist for trunk lid
�
Press the trunk lid gently into its lock.
The trunk closes automatically.
Automatic central locking
The doors and the trunk automatically lock
when the ignition is switched on and the
wheels are turning at speeds of approxi-
mately 9 mph (15 km/h) or more.
You can open a locked door from the in-
side. Open door only when conditions are
safe to do so.For more information on towing the vehi-
cle, see “Towing the vehicle” (
�page 353).
You can deactivate the automatic locking
using the control system (
�page 153).
iIt is not necessary to slam the door or
trunk lid closed. A pneumatic pow-
er-assisted mechanism draws doors
and trunk lid closed quietly and auto-
matically once the door or trunk lid has
been latched. When the pneumatic
power-assist and mechanism has
stopped, doors and / or trunk can be
re-opened.
Warning!
G
To prevent possible personal injury, always
keep hands and fingers away from the door
or trunk opening when closing a door or the
trunk lid. Be especially careful when small
children are around.
In case of danger, pull the inside or outside
door handle, or press the trunk lid lock.
To prevent personal injury, never activate
the closing assist mechanism by tampering
with the door or trunk lid latch.
iThe doors unlock automatically after an
accident if the force of the impact ex-
ceeds a preset threshold.
The vehicle locks automatically when
the ignition is switched on and the
wheels are turning at vehicle speeds of
approximately 9 mph (15 km/h) or
more. You could therefore lock yourself
out when the vehicle�
is pushed or towed
�
is on a test stand
Page 110 of 418
109 Controls in detailSeats
Rear seat head restraints
Folding head restraints back
The rear seat head restraints and the rear
seat power head restraints* can be folded
backward for increased visibility.
1Switch in the front center console
�
Make sure the ignition is switched on.
All the lamps in the instrument cluster
come on.
�
Press switch1 in the front center con-
sole briefly.
The rear head restraints will fold back-
ward.Placing head restraints upright
�
Pull the rear head restraint upright until
it locks into position.
!The rear seat head restraints cannot be
removed.
Warning!
G
For safety reasons, always drive with the
rear head restraints in the upright position
when the rear seats are occupied.
Keep the area around head restraints clear
of articles (e.g. clothing) to not obstruct the
folding operation of the head restraints.
!Make sure the head restraints engage
when placing them upright manually.
Otherwise, their protective function
cannot be ensured.
Page 111 of 418
110 Controls in detailSeatsPlacing power head restraints* upright�
Make sure the ignition is switched on.
All the lamps in the instrument cluster
come on.
�
Press switch1 in the front center con-
sole and hold.
The rear head restraints will fold up-
right.Folding back and placing upright power
head restraints* with the switch in the
rear center console
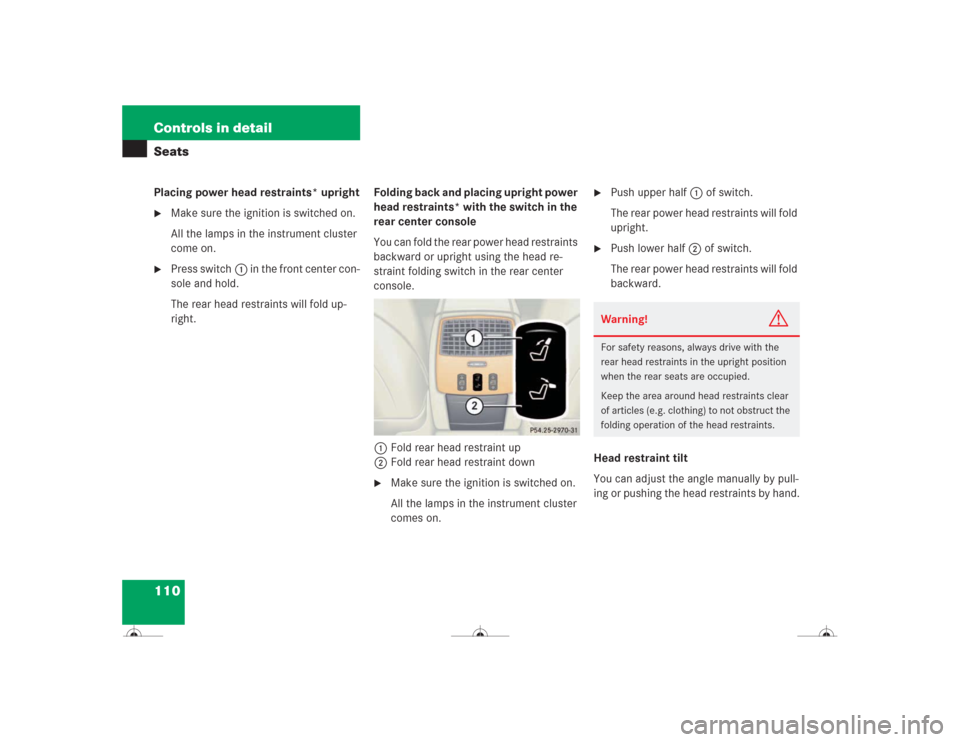
You can fold the rear power head restraints
backward or upright using the head re-
straint folding switch in the rear center
console.
1Fold rear head restraint up
2Fold rear head restraint down
�
Make sure the ignition is switched on.
All the lamps in the instrument cluster
comes on.
�
Push upper half1 of switch.
The rear power head restraints will fold
upright.
�
Push lower half2 of switch.
The rear power head restraints will fold
backward.
Head restraint tilt
You can adjust the angle manually by pull-
ing or pushing the head restraints by hand.Warning!
G
For safety reasons, always drive with the
rear head restraints in the upright position
when the rear seats are occupied.
Keep the area around head restraints clear
of articles (e.g. clothing) to not obstruct the
folding operation of the head restraints.
Page 112 of 418
111 Controls in detailSeats
Lumbar support
You can adjust the contour of the seat’s
lumbar support to best support your spine.
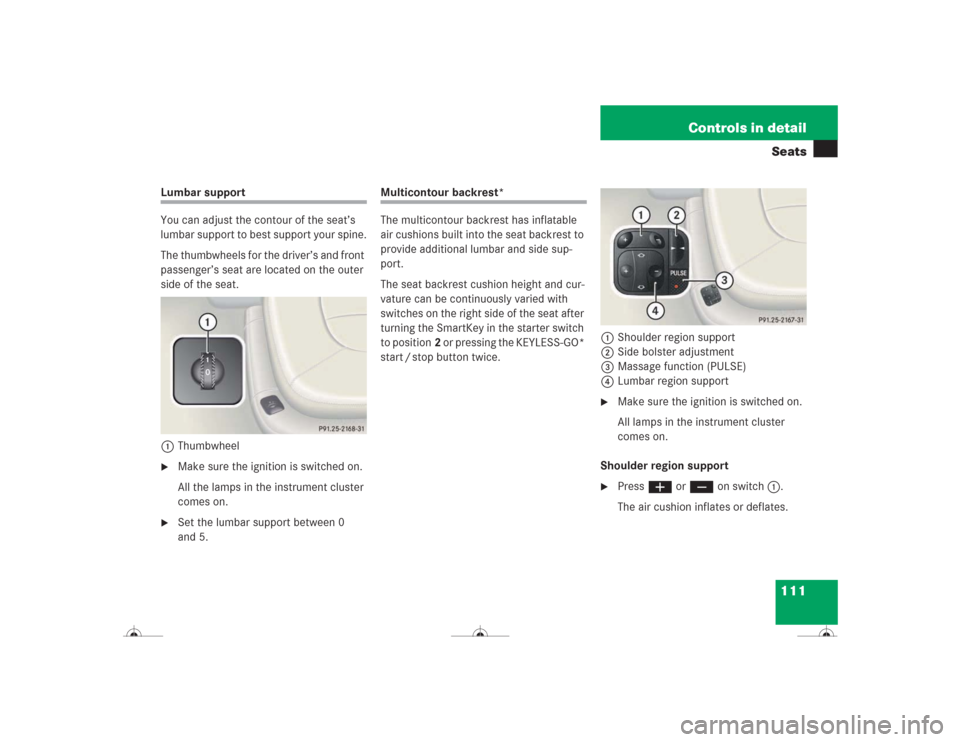
The thumbwheels for the driver’s and front
passenger’s seat are located on the outer
side of the seat.
1Thumbwheel�
Make sure the ignition is switched on.
All the lamps in the instrument cluster
comes on.
�
Set the lumbar support between 0
and 5.
Multicontour backrest*
The multicontour backrest has inflatable
air cushions built into the seat backrest to
provide additional lumbar and side sup-
port.
The seat backrest cushion height and cur-
vature can be continuously varied with
switches on the right side of the seat after
turning the SmartKey in the starter switch
to position2 or pressing the KEYLESS-GO*
start / stop button twice.1Shoulder region support
2Side bolster adjustment
3Massage function (PULSE)
4Lumbar region support
�
Make sure the ignition is switched on.
All lamps in the instrument cluster
comes on.
Shoulder region support
�
Press æ or ç on switch1.
The air cushion inflates or deflates.
Page 114 of 418
113 Controls in detailSeats
Seat heating
Vehicles without seat ventilation*
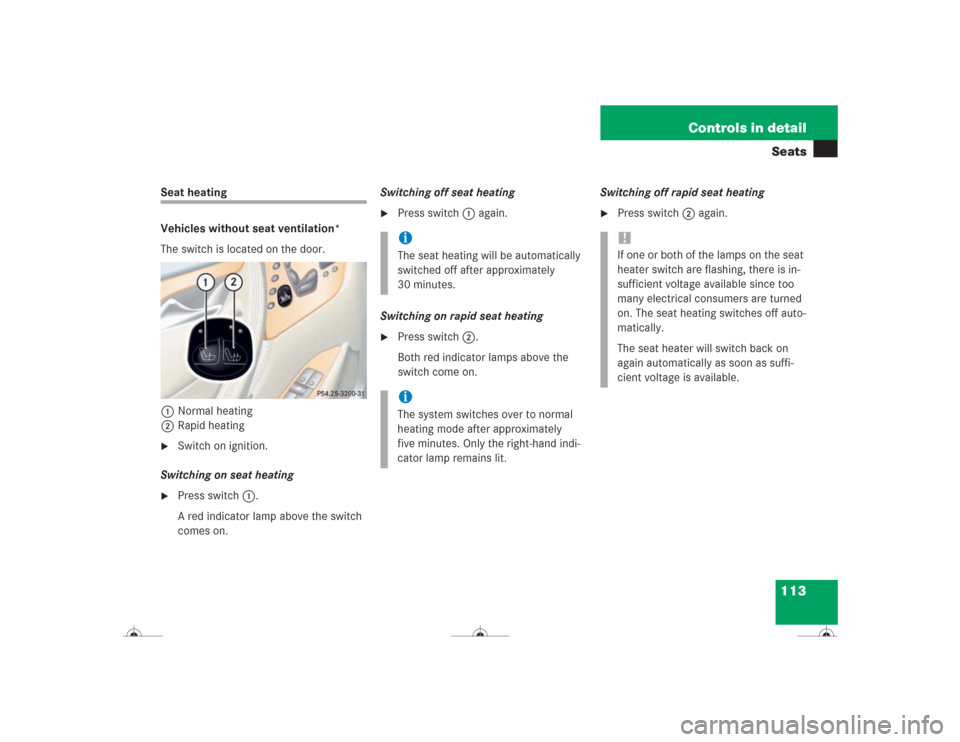
The switch is located on the door.
1Normal heating
2Rapid heating�
Switch on ignition.
Switching on seat heating
�
Press switch1.
A red indicator lamp above the switch
comes on. Switching off seat heating
�
Press switch1 again.
Switching on rapid seat heating
�
Press switch2.
Both red indicator lamps above the
switch come on. Switching off rapid seat heating
�
Press switch2 again.
iThe seat heating will be automatically
switched off after approximately
30 minutes. iThe system switches over to normal
heating mode after approximately
five minutes. Only the right-hand indi-
cator lamp remains lit.
!If one or both of the lamps on the seat
heater switch are flashing, there is in-
sufficient voltage available since too
many electrical consumers are turned
on. The seat heating switches off auto-
matically.
The seat heater will switch back on
again automatically as soon as suffi-
cient voltage is available.
Page 115 of 418
114 Controls in detailSeatsVehicles with seat ventilation*
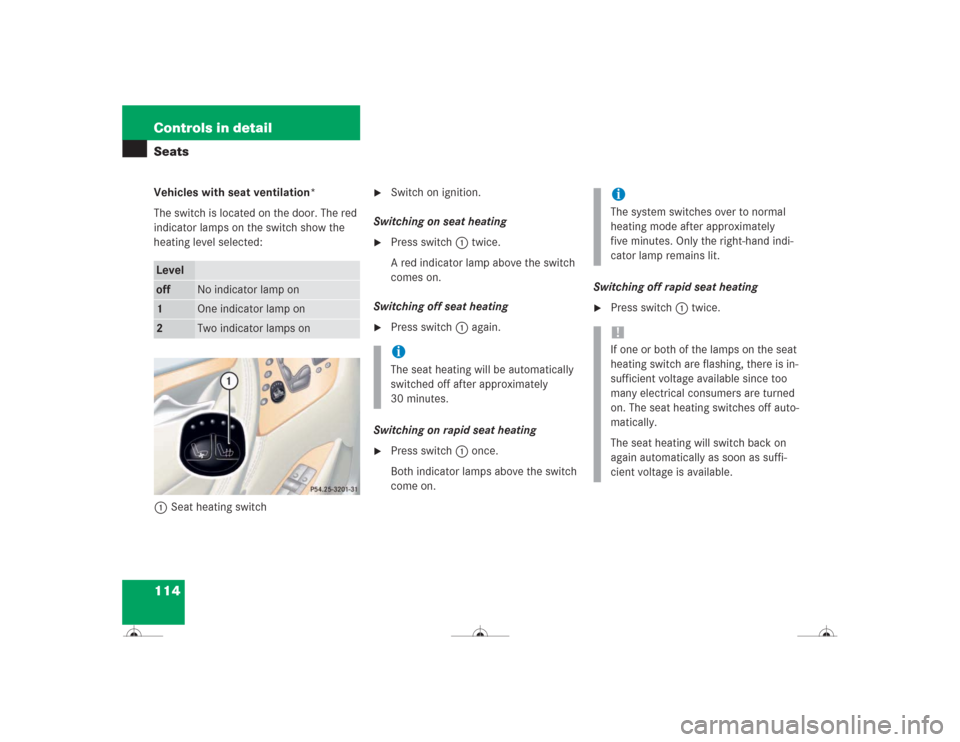
The switch is located on the door. The red
indicator lamps on the switch show the
heating level selected:
1Seat heating switch
�
Switch on ignition.
Switching on seat heating
�
Press switch1 twice.
A red indicator lamp above the switch
comes on.
Switching off seat heating
�
Press switch1 again.
Switching on rapid seat heating
�
Press switch1 once.
Both indicator lamps above the switch
come on. Switching off rapid seat heating
�
Press switch1 twice.
Leveloff
No indicator lamp on
1
One indicator lamp on
2
Two indicator lamps on
iThe seat heating will be automatically
switched off after approximately
30 minutes.
iThe system switches over to normal
heating mode after approximately
five minutes. Only the right-hand indi-
cator lamp remains lit. !If one or both of the lamps on the seat
heating switch are flashing, there is in-
sufficient voltage available since too
many electrical consumers are turned
on. The seat heating switches off auto-
matically.
The seat heating will switch back on
again automatically as soon as suffi-
cient voltage is available.