Page 276 of 374
Preparation
²
Park on a firm, level surface well off the road, to
provide ample work space. Place automatic transmis-
sion in P (Park), or manual transmission in R (Re-
verse), and stop engine. Set parking brake firmly and
activate hazard warning flasher.
²Block tire diagonally oppo-
site tire to be changed to pre-
vent forward and backward
vehicle movement.
Instructions
1. Remove spare tire, jack and tools from stored location.
2. Before raising vehicle, loosen lug nuts on wheel with
flat tire.3. Assemble the jack and jacking tools as shown. Connect
jack handle driver to extensions, then to lug wrench.
4. Locate the jack as shown. For the front tires, place it in
the notch on the body weld seam behind wheel to be
changed. For the rear tires, place it under the axle as
shown. Position the jack handle on the jack.
Front Scissor Jack Location
276 WHAT TO DO IN EMERGENCIES
Page 278 of 374
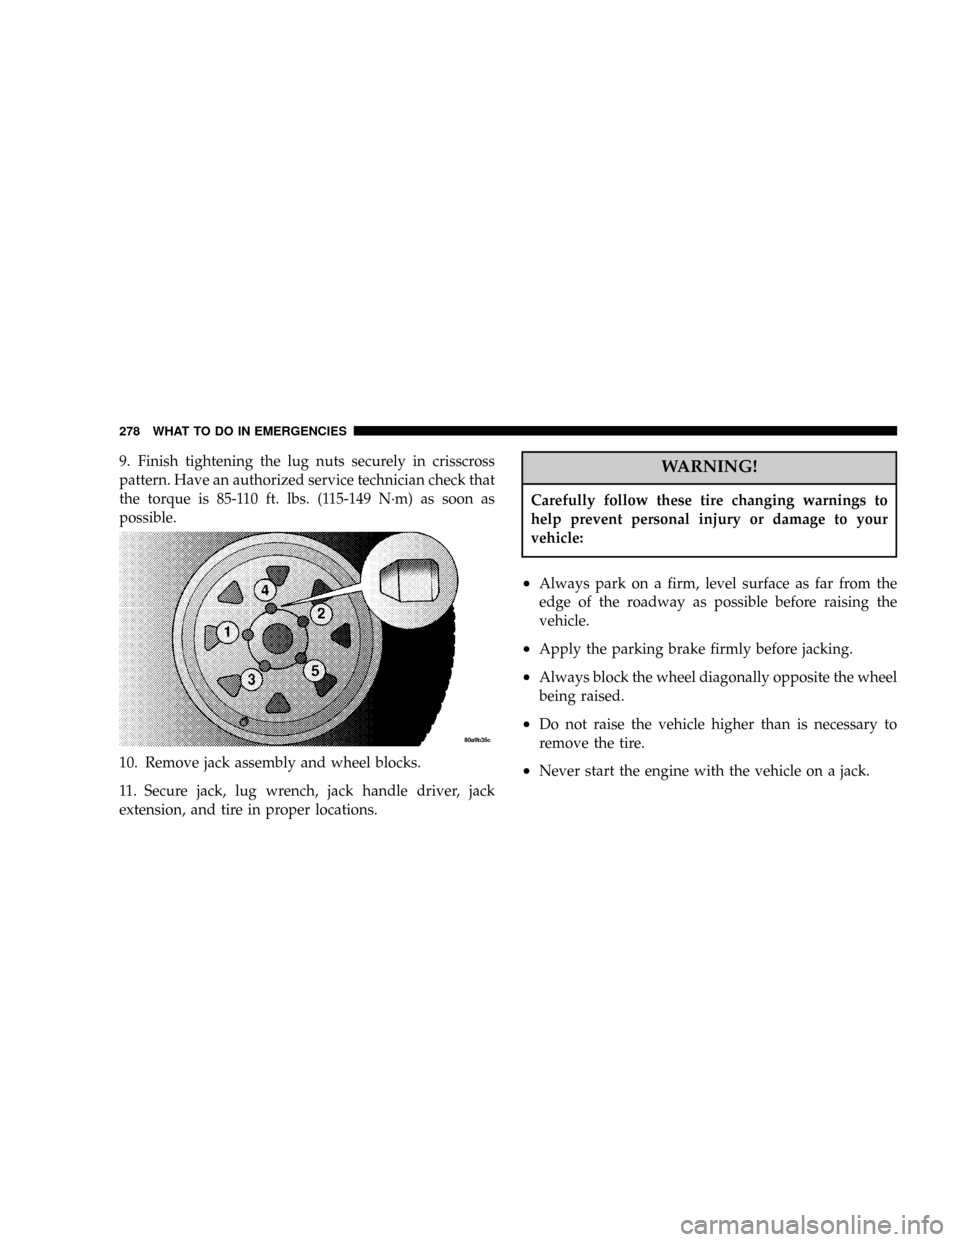
9. Finish tightening the lug nuts securely in crisscross
pattern. Have an authorized service technician check that
the torque is 85-110 ft. lbs. (115-149 N´m) as soon as
possible.
10. Remove jack assembly and wheel blocks.
11. Secure jack, lug wrench, jack handle driver, jack
extension, and tire in proper locations.WARNING!
Carefully follow these tire changing warnings to
help prevent personal injury or damage to your
vehicle:
²Always park on a firm, level surface as far from the
edge of the roadway as possible before raising the
vehicle.
²Apply the parking brake firmly before jacking.
²Always block the wheel diagonally opposite the wheel
being raised.
²Do not raise the vehicle higher than is necessary to
remove the tire.
²Never start the engine with the vehicle on a jack.
278 WHAT TO DO IN EMERGENCIES
Page 279 of 374

²Do not let passengers sit in the vehicle when it is on a
jack.
²Do not get under the vehicle when it is on a jack.
²Failure to follow the ªTire Changing Procedureº may
result in personal injury or damage to your vehicle.
²Only use the jack in the positions indicated.
JUMP STARTING PROCEDURE
NOTE:Check the charge indicator on the battery. If the
indicator is light or yellow, replace the battery.
1. Wear eye protection and remove any metal jewelry
such as watch bands or bracelets that might make an
unintended electrical contact.
2. When boost is provided by a battery in another
vehicle, park that vehicle within booster cable reach but
without letting the vehicles touch. Set the parking brake,place the automatic transmission in P (Park), or manual
transmission in N (Neutral), and turn the ignition to OFF
for both vehicles.
3. Turn off the heater, radio and all unnecessary electrical
loads.
4. Connect one end of a jumper cable to the positive
terminal of the discharged battery. Connect the other end
of the same cable to the positive terminal of the booster
battery.
5. Connect the other cable, first to the negative terminal
of the booster battery and then connect the other end to
a non-paint metal surface on the engine of the vehicle
with the discharged battery. Make sure you have a good
contact on the engine.
6. Start the engine in the vehicle which has the booster
battery, let the engine idle a few minutes, then start the
engine in the vehicle with the discharged battery.
WHAT TO DO IN EMERGENCIES 279
6
Page 312 of 374

To check the automatic transmission fluid level properly,
the following procedure must be used:
1. The vehicle must be on level ground.
2. The engine should be running at curb idle speed for a
minimum of 60 seconds.
3. Fully apply parking brake.
4. Apply the brakes and shift the transmission into P
(Park).
5. The fluidMUSTbe checked with the transmission in
P (Park) to be sure that the fluid level is accurate.
6. Wipe the dipstick clean and reinsert until seated.
Remove dipstick and note reading.
At normal operating temperature (approximately 180É F
(82É C), the fluid level is correct if it is in the HOT region(cross-hatched area) on the oil level indicator. The fluid
level indicator should be in the COLD region at 70É F (21É
C) fluid temperature.
If the fluid level is low, add sufficient fluid to bring to the
proper level. Refer to Recommended Fluids, Lubricants
and Genuine Parts for correct fluid type.
Fluid is added through the dipstick tube.
NOTE:To prevent dirt and water from entering the
transmission after checking or replenishing fluid, make
certain that the dipstick cap is properly reseated.
Special Additives
The manufacturer recommends against the addition of
any additives to the transmission. Exception to this
policy is the use of special dyes to aid in detecting fluid
leaks.
312 MAINTAINING YOUR VEHICLE
Page 359 of 374

Auxiliary Power Outlet................... 133
Bar, Light............................. 103
Battery............................... 298
Emergency Starting..................... 279
Keyless Transmitter Replacement............ 27
Saving Feature........................ 102
Belts, Drive............................ 294
Body Mechanism Lubrication............... 301
B-Pillar Location........................ 244
Brake System........................... 308
Anti-Lock.........................152,234
Hoses.............................. 308
Master Cylinder....................... 310
Parking............................. 232
Warning Light........................ 155
Brake/Transmission Interlock............... 216
Break-In Recommendations, New Vehicle........ 68
Bulb Replacement....................... 324Bulbs, Light............................ 324
Calibration, Compass..................... 122
Capacities, Fluid........................ 326
Caps, Filler
Fuel................................ 262
Radiator............................ 305
Car Washes............................ 316
Cargo Area Cover....................... 137
Cargo Area Features...................... 137
Cargo Compartment
Light.............................99,137
Luggage Carrier....................... 142
Cargo Light..........................99,137
Cargo Organizer........................ 140
Cargo Tie-Downs........................ 138
Carpeting............................. 318
Cassette Tape and Player Maintenance......... 196
Cassette Tape Player.............160,162,174,178
INDEX 359
10
Page 368 of 374

Odometer............................. 154
Trip ................................ 154
Off-Pavement Driving..................236,319
Off-Road Driving........................ 319
Oil, Engine............................ 290
Capacity............................ 326
Change Interval....................... 292
Checking............................ 290
Dipstick............................. 290
Identification Logo..................... 293
Materials Added to..................... 294
Pressure Warning Light.................. 155
Recommendation...................293,326
Viscosity..........................293,326
Oil Filter, Selection....................... 294
Oil Pressure Light....................... 155
Onboard Diagnostic System..............287,288
Opener, Garage Door..................... 125
Organizer, Cargo........................ 140Outside Rearview Mirrors.................. 76
Overhead Console....................... 110
Overheating, Engine...................... 273
Owner's Manual........................ 354
Paint Care............................. 315
Paint Damage.......................... 315
Panic Alarm............................ 25
Parking Brake.......................... 232
Passing Light........................... 101
PCV Valve............................ 297
Pets.................................. 67
Phone, Cellular.......................... 78
Phone, Hands-Free....................... 78
Placard, Tire and Loading Information......... 244
Polishing and Waxing..................... 316
Power
Distribution Center..................... 323
Door Locks........................... 21
368 INDEX
Page:
< prev 1-8 9-16 17-24