Page 2478 of 4264

6A-58 ENGINE MECHANICAL (C24SE)
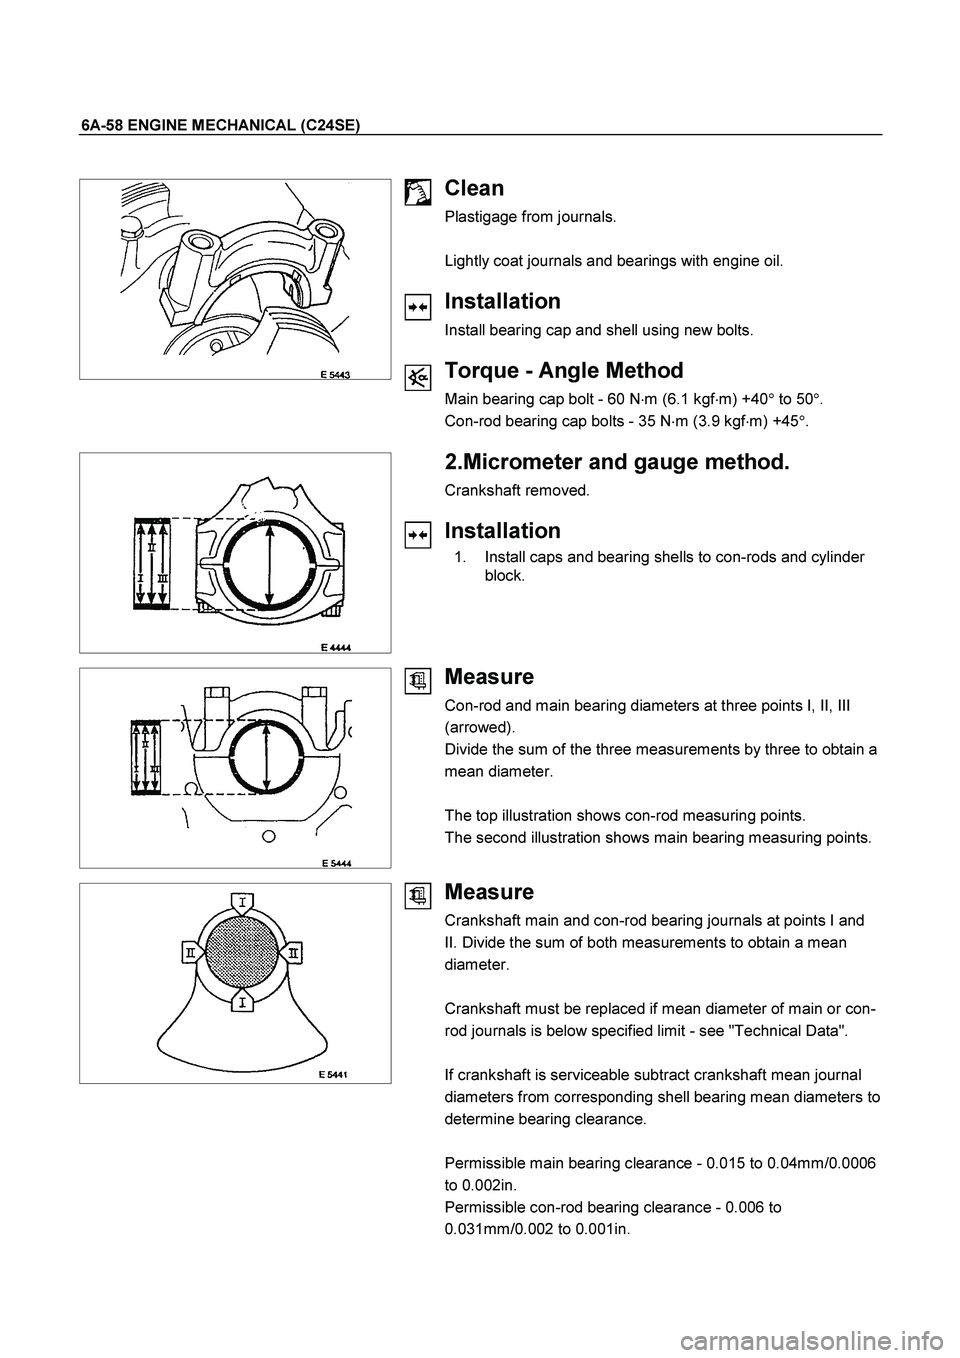
Clean
Plastigage from journals.
Lightly coat journals and bearings with engine oil.
Installation
Install bearing cap and shell using new bolts.
Torque - Angle Method
Main bearing cap bolt - 60 N�
m (6.1 kgf�
m) +40�
to 50�
.
Con-rod bearing cap bolts - 35 N�
m (3.9 kgf�
m) +45�
.
2.Micrometer and gauge method.
Crankshaft removed.
Installation
1. Install caps and bearing shells to con-rods and cylinder
block.
Measure
Con-rod and main bearing diameters at three points I, II, III
(arrowed).
Divide the sum of the three measurements by three to obtain a
mean diameter.
The top illustration shows con-rod measuring points.
The second illustration shows main bearing measuring points.
Measure
Crankshaft main and con-rod bearing journals at points I and
II. Divide the sum of both measurements to obtain a mean
diameter.
Crankshaft must be replaced if mean diameter of main or con-
rod journals is below specified limit - see "Technical Data".
If crankshaft is serviceable subtract crankshaft mean journal
diameters from corresponding shell bearing mean diameters to
determine bearing clearance.
Permissible main bearing clearance - 0.015 to 0.04mm/0.0006
to 0.002in.
Permissible con-rod bearing clearance - 0.006 to
0.031mm/0.002 to 0.001in.
Page 2479 of 4264

ENGINE MECHANICAL (C24SE) 6A-59
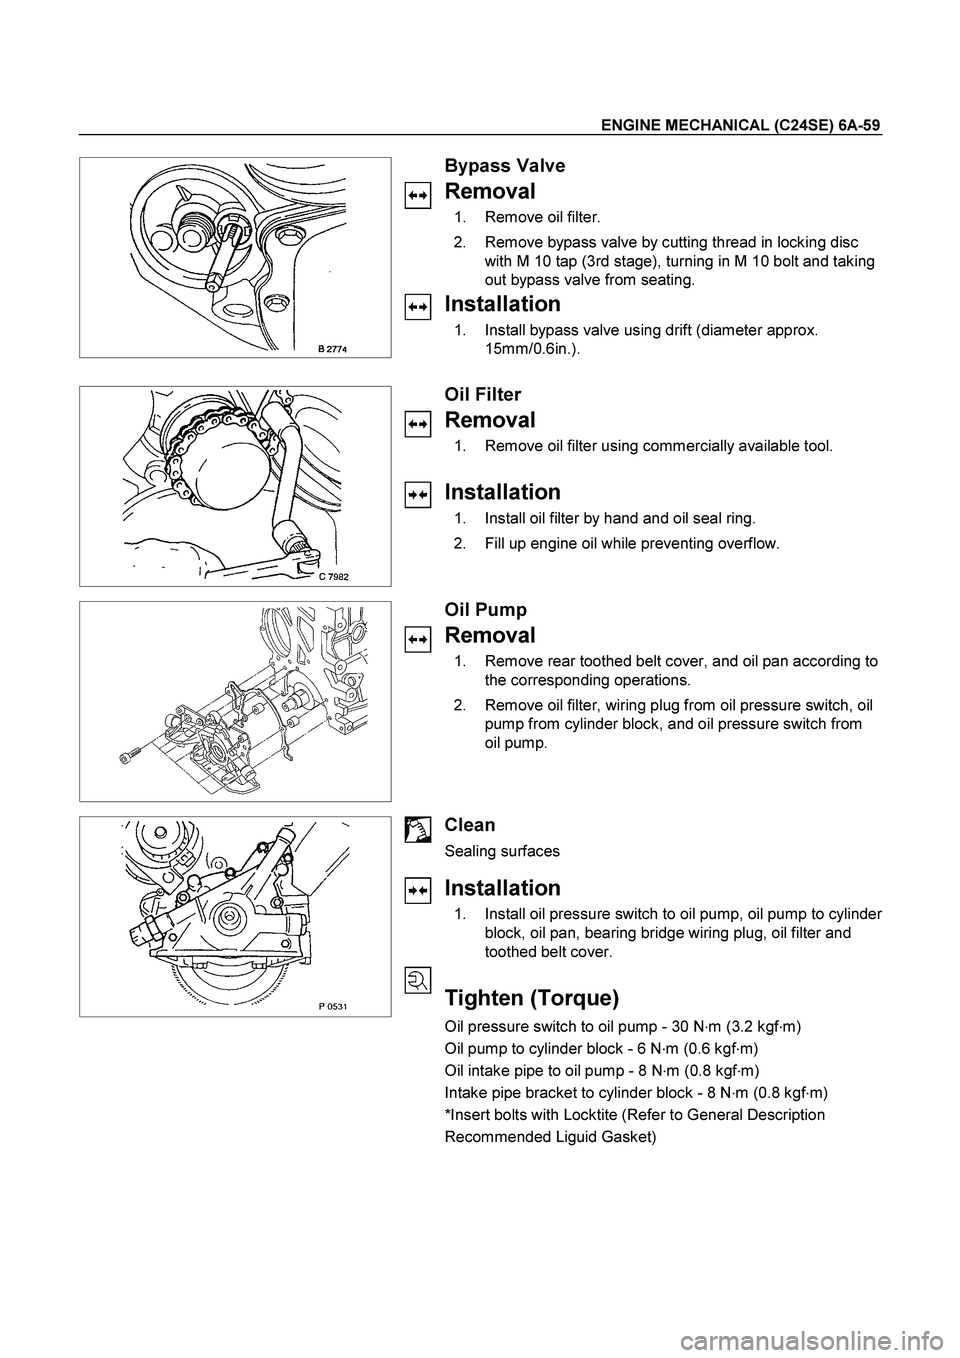
Bypass Valve
Removal
1. Remove oil filter.
2. Remove bypass valve by cutting thread in locking disc
with M 10 tap (3rd stage), turning in M 10 bolt and taking
out bypass valve from seating.
Installation
1. Install bypass valve using drift (diameter approx.
15mm/0.6in.).
Oil Filter
Removal
1. Remove oil filter using commercially available tool.
Installation
1. Install oil filter by hand and oil seal ring.
2. Fill up engine oil while preventing overflow.
Oil Pump
Removal
1. Remove rear toothed belt cover, and oil pan according to
the corresponding operations.
2. Remove oil filter, wiring plug from oil pressure switch, oil
pump from cylinder block, and oil pressure switch from
oil pump.
Clean
Sealing surfaces
Installation
1. Install oil pressure switch to oil pump, oil pump to cylinder
block, oil pan, bearing bridge wiring plug, oil filter and
toothed belt cover.
Tighten (Torque)
Oil pressure switch to oil pump - 30 N�
m (3.2 kgf�
m)
Oil pump to cylinder block - 6 N�
m (0.6 kgf�
m)
Oil intake pipe to oil pump - 8 N�
m (0.8 kgf�
m)
Intake pipe bracket to cylinder block - 8 N�
m (0.8 kgf�
m)
*Insert bolts with Locktite (Refer to General Description
Recommended Liguid Gasket)
Page 2480 of 4264
6A-60 ENGINE MECHANICAL (C24SE)
Oil Pump Safety Valve
Removal
1. Remove closure plug.
2. Remove seal ring.
3. Remove spring.
4. Remove piston.
Installation
1. Install piston (observe installation position).
2. Install spring.
3. Install seal ring.
4. Install closure plug.
Tighten (Torque)
Closure plug - 30 N�
m (3.0 kgf�
m)
Oil Pump (Overhaul)
Removal
1. Remove oil pump according to the corresponding
operation.
2. Remove oil cover and pressure control valve.
Inspect
Clearance between gear pair and housing upper edge - see
“Technical Data”.
Check housing, cover and pressure control valve.
Installation
1. Install pump cover with Sealing Compound 15 03 166 (90
094 714).
2. Install oil pump safety valve according to the
corresponding operation.
3. Install oil pump according to the corresponding operation.
Page 2481 of 4264
ENGINE MECHANICAL (C24SE) 6A-61
OPERATIONS ON OIL CIRCULATION
Cylinder Head Safety Valve
Removal
1. Remove cylinder head according to the corresponding
operation.
2. Make hole in core plugs with pointed drift, turn in self
tapping screw and edge out.
Important!
Cover oil duct in cylinder head with piece of cloth.
3. Pull out valve retainer, using commercially available tool.
4. Remove ball and spring.
5. Cut three threads in the ball seating with M 10 tap (3rd
stage).
6. Coat tap with grease.
7. Remove ball seating from cylinder head with
commercially available tool.
Do not damage cylinder head.
Page 2482 of 4264
6A-62 ENGINE MECHANICAL (C24SE)
Installation
1. Install new pressure valve into cylinder head - with
suitable pipe until stop.
2. Install core hole plugs into cylinder head - with suitable
pipe to end of chamfer.
Page 2483 of 4264
ENGINE MECHANICAL (C24SE) 6A-63
OPERATIONS ON COOLING SYSTEM
Caution!
Before working with the cooling system, be sure to confirm that
the temperature of the engine is cooled down.
Failure to observe this may cause burn.
Cooling System, Check for Leaks
Installation
1. Install commercially available coolant checking
instrument onto compensation tank (Refer to section 6B;
Engine cooling).
2. Check coolant level.
Inspection
Use 5-8840-0277-0 tester & 5-8840-2603-0 adaptor.
Cooling System, Fill Up and Bleed
Important!
Radiator and heater core are made from alminium.
To avoid corrosion, use only anti-freeze with corrosion
protection.
Replace Coolant
1. Confirm the engine is cold enough.
2. Open the radiator cap, pour coolant to the filler neck level
and close the cap.
3. Pour coolant into the reservoir until MAX line is reached.
4. Start the engine, run 2 �
3 minutes at idling speed and
switch off the engine.
5. Refill coolant if the coolant level is lowered.
Page 2484 of 4264

6A-64 ENGINE MECHANICAL (C24SE)
Important!
Do not loosen or open the radiator cap when coolant is hot.
Doing so may cause hot water or steam to splash out, resulting
in burn. When opening the radiator cap, be sure to confirm the
coolant is cold. Cover a thick cloth over the cap and loosen it
slowly to reduce pressure, then open the cap.
6. Close the radiator cap firmly and run the engine at
approx. 2000 rpm. In addition, set the heater temperature
adjuster to the max position to circulate coolant in the
heater conduit system.
7. Confirm that the temperature gauge reads half or more
of full scale and that the thermostat is activated.
Then continue idling 5 minutes more and switch off the
engine, and allow it to cool.
8. After the engine cools down, check the coolant level and
refill it if necessary. When the level is lowered extremely,
check the coolant conduit system and reservoir hose for
leak.
9. Pour coolant into the reservoir to MAX level.
Refill Coolant
Important!
After closing the cooling system, let engine run warm until
thermostat opens (coolant approx. 92�C/197.6F)
Inspection
Coolant level
Allow engine to cool. If necessary, refill coolant.
Check that cooling system self-bleeds during engine warming-
up phase.
Ignition Timing, Check
No Adjustment
Page 2485 of 4264
ENGINE MECHANICAL (C24SE) 6A-65
ENGINE EXTERNAL PARTS
Radiator
Removal
1. Disconnect battery ground cable.
2. Loosen a drain plug to drain EC.
3. Disconnect radiator inlet hose and outlet hose from the engine.
RTW46BSH000101
4. Remove fan guide(1), clips(2) on both sides and the
bottom lock, then remove lower fan guide(3) with fan
shroud(4).
5. Disconnect the reserve tank hose(6) from radiator.
RTW36BMH000101
6. Remove bracket(5).
7. Lift up and remove the radiator assembly with hose,
taking care not to damage the radiator core with a fan
blade.