Page 1107 of 4264
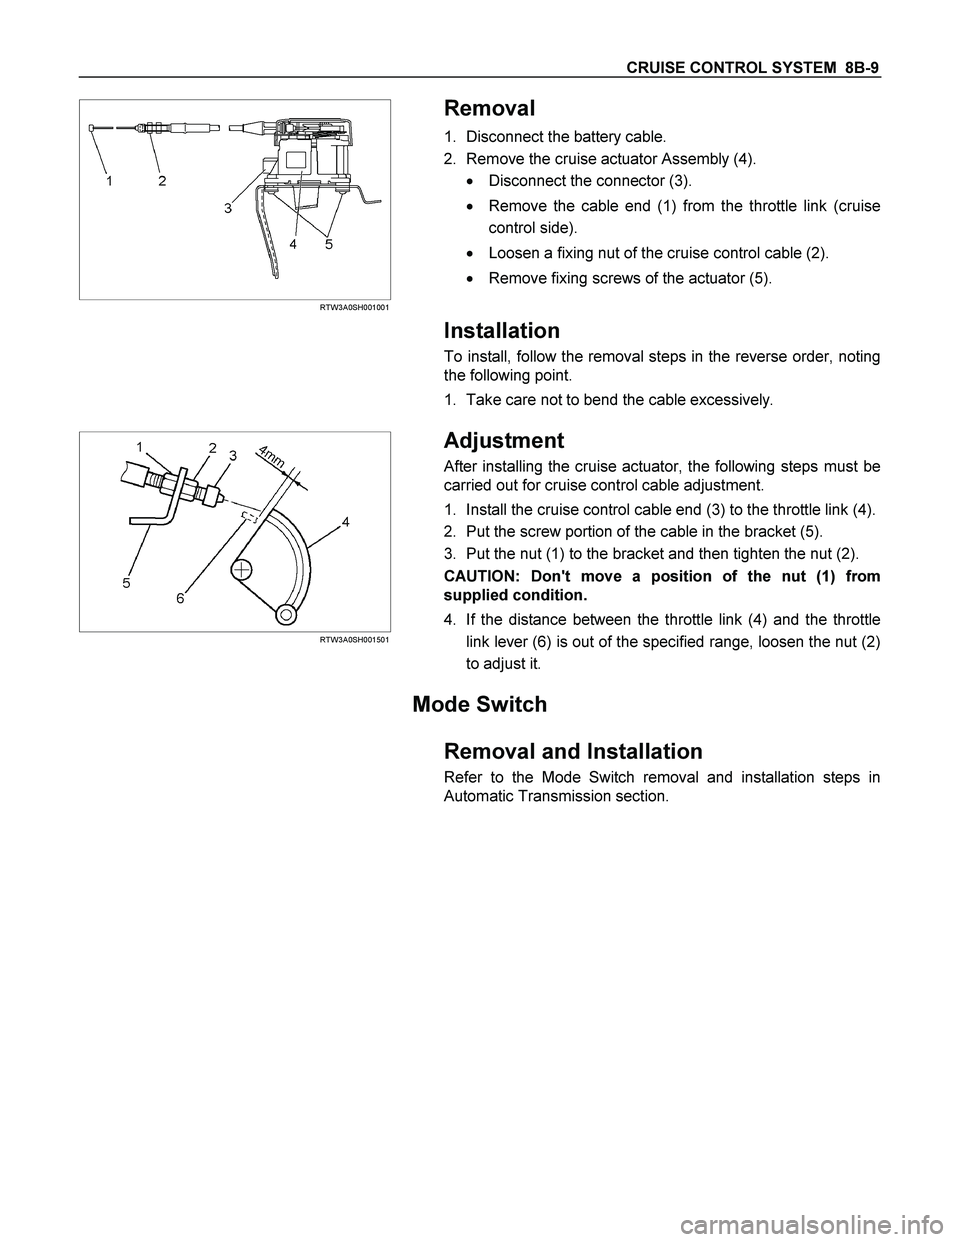
CRUISE CONTROL SYSTEM 8B-9
RTW3A0SH001001
Removal
1. Disconnect the battery cable.
2. Remove the cruise actuator Assembly (4).
� Disconnect the connector (3).
� Remove the cable end (1) from the throttle link (cruise
control side).
� Loosen a fixing nut of the cruise control cable (2).
� Remove fixing screws of the actuator (5).
Installation
To install, follow the removal steps in the reverse order, noting
the following point.
1. Take care not to bend the cable excessively.
RTW3A0SH001501
Adjustment
After installing the cruise actuator, the following steps must be
carried out for cruise control cable adjustment.
1. Install the cruise control cable end (3) to the throttle link (4).
2. Put the screw portion of the cable in the bracket (5).
3. Put the nut (1) to the bracket and then tighten the nut (2).
CAUTION: Don't move a position of the nut (1) from
supplied condition.
4. If the distance between the throttle link (4) and the throttle
link lever (6) is out of the specified range, loosen the nut (2)
to adjust it.
Mode Switch
Removal and Installation
Refer to the Mode Switch removal and installation steps in
Automatic Transmission section.
Page 1119 of 4264
WORKSHOP MANUAL
TF SERIES
ENGINE
4JA1/4JH1-TC
SECTION 6
Page 1121 of 4264
TROUBLESHOOTING 6 – 1
SECTION 6
TROUBLESHOOTING
TABLE OF CONTENTS
PAGE PAGE
BASIC INSPECTION PROCEDURE ... 6– 2
1. HARD STARTING ........................... 6– 3
1-1.Starter Motor Inoperative ......... 6– 3
1-2. Starter Motor Operates But
Engine Does Not Turn Over .......... 6– 3
1-3. Engine Turns Over But Does
Not Start Engine ............................. 6– 4
2. UNSTABLE IDLING ........................ 6– 5
3. INSUFFICIENT POWER ................. 6– 6
4. EXCESSIVE FUEL
CONSUMPTION ................................. 6– 7
5. EXCESSIVE OIL CONSUMPTION.. 6– 8
6. OVERHEATING............................... 6– 9
7. WHITE EXHAUST SMOKE ............. 6– 9
8. DARK EXHAUST SMOKE .............. 6– 10
9. OIL PRESSURE DOES NOT RISE . 6– 11
10. ABNORMAL ENGINE NOISE ....... 6– 12
10-1. Engine Knocking.................... 6– 12
10-2. Gas Leakage Noise ................ 6– 12
10-3. Continuous Noise .................. 6– 13
10-4. Slapping Noise ....................... 6– 13
10-5. Excessive Turbocharger
Noise ............................................... 6– 14
11. ROTATING PART WEAR OF
TURBOCHARGER ............................. 6– 14
12. OIL LEAKAGE FROM
TURBOCHRGER ............................... 6– 15
13. INSUFFICIENT ACCELERATION
AND/OR LACK OF POWER DUE
TO TURBOCHARGER ....................... 6– 15
14. BATTERY CHARGING AND
NOISE PROBLEM.............................. 6– 16
14-1. Battery No Charging .............. 6– 16
14-2. Battery Overcharging ............ 6– 16
14-3. Battery Under Charging......... 6– 17
14-4. Battery Unstable Charging
Current ............................................ 6– 17
14-5. Charging System Noise ......... 6– 18
15. STARTER MOTOR PROBLEM..... 6– 19
15-1. Starter Motor Pinion Engages
to Ring Gear But Engine Does
Not Turn Over ................................. 6– 19
15-2. Incorrect Pinion And Ring
Gear Engagement .......................... 6– 19
15-3. Starter Motor Continues To
Run After The Starter Switch Is
Turned Off ....................................... 6– 20
15-4. Excessive Commutator
Sparking .......................................... 6– 20
Page 1122 of 4264
6 – 2 TROUBLESHOOTING
Basic Inspection Procedure
Follow the under inspection procedure, when the problem vehicle comes workshop.
Step Inspection point Inspection result YES NO
1 Check the check engine lamp Is the check engine lamp turn
ON ? Go to section
6E “On Board
Diagnostic
(OBD) System
Check" Go to Step 2
2 The battery fluid level and the
gravity Was the problem found? Re-charge the
battery or
replace the
battery Go to Step 3
3 The engine coolant capacity Was the problem found? Replenish the
engine coolant Go to Step 4
4 The engine oil level Was the problem found? Replenish the
engine oil Go to Step 5
5 The air cleaner element Was the problem found? Clean or
replace Go to Step 6
6 The piping fixing condition (oil,
vacuum and fuel piping) Was the problem found? Return normal
condition Go to Step 7
7 The drive belt tension and break Was the problem found? Re-adjust the
tension or
replace Go to Step 8
8 Go to section 6E “On Board
Diagnostic (OBD) System
Check” Was the problem found?
Verify repair Go to Step 9
9 Go to mechanical
troubleshooting chart Was the problem found?
Verify repair —
Page 1141 of 4264
ENGINE MECHANICAL 6A – 1
SECTION 6A
ENGINE MECHANICAL
TABLE OF CONTENTS
PAGE
Main Data and Specifications ....................................................................................... 6A - 4
Torque Specifications ................................................................................................... 6A - 8
Standard Bolts ........................................................................................................... 6A - 8
Special Parts Fixing Nuts and Bolts ........................................................................ 6A - 9
Recommended Liquid Gasket ...................................................................................... 6A - 22
LOCTITE Application Procedure .................................................................................. 6A - 23
Servicing......................................................................................................................... 6A - 24
Model Identification ................................................................................................... 6A - 24
Air Cleaner .................................................................................................................. 6A - 24
Lubricating System .................................................................................................... 6A - 24
Fuel System ................................................................................................................ 6A - 25
Cooling System .......................................................................................................... 6A - 27
Valve Clearance Adjustment ..................................................................................... 6A - 31
Compression Pressure Measurement ...................................................................... 6A - 32
General Description....................................................................................................... 6A- 36
Removal and Installation............................................................................................... 6A- 37
Removal ...................................................................................................................... 6A- 37
Installation .................................................................................................................. 6A- 40
Coolant Replenishment.......................................................................................... 6A- 41
Engine Warm-Up..................................................................................................... 6A- 41
Engine Repair Kit ........................................................................................................... 6A- 42
Engine Overhaul ............................................................................................................ 6A- 43
Removal ...................................................................................................................... 6A- 43
External Parts ......................................................................................................... 6A- 43
Page 1177 of 4264
ENGINE MECHANICAL 6A – 37
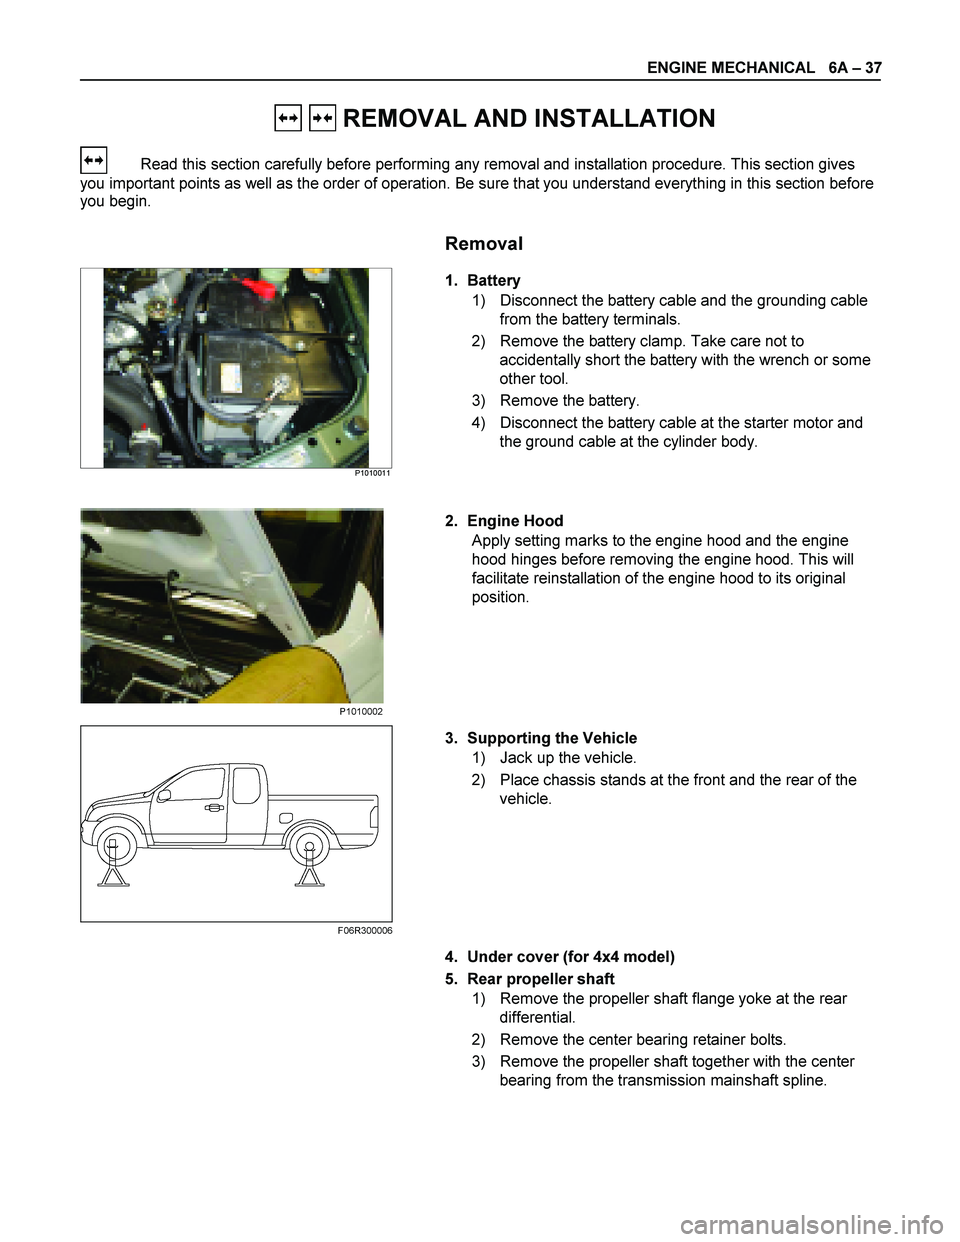
REMOVAL AND INSTALLATION
Read this section carefully before performing any removal and installation procedure. This section gives
you important points as well as the order of operation. Be sure that you understand everything in this section before
you begin.
Removal
P1010011
1. Battery
1) Disconnect the battery cable and the grounding cable from the battery terminals.
2) Remove the battery clamp. Take care not to accidentally short the battery with the wrench or some
other tool.
3) Remove the battery.
4) Disconnect the battery cable at the starter motor and the ground cable at the cylinder body.
2. Engine Hood Apply setting marks to the engine hood and the engine
hood hinges before removing the engine hood. This will
facilitate reinstallation of the engine hood to its original
position.
3. Supporting the Vehicle 1) Jack up the vehicle.
2) Place chassis stands at the front and the rear of the vehicle.
4. Under cover (for 4x4 model) 5. Rear propeller shaft 1) Remove the propeller shaft flange yoke at the rear differential.
2) Remove the center bearing retainer bolts.
3) Remove the propeller shaft together with the center bearing from the transmission mainshaft spline.
F06R300006 P1010002
Page 1226 of 4264
6A – 86 ENGINE MECHANICAL
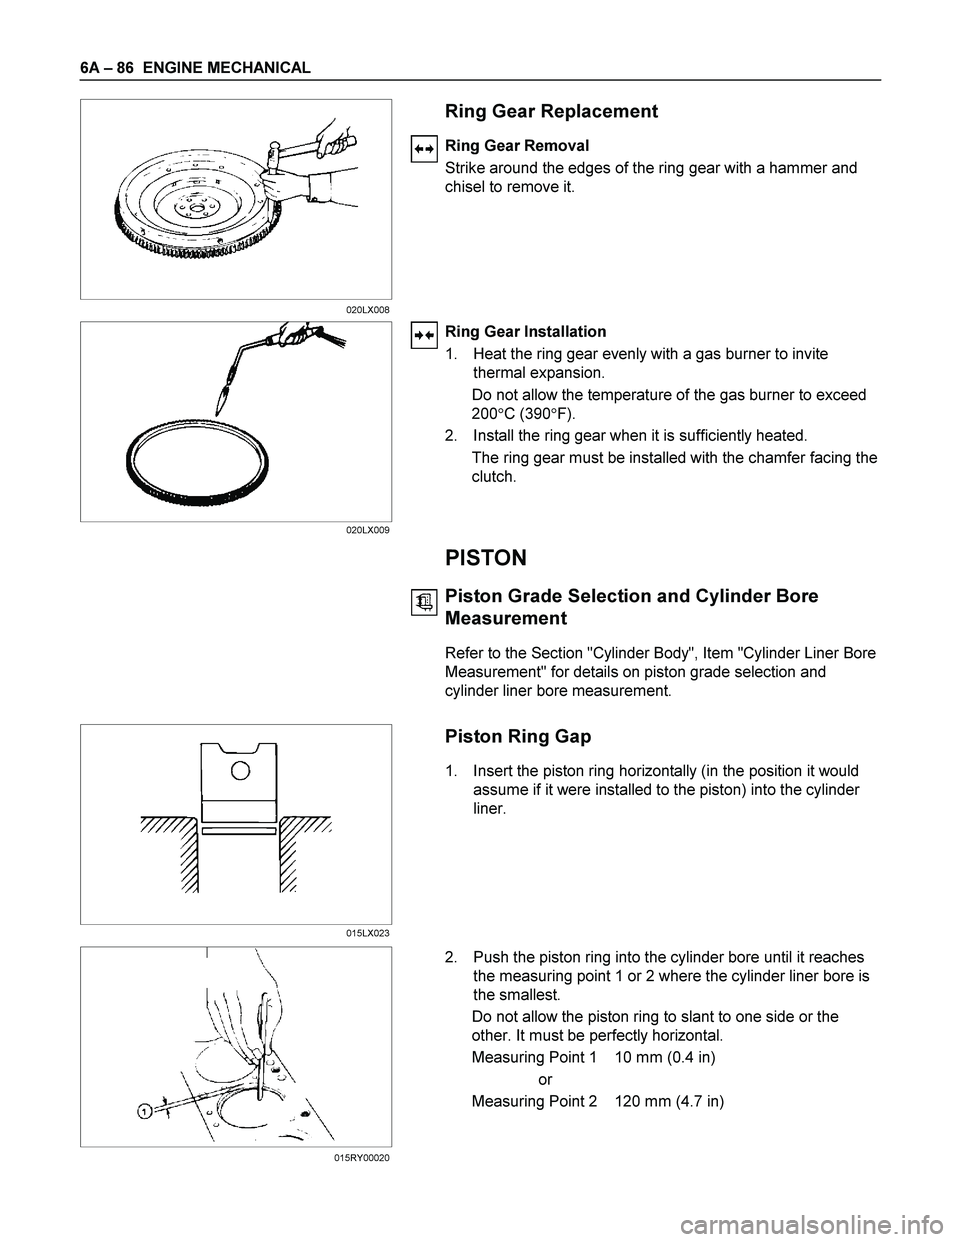
Ring Gear Replacement
Ring Gear Removal
Strike around the edges of the ring gear with a hammer and
chisel to remove it.
Ring Gear Installation
1. Heat the ring gear evenly with a gas burner to invite
thermal expansion.
Do not allow the temperature of the gas burner to exceed
200�C (390�F).
2. Install the ring gear when it is sufficiently heated.
The ring gear must be installed with the chamfer facing the
clutch.
PISTON
Piston Grade Selection and Cylinder Bore
Measurement
Refer to the Section "Cylinder Body", Item "Cylinder Liner Bore
Measurement" for details on piston grade selection and
cylinder liner bore measurement.
Piston Ring Gap
1. Insert the piston ring horizontally (in the position it would
assume if it were installed to the piston) into the cylinder
liner.
2. Push the piston ring into the cylinder bore until it reaches
the measuring point 1 or 2 where the cylinder liner bore is
the smallest.
Do not allow the piston ring to slant to one side or the
other. It must be perfectly horizontal.
Measuring Point 1 10 mm (0.4 in)
or
Measuring Point 2 120 mm (4.7 in)
020LX008
020LX009
015LX023
015RY00020
Page 1232 of 4264
6A – 92 ENGINE MECHANICAL
Oil Seal Installation
Use the special tool to install the front oil seal.
Front Oil Seal Installer: 5-8840-2361-0
1. With the oil seal attached to the sleeve, insert it into the
front end section of the crankshaft.
2. With the oil seal end section attached securely to the
crankshaft, tighten up the center bolt until the sleeve hits
the front end reference plane of the crankshaft securely.
3. Remove the sleeve.
4. With the seal pressed in, check the dimension of the oil
seal section.
Standard Dimension = 1.0 � 0.03mm
NOTE:
Install the oil seal after assembling the timing pulley
housing. The oil seal lip section is applied with oil.
Take notice of the press-in direction of the oil seal.
020R300005