MA-16
ENGINE MAINTENANCE
Revision: August 20072004 QX56
5. Install the air cleaner case (upper).
6. Install the air duct and resonator assembly (inlet).
Changing Engine OilELS0010A
WAR NIN G:
�Be careful not to burn yourself, as the engine oil is hot.
�Prolonged and repeated contact with used engine oil may cause skin cancer; try to avoid direct
skin contact with used oil. If skin contact is made, wash thoroughly with soap or hand cleaner as
soon as possible.
1. Warm up the engine, and check for any oil leaks.
2. Stop the engine and wait for at least 10 minutes.
3. Remove the oil drain plug and oil filler cap to drain the old oil.
4. Install a new washer on the oil drain plug, then install the oil drain plug in the oil pan.
CAUTION:
Clean the drain plug and install with a new washer.
5. Refill the engine with the specified oil.
CAUTION:
�Clean the drain plug and install with a new washer.
�The refill capacity depends on the oil temperature and drain time. Use the oil capacity value as a
reference and check the oil level using the dipstick when filling the oil.
6. Warm up the engine and check the area around the drain plug and oil filter for any oil leaks.
7. Stop the engine and wait for more than 10 minutes.
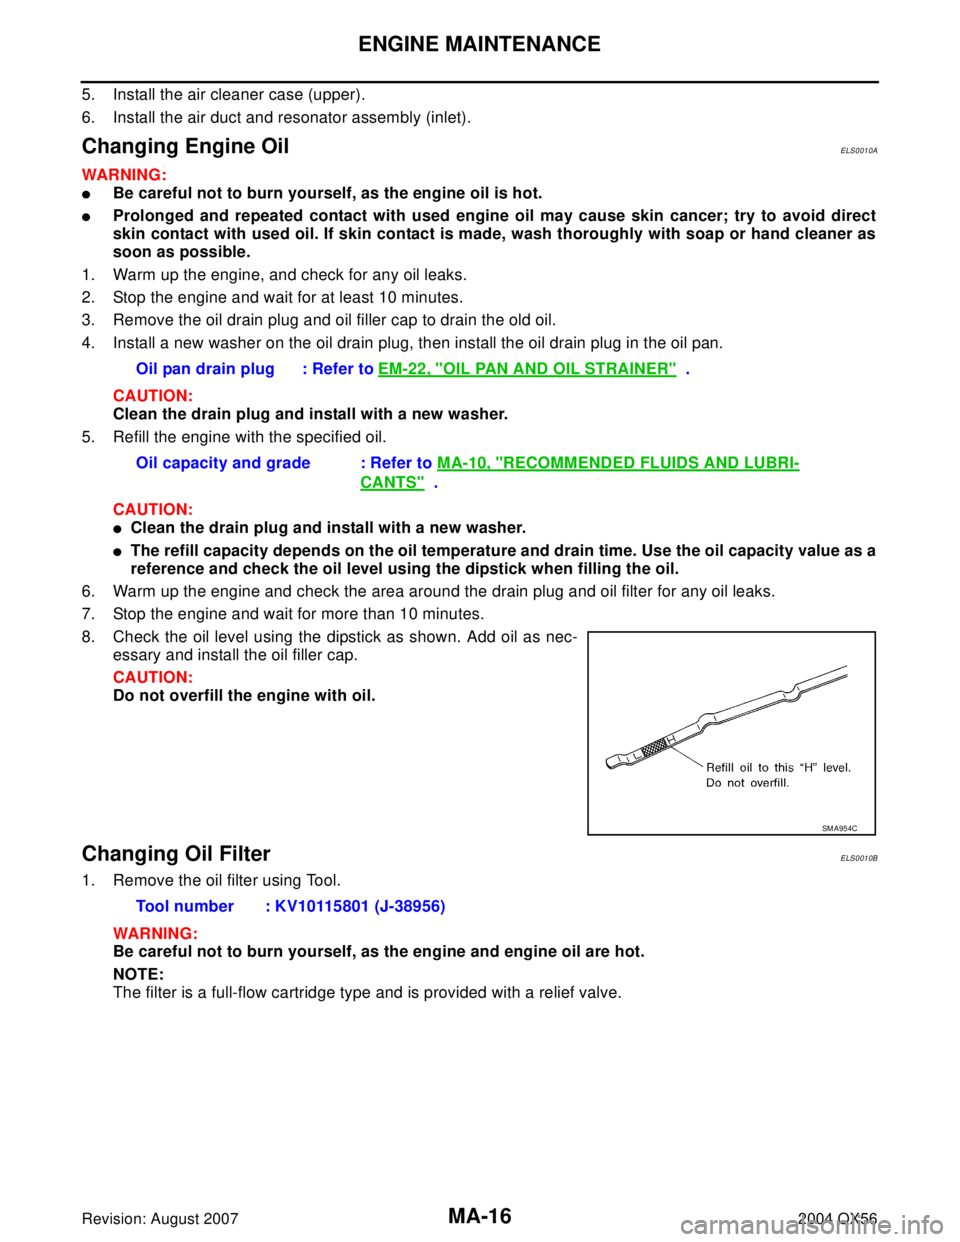
8. Check the oil level using the dipstick as shown. Add oil as nec-
essary and install the oil filler cap.
CAUTION:
Do not overfill the engine with oil.
Changing Oil FilterELS0010B
1. Remove the oil filter using Tool.
WAR NIN G:
Be careful not to burn yourself, as the engine and engine oil are hot.
NOTE:
The filter is a full-flow cartridge type and is provided with a relief valve.Oil pan drain plug : Refer to EM-22, "
OIL PAN AND OIL STRAINER" .
Oil capacity and grade : Refer to MA-10, "
RECOMMENDED FLUIDS AND LUBRI-
CANTS" .
SM A95 4C
Tool number : KV10115801 (J-38956)
MA-24
CHASSIS AND BODY MAINTENANCE
Revision: August 20072004 QX56
Checking Transfer FluidELS0010I
FLUID LEAKAGE AND FLUID LEVEL
1. Make sure that fluid is not leaking from the transfer assembly or around it.
2. Check fluid level from the filler plug hole as shown.
CAUTION:
Do not start engine while checking fluid level.
3. Install the filler plug with a new gasket to the transfer. Tighten to
the specified torque. Refer to TF-110, "
OVERHAUL" .
CAUTION:
Do not reuse gasket.
Changing Transfer FluidELS0010J
DRAINING
1. Stop engine.
2. Remove the drain plug and gasket and drain the fluid.
3. Install the drain plug with a new gasket to the transfer. Tighten to
the specified torque. Refer to TF-110, "
OVERHAUL" .
CAUTION:
Do not reuse gasket.
FILLING
1. Remove the filler plug and gasket.
2. Fill the transfer with new fluid until the fluid level reaches the
specified limit near the filler plug hole.
CAUTION:
Carefully fill fluid. Fill up for approximately 3 minutes.
3. Leave the vehicle for 3 minutes, and check fluid level again.
4. Install the filler plug with a new gasket to the transfer. Tighten to the specified torque. Refer to TF-110,
"OVERHAUL" .
CAUTION:
Do not reuse gasket.
Checking Propeller ShaftELS0010L
Check the front and rear propeller shafts for damage, dents, and cracks. Check the joints for looseness and
any damage. Repair or replace as necessary.
Checking Final Drive OilELS0010M
CAUTION:
If using the vehicle for towing, the rear final drive oil must be replaced as specified. Refer to MA-6,
"Schedule 1" .
NOTE:
Rear final drive shown, front final drive similar.
SM A43 9B
SM A44 4B
Fluid grade:
Refer to MA-10, "
Fluids and Lubricants" .
Fluid capacity:
Refer to MA-10, "
Fluids and Lubricants" .
WDIA0211E