2004 Hyundai Santa Fe Battery
[x] Cancel search: BatteryPage 23 of 253

1FEATURES OF YOUR HYUNDAI
10POWER WINDOWS
B060A03Y-AAT
The power windows operate when the ignition
key is in the "ON" position. The main switches
are located on the driver's armrest and control
the front and rear windows on both sides of the
vehicle. The windows may be opened by de-
pressing the appropriate window switch and
closed by pulling up the switch. To open the
window on the driver's side, press the switch(1)
halfway down. The window moves as long as
the switch is operated. To fully open the driver's
window automatically, press the switch fully
down. In automatic operation, the window will
fully open even if you let go of the switch. To stop
at the desired opening, pull up and release the
switch.
HSM048
(1)OpenClose
B070E02HP-AAT
Replacing the battery
When the transmitter's battery begins to get
weak, it may take several pushes on the button
to lock or unlock the doors, and the LED will not
light. Replace the battery as soon as possible.
Battery type : CR2032
Replacement instructions:
1. Carefully separate the case with a blade
screwdriver as shown in the illustration.2. Remove the old battery from the case and
note the polarity. Make sure the polarity of
the new battery is the same(+side facing
down), then insert it in the transmitter.
HSM327B070E02A-1
Screwdriver
Case
Battery
Page 48 of 253

1FEATURES OF YOUR HYUNDAI
35
!
B990B04Y-AAT
Side Impact Airbag (If installed)
WARNING:
o The side impact airbag is supplemental
to the driver's and the passenger's seat
belt systems and is not a substitute for
them. Therefore your seat belts must be
worn at all times while the vehicle is in
motion. The airbags deploy only in cer-
tain side impact conditions severe
enough to cause significant injury to the
vehicle occupants. Your Hyundai is equipped with a side impact
airbag in each front seat. The purpose of the
airbag is to provide the vehicle's driver and/or
the front passenger with additional protection
than that offered by the seat belt alone. The side
impact airbags are designed to deploy only
during certain side-impact collisions, depend-
ing on the crash severity, angle, speed and point
of impact. The side impact airbags are not
designed to deploy in all side impact situations.
B990B02Y
HTB072
Side airbag
sensor
!WARNING:o The SRS can function only when the
ignition key is in the "ON" position. If the
SRS SRI does not come on, or continu-
ously remains on after flashing for about
6 seconds when the ignition key is
turned to the "ON" position, or after the
engine is started, comes on while driv-
ing, the SRS is not working properly. If
this occurs, have your vehicle immedi-
ately inspected by your Hyundai dealer.
o Before you replace a fuse or disconnect
a battery terminal, turn the ignition key
to the "LOCK" position or remove the
ignition key. Never remove or replace the
air bag related fuse(s) when the ignition
key is in the "ON" position. Failure to
heed this warning will cause the SRS SRI
to illuminate.
Page 66 of 253

1FEATURES OF YOUR HYUNDAI
53DIGITAL CALENDARDIGITAL CLOCK
NOTE:The ignition must be in the "ON" position
for the rear window defroster to operate.
B400A01A-AAT
There are three control buttons for the digital
clock. Their functions are:
HOUR - Push "H" to advance the hour indi-
cated.
MIN - Push "M" to advance the minute indicated.
RESET - Push "R" to reset minutes to ":00" to
facilitate resetting the clock to the correct time.
When this is done:
Pressing "R" between 10 : 30 and 11 : 29
changes the readout to 11 : 00.
Pressing "R" between 11 : 30 and 12 : 29
changes the readout to 12 : 00.
B400B02O-GAT
(If installed)
How to adjust the date & the time
1. Whenever "M" button is pushed, the "YEAR",
"MONTH", "DAY", "HOUR" and "MINUTE"
blinks in order.
2. Adjust the date & the time by pushing
" (UP)", " (DOWN)" button when the
year/month/day/hour/minute each blinks.
3. After adjusting the date & the time, push "M"
button once more and the adjustment is
completed.
NOTE:When the battery has been reconnected or
charged, set the date and time as described
above. However, the first display mode is
set on DEC 01.
HSM100
HSM292
CAUTION:Do not clean the inner side of the rear
window glass with an abrasive type of glass
cleaner or use a scraper to remove foreign
deposits from the inner surface of the glass
as this may cause damage to the defroster
elements.
!
Page 78 of 253

1FEATURES OF YOUR HYUNDAI
65
NOTE:If programming a garage door opener or
gate, it is advised to unplug the device
during the "cycling" process to prevent
possible motor burnout.
Programming
Ensure the ignition switch is turned to the "ACC"
position to program and/or operate HomeLink
system. It is also recommended that a new
battery be placed in the handheld transmitter of
the device being programmed to HomeLink for
quicker programming and accurate transmis-
sion of the radio-frequency.
Follow these steps to program your HomeLink
mirror:1. When programming the buttons for the first
time, press and hold the two outside
HomeLink buttons ( , ), releasing when
the indicator light begins to flash (approxi-
mately 20 seconds). This procedure erases
the factory-set default codes. Do not per-
form this step when programming additional
transmitters.
B520C02L
Flashing
Flashing
2. Hold the transmitter of the device you want
to program 1 to 3 inches away from the
bottom of the mirror. Simultaneously press
the handheld transmitter button and the
HomeLink button you wish to program. The
indicator light will flash slowly at first, then
rapidly, indicating successful programming.
B520C03L
Transmitter
1 ~ 3 inches
Additional Programming for Rolling Code
Devices
For any rolling-code-equipped device; follow
the steps additional below after completing the
"Programming" section. A second person may
make the following steps easier.
1. Locate the "learn" or "smart" button on the
device's motor head unit. The exact location
and color of the button varies by product
brand, but is usually referenced in the device's
owner's manual. Contact HomeLink at 1-
800-355-3515 or www.homelink.com for
help.
2. Press and release the "learn" or "smart"
button on the device's motor head unit.
NOTE:You now have 30 seconds to initiate step 3. 3. If the garage door opener or other device you
wish to program is rolling-code equipped,
proceed to the "Rolling Code Programming"
section.
4. Repeat step 2 to program the remaining
HomeLink buttons.
Page 102 of 253

1FEATURES OF YOUR HYUNDAI
89
B970C01O-GAT
Automatic OperationNOTE:If the battery has been discharged or dis-
connected, the temperature mode will reset
to Fahrenheit degree.
This is a normal condition and you can
adjust the temperature mode from Fahren-
heit to Centigrade as follows;
Press the TEMP down ( ) button 3 seconds
or more with the AMB button held down.
The display shows that the unit of tempera-
ture is adjusted to Fahrenheit or Centigrade
(°F
→ →→ →
→ °C or °C
→ →→ →
→ °F).
The FATC (Full Automatic Temperature Con-
trol) system automatically controls the heating
and cooling by doing as follows:
1. Push the "AUTO" switch. The indicator light
will come on confirming that the Face, Floor
and/or Bi-Level modes as well as the blower
speed and, the air conditioning will operate if
ambient temperature is higher than 32°F
(0°C) and automatically turns off if the ambi-
ent temperature drops below 32°F(0°C).
NOTE:Never place things on the sensor which is
located in the car on the instrument panel
to ensure better control of the heating and
cooling system.
B970C01O
HSM502
Photo sensor 2. Push the "TEMP" button to set the desired
temperature.
The temperature will increase to the maxi-
mum "HI" by pushing on the button. Each
push of the button will cause the temperature
to increase by 1°F(0.5°C).
The temperature will decrease to the mini-
mum "LO" by pushing on the button. Each
push of the button will cause the temperature
to decrease by 1°F(0.5°C).
B970C03O
Page 113 of 253

1FEATURES OF YOUR HYUNDAI
100
B260D04O-AAT
1. Playing CD
o Insert the CD with the label facing upward.
o Insert the CD to start CD playback, during
radio operation.
o When a disc is in the CD deck, if you press
the CD button, the CD player will begin
playing even if the radio is being used.
o The CD player can be used when the ignition
switch is in either the "ON" or "ACC" position.
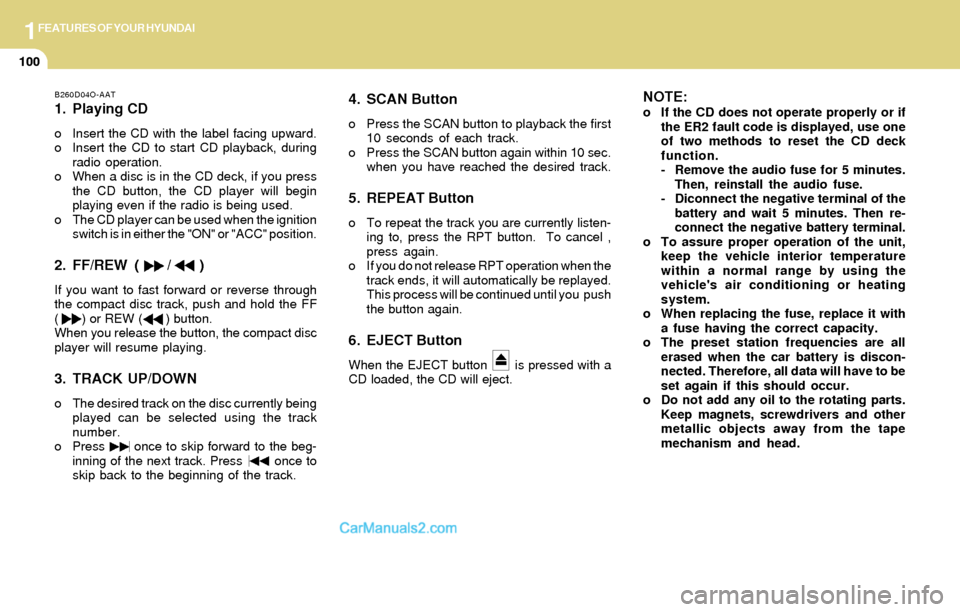
2. FF/REW ( / )
If you want to fast forward or reverse through
the compact disc track, push and hold the FF
( ) or REW ( ) button.
When you release the button, the compact disc
player will resume playing.
3. TRACK UP/DOWN
o The desired track on the disc currently being
played can be selected using the track
number.
o Press once to skip forward to the beg-
inning of the next track. Press once to
skip back to the beginning of the track.
4. SCAN Button
o Press the SCAN button to playback the first
10 seconds of each track.
o Press the SCAN button again within 10 sec.
when you have reached the desired track.
5. REPEAT Button
o To repeat the track you are currently listen-
ing to, press the RPT button. To cancel ,
press again.
o If you do not release RPT operation when the
track ends, it will automatically be replayed.
This process will be continued until you push
the button again.
6. EJECT Button
When the EJECT button is pressed with a
CD loaded, the CD will eject.
NOTE:o If the CD does not operate properly or if
the ER2 fault code is displayed, use one
of two methods to reset the CD deck
function.
- Remove the audio fuse for 5 minutes.
Then, reinstall the audio fuse.
- Diconnect the negative terminal of the
battery and wait 5 minutes. Then re-
connect the negative battery terminal.
o To assure proper operation of the unit,
keep the vehicle interior temperature
within a normal range by using the
vehicle's air conditioning or heating
system.
o When replacing the fuse, replace it with
a fuse having the correct capacity.
o The preset station frequencies are all
erased when the car battery is discon-
nected. Therefore, all data will have to be
set again if this should occur.
o Do not add any oil to the rotating parts.
Keep magnets, screwdrivers and other
metallic objects away from the tape
mechanism and head.
Page 114 of 253

1FEATURES OF YOUR HYUNDAI
101
o This equipment is designed to be used
only in a 12 volt DC battery system with
negative ground.
o This unit is made of precision parts. Do
not attempt to disassemble or adjust
any parts.
o When driving your vehicle, be sure to
keep the volume of the unit set low
enough to allow you to hear sounds
coming from the outside.
o Do not expose this equipment (includ-
ing the speakers) to water or excessive
moisture.
!CAUTION:o Do not insert warped or poor quality
discs into the CD player as damage to the
unit may occur.
o Do not insert anything like coins into the
player slot as damage to the unit may
occur.
o Do not place beverages close to the
audio system. The playback mechanism
may be damaged if you spill them.
o Do not impact on the audio system, or
the playback mechanism could be dam-
aged.
o Driving on the off-roads or other vibra-
tions may skip your compact disc.
Do not use the audio system on off-
roads as the discs could be scratched
and damaged.
o Do not grip or pull out the disc with your
hand while the disc is being pulled into
the unit by the self loading mechanism.
These can cause poor disc scratching to
occur or trouble in the compact disc
player.
o Avoid using CD-Recordable or CD-
Rewritable as the player could not be
operated in recording way of the CD
maker. When using the compact disc
player, genuine CDs are recommended.
Page 141 of 253

2DRIVING YOUR HYUNDAI
4KEY POSITIONSTO START THE ENGINE
C040A01A-AAT
CAUTION:The engine should not be turned off or the
key removed from the ignition key cylinder
while the car is in motion. The steering
wheel is locked by removing the key.
NOTE:Do not hold the key in the "START" position
for more than 15 seconds.
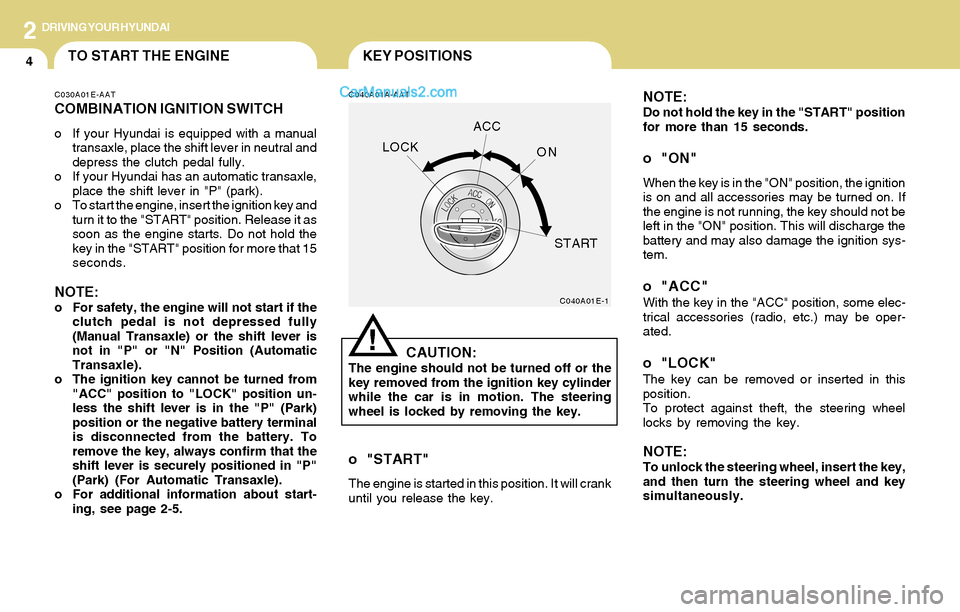
o "ON"
When the key is in the "ON" position, the ignition
is on and all accessories may be turned on. If
the engine is not running, the key should not be
left in the "ON" position. This will discharge the
battery and may also damage the ignition sys-
tem.
o "ACC"With the key in the "ACC" position, some elec-
trical accessories (radio, etc.) may be oper-
ated.
o "LOCK"The key can be removed or inserted in this
position.
To protect against theft, the steering wheel
locks by removing the key.
NOTE:To unlock the steering wheel, insert the key,
and then turn the steering wheel and key
simultaneously.
C040A01E-1
LOCKACC
ON
START
!
C030A01E-AAT
COMBINATION IGNITION SWITCH
o If your Hyundai is equipped with a manual
transaxle, place the shift lever in neutral and
depress the clutch pedal fully.
o If your Hyundai has an automatic transaxle,
place the shift lever in "P" (park).
o To start the engine, insert the ignition key and
turn it to the "START" position. Release it as
soon as the engine starts. Do not hold the
key in the "START" position for more that 15
seconds.
NOTE:o For safety, the engine will not start if the
clutch pedal is not depressed fully
(Manual Transaxle) or the shift lever is
not in "P" or "N" Position (Automatic
Transaxle).
o The ignition key cannot be turned from
"ACC" position to "LOCK" position un-
less the shift lever is in the "P" (Park)
position or the negative battery terminal
is disconnected from the battery. To
remove the key, always confirm that the
shift lever is securely positioned in "P"
(Park) (For Automatic Transaxle).
o For additional information about start-
ing, see page 2-5.
o "START"
The engine is started in this position. It will crank
until you release the key.