2004 Hyundai Santa Fe ECO mode
[x] Cancel search: ECO modePage 16 of 253

1FEATURES OF YOUR HYUNDAI
3KEYSBREAKING IN YOUR NEW HYUNDAI
B010F01A-AAT
Operation in Foreign Countries
If you are going to drive your Hyundai in another
country, be sure to:
o Observe all regulations regarding registra-
tion and insurance.
o Determine that acceptable fuel is available.
B010E01A-AAT
Gasolines for Cleaner Air
To help contribute to cleaner air, Hyundai rec-
ommends that you use gasolines treated with
detergent additives, which help prevent deposit
formation in the engine. These gasolines will
help the engine run cleaner and enhance per-
formance of the Emission Control System.
B020A01S-AAT
During the First 1,200 Miles (2,000 Km)
No formal "break-in" procedure is required with
your new Hyundai. However, you can contrib-
ute to the economical operation and durability of
your Hyundai by observing the following recom-
mendations during the first 1,200 miles (2,000
km).
o Don't drive faster than 55 MPH (88 km/h).
o While driving, keep your engine speed (rpm,
or revolutions per minute) between 2,000
rpm and 4,000 rpm.
o Use moderate acceleration. Don't start
quickly or depress the accelerator pedal
fully.
o For the first 200 miles (300 km), try to avoid
hard stops.
o Don't lug the engine (in other words, don't
drive so slowly in too high a gear that the
engine "bucks"-shift to a lower gear).
o Whether going fast or slow, vary your speed
from time to time.
o Don't let the engine idle longer than 3 minutes
at one time.
o Don't tow a trailer during the first 1,200 miles
(2,000 km) of operation.
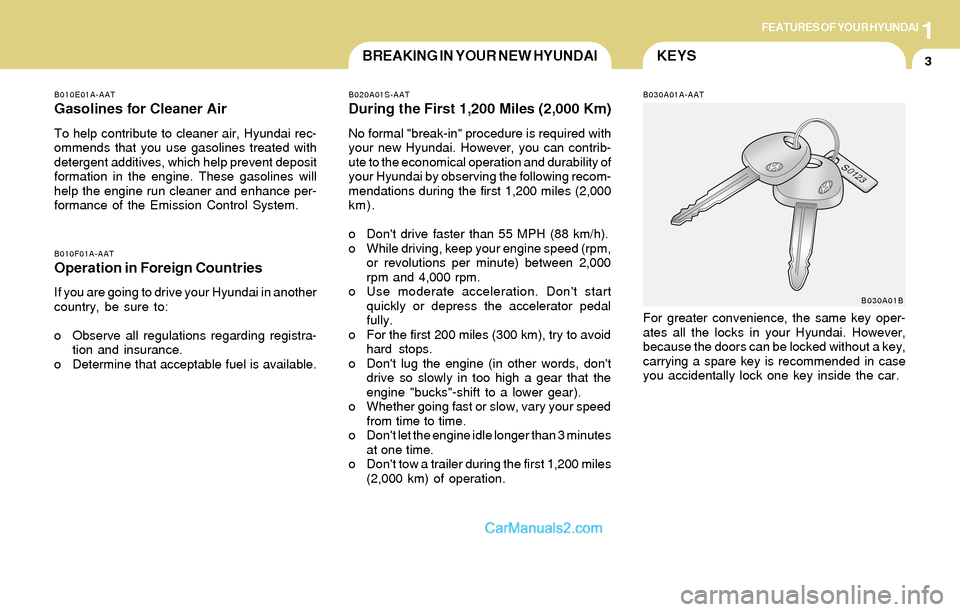
B030A01A-AAT
B030A01B
For greater convenience, the same key oper-
ates all the locks in your Hyundai. However,
because the doors can be locked without a key,
carrying a spare key is recommended in case
you accidentally lock one key inside the car.
Page 35 of 253

1FEATURES OF YOUR HYUNDAI
22
!
NOTE:Although the combination retractor pro-
vides the same level of protection for seated
passengers in either emergency or auto-
matic locking modes, it is recommended
that seated passengers use the emergency
locking feature for improved convenience.
The automatic locking function is intended
to facilitate child restraint installation. To
convert from the automatic locking feature
to the emergency locking operation mode,
allow the unbuckled seat belt to fully re-
tract.
WARNING:o For maximum restraint system protec-
tion, the seat belts must always be used
whenever the car is moving.
o Seat belts are most effective when
seatbacks are in the upright position.
o Children must always be seatbelted in
the rear seats. Never allow children to
ride in the front passanger seat.
o The shoulder belt should be positioned
midway over the shoulder nearest the
door for the most effective protection.
Never wear the seat belt under the arm
nearest the door. Wearing the belt under
the arm nearest the door could cause
serious or fatal injuries in an accident.
B190A01Y-AAT
SEAT BELTS-Front Passenger and Rear
Seat 3-Point System with Combination
Locking Retractor
To Fasten Your Belt
Combination retractor type seat belts are in-
stalled in the rear seat positions to help accom-
modate the installation of child restraint systems.
Although a combination retractor is also installed
in the front passenger seat position, Hyundai
strongly recommends that children always be
seated in the rear seat. NEVER place any infant
restraint system in the front seat of the vehicle.
This type of seat belt combines the features of
both an emergency locking retractor seat belt
and an automatic locking retractor seat belt. To
fasten your seat belt, pull it out of the retractor
and insert the metal tab into the buckle. There
will be an audible "click" when the tab locks into
the buckle. When not securing a child restraint,
the seat belt operates in the same way as the
driver's seat belt (Emergency Locking Retrac-
tor Type). It automatically adjusts to the proper
length only after the lap belt portion of the seat
belt is adjusted manually so that it fits snugly
around your hips. When the seat belt is fully
extended from the retractor to allow the instal-
lation of a child restraint system, the seat belt
operation changes to allow the belt to retract, but
not to extend (Automatic Locking Retractor
Type). See page 1-29.
WARNING:o Avoid wearing twisted seat belts. A
twisted belt can't do its job as well. In a
collision, it could even cut into you. Be
sure the belt webbing is straight and not
twisted.
o Be careful not to damage the belt web-
bing or hardware. If the belt webbing or
hardware is damaged, replace it.
!
Page 42 of 253

1FEATURES OF YOUR HYUNDAI
29
!
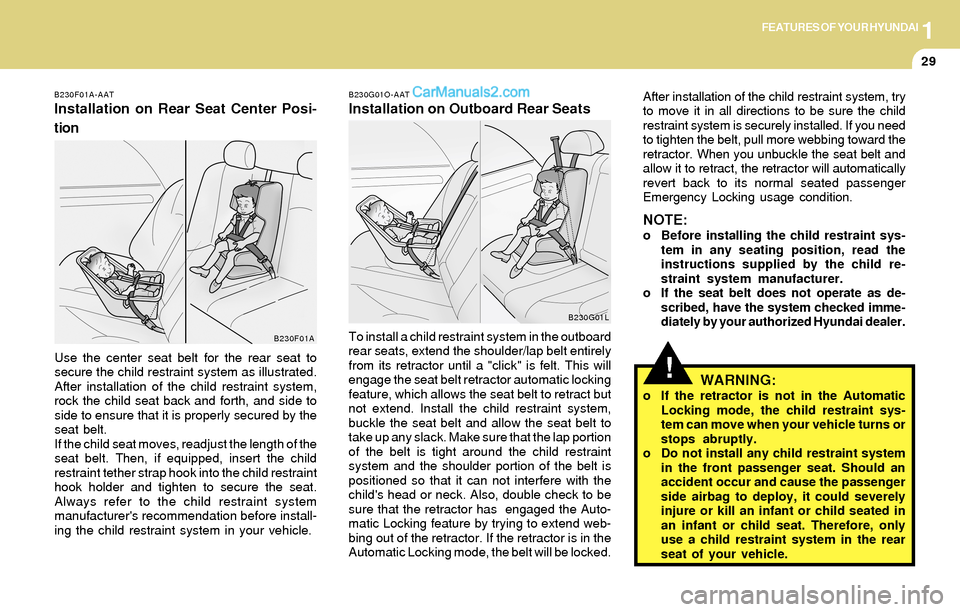
B230G01O-AAT
Installation on Outboard Rear Seats
WARNING:
o If the retractor is not in the Automatic
Locking mode, the child restraint sys-
tem can move when your vehicle turns or
stops abruptly.
o Do not install any child restraint system
in the front passenger seat. Should an
accident occur and cause the passenger
side airbag to deploy, it could severely
injure or kill an infant or child seated in
an infant or child seat. Therefore, only
use a child restraint system in the rear
seat of your vehicle. To install a child restraint system in the outboard
rear seats, extend the shoulder/lap belt entirely
from its retractor until a "click" is felt. This will
engage the seat belt retractor automatic locking
feature, which allows the seat belt to retract but
not extend. Install the child restraint system,
buckle the seat belt and allow the seat belt to
take up any slack. Make sure that the lap portion
of the belt is tight around the child restraint
system and the shoulder portion of the belt is
positioned so that it can not interfere with the
child's head or neck. Also, double check to be
sure that the retractor has engaged the Auto-
matic Locking feature by trying to extend web-
bing out of the retractor. If the retractor is in the
Automatic Locking mode, the belt will be locked.After installation of the child restraint system, try
to move it in all directions to be sure the child
restraint system is securely installed. If you need
to tighten the belt, pull more webbing toward the
retractor. When you unbuckle the seat belt and
allow it to retract, the retractor will automatically
revert back to its normal seated passenger
Emergency Locking usage condition.
NOTE:o Before installing the child restraint sys-
tem in any seating position, read the
instructions supplied by the child re-
straint system manufacturer.
o If the seat belt does not operate as de-
scribed, have the system checked imme-
diately by your authorized Hyundai dealer.
B230G01L B230F01A-AAT
Installation on Rear Seat Center Posi-
tion
Use the center seat belt for the rear seat to
secure the child restraint system as illustrated.
After installation of the child restraint system,
rock the child seat back and forth, and side to
side to ensure that it is properly secured by the
seat belt.
If the child seat moves, readjust the length of the
seat belt. Then, if equipped, insert the child
restraint tether strap hook into the child restraint
hook holder and tighten to secure the seat.
Always refer to the child restraint system
manufacturer's recommendation before install-
ing the child restraint system in your vehicle.
B230F01A
Page 63 of 253

1FEATURES OF YOUR HYUNDAI
50WINDSHIELD WIPER AND WASHER
SWITCH
B340G01L-GAT
Auto Light (If installed)
To operate the automatic light feature, turn the
barrel on the end of the multi-function switch. If
you set the multi-function switch to "AUTO", the
tail lights and headlights will be turned automati-
cally on or off according to external illumination.
B350A01A-AAT
The windshield wiper switch has three posi-
tions:
1. Intermittent wiper operation
2. Low-speed operation
3. High-speed operation
NOTE:To prevent damage to the wiper system, do
not attempt to wipe away heavy accumula-
tions of snow or ice. Accumulated snow
and ice should be removed manually. If
there is only a light layer of snow or ice,
operate the heater in the defrost mode to
melt the snow or ice before using the wiper.
HSM294B350A01O-A
(1)
(2)
(3)
B350B01O-GAT
Windshield Washer Operation
To use the windshield washer, pull the wiper/
washer lever toward the steering wheel. When
the washer lever is operated, the wipers auto-
matically make two passes across the wind-
shield. The washer continues to operate until
the lever is released.
NOTE:o Do not operate the washer more than 15
seconds at a time or when the fluid
reservoir is empty.
o In icy or freezing weather, be sure the
wiper blades are not frozen to the glass
prior to operating the wipers.
o In areas where water freezes in winter,
use windshield washer antifreeze.
B350B01O-A
Page 66 of 253

1FEATURES OF YOUR HYUNDAI
53DIGITAL CALENDARDIGITAL CLOCK
NOTE:The ignition must be in the "ON" position
for the rear window defroster to operate.
B400A01A-AAT
There are three control buttons for the digital
clock. Their functions are:
HOUR - Push "H" to advance the hour indi-
cated.
MIN - Push "M" to advance the minute indicated.
RESET - Push "R" to reset minutes to ":00" to
facilitate resetting the clock to the correct time.
When this is done:
Pressing "R" between 10 : 30 and 11 : 29
changes the readout to 11 : 00.
Pressing "R" between 11 : 30 and 12 : 29
changes the readout to 12 : 00.
B400B02O-GAT
(If installed)
How to adjust the date & the time
1. Whenever "M" button is pushed, the "YEAR",
"MONTH", "DAY", "HOUR" and "MINUTE"
blinks in order.
2. Adjust the date & the time by pushing
" (UP)", " (DOWN)" button when the
year/month/day/hour/minute each blinks.
3. After adjusting the date & the time, push "M"
button once more and the adjustment is
completed.
NOTE:When the battery has been reconnected or
charged, set the date and time as described
above. However, the first display mode is
set on DEC 01.
HSM100
HSM292
CAUTION:Do not clean the inner side of the rear
window glass with an abrasive type of glass
cleaner or use a scraper to remove foreign
deposits from the inner surface of the glass
as this may cause damage to the defroster
elements.
!
Page 83 of 253

1FEATURES OF YOUR HYUNDAI
70ROOF RACK
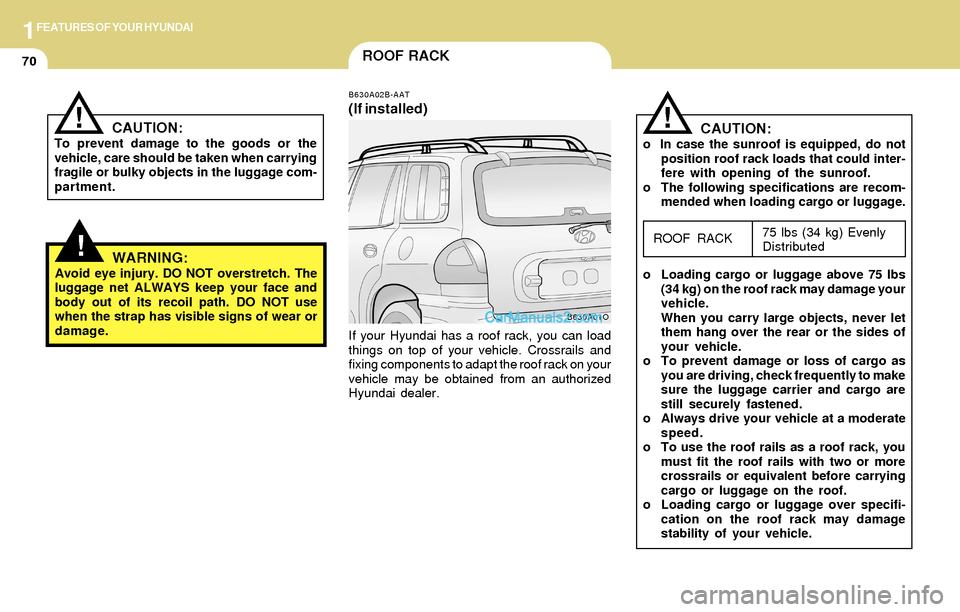
B630A02B-AAT
(If installed)
If your Hyundai has a roof rack, you can load
things on top of your vehicle. Crossrails and
fixing components to adapt the roof rack on your
vehicle may be obtained from an authorized
Hyundai dealer.
B630A01O
CAUTION:o In case the sunroof is equipped, do not
position roof rack loads that could inter-
fere with opening of the sunroof.
o The following specifications are recom-
mended when loading cargo or luggage.
75 lbs (34 kg) Evenly
Distributed
o Loading cargo or luggage above 75 lbs
(34 kg) on the roof rack may damage your
vehicle.
When you carry large objects, never let
them hang over the rear or the sides of
your vehicle.
o To prevent damage or loss of cargo as
you are driving, check frequently to make
sure the luggage carrier and cargo are
still securely fastened.
o Always drive your vehicle at a moderate
speed.
o To use the roof rails as a roof rack, you
must fit the roof rails with two or more
crossrails or equivalent before carrying
cargo or luggage on the roof.
o Loading cargo or luggage over specifi-
cation on the roof rack may damage
stability of your vehicle.
ROOF RACK
!!CAUTION:To prevent damage to the goods or the
vehicle, care should be taken when carrying
fragile or bulky objects in the luggage com-
partment.
!WARNING:Avoid eye injury. DO NOT overstretch. The
luggage net ALWAYS keep your face and
body out of its recoil path. DO NOT use
when the strap has visible signs of wear or
damage.
Page 93 of 253

1FEATURES OF YOUR HYUNDAI
80
B670D03O-AAT
Air Flow Control
This is used to turn the blower fan on/off and to
direct the flow of air. Air can be directed to the
floor, dashboard outlets, or windshield. Five
symbols are used to represent Face, Bi-Level,
Floor, Floor-Defrost and Defrost air position.
The MAX A/C mode is used to cool the inside of
the vehicle faster. The "OFF" mode is used to
turn the blower fan off.
B670D01O-1B670D02O
NOTE:o It should be noted that prolonged opera-
tion of the heating system in " " mode
will give rise to fogging of the wind-
shield and side windows and the air
within the passenger compartment will
become stale. In addition prolonged use
of the air conditioning with the " "
mode selected may result in the air within
the passenger compartment becoming
excessively dry.
o When the ignition switch is turned "ON"
the air intake control switch will change
to " " mode in floor, floor-defrost and
defrost position. This is normal opera-
tion. But, the air intake control switch
will change to " " mode when the
ignition switch is turned "ON" with the
MAX A/C mode selected.
Face-Level
Selecting the "Face" mode will cause air to be
discharged through the face level vents.
Page 102 of 253

1FEATURES OF YOUR HYUNDAI
89
B970C01O-GAT
Automatic OperationNOTE:If the battery has been discharged or dis-
connected, the temperature mode will reset
to Fahrenheit degree.
This is a normal condition and you can
adjust the temperature mode from Fahren-
heit to Centigrade as follows;
Press the TEMP down ( ) button 3 seconds
or more with the AMB button held down.
The display shows that the unit of tempera-
ture is adjusted to Fahrenheit or Centigrade
(°F
→ →→ →
→ °C or °C
→ →→ →
→ °F).
The FATC (Full Automatic Temperature Con-
trol) system automatically controls the heating
and cooling by doing as follows:
1. Push the "AUTO" switch. The indicator light
will come on confirming that the Face, Floor
and/or Bi-Level modes as well as the blower
speed and, the air conditioning will operate if
ambient temperature is higher than 32°F
(0°C) and automatically turns off if the ambi-
ent temperature drops below 32°F(0°C).
NOTE:Never place things on the sensor which is
located in the car on the instrument panel
to ensure better control of the heating and
cooling system.
B970C01O
HSM502
Photo sensor 2. Push the "TEMP" button to set the desired
temperature.
The temperature will increase to the maxi-
mum "HI" by pushing on the button. Each
push of the button will cause the temperature
to increase by 1°F(0.5°C).
The temperature will decrease to the mini-
mum "LO" by pushing on the button. Each
push of the button will cause the temperature
to decrease by 1°F(0.5°C).
B970C03O