2004 Hyundai Grandeur Starting
[x] Cancel search: StartingPage 141 of 235
2- 8 DRIVING YOUR HYUNDAI
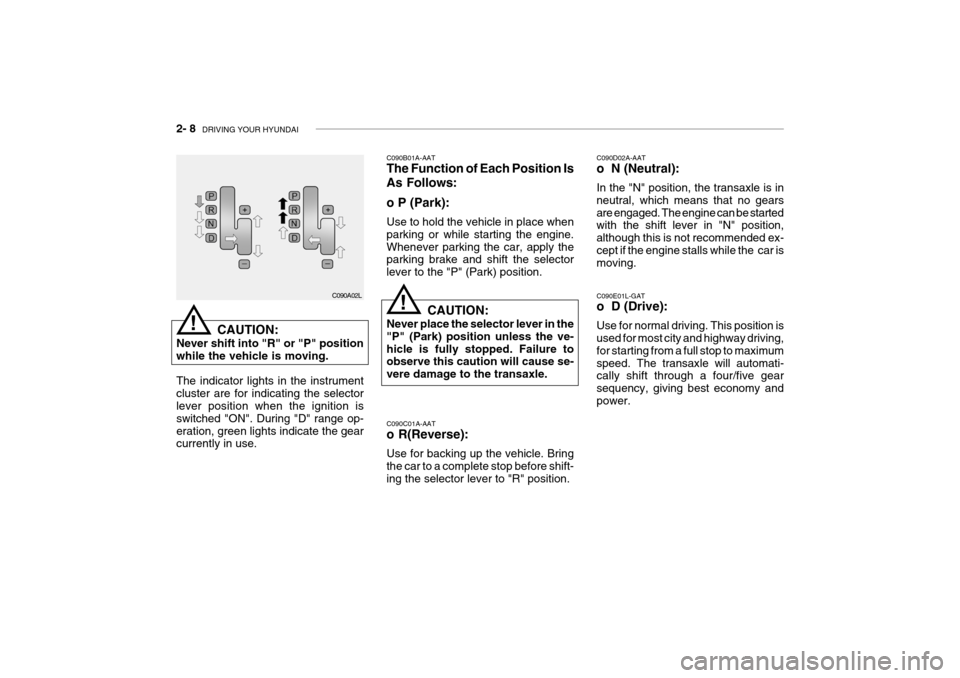
C090C01A-AAT o R(Reverse): Use for backing up the vehicle. Bring the car to a complete stop before shift- ing the selector lever to "R" position. C090D02A-AAT o N (Neutral): In the "N" position, the transaxle is in neutral, which means that no gearsare engaged. The engine can be started with the shift lever in "N" position, although this is not recommended ex-cept if the engine stalls while the car is moving. C090E01L-GAT o D (Drive): Use for normal driving. This position is used for most city and highway driving, for starting from a full stop to maximumspeed. The transaxle will automati- cally shift through a four/five gear sequency, giving best economy andpower.
C090B01A-AAT The Function of Each Position Is As Follows: o P (Park): Use to hold the vehicle in place when parking or while starting the engine.Whenever parking the car, apply the parking brake and shift the selector lever to the "P" (Park) position.
CAUTION:
Never place the selector lever in the"P" (Park) position unless the ve-hicle is fully stopped. Failure to observe this caution will cause se- vere damage to the transaxle.
C090A02L
CAUTION:
Never shift into "R" or "P" positionwhile the vehicle is moving. The indicator lights in the instrument cluster are for indicating the selector lever position when the ignition is switched "ON". During "D" range op-eration, green lights indicate the gear currently in use.
!
!
Page 145 of 235

2- 12 DRIVING YOUR HYUNDAI
On slippery road surfaces, the traction control system (TCS) limits the drive wheels from spinning excessively, thushelping the car to accelerate. It also provides sufficient driving force and steering performance as the car turnsat accelerated speeds. SLIP Control Limits the drive wheels from spinning excessively during starting or while making accelerated turns on slipperyroads to avoid losing the driving force of the front wheels. Driving hints TCS does not actively apply brakes. Be sure to decelerate the car suffi- ciently before entering curves.
CAUTION:
When the TCS indicator blinks, SLIPcontrol function has been activat- ed. It also means that the road is slippery or your car is acceleratingexcessively. In this situation, gen- tly release foot pressure from the accelerator pedal and maintainmoderate speed.
C300A01L-DAG
Right-Hand Drive
C300A02Y-GAT TRACTION CONTROL SYSTEM (TCS)(If installed)
C300A01L
Left-Hand Drive
!
o Rough, gravel or snow-covered
roads.
o With tire chains installed.
o On roads where the road surface
is pitted or has different surface height.
The safety features of an ABSequipped vehicle should not be tested by high speed driving or cornering. This could endanger thesafety of yourself or others.
Page 156 of 235

3. WHAT TO DO IN AN EMERGENCY
If the Engine Will not Start .............................................................. 3-2
Jump Starting .................................................................................. 3-2
If the Engine Overheats .................................................................. 3-4
Spare Tire ....................................................................................... 3-5
If You Have a Flat Tire .................................................................... 3-5
If Your Car Must Be Towed ..........................................................3-10
Emergency Towing ....................................................................... 3-12
If You Lose Your Keys .................................................................. 3-12
3
Page 157 of 235
3- 2 WHAT TO DO IN AN EMERGENCY
D010A01A-AAT IF THE ENGINE WILL NOT START
WARNING:
If the engine will not start, do not push or pull the car to start it. Thiscould result in a collision or cause other damage. In addition, push or pull starting may cause the cata-lytic converter to be overloaded and create a fire hazard. D010B01A-AAT If Engine Doesn't Turn Over or Turns Over Slowly 1. If your car has an automatic
transaxle, be sure the gear selector lever is in "N" or "P" and the emer-gency brake is set.
2. Check the battery connections to be
sure they are clean and tight.
3. Turn on the interior light. If the light dims or goes out when you operatethe starter, the battery is discharged.
4. Check the starter connections to be sure they are securely tightened.
5. Do not push or pull the vehicle to start it. See instructions for "Jump Starting" on the following pages. D010D01A-AAT If Engine Stalls While Driving
1. Reduce your speed gradually, keep-
ing a straight line. Move cautiously off the road to a safe place.
2. Turn on your emergency flashers.
3. Try to start the engine again. If your
vehicle will not start, contact a Hyundai dealer or seek other quali- fied assistance.
D010C02Y-AAT If Engine Turns Over Normally but Does Not Start
1. Check fuel level.
2. With the key in the off position, check all connectors at ignition, coils and spark plugs. Reconnect any that may be disconnected or loose.
3. Check the fuel line in the engine compartment.
4. If engine still does not to start, call a
Hyundai dealer or seek other quali- fied assistance.
D010B01L
D020A03A-AAT JUMP STARTING
HXG554J
Dischargedbattery
Booster battery
!
Page 158 of 235

WHAT TO DO IN AN EMERGENCY 3- 3
WARNING:
The gas produced by the battery during the jump-start operation is highly explosive. If these instruc- tions are not followed exactly, seri-ous personal injury and damage to the vehicle may occur! If you are not sure how to follow this proce-dure, seek qualified assistance. Automobile batteries contain sul- furic acid. This is poisonous andhighly corrosive. When jump start- ing, wear protective glasses and be careful not to get acid on yourself,your clothing or on the car.
o If you should accidentally get acid on your skin or in your eyes, imme- diately remove any contaminatedclothing and flush the area with clear water for at least 15 minutes. Then promptly obtain medical attention. Ifyou must be transported to an emer- gency facility, continue to apply water to the affected area with a spongeor cloth. o The gas produced by the battery
during the jump-start operation ishighly explosive. Do not smoke orallow a spark or open flame in the vicinity.
o The battery being used to provide the jump start must be 12-volt. If youcannot determine that it is a 12-volt battery, do not attempt to use it forthe jump start.
o To jump start a car with a discharged
battery, follow this procedure ex-actly:
1. If the booster battery is installed in another vehicle, be sure the two vehicles are not touching.
2. Turn off all unnecessary lights and
accessories in both vehicles.
3. Attach the clamps of the jumper
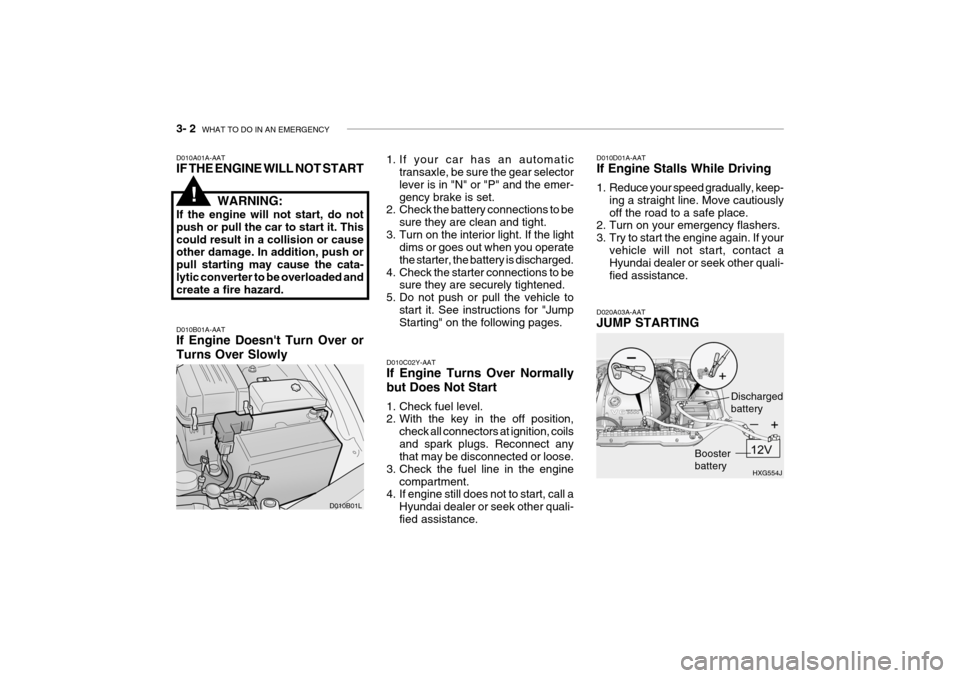
cable in the exact order shown in the illustration. That is, first, attach one clamp of the jumper cable to the positive (+) post or cable of thedischarged battery. Then attach the other end of the same cable to the positive (+) post or cable of thebooster battery. Next, using the other cable, attach one clamp to the negative (-) post or cable of the booster battery. Then attach the other end of that cable to a solid metal part of the engine of the ve-hicle with the discharged battery away from the battery. Do not con- nect the cable to any moving part.
4. Start the engine in the car with the booster battery and let it run for afew minutes. This will help to as-sure that the booster battery is fully charged. During the jumping opera- tion, run the engine in this vehicle atabout 2,000 rpm.
5. Start the engine in the car with the
discharged battery using the nor-mal starting procedure. After the engine starts, leave the jumper cables connected and let the enginerun at fast idle or about 2,000 rpm for several minutes.
6. Carefully remove the jumper cables
in the reverse order of attachment.
If you do not know why your battery became discharged (because the lights were left on, etc.), have the charging system checked by your Hyundaidealer.!
Page 175 of 235

5- 2 VEHICLE MAINTENANCE REQUIREMENTS
F010C01A-GAT
Specified Scheduled Procedures
These are the procedures such as
inspections, adjustments and replace- ments that are listed in the mainte- nance charts starting on page 5-4.These procedures must be performed at the intervals shown in the mainte- nance schedule to assure that yourwarranty remains in effect. Although it is strongly recommended that they be performed by the factory-trainedor distributor-trained technicians at your Hyundai dealer, these proce- dures may be performed at any quali-fied service facility. F010D01A-GAT
General Checks
These are the regular checks youshould perform when you drive your Hyundai or you fill the fuel tank. A list of these items will be found on page6-5.
F010A01A-GAT MAINTENANCE INTERVALS
Service Requirements To assure that you receive the great- est number of kilometers of satisfyingoperation from your Hyundai, certain maintenance procedures must be performed. Although careful designand engineering have reduced these to a minimum, those that are required are of the utmost importance.It is your responsibility to have thesemaintenance procedures performedto comply with the terms of the war- ranties covering your new Hyundai. The Service Passport supplied withyour new vehicle provides further in- formation about these warranties.
F010B01A-AAT
Maintenance Requirements
The maintenance required for your
Hyundai can be divided into threemain areas:
o Specified scheduled procedures
o General checks
o Do-it-yourself maintenance It is suggested that genuine Hyundai
service parts be used for any requiredrepairs or replacements. Other parts ofequivalent quality such as engine oil, engine coolant, manual or auto transaxle oil, brake fluid and so onwhich are not supplied by Hyundai Motor Company or its distributor may be used without affecting your war-ranty coverage but you should al- ways be sure these are equivalent to the quality of the original Hyundaiparts. Your Service Passport provides further information about your war- ranty coverage.
Page 180 of 235

VEHICLE MAINTENANCE REQUIREMENTS 5- 7
F060A01A-AAT
EXPLANATION OF SCHEDULED MAINTENANCE ITEMS
F060M01A-AAT
o Engine Oil and Filter
The engine oil and filter should be changed at the intervals specified in the maintenance schedule. If the car is being driven in severe conditions,more frequent oil and filter changes are required. F060B01A-AAT
o Drive Belts
Inspect all drive belts for evidence of cuts, cracks, excessive wear or oil and replace if necessary. Drive beltsshould be checked periodically for proper tension and adjusted as nec- essary. After installing a new filter, run the
engine for several minutes, and checkfor leaks at the connections. Fuelfilters should be installed by trained technicians.
F060D01A-AAT
o Fuel Lines, Fuel Hoses and Connections
Check the fuel lines, fuel hoses and connections for leakage and damage.Have a trained technician replace any damaged or leaking parts immedi- ately. F060E01A-AAT
o Timing Belt Inspect all parts related to the timing belt for damage and deformation. Replace any damaged parts immedi- ately. F060G01A-AAT
o Vapor Hose and Fuel Filler Cap The vapor hose and fuel filler cap should be inspected at those inter- vals specified in the maintenance schedule. Make sure that a new va-por hose or fuel filler cap is correctly replaced. F060F01A-AAT
o Vacuum, Crankcase Ventila-
tion Hoses
Inspect the surface of hoses for evi- dence of heat and/or mechanical dam-age. Hard and brittle rubber, crack- ing, tears, cuts, abrasions, and ex- cessive swelling indicate deteriora-tion. Particular attention should be paid to examine those hose surfaces nearest to high heat sources, such asthe exhaust manifold.Inspect the hose routing to assurethat the hoses do not come in contact with any heat source, sharp edges or moving component which might causeheat damage or mechanical wear. Inspect all hose connections, such as clamps and couplings, to make surethey are secure, and that no leaks are present. Hoses should be replaced immediately if there is any evidenceof deterioration or damage.
F060C01A-AAT
o Fuel Filter
A clogged filter can limit the speed atwhich the vehicle may be driven, dam- age the emission system and cause hard starting. If an excessive amountof foreign matter accumulates in the fuel tank, the filter may require re- placement more frequently.
Page 223 of 235

CONSUMER INFORMATION 8- 3
CAUTION:
Always observe the following:
o Check pressures when the tires are cold. That is, after the car has been parked for at least threehours and hasn't been driven more than 1.6 km or one mile since starting up.
o Check the pressure of your spare tire each time you check thepressure of other tires.
o Never overload your car. Be es- pecially careful about overload-ing if you equip your car with a luggage rack or car top carrier. I040A01S-GAT SNOW TIRES If you equip your car with snow tires, they should be the same size and have the same load capacity as the original tires. Snow tires should beinstalled on all four wheels; other- wise, poor handling may result. Snow tires should carry 28 kPa (4 psi) more air pressure than the pres- sure recommended for the standard tires on the tire label on the driver'sdoor edge, or up to the maximum pressure shown on the tire sidewall whichever is less.Do not drive faster than 120 km/h (75mph) when your car is equipped withsnow tires.
6.0x15 6.0x16
TIRE SIZE
RIM
SIZE PRESSURE, kPa (PSI)
205/65R15 94V205/60R16 96V REAR
210(30) 210(30) FRONT
240(35) 240(35)
NORMAL LOAD MAXIMUM LOAD
REAR
240(35)240(35)
FRONT
220(32)230(33)
These pressures were chosen to pro-
vide the most satisfactory combina-tion of ride comfort, tire wear and stability under normal conditions. Tire pressures should be checked at least monthly. Proper tire inflation pressures should be maintained for these reasons:
o Lower-than-recommended tire pressures cause uneven tread wear and poor handling.
o Higher-than-recommended tire pressures increase the chance ofdamage from impacts and causeuneven tread wear.
!