Page 192 of 389

1CONTROLS AND EQUIPMENT
12
!
!WARNING:
To ensure the seat is locked se- curely, attempt to move the seatforward or rearward without using the lock release lever.
SEATS
!
WARNING:
1) Be careful that someone's head, hands and body are not trapped by a closing window.
2) Never try to operate the main switch on the driver's door andthe individual door windowswitch in opposing directions at the same time. If this is done, the window will stop and cannot beopened or closed.
3) Do not leave children alone in the
car. Always remove the ignitionkey for their safety. SB070A1-E FRONT SEAT ADJUSTMENT
WARNING:
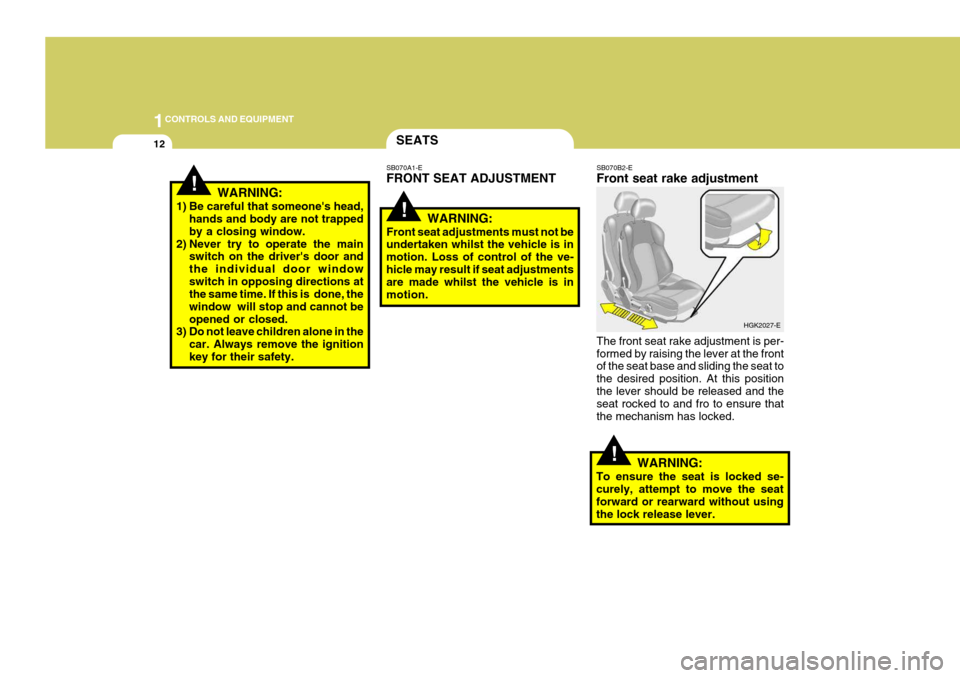
Front seat adjustments must not be undertaken whilst the vehicle is in motion. Loss of control of the ve-hicle may result if seat adjustments are made whilst the vehicle is in motion. SB070B2-E Front seat rake adjustment The front seat rake adjustment is per- formed by raising the lever at the front of the seat base and sliding the seat to the desired position. At this positionthe lever should be released and the seat rocked to and fro to ensure that the mechanism has locked.
HGK2027-E
Page 231 of 389

1
CONTROLS AND EQUIPMENT
51
NOTE: The ignition must be in the "ON" position to turn on the headlights. Side light auto cut If you do not turn the side lights "OFF" after driving, the side lights will auto-matically shut "OFF" when the driver's door is opened. To turn them "ON" again you mustsimply turn the ignition key to the "ON" position. SB220D1-E HIGH AND LOW BEAM To turn on the headlight high beams, push the lever forward (away fromyou). For low beams, pull the lever back (toward you). The appropriate headlight beam indicator light will comeon at the same time. B340G01LZ-GAT Auto Light (Not all models) To operate the automatic lamp fea- ture, turn the barrel on the end of the multi-function switch. If you set themulti-function switch to "AUTO", the tail lamps and headlamps will be turned automatically on or off according toexternal illumination.
HGK2075-ENOTE: Switch on car lamp manually in foggy, cloudy and rainy conditions. NOTE:
o Never place anything over sen-
sor located on the instrument panel, this will ensure better auto lamp system control.
o Don't clean the sensor using a window cleaner.
o If your vehicle has window tint or other types of coating on the front windscreen, the AUTO lamp system may not work properly. B340G01GK-E
Auto Light Sensor
Page 233 of 389

1
CONTROLS AND EQUIPMENT
53
NOTE:
o Do not operate the washers for
more than 15 seconds continu- ously or when the fluid reservoiris empty.
o In icy or snowy weather, ensure
that the wiper blades are not fro-zen to the glass prior to operat- ing the wipers.
o In areas where water freezes in winter, use windshield washerantifreeze.
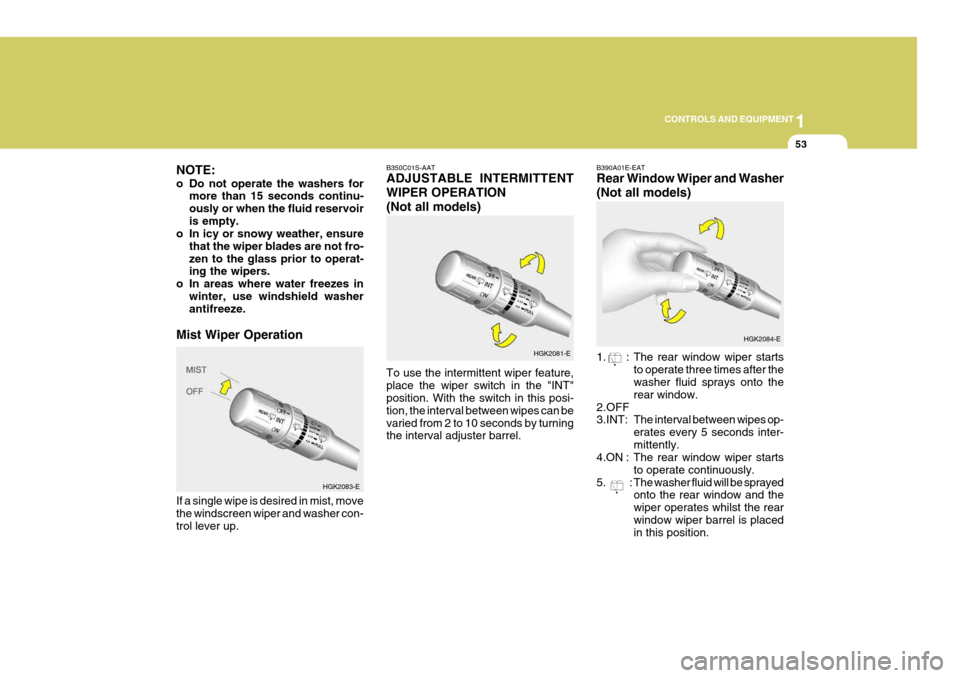
Mist Wiper Operation B350C01S-AAT ADJUSTABLE INTERMITTENT WIPER OPERATION(Not all models) To use the intermittent wiper feature, place the wiper switch in the "INT" position. With the switch in this posi- tion, the interval between wipes can bevaried from 2 to 10 seconds by turning the interval adjuster barrel.
HGK2081-E
HGK2084-E
HGK2083-E
If a single wipe is desired in mist, move the windscreen wiper and washer con-trol lever up.B390A01E-EAT Rear Window Wiper and Washer (Not all models)
1. : The rear window wiper starts to operate three times after the washer fluid sprays onto the rear window.
2.OFF 3.INT: The interval between wipes op- erates every 5 seconds inter-mittently.
4.ON : The rear window wiper starts
to operate continuously.
5. : The washer fluid will be sprayed onto the rear window and thewiper operates whilst the rearwindow wiper barrel is placed in this position.
Page 235 of 389

1
CONTROLS AND EQUIPMENT
55HAZARD WARNING SYSTEM
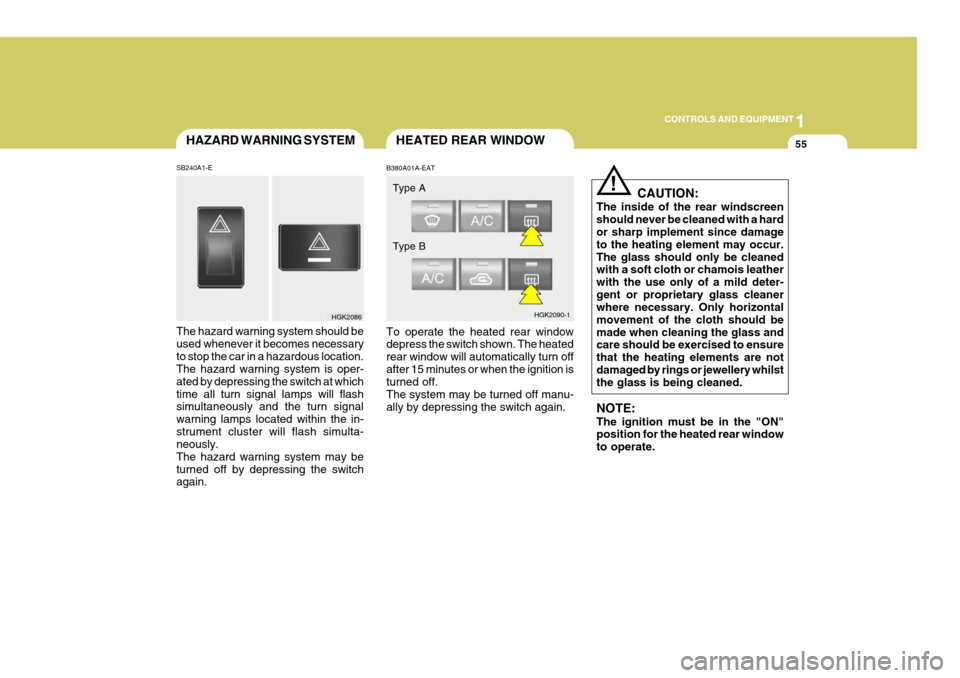
SB240A1-E The hazard warning system should be used whenever it becomes necessaryto stop the car in a hazardous location. The hazard warning system is oper- ated by depressing the switch at whichtime all turn signal lamps will flash simultaneously and the turn signal warning lamps located within the in-strument cluster will flash simulta- neously. The hazard warning system may beturned off by depressing the switch again.
HGK2086
HEATED REAR WINDOW
B380A01A-EAT To operate the heated rear window depress the switch shown. The heated rear window will automatically turn offafter 15 minutes or when the ignition is turned off. The system may be turned off manu-ally by depressing the switch again. Type A
HGK2090-1
Type B
!
CAUTION:
The inside of the rear windscreen should never be cleaned with a hard or sharp implement since damage to the heating element may occur.The glass should only be cleaned with a soft cloth or chamois leather with the use only of a mild deter-gent or proprietary glass cleaner where necessary. Only horizontal movement of the cloth should bemade when cleaning the glass and care should be exercised to ensure that the heating elements are not damaged by rings or jewellery whilst the glass is being cleaned. NOTE: The ignition must be in the "ON" position for the heated rear window to operate.
Page 243 of 389

1
CONTROLS AND EQUIPMENT
63
B510D01Y-EAT OUTSIDE REARVIEW MIRROR HEATER (Not all models) The outside rearview mirror heater is actuated in connection with the rearwindow defroster. To heat the outside rearview mirror glass, push in the switch for the rear window defroster. Therearview mirror glass will be heated for defrosting or defogging and will give you improved rear vision in inclementweather conditions. Push the switch again to turn the heater off. The out- side rearview mirror heater automati-cally turns itself off after 15 minutes.
HGK2090-1
Type A
Type B
!
SB360C1-F FOLDING THE OUTSIDE REAR VIEW MIRRORS To fold the outside rear view mirrors, push them towards the rear.The outside rear view mirrors can be folded rearward for parking in restricted areas. WARNING:
Do not adjust or fold the outsiderear view mirrors while the vehicle is moving. This could result in loss of control, and an accident causingdeath, serious injury or property damage. HGK2055
DAY/NIGHT INSIDE REAR- VIEW MIRROR
SB370A1-E The interior mirror is of the day/night type to enable the glare of headlampsfrom following vehicles to be elimi- nated during night time driving. The tab located at the bottom of themirror should be set to the position nearest the windscreen for normal day time driving, and flipped towards therear of the vehicle to eliminate glare during night time driving. To adjust the field of vision, the mirror may be movedby hand upon the mounting. NOTE: The mirror should always be ad- justed prior to setting the vehicle in motion.
HGK2052
Page 244 of 389

1CONTROLS AND EQUIPMENT
64HIGH-MOUNTED REAR STOP LIGHT
B550A02S-DAT In addition to the lower-mounted rear stopl ights on either side of the car, thehigh mounted rear stop light in the centre of the rear window or inserted in the rear spoiler also comes on whenthe brakes are applied. Type A
B550A01GK
Type B Type C
PARKING BRAKE
SB380A1-E The parking brake must always be set when the vehicle is to be left unattended.When the parking brake is applied, and the ignition key is at the "ON" position, the parking brake warning lamp will beilluminated. Before driving the vehicle, the parking brake must be fully released and the warning lamp extinguished.
o To set the parking brake, apply the foot brake and pull the parking brake lever up with the button depressed. Release the button when the brake is fully applied.
o To release the parking brake, apply the foot brake and pull up the park-ing brake lever slightly. Depress thebutton and lower the lever. HGK3019
B520B01O-GAT (Electric type) (Not all models) The electric type day/night inside rear- view mirror automatically controls the glare of headlights of the car behindyou. Adjust the rearview mirror to the desired position.
Sensor
HGK2051
Page 248 of 389
1CONTROLS AND EQUIPMENT
68SUNVISOR
SB510A3-E Sun visors are fitted to both the driver and passenger side of the vehicle.Certain derivatives are equipped with a vanity mirror which is located on the back of the passenger visor. The visormay be lowered to reduce the amount of glare from directly ahead, or may be moved towards the side window toreduce glare from the side of the ve- hicle, once the inner pivot has been unclipped from the bracket. Vanity mirror
HGK2119-E
!WARNING:
Do not close an open hatchback door whilst a person(s) is sittingupright on the rear seat. The hatch- back door or hatchback door glass may contact the head of a personsitting upright on the rear seat. Clos- ing the hatchback door onto a person's head may cause seriousinjuries, including death.
B540D01GK-EAT when you close the hatchback door
B540D01GK
HGK227
Page 256 of 389
1FEATURES OF YOUR HYUNDAI
76HEATING AND VENTILA- TION
B670A01GK-GAT Rotary Type
1. Air Conditioning switch
2. Air intake control switch
3. Rear window defroster switch
4. Air flow control switch
5. Fan speed control switch
6. Temperature control switch B670B01A-AAT Fan Speed Control (Blower Control) This is used to turn the blower fan on or off and to select the fan speed. This blower fan speed, and therefore the volume of air delivered from thesystem, may be controlled manually by setting the blower control between the "1" and "4" positions. B670E02A-AAT Temperature Control This control is used to adjust the degree of heating or cooling desired.
Cool
HGK2091
HGK2093 HGK2092
Warm