Page 276 of 389
1FEATURES OF YOUR HYUNDAI
96ANTENNA
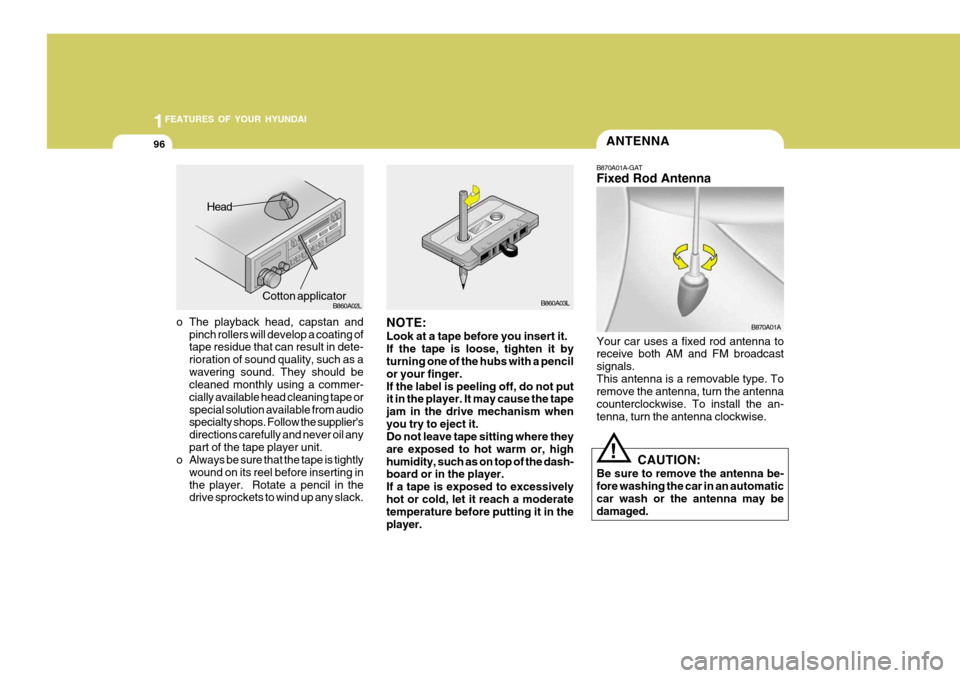
o The playback head, capstan and pinch rollers will develop a coating of tape residue that can result in dete- rioration of sound quality, such as awavering sound. They should be cleaned monthly using a commer- cially available head cleaning tape orspecial solution available from audio specialty shops. Follow the supplier's directions carefully and never oil anypart of the tape player unit.
o Always be sure that the tape is tightly
wound on its reel before inserting inthe player. Rotate a pencil in the drive sprockets to wind up any slack. B860A03L
NOTE: Look at a tape before you insert it. If the tape is loose, tighten it by turning one of the hubs with a pencil or your finger.If the label is peeling off, do not put it in the player. It may cause the tape jam in the drive mechanism whenyou try to eject it. Do not leave tape sitting where they are exposed to hot warm or, highhumidity, such as on top of the dash- board or in the player. If a tape is exposed to excessivelyhot or cold, let it reach a moderate temperature before putting it in the player. B870A01A
!
Head
Cotton applicator B860A02L
B870A01A-GAT Fixed Rod Antenna Your car uses a fixed rod antenna to receive both AM and FM broadcast signals.This antenna is a removable type. To remove the antenna, turn the antenna counterclockwise. To install the an-tenna, turn the antenna clockwise.
CAUTION:
Be sure to remove the antenna be- fore washing the car in an automatic car wash or the antenna may bedamaged.
Page 280 of 389
2DRIVING YOUR HYUNDAI
4
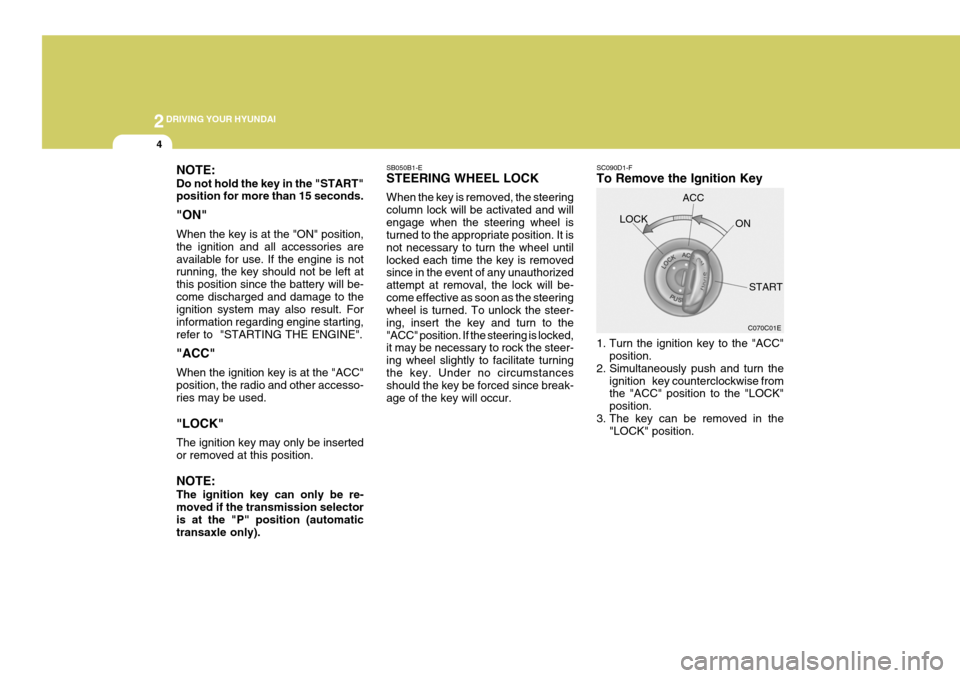
NOTE: Do not hold the key in the "START" position for more than 15 seconds. "ON" When the key is at the "ON" position, the ignition and all accessories areavailable for use. If the engine is not running, the key should not be left at this position since the battery will be-come discharged and damage to the ignition system may also result. For information regarding engine starting,refer to "STARTING THE ENGINE". "ACC" When the ignition key is at the "ACC" position, the radio and other accesso- ries may be used. "LOCK" The ignition key may only be inserted or removed at this position. NOTE: The ignition key can only be re- moved if the transmission selector is at the "P" position (automatictransaxle only). SC090D1-F To Remove the Ignition Key
1. Turn the ignition key to the "ACC"
position.
2. Simultaneously push and turn the
ignition key counterclockwise from the "ACC" position to the "LOCK" position.
3. The key can be removed in the "LOCK" position.LOCK
C070C01E
ACC
ON
START
SB050B1-E STEERING WHEEL LOCK When the key is removed, the steering column lock will be activated and willengage when the steering wheel is turned to the appropriate position. It is not necessary to turn the wheel untillocked each time the key is removed since in the event of any unauthorized attempt at removal, the lock will be-come effective as soon as the steering wheel is turned. To unlock the steer- ing, insert the key and turn to the"ACC" position. If the steering is locked, it may be necessary to rock the steer- ing wheel slightly to facilitate turningthe key. Under no circumstances should the key be forced since break- age of the key will occur.
Page 305 of 389
3
IN CASE OF EMERGENCY
7
D060B01GK-EAT 1. Obtain Spare Tyre and Tool Remove the spare tyre, jack and tool bag from the boot. HGK4008
HGK4009
The jack is located behind the right side of luggage trim. Remove the jackcover with screwing the bolts. Turn the jack end counterclockwise to lower the jack height by using a screw driver orwrench bar and remove it from the bracket.
Flat tyre
SD070D1-E 2. Block the Wheel Block the wheel that is diagonally op- posite from the flat tyre to prevent thevehicle from rolling when the car is raised on the jack. HGK4011
Page 306 of 389
3 IN CASE OF EMERGENCY
8
HGK4013 Wrench barHGK4012
HFC4022
Wheel nutwrench
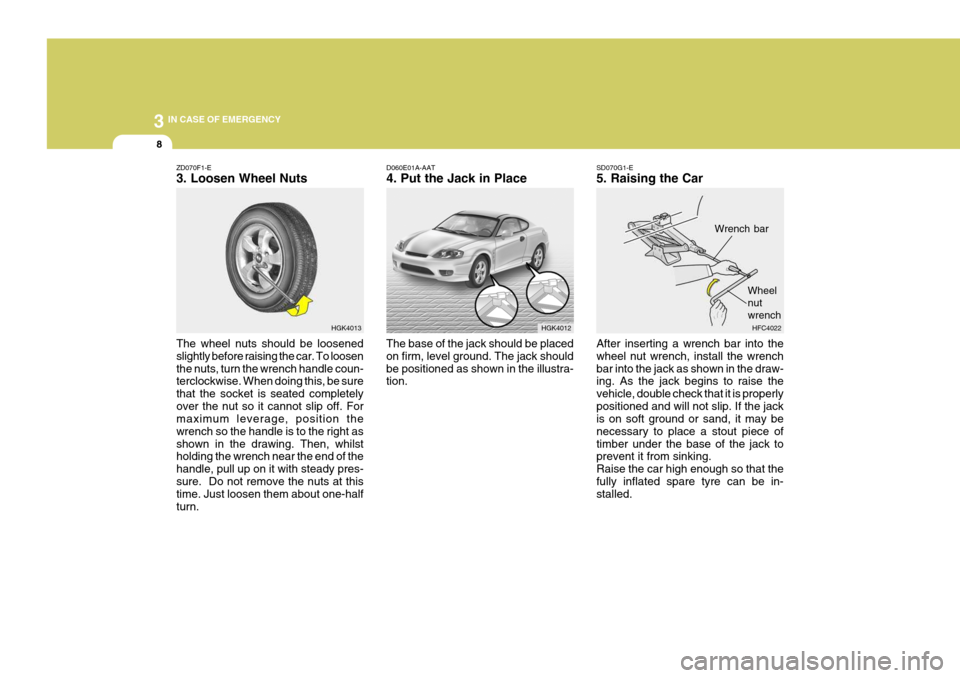
ZD070F1-E 3. Loosen Wheel Nuts The wheel nuts should be loosened slightly before raising the car. To loosenthe nuts, turn the wrench handle coun- terclockwise. When doing this, be sure that the socket is seated completelyover the nut so it cannot slip off. For maximum leverage, position the wrench so the handle is to the right asshown in the drawing. Then, whilst holding the wrench near the end of the handle, pull up on it with steady pres-sure. Do not remove the nuts at this time. Just loosen them about one-half turn. SD070G1-E 5. Raising the Car After inserting a wrench bar into the wheel nut wrench, install the wrenchbar into the jack as shown in the draw- ing. As the jack begins to raise the vehicle, double check that it is properlypositioned and will not slip. If the jack is on soft ground or sand, it may be necessary to place a stout piece oftimber under the base of the jack to prevent it from sinking. Raise the car high enough so that thefully inflated spare tyre can be in- stalled.
D060E01A-AAT 4. Put the Jack in Place
The base of the jack should be placed on firm, level ground. The jack shouldbe positioned as shown in the illustra- tion.
Page 308 of 389

3 IN CASE OF EMERGENCY
10
HGK4014
D060H02Y-EAT 7. Reinstall Wheel Nuts To reinstall the wheel hold it on the studs put the wheel nuts on the studsand tighten them finger tight. The nuts should be installed with their small diameter ends directed inward. Jigglethe tyre to be sure it is completely seated, then tighten the nuts as much as possible with your fingers again. SD070J1-E
8. Lower Vehicle and Tighten
Nuts
Lower the car to the ground by turning the wheel nut wrench counterclock- wise. Then position the wrench as shown in the drawing and tighten thewheel nuts. Be sure the socket is seated completely over the nut. Do not stand on the wrench handle or use an exten-sion pipe over the wrench handle.
D060H01GK Go around the wheel tightening everyother nut until they are all tight. Thendouble-check each nut for tightness. After changing wheels, have a techni- cian tighten the wheel nuts to theirproper torque as soon as possible. Wheel nut tightening torque Steel wheel & aluminium alloy wheel: 90-110 Nm. (65-80 lb.ft)
Page 333 of 389
6
OWNER MAINTENANCE
7
HGK5005
SG030D2-E
ENGINE OIL REPLENISHMENT
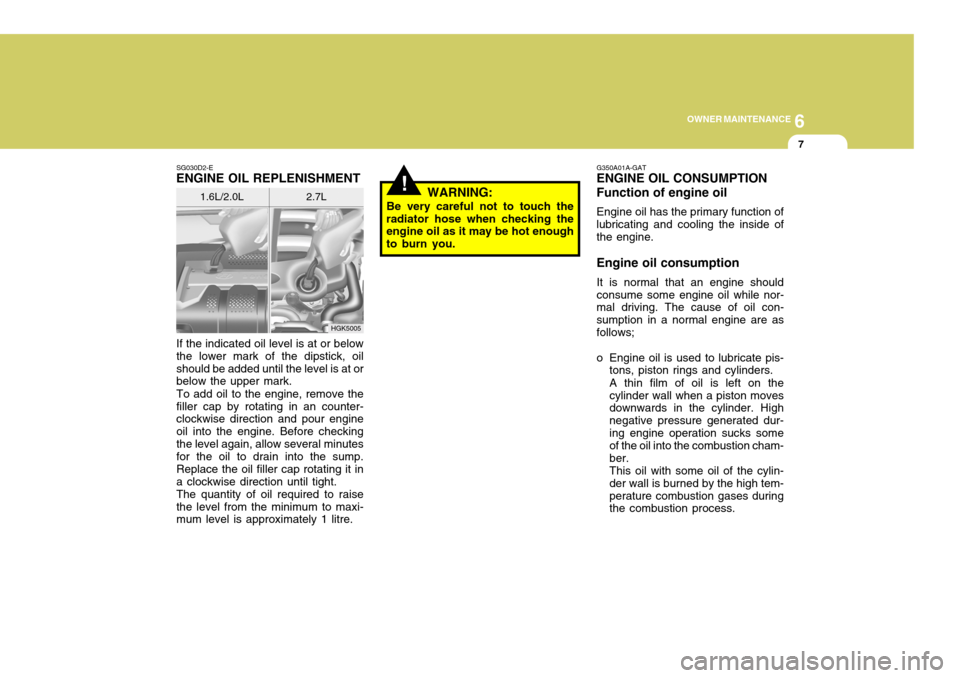
If the indicated oil level is at or below the lower mark of the dipstick, oilshould be added until the level is at or below the upper mark. To add oil to the engine, remove the filler cap by rotating in an counter- clockwise direction and pour engine oil into the engine. Before checkingthe level again, allow several minutes for the oil to drain into the sump. Replace the oil filler cap rotating it ina clockwise direction until tight.The quantity of oil required to raisethe level from the minimum to maxi- mum level is approximately 1 litre. 1.6L/2.0L
G350A01A-GAT ENGINE OIL CONSUMPTION Function of engine oil Engine oil has the primary function of lubricating and cooling the inside of the engine. Engine oil consumption It is normal that an engine should consume some engine oil while nor- mal driving. The cause of oil con- sumption in a normal engine are asfollows;
o Engine oil is used to lubricate pis-
tons, piston rings and cylinders. A thin film of oil is left on the cylinder wall when a piston moves downwards in the cylinder. High negative pressure generated dur-ing engine operation sucks some of the oil into the combustion cham- ber.This oil with some oil of the cylin-der wall is burned by the high tem-perature combustion gases during the combustion process.
2.7L
!WARNING:
Be very careful not to touch the
radiator hose when checking the engine oil as it may be hot enough to burn you.
Page 335 of 389
6
OWNER MAINTENANCE
9
!
3. Prepare a suitable receptacle to
collect the displaced oil and re- move the drain plug from the sump.
WARNING:
The oil being drained from the
engine will be hot. Care should beexercised to prevent scalding. 6. Install a new oil filter having
smeared the sealing ring with cleanoil and rotating clockwise until the filter contacts the mounting and then a further one half turn. Do notover-tighten. Tightening torque: 1.2 ~ 1.6 kgf.m
7. Remove the engine oil level dip- stick.
8. Pour the specified quantity of the recom-mended oil into the engine and replace the filler cap. Start theengine and ensure that no oil leaks exist. Turn off the engine and after a couple minutes, recheck the oillevel.
4. When the oil has drained from the
sump, replace the drain plug usinga new gasket ensuring that the plug is not over tightened. Tightening torque: 4.5 ~ 4.0 kgf.m (1.6/2.0L) 4.5 ~ 3.5 kgf.m (2.7L)
5. Remove the oil filter by rotating counterclock-wise, using a propri-etary oil filter removal tool if neces- sary. Note that the oil filter will contain approximately 0.5 litres ofoil and this should be collected in a suitable receptacle. WARNING:
Prolonged and repeated contact with used engine oils may result inserious skin disorders including dermatitis and cancer. Avoid con- tact with skin as far as possibleand always wash thoroughly after any contact. Keep used oils out of reach of children. It is illegal topollute drains, water courses and soil. Use only authorized waste collection facilities including civic amenity sites and garages for the disposal of used oil and oil filters.If in doubt, contact the local au- thority for disposal instructions.
!
Page 340 of 389
6OWNER MAINTENANCE
14
!
HGK5066 4. When preparing to remove the old
spark plug, guide the socket down over the spark plug, being careful not to damage the ceramic insula-tor.
5. To remove the old spark plug, turn
the wrench handle in a counter-clockwise direction.
6. To install the new spark plug, guide the socket down over the spark plug, being careful not to damage the ceramic insulator.
G060C02GK-GAT Changing the Spark Plugs You will find it easier to change spark plugs if the engine is cold. Alwayschange one spark plug at a time. This helps avoid getting the wires mixed up.
1. Remove the engine rocker cover.
(1.6L/2.0L Engine)
NOTE: It is recommended that the spark plugs for 2.7L Engine should be changed by an authorized Hyundaidealer. 2. Using a clean cloth, remove any
dirt that has accumulated aroundthe base of the spark plug so it cannot fall into the cylinder when the spark plug is removed.
3. To remove the spark plug cable, pull straight up on the insulatedconnector, not the cable. Pullingon the cable may damage the car- bon core conductor.
HGK5062 WARNING:
It is recommended that the engine
be cool or cold when changing the spark plugs. If the engine is hot,you could burn yourself on the insulated connector, the spark plug or the engine itself.