2004 Hyundai Coupe height
[x] Cancel search: heightPage 168 of 389

INDEX10-3
R Rear Seats
Before Folding the Rear Seats ..................................................... 1-10
Fold down ..................................................................................... 1-10
Rear seat entry ............................................................................. 1-10
Rear Seat Pos itions ....................................................................... 1-9
Rear Window Defroster Switch ......................................................... 1-36
Rear Window Wiper and Switch .. ..................................................... 1-35
SSeat Belts 3-Point type .................................................................................. 1-13
Adjustable height .......................................................................... 1-13
Adjusting your seat belt ................................................................ 1-13
Care of seat belts ......................................................................... 1-12
Precautions ................................................................................... 1-11
Pre-tentioner Seat Belt ................................................................. 1-18
Spark Plugs ........................................................................................ 6-8
Spectacle Case ................................................................................. 1-40
Speedometer ..................................................................................... 1-30
Starting Procedures ............................................................................ 2-3Steering Wheel Free play ...................................................................................... 6-15
Tilt lever ........................................................................................ 1-47
Stereo Radio Operation (H250, H260) ....................................1-65, 1-72
Stereo Sound System ............................................................ 1-63 ~ 1-64Sun Visor .......................................................................................... 1-46
Sunroof .............................................................................................. 1-38
TTachometer ....................................................................................... 1-30
Tail Gate ........................................................................................... 1-45
TCS (Traction control system) .......................................................... 2-10
Theft Alarm System ............................................................................ 1-5
JJump Starting
...................................................................................... 3-1
K
Keys .................................................................................................. 1-2 If you lose your keys .................................................................... 3-10
Positions ......................................................................................... 2-2
L
Light Bulb Replacement .................................................................... 6-20
Lubrication Chart ................................................................................. 9-3
Luggage Net ...................................................................................... 1-47
M Maintenance Intervals Explanation of scheduled maintenance items ....................... 5-5 ~ 5-7
Maintenance under severe usage conditions ................................. 5-4
Scheduled maintenance ................................................................. 5-2
Service requirements ...................................................................... 5-1
Map Light .......................................................................................... 1-40
Mirros Day-night inside rearview ............................................................. 1-42
Outside rearview folding ............................................................... 1-42
Outsde rearview heating .............................................................. 1-41
Multi gauge ........................................................................................ 1-32
OOdometer .......................................................................................... 1-30
PParking Brake ................................................................................... 1-43
Power Steering Fluid Level ............................................................... 6-19
Page 194 of 389

1CONTROLS AND EQUIPMENT
14
SB070E1-E Lumbar support adjustment (Driver's seat only)(Not all models) Some models are fitted with adjust- able driver seat lumbar support whichmay be used to increase the amount of lumbar support offered by the seat back. Adjustment is performed bymoving the handle at the side of the backrest in a forward direction to in- crease the support. SOFT
!WARNING:
o For maximum effectiveness in case of an accident the head re- straint should be adjusted so the middle of the head restraint is at the same height as the top of theoccupant's eyes. For this rea- son, the use of a cushion that holds the body away from theseatback should not be recom- mended. o Do not operate vehicle with the
head restraints removed as in- jury to the occupants may occur in the event of an accident. Head restraints may provide protec-tion against neck injuries when properly adjusted.
o Do not adjust the head restraint
height whilst the vehicle is inmotion.
B080D01JM HGK2030-E
FIRM
Page 195 of 389
1
CONTROLS AND EQUIPMENT
15
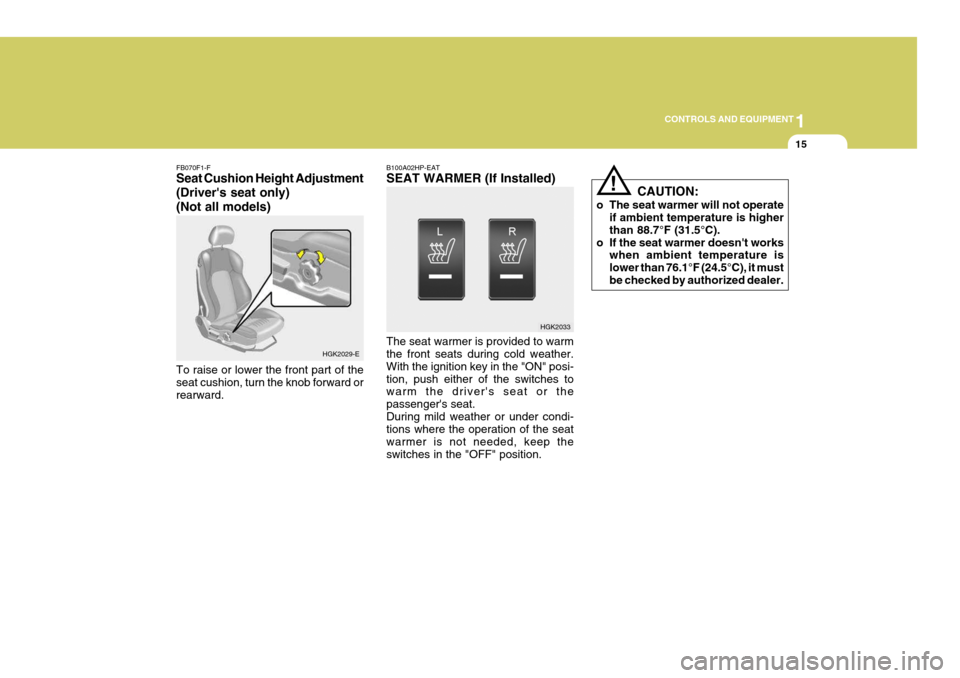
FB070F1-F Seat Cushion Height Adjustment (Driver's seat only)(Not all models) To raise or lower the front part of the seat cushion, turn the knob forward orrearward. B100A02HP-EAT SEAT WARMER (If Installed) The seat warmer is provided to warm the front seats during cold weather. With the ignition key in the "ON" posi-tion, push either of the switches to warm the driver's seat or the passenger's seat.During mild weather or under condi- tions where the operation of the seat warmer is not needed, keep theswitches in the "OFF" position.
HGK2029-E
HGK2033
!
CAUTION:
o The seat warmer will not operate if ambient temperature is higher than 88.7°F (31.5°C).
o If the seat warmer doesn't works when ambient temperature islower than 76.1°F (24.5°C), it mustbe checked by authorized dealer.
Page 200 of 389
1CONTROLS AND EQUIPMENT
20
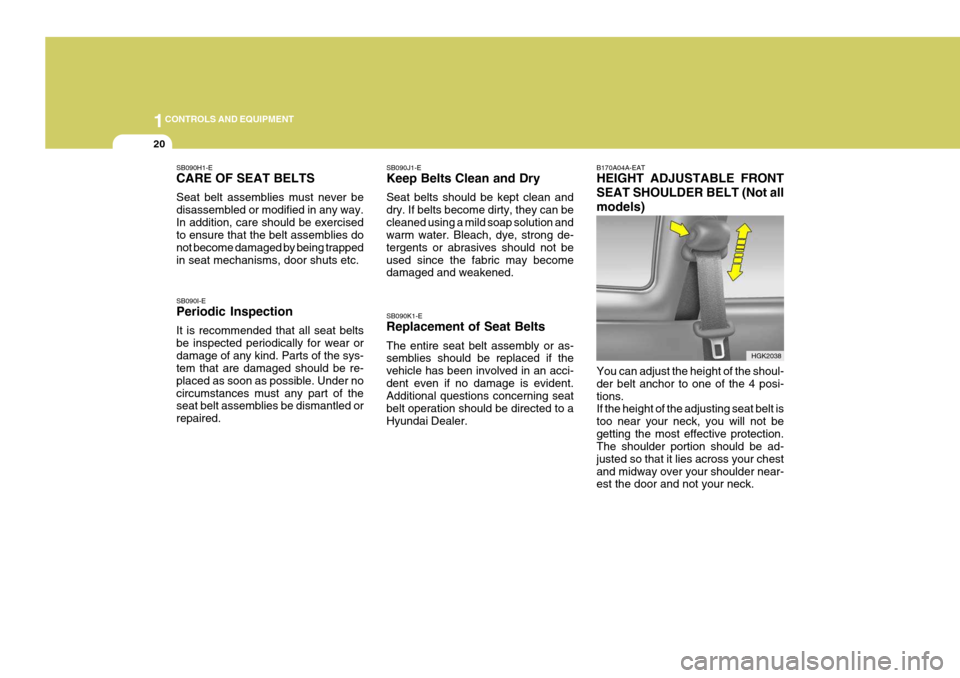
B170A04A-EAT HEIGHT ADJUSTABLE FRONT SEAT SHOULDER BELT (Not allmodels)
HGK2038
You can adjust the height of the shoul- der belt anchor to one of the 4 posi-tions. If the height of the adjusting seat belt is too near your neck, you will not begetting the most effective protection. The shoulder portion should be ad- justed so that it lies across your chestand midway over your shoulder near- est the door and not your neck.
SB090H1-E CARE OF SEAT BELTS Seat belt assemblies must never be disassembled or modified in any way.In addition, care should be exercised to ensure that the belt assemblies do not become damaged by being trappedin seat mechanisms, door shuts etc. SB090I-E Periodic Inspection It is recommended that all seat belts be inspected periodically for wear ordamage of any kind. Parts of the sys- tem that are damaged should be re- placed as soon as possible. Under nocircumstances must any part of the seat belt assemblies be dismantled or repaired.
SB090J1-E Keep Belts Clean and Dry Seat belts should be kept clean and dry. If belts become dirty, they can becleaned using a mild soap solution and warm water. Bleach, dye, strong de- tergents or abrasives should not beused since the fabric may become damaged and weakened. SB090K1-E Replacement of Seat Belts The entire seat belt assembly or as- semblies should be replaced if the vehicle has been involved in an acci-dent even if no damage is evident. Additional questions concerning seat belt operation should be directed to aHyundai Dealer.
Page 201 of 389
1
CONTROLS AND EQUIPMENT
21
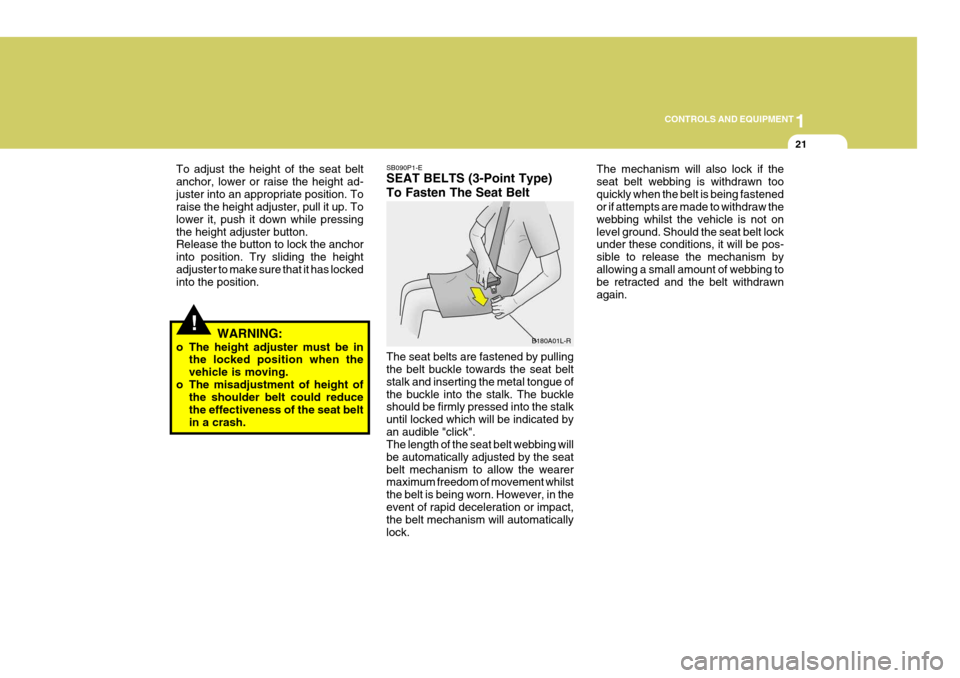
SB090P1-E SEAT BELTS (3-Point Type) To Fasten The Seat Belt The seat belts are fastened by pulling the belt buckle towards the seat belt stalk and inserting the metal tongue ofthe buckle into the stalk. The buckle should be firmly pressed into the stalk until locked which will be indicated byan audible "click". The length of the seat belt webbing will be automatically adjusted by the seatbelt mechanism to allow the wearer maximum freedom of movement whilst the belt is being worn. However, in theevent of rapid deceleration or impact, the belt mechanism will automatically lock. B180A01L-R
!
To adjust the height of the seat belt anchor, lower or raise the height ad-juster into an appropriate position. To raise the height adjuster, pull it up. To lower it, push it down while pressingthe height adjuster button. Release the button to lock the anchor into position. Try sliding the heightadjuster to make sure that it has locked into the position.
WARNING:
o The height adjuster must be in the locked position when the vehicle is moving.
o The misadjustment of height of the shoulder belt could reducethe effectiveness of the seat beltin a crash. The mechanism will also lock if theseat belt webbing is withdrawn tooquickly when the belt is being fastened or if attempts are made to withdraw the webbing whilst the vehicle is not onlevel ground. Should the seat belt lock under these conditions, it will be pos- sible to release the mechanism byallowing a small amount of webbing to be retracted and the belt withdrawn again.
Page 203 of 389
1
CONTROLS AND EQUIPMENT
23
!WARNING:
o A child restraint system must be placed in the rear seat. Never install a child or infant seat on the front passenger's seat.Should an accident occur and cause the passenger side airbag to deploy, it could severely in-jure or kill an infant or child seated in an infant or child seat. Thus, only use a child restraint in therear seat of your vehicle.
o Since a safety belt or child re-
straint system can become very hot if it is left in a closed vehicle, be sure to check the seat coverand buckles before placing a child there.
o When the child restraint system is not in use, store it in the lug-gage compartment or fasten it with a safety belt so that it willnot be thrown forward in the case of a sudden stop or an accident. o Never use an infant carrier or
child safety seat that "hooks"over a seatback; it may not pro- vide adequate security in an ac-cident.
o Never allow a child to be held in
a person's arms whilst they are ina moving vehicle, as this could result in serious injury to the child in the event of an accidentor a sudden stop. Holding a child in a moving vehicle does not provide the child with any meansof protection during an accident, even if the person holding the child is wearing a seat belt.
o If the child restraint seat is not anchored properly, the risk of achild being seriously injured orkilled in a collision greatly in- creases.
o Children who are too large to be
in a child restraint should sit in the rear seat and be restrained with the available lap/shoulder belts. Never allow children to ridein the front passanger seat.
o Always make sure that the shoul-
der belt portion of the outboardlap/shoulder belt is positioned midway over the shoulder, never across the neck. Moving the childcloser to the centre of the vehicle may help provide a good shoul- der belt fit. The lap belt portion ofthe lap/shoulder belt or the cen- tre seat lap belt must always be positioned as low as possible onthe child's hips and as snug as possible.
o If the seat belt will not properly fit the child, we recommend the useof an approved booster seat in the rear seat in order to raise thechild's seating height so that the seat belt will properly fit the child.
o Never allow a child to stand up or kneel on the seat.
Page 288 of 389

2DRIVING YOUR HYUNDAI
12
WARNING:
ABS will not prevent accidents due to improper or dangerous driving manoeuvres. Even though vehiclecontrol is improved during emer- gency braking, always maintain a safe distance between you and ob-jects ahead. Vehicle speeds should always be reduced during extreme road conditions.The braking distance for cars equipped with an anti-lock braking system may be longer than for thosewithout it in the following road con- ditions. These roads should be driven at reduced speeds.
o Rough, gravel or snow-covered roads.
o With tyre chains installed.
o On roads where the road surface
is pitted or has different surface height.!The safety features of an ABS equipped vehicle should not be tested by high speed driving or cornering. This could endanger thesafety of yourself or others.
ANTI-LOCK BRAKE SYSTEM (ABS)
C120A02A-EAT (Not all models) The Anti-Lock Brake System (ABS) is designed to prevent wheel lock-up during sudden braking or on hazard- ous road surfaces. The ABS controlmodule monitors the wheel speed and controls the pressure applied to each brake. Thus, in emergency situationsor on slick roads, ABS will increase vehicle control during braking. NOTE: During ABS operation, a slight pul- sation may be felt in the brake pedal when the brakes are applied. Also,a noise may be heard in the engine compartment while braking. These conditions are normal and indicatethat the anti-lock brake system is functioning properly.
Page 305 of 389
3
IN CASE OF EMERGENCY
7
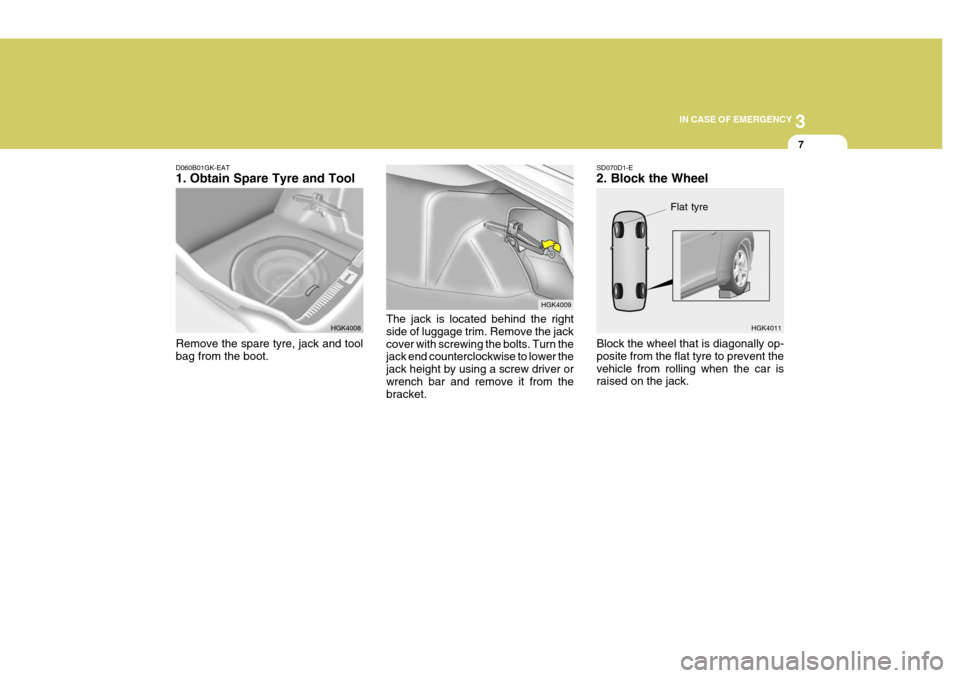
D060B01GK-EAT 1. Obtain Spare Tyre and Tool Remove the spare tyre, jack and tool bag from the boot. HGK4008
HGK4009
The jack is located behind the right side of luggage trim. Remove the jackcover with screwing the bolts. Turn the jack end counterclockwise to lower the jack height by using a screw driver orwrench bar and remove it from the bracket.
Flat tyre
SD070D1-E 2. Block the Wheel Block the wheel that is diagonally op- posite from the flat tyre to prevent thevehicle from rolling when the car is raised on the jack. HGK4011