Page 214 of 296

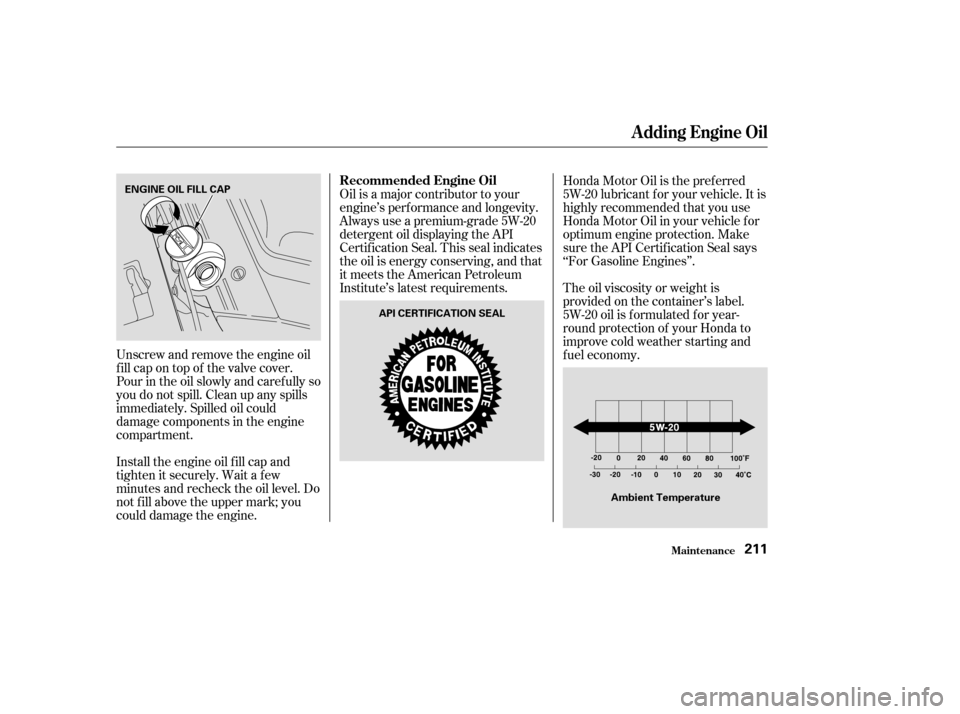
Unscrew and remove the engine oil
fill cap on top of the valve cover.
Pour in the oil slowly and caref ully so
you do not spill. Clean up any spills
immediately. Spilled oil could
damage components in the engine
compartment.
Install the engine oil f ill cap and
tighten it securely. Wait a f ew
minutes and recheck the oil level. Do
not f ill above the upper mark; you
could damage the engine.Oil is a major contributor to your
engine’s perf ormance and longevity.
Always use a premium-grade 5W-20
detergent oil displaying the API
Certif ication Seal. This seal indicates
the oil is energy conserving, and that
it meets the American Petroleum
Institute’s latest requirements.
Honda Motor Oil is the pref erred
5W-20 lubricant f or your vehicle. It is
highly recommended that you use
Honda Motor Oil in your vehicle f or
optimum engine protection. Make
sure the API Certif ication Seal says
‘‘For Gasoline Engines’’.
The oil viscosity or weight is
provided on the container’s label.
5W-20 oil is f ormulated f or year-
round protection of your Honda to
improve cold weather starting and
f uel economy.
A dding Engine Oil
Maint enance
Recommended Engine Oil
211
ENGINE OIL FILL CAP
Ambient Temperature
API CERTIFICATION SEAL
Page 220 of 296

To thoroughly f lush the transmission,
the technician should drain and ref ill
it with Honda ATF-Z1, then drive the
vehicle f or a short distance. Do this
three times. Then drain and ref ill the
transmission a final time.Insert the dipstick all the way back
into the transmission securely as
shown in the illustration.
The transmission should be drained
and ref illed with new f luid according
to the time and distance recommen-
dations in the maintenance schedule.
If you are not sure how to add f luid,
contact your Honda dealer.
If the level is below the lower
mark, remove the f ill plug and add
f luid to bring it to the upper mark.
Pour the f luid slowly and caref ully
so you do not spill. Clean up any
spills immediately; it could damage
components in the engine
compartment.
Always use Honda ATF-Z1
(Automatic Transmission Fluid). If
it’s not available, you may use a
DEXRON
III automatic
transmission f luid as a temporary
replacement. However, continued
use can af f ect the shif t quality.
Have the transmission f lushed and
ref illed with Honda ATF-Z1 as
soon as it is convenient.
Insert the dipstick all the way into
the transmission as shown.
Remove the dipstick and check
the f luid level. It should be
between the upper and lower
marks. 5.
6.
3.
4.
Automatic Transmission Fluid
Maint enance217
DIPSTICK
UPPER MARKLOWER MARK
Page 224 of 296
Open the hood. To change a
headlight bulb on the driver’s side,
remove the air intake cover.Remove the electrical connector
f rom the bulb by pulling the
connector straight back.
Remove the rubber weather seal
by pulling on the tab.
Unclip the end of the hold-down
wire f rom its slot. Pivot it out of
the way, and remove the bulb.Install the new bulb into the hole,
making sure the tabs are in their
slots. Pivot the hold-down wire
back in place, and clip the end into
the slot.
Install the rubber seal over the
back of the headlight assembly.
Make sure it is right side up; it is
marked ‘‘TOP’’.
Push the electrical connector onto
the new bulb. Make sure it is
connected securely. Turn on the
headlights to test the new bulb.
(Driver’s side)
Reinstall the air intake cover.
1.
2.
3.
4.6.
7.
8. 5.
Lights
Maint enance221
AIR
INTAKE
COVER
HOLD-DOWN WIRE WEATHER
SEAL
BULB CONNECTOR
Page 228 of 296
Place a cloth on the edge of the
lens segment on the passenger’s
side. Remove that lens segment by
caref ully prying on its edge with a
small f lat-tipped screwdriver.
Use a Phillips-head screwdriver to
remove the screw under the lens.Pull the light assembly out of the
tailgate.
Remove the socket f rom the light
assembly by turning it one-quarter
turn counterclockwise.Put the socket back into the light
assembly and turn it clockwise to
lock it in place.
Turn on the lights to make sure
the new bulb is working.
Put the light assembly back into
the tailgate. Install the screw and
tighten it securely. Reinstall the
lens segment.
Pull the bulb straight out of its
socket. Push the new bulb straight
into the socket until it bottoms.
1.
2.
3.6.
7.
4.
5. 8.
Lights
Maint enance
Replacing a High-mount Brake
Light Bulb
225
SCREW
Page 246 of 296
Bef ore mounting the spare tire,
wipeanydirtoff themounting
surface of the wheel and hub with
a clean cloth. Wipe the hub
carefully;itmaybehotfrom
driving.Put on the spare tire. Put the
wheel nuts back on f inger-tight,
then tighten them in a crisscross
pattern with the wheel wrench
until the wheel is f irmly against
the hub. Do not try to tighten
them f ully.
Lower the vehicle to the ground
and remove the jack.
Tighten the wheel nuts securely in
the same crisscross pattern. Have
the wheel nut torque checked at
the nearest automotive service
f acility.
Tighten the wheel nuts to:
16. 17.
18. 19.
CONT INUED
Changing a Flat T ire
T aking Care of t he Unexpect ed243
HAB
80 lbf·ft (108 N·m , 11 kgf·m)
Page 247 of 296
Put the f lat tire in the supplied
vinyl bag. This bag is stored in the
rear compartment on the driver’s
side panel in the third row. Knot
the top of the vinyl bag.When the third seat is not f olded,
the f lat tire is secured behind the
third seat.
Turn on the sliding door MAIN
switch so you can open the door.
Remove the bracket and the wing
bolt f rom the spare tire lid by
unscrewing the bracket mounting
bolt.
You will f ind a u-shaped slit on the
carpet behind the seat bottom of
the third seat. Pull up the carpet at
theslitandremovetheplastic
screw with a coin.
20.
22.
21.
Storing the f lat tire behind the third
row
On EX and EX-L models
Changing a Flat T ire
T aking Care of t he Unexpect ed244
BRACKET MOUNTING BOLT WING BOLT
BRACKET
MOUNTING
BOLT
BRACKET PLASTIC
SCREW
BRACKET
Page 248 of 296
Adjust the seat-back of the third
seat to the upright position (see
page ). Install the bracket and
the bracket mounting bolt to the
attachment point as shown, and
tighten the bolt. Make sure the
bracket is securely locked.Install the flat tire on the bracket
with the inside of the wheel facing
toward you. Put the tire mounting
wing bolt in the attachment point
through one of the f ive wheel nut
holes and the bracket as shown.
Poke holes in the vinyl bag. Secure
the f lat tire by tightening the wing
bolt.When the third seat is f olded, the
f lat tire is secured to the f loor on
topof thefoldedseat.Pullupthe
carpet on the attachment point and
remove the plastic screw as
described in the previous
procedure.
Remove the wing bolt from the
bracket that is attached to the
spare tire lid.
23.
90Storing the Flat Tire on the Floor
CONT INUED
Changing a Flat T ire
T aking Care of t he Unexpect ed245
BRACKET
TIRE MOUNTING WING BOLT
Page 249 of 296

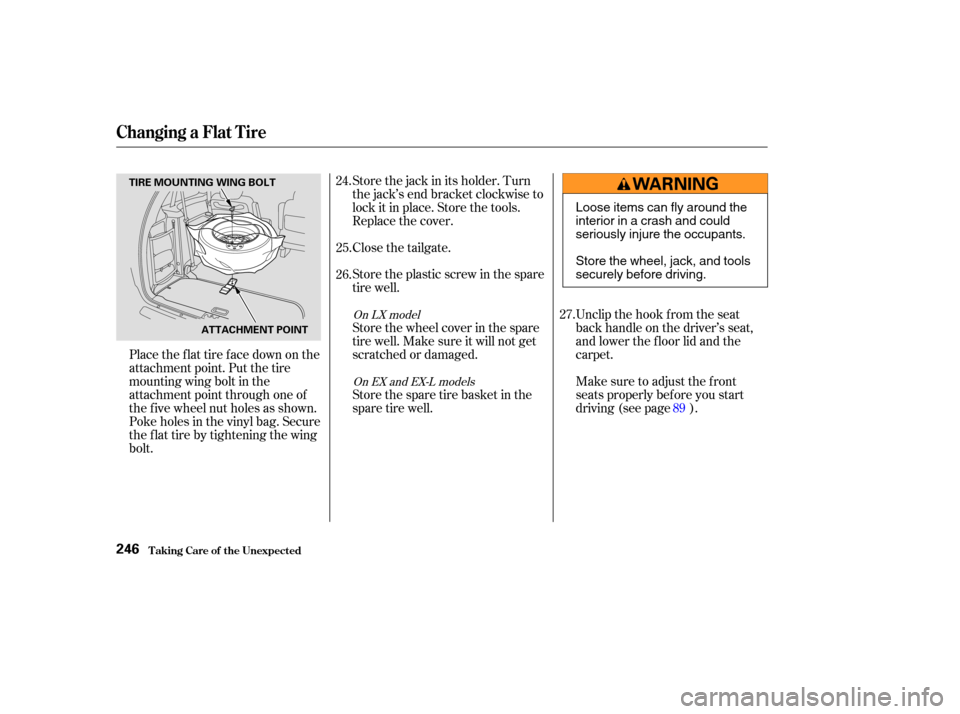
Place the flat tire face down on the
attachment point. Put the tire
mountingwingboltinthe
attachment point through one of
the f ive wheel nut holes as shown.
Poke holes in the vinyl bag. Secure
the f lat tire by tightening the wing
bolt.Store the jack in its holder. Turn
the jack’s end bracket clockwise to
lock it in place. Store the tools.
Replace the cover.
Close the tailgate.
Store the plastic screw in the spare
tire well.
Store the wheel cover in the spare
tire well. Make sure it will not get
scratched or damaged.
Storethesparetirebasketinthe
spare tire well.
Unclip the hook f rom the seat
back handle on the driver’s seat,
and lower the f loor lid and the
carpet.
Make sure to adjust the f ront
seats properly bef ore you start
driving (see page ).
24.
25.
26.
27.
89
On LX modelOn EX and EX-L models
Changing a Flat T ire
T aking Care of t he Unexpect ed246
TIRE MOUNTING WING BOLT
ATTACHMENT POINT
Loose items can fly around the
interiorinacrashandcould
seriously injure the occupants.
Store the wheel, jack, and tools
securely before driving.