Page 167 of 296

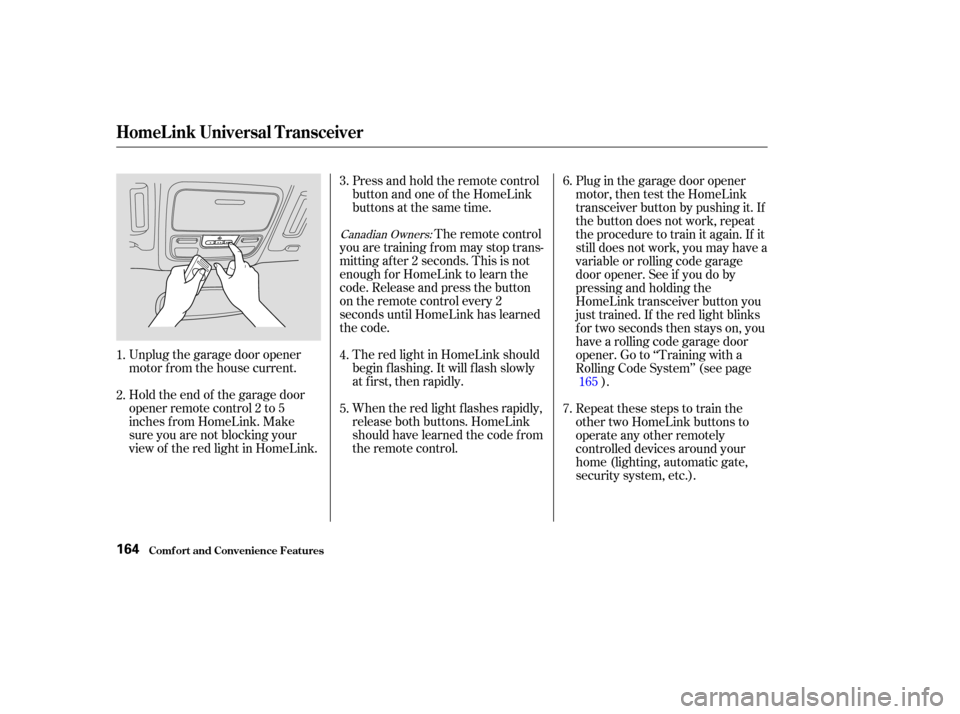
Unplug the garage door opener
motor f rom the house current.
Holdtheendof thegaragedoor
opener remote control 2 to 5
inches f rom HomeLink. Make
sure you are not blocking your
view of the red light in HomeLink.Press and hold the remote control
button and one of the HomeLink
buttons at the same time.
The remote control
you are training f rom may stop trans-
mitting after 2 seconds. This is not
enough f or HomeLink to learn the
code. Release and press the button
on the remote control every 2
seconds until HomeLink has learned
the code.
The red light in HomeLink should
begin f lashing. It will f lash slowly
at first, then rapidly.
When the red light f lashes rapidly,
release both buttons. HomeLink
should have learned the code from
the remote control. Plug in the garage door opener
motor, then test the HomeLink
transceiver button by pushing it. If
the button does not work, repeat
the procedure to train it again. If it
still does not work, you may have a
variable or rolling code garage
door opener. See if you do by
pressing and holding the
HomeLink transceiver button you
just trained. If the red light blinks
f or two seconds then stays on, you
have a rolling code garage door
opener. Go to ‘‘Training with a
Rolling Code System’’ (see page
).
Repeat these steps to train the
other two HomeLink buttons to
operate any other remotely
controlled devices around your
home (lighting, automatic gate,
security system, etc.).
2. 3.
1. 4.
5.7. 6.
165
Canadian Owners:
HomeL ink Universal T ransceiver
Comf ort and Convenience Feat ures164
Page 168 of 296

�µ�µ
For security purposes, newer garage
door opening systems use a ‘‘rolling’’
or variable code. Inf ormation f rom
the remote control and the garage
door opener are needed bef ore
HomeLink can operate the garage
door opener.
The ‘‘Training HomeLink’’
procedure trains HomeLink to the
proper garage door opener code.
The f ollowing procedure
synchronizes HomeLink to the
garage door opener so they send and
receive the correct codes.
Make sure you have properly
completed the ‘‘Training
HomeLink’’ procedure.
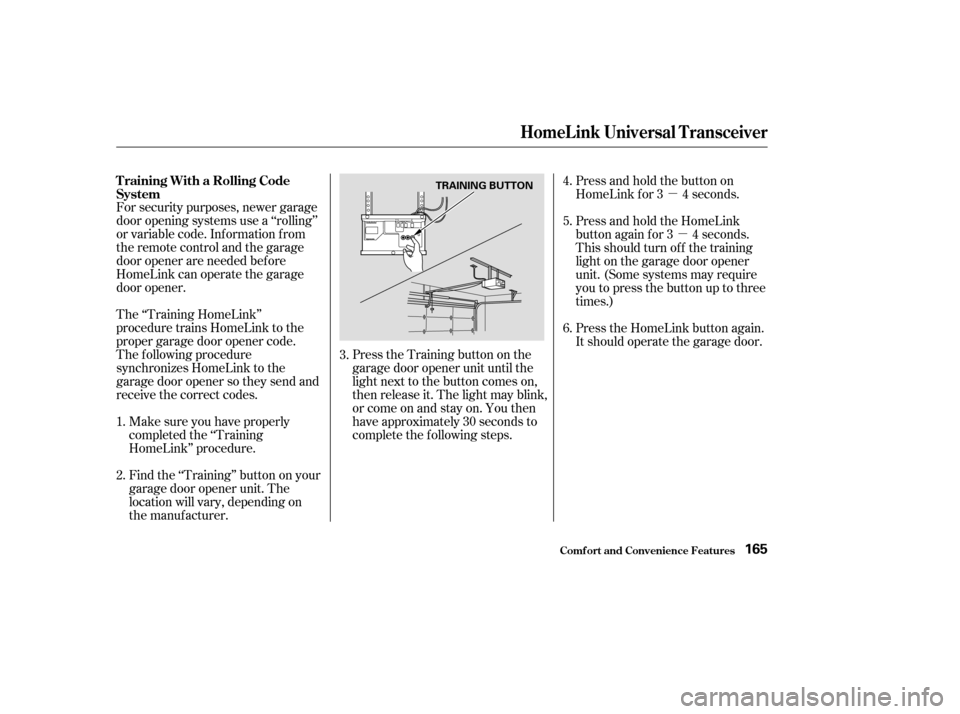
Find the ‘‘Training’’ button on your
garage door opener unit. The
location will vary, depending on
the manufacturer. Press the Training button on the
garage door opener unit until the
light next to the button comes on,
then release it. The light may blink,
or come on and stay on. You then
have approximately 30 seconds to
complete the f ollowing steps.Press and hold the button on
HomeLink f or 3 4 seconds.
Press and hold the HomeLink
button again f or 3 4 seconds.
This should turn of f the training
light on the garage door opener
unit. (Some systems may require
youtopressthebuttonuptothree
times.)
Press the HomeLink button again.
It should operate the garage door.
6.
2. 4.
5.
1. 3.
T raining With a Rolling Code
System
HomeL ink Universal T ransceiver
Comf ort and Convenience Feat ures165
TRAINING BUTTON
Page 174 of 296
Pull the support rod out of its clip
and insert the end into the hole on
the driver’s side of the hood.
Lif t it up slightly to remove the
support rod f rom the hole. Put the
support rod back into its holding clip.
Lower the hood to about a f oot (30
cm) above the f ender, then let it
drop. Make sure it is securely
latched. Wait a f ew minutes af ter turning the
engine of f bef ore you check the oil.
Remove the dipstick (orange
handle).
Wipe of f the dipstick with a clean
cloth or paper towel.
Insert it all the way back in its hole. Remove the dipstick again and
check the level. It should be
between the upper and lower
marks.
If it is near or below the lower mark,
see on page .
1.
3.
2.
3.4.
211
Bef ore Driving
T o Close t he Hood:
Oil Check
A dding Oil
Service Station Procedures
171
DIPSTICK
SUPPORT ROD
UPPER MARK
LOWER MARK
Page 181 of 296

Store or secure all items that could
be thrown around and hurt
someone during a crash.
Be sure items placed on the f loor
behind the f ront seats cannot roll
under the seats and interf ere with
the pedals or seat operation.
Keep the glove box closed while
driving. If it is open, a passenger
could injure their knees during a
crash or sudden stop.Distribute cargo evenly on the
f loor of the cargo area, placing the
heaviest items on the bottom and
as f ar f orward as possible. Tie
down items that could be thrown
about the vehicle during a crash or
sudden stop.
If you carry large items that
prevent you f rom closing the
tailgate, exhaust gas can enter the
passenger area. To avoid the
possibility of
, f ollow the instructions
on page .
If you carry any items on a roof
top carrier, be sure the total
weight of the rack and the items
does not exceed 150 lb (68 kg). If you use an accessory roof top
carrier, the roof top carrier weight
limit may be lower. Ref er to the
inf ormation that came with your roof
top carrier.
54
Carrying Items in the Passenger
Compartment
carbon monoxide
poisoning
Carrying Cargo in the Cargo A rea
or on a Roof T op Carrier
Carrying Cargo
Bef ore Driving178
Page 182 of 296
The side cargo net can be installed
on the driver’s side panel in the
cargo area to secure small items. To
install the side cargo net, hook each
loop on the f our corners of the net to
the tabs on the lef t side panel. When
youfolddownthethirdseat,store
the head restraints in the side cargo
net.You can use the cargo net to secure
items in the cargo area, and store
small items between the two halves
of the net. To install the cargo net,
hook the loops on the f our corners of
the net to the tabs at both sides of
the tailgate sill.There are cargo hooks f or plastic
grocery bags on the back of the third
row seat. They are designed to hold
light items. Heavy objects may
damage the hooks.On EX and EX-L models
Carrying Cargo
Side Cargo Net
Cargo Net Cargo Hooks
Bef ore Driving179
CARGO HOOKS
Page 185 of 296
Youshoulddothefollowingchecks
and adjustments bef ore you drive
your vehicle.Make sure all windows, mirrors,
and outside lights are clean and
unobstructed. Remove f rost, snow,
or ice.
Check that the hood is f ully closed.
Visually check the tires. If a tire
looks low, use a gauge to check its
pressure.
Check that any items you may be
carrying are stored properly or
f astened down securely. Check the seat adjustment (see
page ).
Check the adjustment of the
inside and outside mirrors (see
page ).
Check the steering wheel
adjustment (see page ).
Make sure the doors and the
tailgate are securely closed and
locked.
Fasten your seat belt. Check that
your passengers have f astened
their seat belts (see page ).
When you start the engine, check
the gauges and indicators in the
instrument panel (see page ).
3.
2.
1.
4. 5.
6.
7.
8.
9.
10. 88
102 74
1460
Preparing to Drive
Driving182
Page 199 of 296

The best way to conf irm that vehicle
and trailer weights are within limits
is to have them checked at public
scale.
Using a suitable scale or a special
tongue load gauge, check the tongue
load the f irst time you set up a
towing combination (a f ully-loaded
vehicle and trailer), then recheck the
tongue load whenever the conditions
change.Towing generally requires a variety
of supplemental equipment. To
ensure the best quality, we
recommend that you purchase
Honda equipment whenever possible.
Always use saf ety chains. Make sure
they are secured to both the trailer
and hitch, and that they cross under
the tongue so they can catch the
trailer if it becomes unhitched.
Leave enough slack to allow the
trailer to turn corners easily, but do
not let chains drag on the ground. Any hitch used on your vehicle must
be properly bolted to the underbody,
using the six threaded holes
provided. A hitch and the required
f luid coolers designed especially f or
your Odyssey can be obtained f rom
your Honda dealer.If the total trailer weight is more
than 1,850 lbs (840 kg), you must
also use a weight distributing hitch.
This device transf ers weight f rom
the vehicle’s rear wheels to the f ront
wheels, and to the trailer’s wheels.
Caref ully f ollow the hitch maker’s
instructions f or proper installation
and adjustment.
If the total trailer weight exceeds
2,000 lbs (900 kg), you should install
a sway control device to minimize
swaying that can occur in crosswinds
and in normal and emergency
driving maneuvers. Your trailer
maker can tell you what kind of sway
control you need and how to install it.
Discuss any additional needs with
your trailer sales or rental agency,
and make sure all equipment is
properly installed, maintained, and
also meets state and province
regulations.
Towing a Trailer
Driving
Checking L oadsT owing Equipment and
A ccessories
Saf et y Chains
HitchesWeight Distributing Hitch
Sway Cont rol
196
Page 201 of 296

When towing a trailer, you should
carry a f ull-size wheel and tire as a
spare in case you have a flat. If you
use the compact spare tire that came
with the vehicle, it may adversely
af f ect vehicle handling. See pagef or inf ormation on proper tire
size, and page f or inf ormation on
how to store a f ull-size tire. When
storing a f ull-size spare tire in the
trailer, f ollow the trailer maker’s
instructions.
Many states and Canadian provinces
require special outside mirrors when
towing a trailer. Even if they don’t,
you should install special mirrors if
you cannot clearly see behind you, or
if the trailer creates a blind spot.
Askyourtrailersalesorrental
agency if any other items are
recommended or required f or your
towing situation. When preparing to tow, and bef ore
driving away, be sure to check the
f ollowing:
You may want to fill the fuel tank
with premium f uel. Premium f uel
provides improved perf ormance. Your vehicle tires and spare are
properly inf lated (see page ),
and the trailer tires and spare are
inflated as recommended by the
trailer maker. The lights and brakes on your
vehicle and the trailer are working
properly. Allitemsonandinthetrailerare
properly secured and cannot shif t
while you drive.
Thehitch,safetychains,andany
other attachments are secure. All weights and loads are within
limits (see pages and ). The trailer has been properly
serviced and is in good condition. If you tow f requently, f ollow the
Severe Conditions maintenance
schedule. The vehicle has been properly
serviced, and the tires, brakes,
suspension, and cooling system
are in good operating condition.
244
233
194231
195
Towing a Trailer
Driving
Spare Vehicle T ire
Additional Trailer EquipmentPre-T ow Checklist
198