Page 399 of 588

All engine speed values listed above are factory preset
values. With the exception of the TCC lockup speed
(1,100 rpm) and the ªtap²increment (100 rpm), all
of these values are programmable and can be adjusted
by your dealer or body up®tter. If the PTO software
settings do not match the settings shown here, then they
may have already been altered in order to satisfy the
requirements of the installed PTO system and body
equipment.
When the PTO switch is turned on, the engine is limited
to 2200 rpms. If there are no accessories installed on
the vehicle, make sure the PTO switch is turned off.Step-Bumper Pad
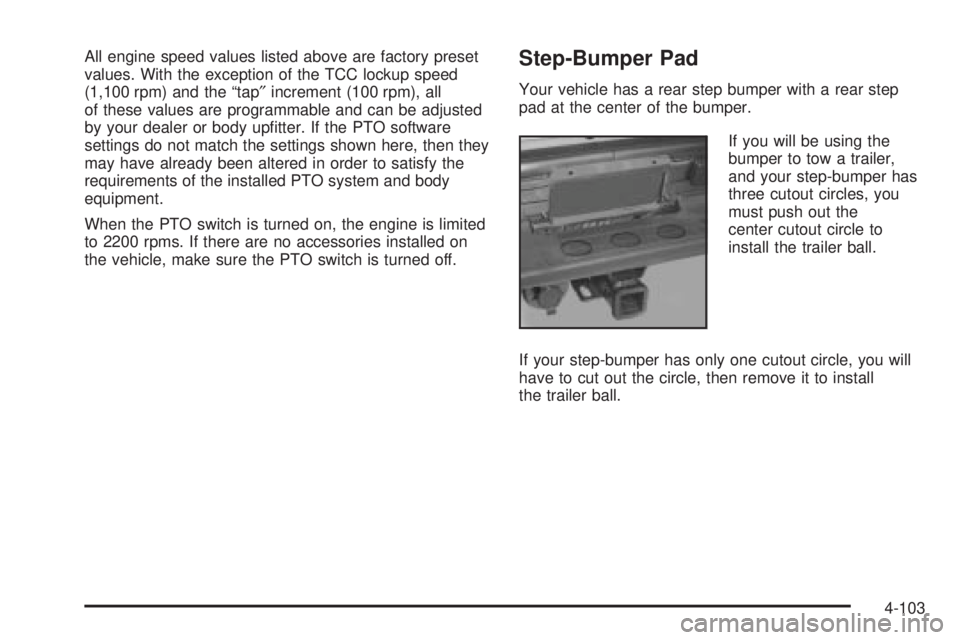
Your vehicle has a rear step bumper with a rear step
pad at the center of the bumper.
If you will be using the
bumper to tow a trailer,
and your step-bumper has
three cutout circles, you
must push out the
center cutout circle to
install the trailer ball.
If your step-bumper has only one cutout circle, you will
have to cut out the circle, then remove it to install
the trailer ball.
4-103
Page 401 of 588

Service............................................................5-3
Doing Your Own Service Work.........................5-3
Adding Equipment to the Outside of Your
Vehicle......................................................5-4
Fuel................................................................5-4
Gasoline Octane............................................5-4
Gasoline Speci®cations....................................5-5
California Fuel...............................................5-5
Additives.......................................................5-6
Fuels in Foreign Countries...............................5-6
Filling Your Tank............................................5-7
Filling a Portable Fuel Container.......................5-9
Checking Things Under the Hood....................5-10
Hood Release..............................................5-10
Engine Compartment Overview.......................5-12
Engine Oil...................................................5-18
Engine Air Cleaner/Filter................................5-23
Automatic Transmission Fluid (Except Allison
Transmission
ž) ..........................................5-25
Automatic Transmission Fluid (Allison
Transmission
ž) ..........................................5-28
Manual Transmission Fluid.............................5-31
Hydraulic Clutch...........................................5-32
Engine Coolant.............................................5-33
Coolant Surge Tank Pressure Cap..................5-36
Engine Overheating.......................................5-36Cooling System............................................5-39
Engine Fan Noise.........................................5-44
Power Steering Fluid.....................................5-45
Windshield Washer Fluid................................5-46
Brakes........................................................5-48
Battery........................................................5-52
Jump Starting...............................................5-53
Rear Axle.......................................................5-59
Four-Wheel Drive............................................5-60
Noise Control System.....................................5-62
Tampering with Noise Control System
Prohibited.................................................5-62
Bulb Replacement..........................................5-64
Halogen Bulbs..............................................5-64
Headlamps..................................................5-64
Front Turn Signal, Sidemarker and Daytime
Running Lamps.........................................5-66
Roof Marker Lamps......................................5-67
Center High-Mounted Stoplamp (CHMSL) and
Cargo Lamp.............................................5-69
Pickup Box Identi®cation and Fender Marker
Lamps.....................................................5-70
Taillamps.....................................................5-71
Replacement Bulbs.......................................5-74
Section 5 Service and Appearance Care
5-1
Page 426 of 588

Get the vehicle warmed up by driving about 15 miles
(24 km) when outside temperatures are above 50ÉF
(10ÉC). If it's colder than 50ÉF (10ÉC), drive the vehicle
in THIRD (3) until the engine temperature gage
moves and then remains steady for 10 minutes.
A cold ¯uid check can be made after the vehicle has
been sitting for eight hours or more with the engine off,
but this is used only as a reference. Let the engine
run at idle for ®ve minutes if outside temperatures are
50ÉF (10ÉC) or more. If it's colder than 50ÉF (10ÉC), you
may have to idle the engine longer. Should the ¯uid
level be low during this cold check, you
mustcheck the
¯uid hot before adding ¯uid. Checking the ¯uid hot
will give you a more accurate reading of the ¯uid level.
Checking the Fluid Level
Prepare your vehicle as follows:
·Park your vehicle on a level place. Keep the engine
running.
·With the parking brake applied, place the shift lever
in PARK (P).
·With your foot on the brake pedal, move the shift
lever through each gear range, pausing for about
three seconds in each range. Then, position the shift
lever in PARK (P).
·Let the engine run at idle for three minutes or more.
Then, without shutting off the engine, follow these
steps:
The transmission dipstick
handle with the graphic is
located at the rear of
the engine compartment,
on the passenger's side.
5-26
Page 432 of 588

How to Add Fluid
Here's how to add ¯uid. Refer to the Maintenance
Schedule to determine what kind of ¯uid to use. See
Recommended Fluids and Lubricants on page 6-14.
1. Remove the ®ller plug.
2. Add ¯uid at the ®ller plug hole. Add only enough
¯uid to bring the ¯uid level up to the bottom of the
®ller plug hole.
3. Install the ®ller plug. Be sure the plug is fully
seated.
Hydraulic Clutch
The hydraulic clutch linkage in your vehicle is
self-adjusting. The clutch master cylinder reservoir is
®lled with hydraulic clutch ¯uid.
It is not necessary to regularly check clutch ¯uid unless
you suspect there is a leak in the system. Adding
¯uid won't correct a leak.
A ¯uid loss in this system could indicate a problem.
Have the system inspected and repaired.
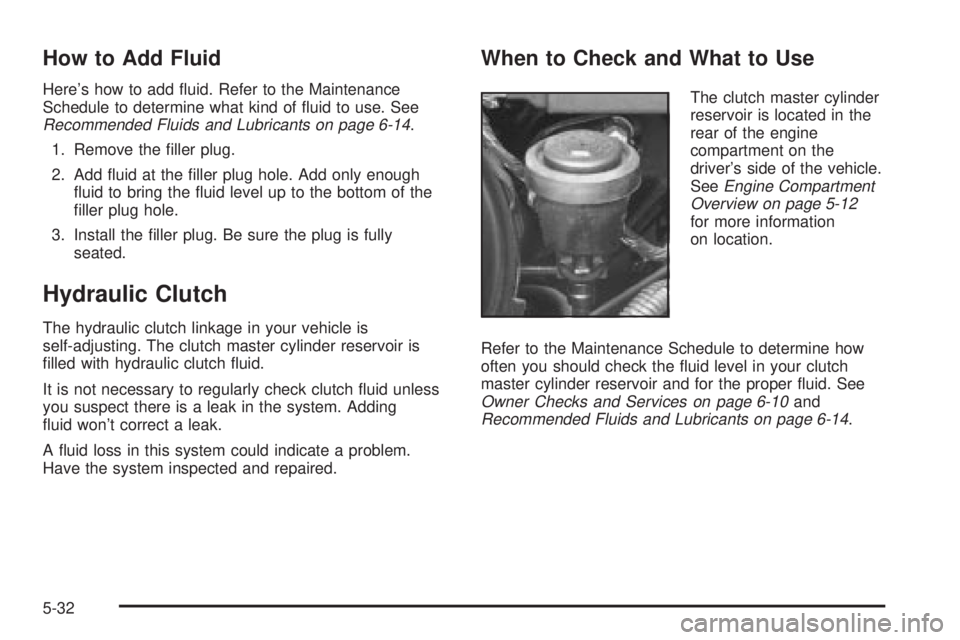
When to Check and What to Use
The clutch master cylinder
reservoir is located in the
rear of the engine
compartment on the
driver's side of the vehicle.
See
Engine Compartment
Overview on page 5-12
for more information
on location.
Refer to the Maintenance Schedule to determine how
often you should check the ¯uid level in your clutch
master cylinder reservoir and for the proper ¯uid. See
Owner Checks and Services on page 6-10andRecommended Fluids and Lubricants on page 6-14.
5-32
Page 452 of 588

Replacing Brake System Parts
The braking system on a vehicle is complex. Its many
parts have to be of top quality and work well together if
the vehicle is to have really good braking. Your
vehicle was designed and tested with top-quality GM
brake parts. When you replace parts of your braking
system Ð for example, when your brake linings
wear down and you need new ones put in Ð be sure
you get new approved GM replacement parts. If you do
not, your brakes may no longer work properly. For
example, if someone puts in brake linings that are wrong
for your vehicle, the balance between your front and
rear brakes can change Ð for the worse. The braking
performance you have come to expect can change
in many other ways if someone puts in the wrong
replacement brake parts.
Battery
Your new vehicle comes with a maintenance free
ACDelcožbattery. When it is time for a new battery, get
one that has the replacement number shown on the
original battery's label. We recommend an ACDelco
ž
battery. SeeEngine Compartment Overview on
page 5-12for battery location.
Warning:Battery posts, terminals and related
accessories contain lead and lead compounds,
chemicals known to the State of California to cause
cancer and reproductive harm. Wash hands after
handling.
Vehicle Storage
If you are not going to drive your vehicle for 25 days or
more, remove the black, negative (-) cable from
the battery. This will help keep your battery from
running down.
{CAUTION:
Batteries have acid that can burn you and gas
that can explode. You can be badly hurt if you
are not careful. See
Jump Starting on
page 5-53
for tips on working around a battery
without getting hurt.
Contact your dealer to learn how to prepare your
vehicle for longer storage periods.
Also, for your audio system, see
Theft-Deterrent
Feature on page 3-127.
5-52
Page 459 of 588
Rear Axle
When to Check Lubricant
It is not necessary to regularly check rear axle ¯uid
unless you suspect there is a leak or you hear an
unusual noise. A ¯uid loss could indicate a problem.
Have it inspected and repaired..
How to Check Lubricant
To get an accurate reading, the vehicle should be on a
level surface.
The proper level for the 1500 Series is from 5/8 inch to
1 5/8 inch (15 mm to 40 mm) below the bottom of the ®ller
plug hole. The proper level for the 1500 HD Series,
2500 Series, 2500 HD, and 3500 Series is from 0 to
1/2 inch (0 to 13 mm) below the bottom of the ®ller plug
hole. The proper level for the 1500 and 2500 Series
vehicles with QUADRASTEERŸ (4 Wheel Steer) is from
0 to 1/4 inch (0 to 6 mm) below the ®ller plug hole. Add
only enough ¯uid to reach the proper level.
What to Use
To determine what kind of lubricant to use seeRecommended Fluids and Lubricants on page 6-14.
1500 Series Shown, 2500 Series Similar
5-59
Page 471 of 588
Taillamps
1. Open the tailgate.
2. Remove the two rear
lamp assembly screws
near the tailgate
latch and pull out the
lamp assembly.
Your vehicle may have
one of the following
taillamp assemblies:A. Stoplamp
B. Turn Signal
C. Back-up Lamp
5-71
Page 473 of 588
4. Pull the old bulb straight out from the socket.
5. Press a new bulb into the socket and turn the socket
clockwise into the taillamp housing.
6. Reinstall the rear lamp assembly.
7. Close the tailgate.
Taillamps (Chassis Cab Models)
A. Turn Signal Lamp
B. Stoplamp
C. Back-up Lamp1. Using your hands, peel the rubber seal away from
the lens.
2. Lift the lens off the lamp assembly.
3. Pull the old bulb straight out from the socket.
4. Put a new bulb into the socket and press it in until it
is tight.
5. Reinstall the lens and the lens seal.
5-73