Page 312 of 588
To engage the 4 Wheel Steer tow mode, press the
button until the 4 and tow mode indicators light up on
the instrument panel. If the tow indicator is ¯ashing you
will have to center the steering wheel by turning it to
the left or right. While in the 4 wheel steer tow mode, it
is possible the steering wheel may be slightly off
center. For more information, see
Towing a Trailer on
page 4-70.
Car Washes for QUADRASTEERŸ
Equipped Vehicles
Notice:Because your vehicle has a wider rear
track a small number of older car washes may be
too narrow for your vehicle. Conveyor systems
on some automatic car washes may damage your
vehicle. Only use conveyor system car washes with
13-inch (33 cm) wide conveyor rails and/or
stationary washes with at least 82 inches (208 cm)
between the rails. Before using the car wash
check with the manager.
4-16
Page 319 of 588

Loading Your Vehicle for Off-Road
Driving
There are some important things to remember about
how to load your vehicle.
·The heaviest things should be on the load ¯oor and
forward of your rear axle. Put heavier items as far
forward as you can.
·Be sure the load is secured properly, so driving on
the off-road terrain does not toss things around.
{CAUTION:
·Cargo on the load ¯oor piled higher than
the seatbacks can be thrown forward
during a sudden stop. You or your
passengers could be injured. Keep cargo
below the top of the seatbacks.
·Unsecured cargo on the load ¯oor can be
tossed about when driving over rough
terrain. You or your passengers can be
struck by ¯ying objects. Secure the cargo
properly.
·Heavy loads on the roof raise the vehicle's
center of gravity, making it more likely to
roll over. You can be seriously or fatally
injured if the vehicle rolls over. Put heavy
loads inside the cargo area, not on the
roof. Keep cargo in the cargo area as far
forward and low as possible.
You will ®nd other important information in this manual.
See
Loading Your Vehicle on page 4-57andTires
on page 5-76.
4-23
Page 328 of 588

·Never go downhill with the transmission in
NEUTRAL (N), or with the clutch pedal pressed
down in a manual shift. This is called
ªfree-wheeling.º Your brakes will have to do all the
work and could overheat and fade.
Q:Am I likely to stall when going downhill?
A:It is much more likely to happen going uphill. But if
it happens going downhill, here is what to do.
·Stop your vehicle by applying the regular brakes.
Apply the parking brake.
·Shift to PARK (P) (or to neutral with the manual
transmission) and, while still braking, restart the
engine.
·Shift back to a low gear, release the parking brake,
and drive straight down.
·If the engine will not start, get out and get help.
Driving Across an Incline
Sooner or later, an off-road trail will probably go across
the incline of a hill. If this happens, you have to
decide whether to try to drive across the incline. Here
are some things to consider:
·A hill that can be driven straight up or down may be
too steep to drive across. When you go straight up
or down a hill, the length of the wheel base (the
distance from the front wheels to the rear wheels)
reduces the likelihood the vehicle will tumble
end over end. But when you drive across an incline,
the much more narrow track width (the distance
between the left and right wheels) may not prevent
the vehicle from tilting and rolling over. Also,
driving across an incline puts more weight on the
downhill wheels. This could cause a downhill
slide or a rollover.
·Surface conditions can be a problem when you
drive across a hill. Loose gravel, muddy spots,
or even wet grass can cause your tires to slip
sideways, downhill. If the vehicle slips sideways,
it can hit something that will trip it (a rock, a rut, etc.)
and roll over.
·Hidden obstacles can make the steepness of the
incline even worse. If you drive across a rock with the
uphill wheels, or if the downhill wheels drop into a rut
or depression, your vehicle can tilt even more.
4-32
Page 334 of 588

Here are some tips on night driving.
·Drive defensively.
·Do not drink and drive.
·Adjust your inside rearview mirror to reduce the
glare from headlamps behind you.
·Since you can not see as well, you may need to
slow down and keep more space between you
and other vehicles.
·Slow down, especially on higher speed roads. Your
headlamps can light up only so much road ahead.
·In remote areas, watch for animals.
·If you are tired, pull off the road in a safe place
and rest.
No one can see as well at night as in the daytime. But
as we get older these differences increase. A
50-year-old driver may require at least twice as much
light to see the same thing at night as a 20-year-old.
What you do in the daytime can also affect your
night vision. For example, if you spend the day in bright
sunshine you are wise to wear sunglasses. Your
eyes will have less trouble adjusting to night. But if you
are driving, do not wear sunglasses at night. They
may cut down on glare from headlamps, but they also
make a lot of things invisible.You can be temporarily blinded by approaching
headlamps. It can take a second or two, or even several
seconds, for your eyes to re-adjust to the dark. When
you are faced with severe glare (as from a driver
who does not lower the high beams, or a vehicle with
misaimed headlamps), slow down a little. Avoid
staring directly into the approaching headlamps.
Keep your windshield and all the glass on your vehicle
clean Ð inside and out. Glare at night is made much
worse by dirt on the glass. Even the inside of the glass
can build up a ®lm caused by dust. Dirty glass makes
lights dazzle and ¯ash more than clean glass would,
making the pupils of your eyes contract repeatedly.
Remember that your headlamps light up far less of a
roadway when you are in a turn or curve. Keep
your eyes moving; that way, it is easier to pick out dimly
lighted objects. Just as your headlamps should be
checked regularly for proper aim, so should your eyes
be examined regularly. Some drivers suffer from
night blindness Ð the inability to see in dim light Ð and
are not even aware of it.
4-38
Page 352 of 588

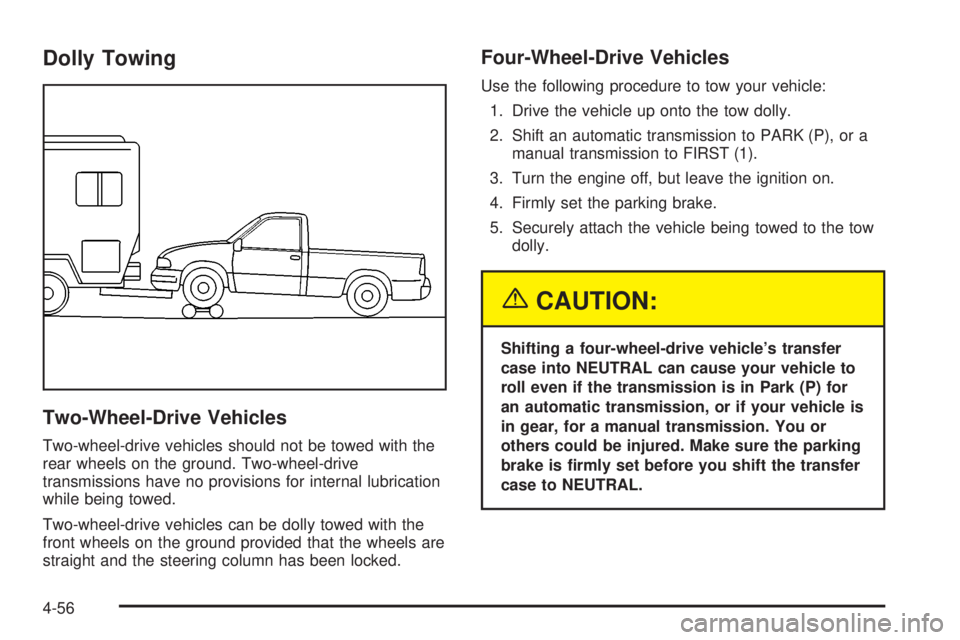
Dolly Towing
Two-Wheel-Drive Vehicles
Two-wheel-drive vehicles should not be towed with the
rear wheels on the ground. Two-wheel-drive
transmissions have no provisions for internal lubrication
while being towed.
Two-wheel-drive vehicles can be dolly towed with the
front wheels on the ground provided that the wheels are
straight and the steering column has been locked.
Four-Wheel-Drive Vehicles
Use the following procedure to tow your vehicle:
1. Drive the vehicle up onto the tow dolly.
2. Shift an automatic transmission to PARK (P), or a
manual transmission to FIRST (1).
3. Turn the engine off, but leave the ignition on.
4. Firmly set the parking brake.
5. Securely attach the vehicle being towed to the tow
dolly.
{CAUTION:
Shifting a four-wheel-drive vehicle's transfer
case into NEUTRAL can cause your vehicle to
roll even if the transmission is in Park (P) for
an automatic transmission, or if your vehicle is
in gear, for a manual transmission. You or
others could be injured. Make sure the parking
brake is ®rmly set before you shift the transfer
case to NEUTRAL.
4-56
Page 353 of 588
6. Shift the transfer case to NEUTRAL. SeeFour-Wheel Drive on page 2-35for the proper
procedure to select the neutral position for
your vehicle.
7. Release the parking brake only after the vehicle
being towed is ®rmly attached to the towing
vehicle.
8. Turn the ignition off and lock the steering column.
Loading Your Vehicle
It is very important to know how much weight your
vehicle can carry. This weight is called the vehicle
capacity weight and includes the weight of all occupants,
cargo and all nonfactory-installed options. Two labels
on your vehicle show how much weight it may properly
carry, the Tire and Loading Information label and the
Certi®cation/Tire label.
{CAUTION:
Do not load your vehicle any heavier than the
GVWR, or either the maximum front or rear
GAWR. If you do, parts on your vehicle can
break, and it can change the way your vehicle
handles. These could cause you to lose
control and crash. Also, overloading can
shorten the life of your vehicle.
4-57
Page 354 of 588

Tire and Loading Information Label
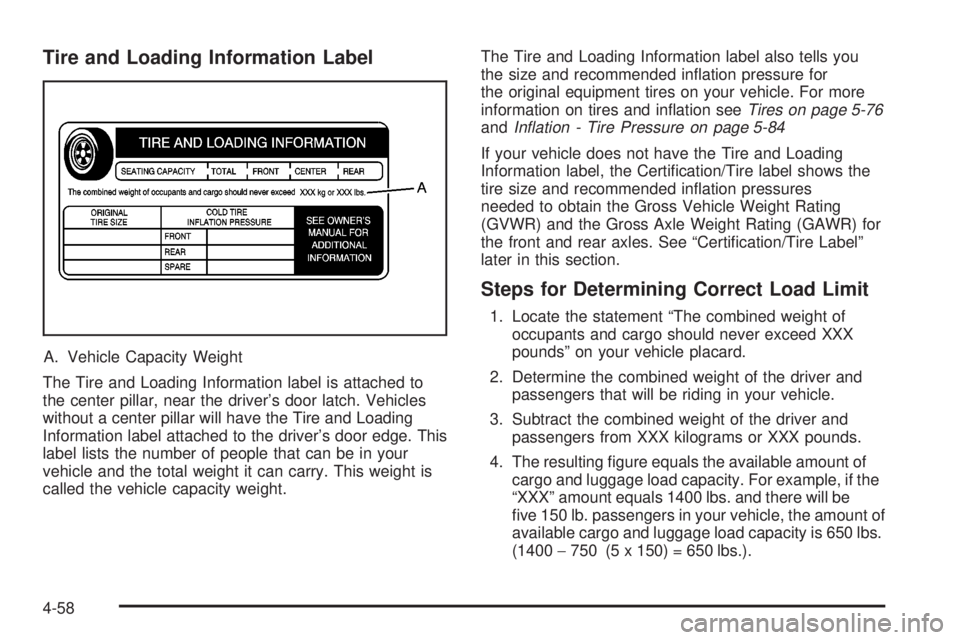
A. Vehicle Capacity Weight
The Tire and Loading Information label is attached to
the center pillar, near the driver's door latch. Vehicles
without a center pillar will have the Tire and Loading
Information label attached to the driver's door edge. This
label lists the number of people that can be in your
vehicle and the total weight it can carry. This weight is
called the vehicle capacity weight.The Tire and Loading Information label also tells you
the size and recommended in¯ation pressure for
the original equipment tires on your vehicle. For more
information on tires and in¯ation see
Tires on page 5-76andIn¯ation - Tire Pressure on page 5-84
If your vehicle does not have the Tire and Loading
Information label, the Certi®cation/Tire label shows the
tire size and recommended in¯ation pressures
needed to obtain the Gross Vehicle Weight Rating
(GVWR) and the Gross Axle Weight Rating (GAWR) for
the front and rear axles. See ªCerti®cation/Tire Labelº
later in this section.
Steps for Determining Correct Load Limit
1. Locate the statement ªThe combined weight of
occupants and cargo should never exceed XXX
poundsº on your vehicle placard.
2. Determine the combined weight of the driver and
passengers that will be riding in your vehicle.
3. Subtract the combined weight of the driver and
passengers from XXX kilograms or XXX pounds.
4. The resulting ®gure equals the available amount of
cargo and luggage load capacity. For example, if the
ªXXXº amount equals 1400 lbs. and there will be
®ve 150 lb. passengers in your vehicle, the amount of
available cargo and luggage load capacity is 650 lbs.
(1400-750 (5 x 150) = 650 lbs.).
4-58
Page 357 of 588

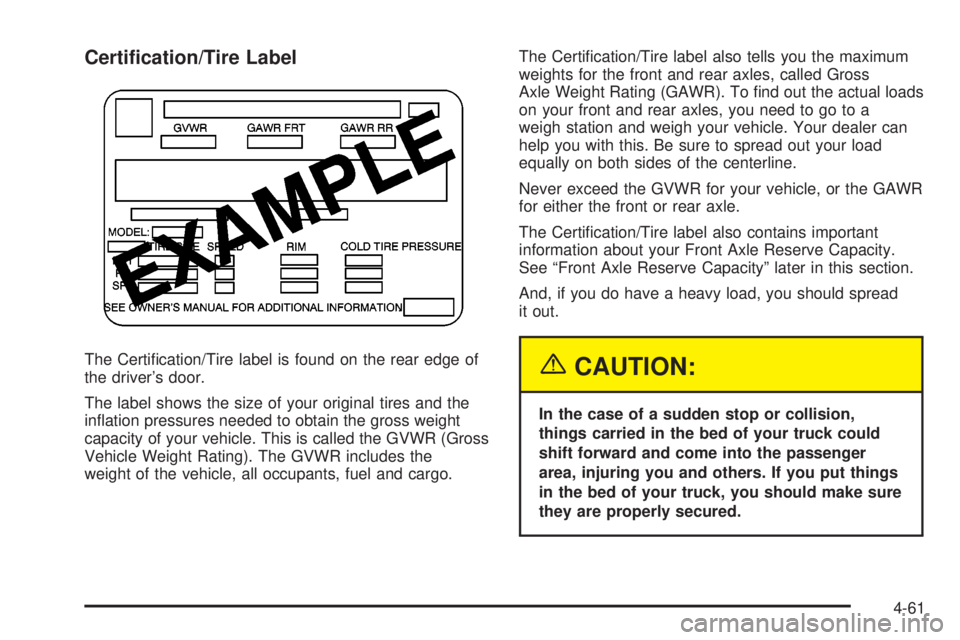
Certi®cation/Tire Label
The Certi®cation/Tire label is found on the rear edge of
the driver's door.
The label shows the size of your original tires and the
in¯ation pressures needed to obtain the gross weight
capacity of your vehicle. This is called the GVWR (Gross
Vehicle Weight Rating). The GVWR includes the
weight of the vehicle, all occupants, fuel and cargo.The Certi®cation/Tire label also tells you the maximum
weights for the front and rear axles, called Gross
Axle Weight Rating (GAWR). To ®nd out the actual loads
on your front and rear axles, you need to go to a
weigh station and weigh your vehicle. Your dealer can
help you with this. Be sure to spread out your load
equally on both sides of the centerline.
Never exceed the GVWR for your vehicle, or the GAWR
for either the front or rear axle.
The Certi®cation/Tire label also contains important
information about your Front Axle Reserve Capacity.
See ªFront Axle Reserve Capacityº later in this section.
And, if you do have a heavy load, you should spread
it out.{CAUTION:
In the case of a sudden stop or collision,
things carried in the bed of your truck could
shift forward and come into the passenger
area, injuring you and others. If you put things
in the bed of your truck, you should make sure
they are properly secured.
4-61