2004 GMC CANYON towing
[x] Cancel search: towingPage 1 of 420

Seats and Restraint Systems........................... 1-1
Front Seats
............................................... 1-3
Rear Seats
............................................... 1-9
Safety Belts
.............................................1-11
Child Restraints
.......................................1-31
Air Bag Systems
......................................1-60
Restraint System Check
............................1-73
Features and Controls..................................... 2-1
Keys
........................................................ 2-2
Doors and Locks
....................................... 2-7
Windows
.................................................2-12
Theft-Deterrent Systems
............................2-14
Starting and Operating Your Vehicle
...........2-16
Mirrors
....................................................2-36
OnStar
®System
......................................2-41
Storage Areas
.........................................2-42
Instrument Panel............................................. 3-1
Instrument Panel Overview
.......................... 3-2
Climate Controls
......................................3-18
Warning Lights, Gages, and Indicators
........3-22
Driver Information Center (DIC)
..................3-37
Audio System(s)
.......................................3-42Driving Your Vehicle....................................... 4-1
Your Driving, the Road, and Your Vehicle
........ 4-2
Towing
...................................................4-47
Service and Appearance Care.......................... 5-1
Service
..................................................... 5-3
Fuel
......................................................... 5-5
Checking Things Under the Hood
...............5-10
Rear Axle
...............................................5-47
Four-Wheel Drive
.....................................5-48
Front Axle
...............................................5-49
Bulb Replacement
....................................5-50
Windshield Wiper Blade Replacement
.........5-55
Tires
......................................................5-57
Appearance Care
.....................................5-94
Vehicle Identi�cation
...............................5-103
Electrical System
....................................5-103
Capacities and Speci�cations
...................5-108
Maintenance Schedule..................................... 6-1
Maintenance Schedule
................................ 6-2
Customer Assistance and Information.............. 7-1
Customer Assistance and Information
........... 7-2
Reporting Safety Defects
...........................7-10
Index.................................................................1
2004 GMC Canyon Owner ManualM
Page 96 of 420

Passlock®
Your vehicle is equipped with the Passlock®
theft-deterrent system.
Passlock®is a passive theft-deterrent system. Passlock®
enables fuel if the ignition lock cylinder is turned with
a valid key. If a correct key is not used or the ignition
lock cylinder is tampered with, the fuel system is
disabled and the vehicle will not start.
During normal operation, the security light will turn off
approximately �ve seconds after the key is turned
to RUN. SeeSecurity Light on page 3-35.
If the engine stalls and the security light �ashes, wait
about 10 minutes until the light stops �ashing before
trying to restart the engine. Remember to release
the key from START as soon as the engine starts.
If the engine does not start after three tries, the vehicle
needs service.
If the engine is running and the security light comes on,
you will be able to restart the engine if you turn the engine
off. However, your Passlock
®system is not working
properly and must be serviced by your dealer. Your
vehicle is not protected by Passlock
®at this time. You
may also want to check the fuse seeFuses and Circuit
Breakers on page 5-104. See your dealer for service.
In an emergency, call the GM Roadside Assistance
Center. SeeRoadside Assistance Program on page 7-6.
Starting and Operating Your
Vehicle
New Vehicle Break-In
Notice:Your vehicle does not need an elaborate
“break-in.” But it will perform better in the long run
if you follow these guidelines:
Keep your speed at 55 mph (88 km/h) or less
for the �rst 500 miles (805 km).
Do not drive at any one speed — fast or
slow — for the �rst 500 miles (805 km).
Do not make full-throttle starts.
Avoid making hard stops for the �rst 200 miles
(322 km) or so. During this time your new brake
linings are not yet broken in. Hard stops with new
linings can mean premature wear and earlier
replacement. Follow this breaking-in guideline
every time you get new brake linings.
Do not tow a trailer during break-in. SeeTowing a
Trailer on page 4-60for more information.
2-16
Page 101 of 420

Automatic Transmission Operation
Your automatic transmission has a shift lever on the
steering column.
It features an electronic shift position indicator within the
instrument cluster. This display must be powered
anytime the shift lever is capable of being moved out of
PARK (P). This means that if your key is in OFF, but
not locked, there will be a small current drain on
your battery which could discharge your battery over a
period of time. If you need to leave your key in the
ignition in OFF for an extended period, it is
recommended that you disconnect the battery cable
from the battery to prevent discharging your battery.
There are several different positions for your shift lever.
PARK (P):This position locks your rear wheels. It is
the best position to use when you start your engine
because your vehicle cannot move easily.
{CAUTION:
It is dangerous to get out of your vehicle if the
shift lever is not fully in PARK (P) with the
parking brake �rmly set. Your vehicle can roll.
Do not leave your vehicle when the engine is
running unless you have to. If you have left the
engine running, the vehicle can move suddenly.
You or others could be injured. To be sure your
vehicle will not move, even when you are on
fairly level ground, always set your parking
brake and move the shift lever to PARK (P). See
Shifting Into Park (P) (Automatic Transmission)
on page 2-30. If you are pulling a trailer,
seeTowing a Trailer on page 4-60.
Make sure the shift lever is fully in PARK (P) before
starting the engine. Your vehicle has an automatic
transmission shift lock control system. You have to
fully apply your regular brakes before you can shift
from PARK (P) when the ignition key is in RUN.
2-21
Page 103 of 420

DRIVE (D):This position is for normal driving. If you
need more power for passing, and you are:
Going less than about 35 mph (55 km/h), push your
accelerator pedal about halfway down.
Going about 35 mph (55 km/h) or more, push the
accelerator all the way down.
You will shift down to the next gear and have more
power.
DRIVE (D) should not be used when towing a trailer,
carrying a heavy load, driving on steep hills, or for
off-road driving. Select THIRD (3) when operating the
vehicle under any of these conditions.
THIRD (3):This position is also used for normal driving.
However, it offers more power and lower fuel economy
than DRIVE (D). You should use THIRD (3) when towing
a trailer, carrying a heavy load, driving on steep hills
or winding roads or for off-road driving.SECOND (2):This position gives you more power but
lower fuel economy than THIRD (3). You can use
SECOND (2) on hills. It can help control your speed as
you go down steep mountain roads, but then you
would also want to use your brakes off and on. You can
also use SECOND (2) for starting your vehicle from a
stop on slippery road surfaces.
FIRST (1):This position gives you even more power
but lower fuel economy than SECOND (2). You can use
it on very steep hills, or in deep snow or mud. If the
shift lever is put in FIRST (1) while the vehicle is moving
forward, the transmission will not shift into FIRST (1)
until the vehicle is going slowly enough.
Notice:Spinning the tires or holding the vehicle
in one place on a hill using only the accelerator
pedal may damage the transmission. If you
are stuck, do not spin the tires. When stopping on a
hill, use the brakes to hold the vehicle in place.
2-23
Page 106 of 420

Four-Wheel Drive
If your vehicle has four-wheel drive, you can send your
engine’s driving power to all four wheels for extra
traction. To get the most satisfaction out of four-wheel
drive, you must be familiar with its operation. Read
the part that follows before using four-wheel drive. You
should use two-wheel-drive high (2HI) for most
normal driving conditions.
Notice:Driving on pavement in four-wheel drive for
an extended period of time may cause premature
wear on your vehicle’s powertrain. Do not drive
in four-wheel drive on pavement for extended
periods of time.
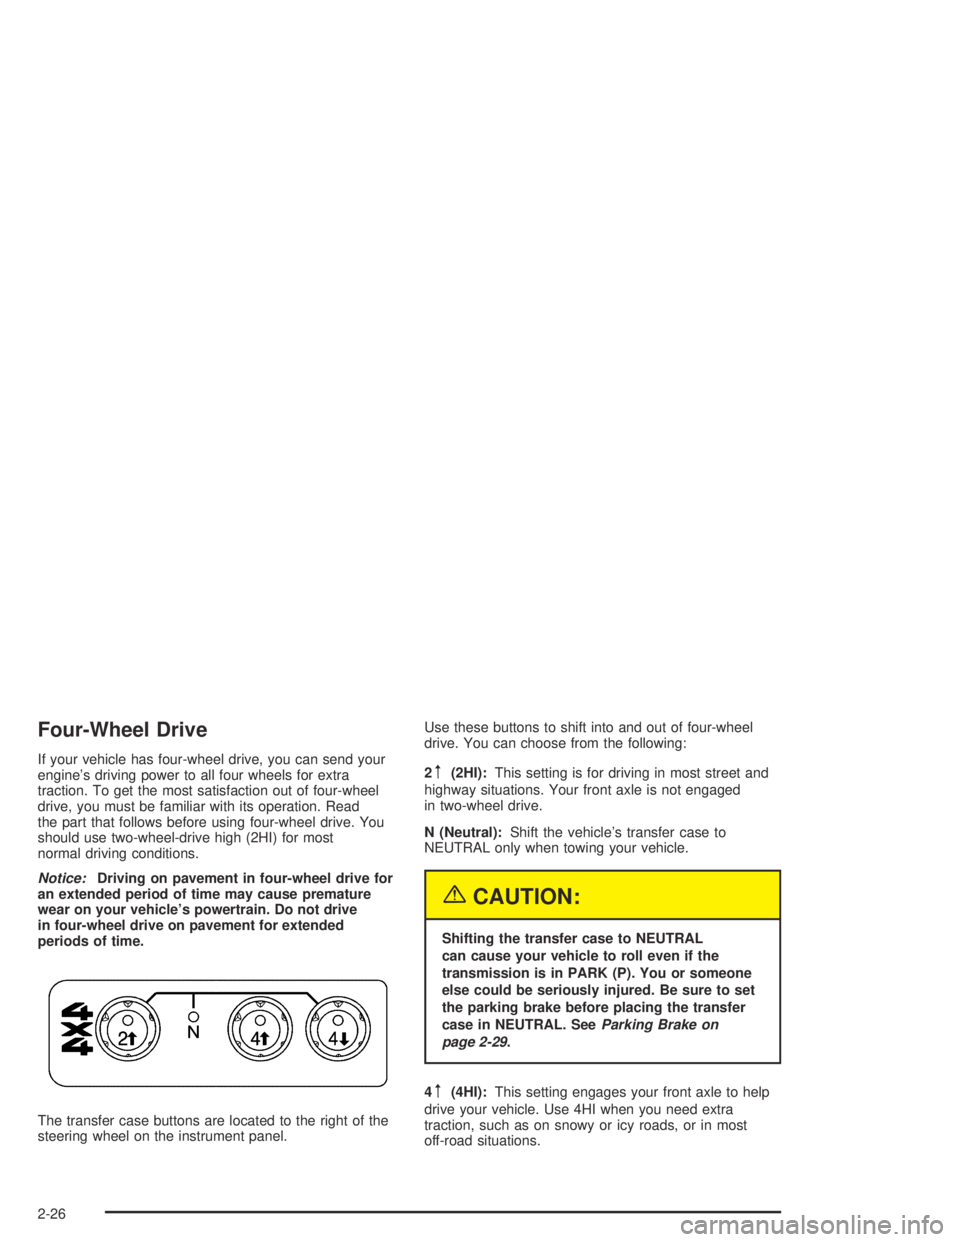
The transfer case buttons are located to the right of the
steering wheel on the instrument panel.Use these buttons to shift into and out of four-wheel
drive. You can choose from the following:
2m(2HI):This setting is for driving in most street and
highway situations. Your front axle is not engaged
in two-wheel drive.
N (Neutral):Shift the vehicle’s transfer case to
NEUTRAL only when towing your vehicle.
{CAUTION:
Shifting the transfer case to NEUTRAL
can cause your vehicle to roll even if the
transmission is in PARK (P). You or someone
else could be seriously injured. Be sure to set
the parking brake before placing the transfer
case in NEUTRAL. SeeParking Brake on
page 2-29.
4
m(4HI):This setting engages your front axle to help
drive your vehicle. Use 4HI when you need extra
traction, such as on snowy or icy roads, or in most
off-road situations.
2-26
Page 108 of 420

Shifting from 4LO to 2HI or 4HI
To shift from 4LO to 2HI or 4HI, your vehicle must be
stopped or moving less than 1.2 mph (2 km/h) with
the transmission in NEUTRAL (N) or the clutch pedal
engaged. The preferred method for shifting out of 4LO
is to have your vehicle moving 1.2 mph (2 km/h).
Press and release the 4HI button. You must wait for
the 4HI indicator light to stop �ashing and remain
illuminated before shifting your transmission into gear
or releasing the clutch pedal.
If the 4HI button is pressed when your vehicle is in gear
and/or moving, the 4HI indicator light will �ash for
30 seconds but not complete the shift.
On vehicles with an automatic transmission, if your
transfer case does not shift into 4HI, your transmission
indicator switch may require adjustment. With your
transmission in NEUTRAL (N), press and release the
4HI button. While the 4HI indicator light is �ashing, shift
your transmission into PARK (P). Wait until the 4HI
indicator light remains illuminated before shifting your
transmission into gear. Press the 4HI button again
to complete the shift. This will get you into 4HI, but you
should take your vehicle in for service to restore
normal operation.
Shifting to NEUTRAL
Use NEUTRAL when you plan to tow your vehicle.
SeeRecreational Vehicle Towing on page 4-47
for towing instructions. To shift the transfer case into
NEUTRAL, set the parking brake, then press and hold
the 2HI and the 4LO buttons at the same time for
10 seconds.
Shifting out of NEUTRAL
After towing your vehicle, you will have to shift out of
NEUTRAL in order to drive. To shift out of NEUTRAL,
do the following:
1. Set the parking brake and apply the regular brake
pedal. SeeParking Brake on page 2-29for more
information.
2. Start a vehicle with an automatic transmission in
PARK (P). Use FIRST (1) for vehicles with a
manual transmission.
3. Put an automatic transmission in NEUTRAL (N) or
press the clutch pedal for vehicles with a manual
transmission.
4. Press the button for the desired transfer case
position (2HI, 4HI or 4LO).
5. Shift the transmission to the desired gear. After the
transfer case has shifted out of NEUTRAL, the
indicator light will go out.
A re-engagement sound is normal when shifting out
of NEUTRAL.
2-28
Page 109 of 420

Parking Brake
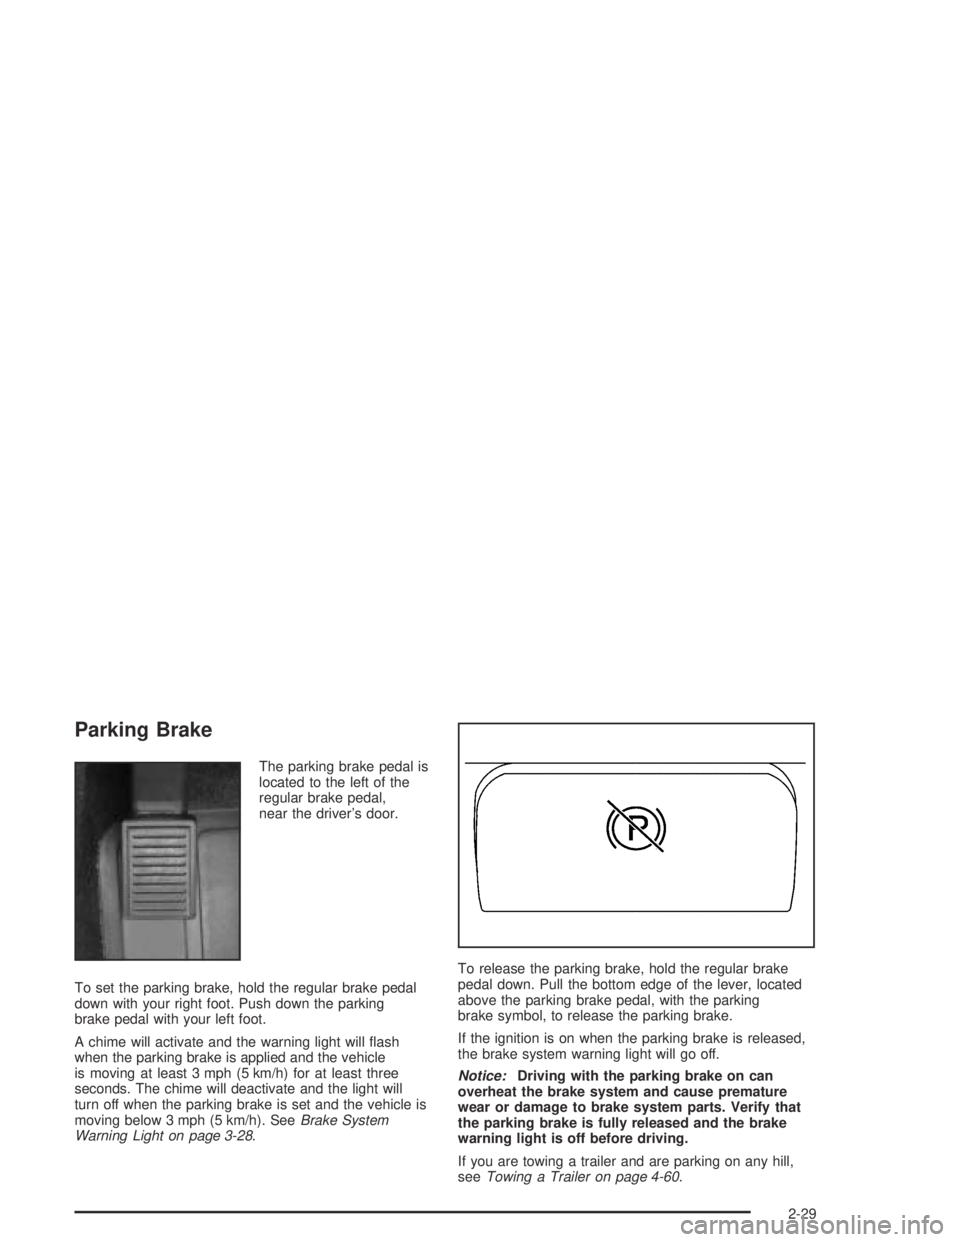
The parking brake pedal is
located to the left of the
regular brake pedal,
near the driver’s door.
To set the parking brake, hold the regular brake pedal
down with your right foot. Push down the parking
brake pedal with your left foot.
A chime will activate and the warning light will �ash
when the parking brake is applied and the vehicle
is moving at least 3 mph (5 km/h) for at least three
seconds. The chime will deactivate and the light will
turn off when the parking brake is set and the vehicle is
moving below 3 mph (5 km/h). SeeBrake System
Warning Light on page 3-28.To release the parking brake, hold the regular brake
pedal down. Pull the bottom edge of the lever, located
above the parking brake pedal, with the parking
brake symbol, to release the parking brake.
If the ignition is on when the parking brake is released,
the brake system warning light will go off.
Notice:Driving with the parking brake on can
overheat the brake system and cause premature
wear or damage to brake system parts. Verify that
the parking brake is fully released and the brake
warning light is off before driving.
If you are towing a trailer and are parking on any hill,
seeTowing a Trailer on page 4-60.
2-29
Page 110 of 420

Shifting Into Park (P)
(Automatic Transmission)
{CAUTION:
It can be dangerous to get out of your vehicle
if the shift lever is not fully in PARK (P) with
the parking brake �rmly set. Your vehicle can
roll. If you have left the engine running, the
vehicle can move suddenly. You or others
could be injured. To be sure your vehicle will
not move, even when you are on fairly level
ground, use the steps that follow. If you are
pulling a trailer, seeTowing a Trailer on
page 4-60.1. Hold the brake pedal down with your right foot and
set the parking brake.
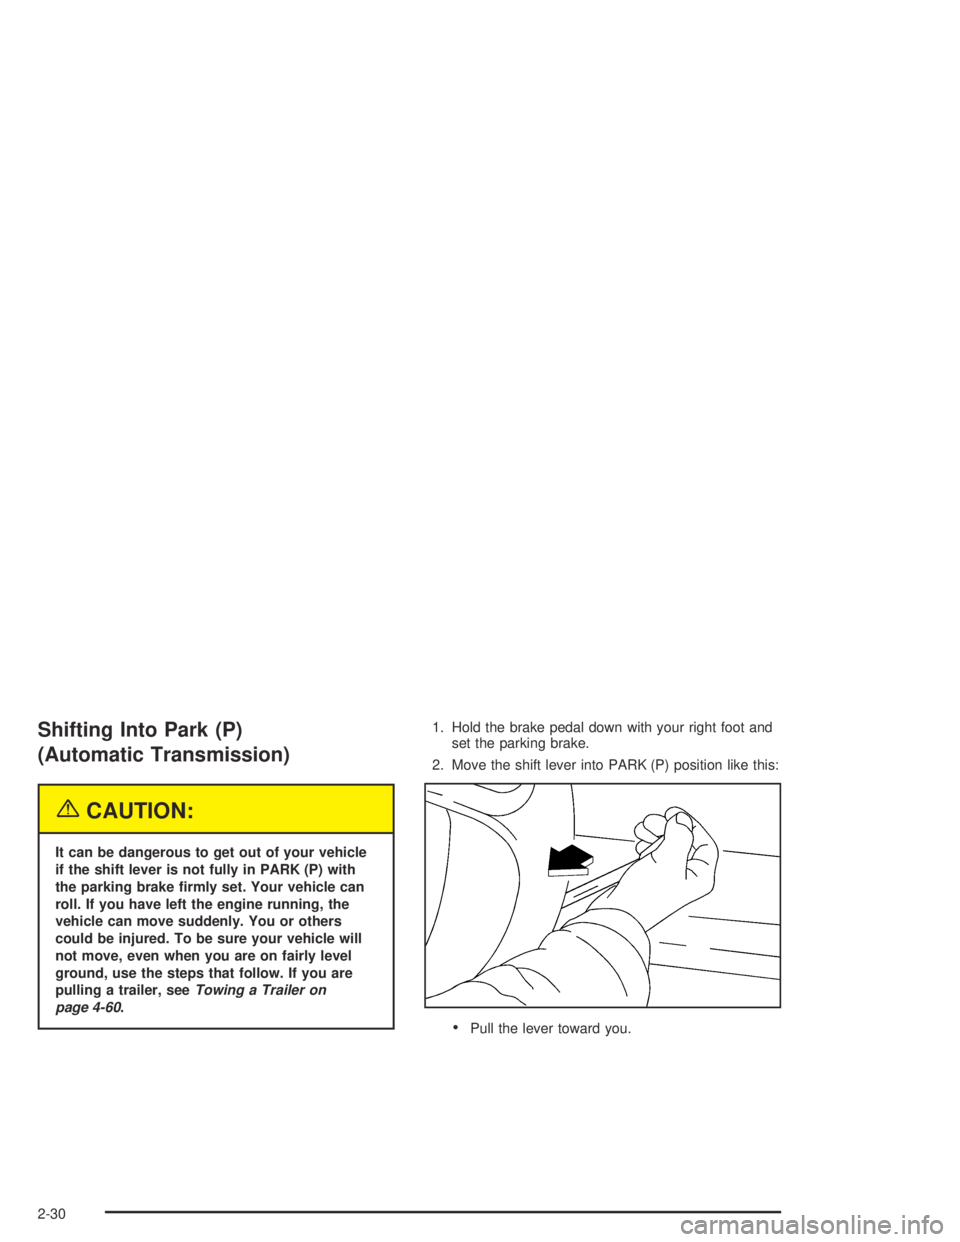
2. Move the shift lever into PARK (P) position like this:
Pull the lever toward you.
2-30