Page 2 of 280
Locks and Security 82
Keys 82
Locks 82
Anti-theft system 85
Seating and Safety Restraints 97
Seating 97
Safety restraints 102
Air bags 118
Child restraints 129
Driving 144
Starting 144
Brakes 149
Transmission operation 151
Trailer towing 173
Roadside Emergencies 186
Getting roadside assistance 186
Hazard flasher switch 187
Fuel pump shut-off switch 187
Fuses and relays 188
Changing tires 195
Jump starting 201
Wrecker towing 206
Customer Assistance 207
Reporting safety defects (U.S. only) 215
Cleaning 216
Table of Contents
2
Page 54 of 280
1. To open the bins, move the
center latch forward which will
allow the door to be opened.
2. The latches on the side of the
bins are to enable the user to
remove the bin or add a dealer
purchased feature.
Sliding the bins on the rails may
cause damage to the headliner.
The removable bins are to be
snapped into place not slid.
Storage compartment
Press the latch to open the storage
compartment. The door will open
slightly and can be moved to full
open.
The storage compartment may be
used to secure sunglasses or a
similar object.
Overhead Storage Bins
²When on the overhead rail, adjacent bins must be pinned together.
Bins adjacent to the End Cap must be pinned to the End Cap. Bins
without pin attachments should not be placed on the overhead rail.
²Failure to pin the bins together can allow the bins to become
separated from the rail under certain conditions.
Bin Removal
Attach and remove bins from the rail using the following instructions:
Driver Controls
54
Page 57 of 280

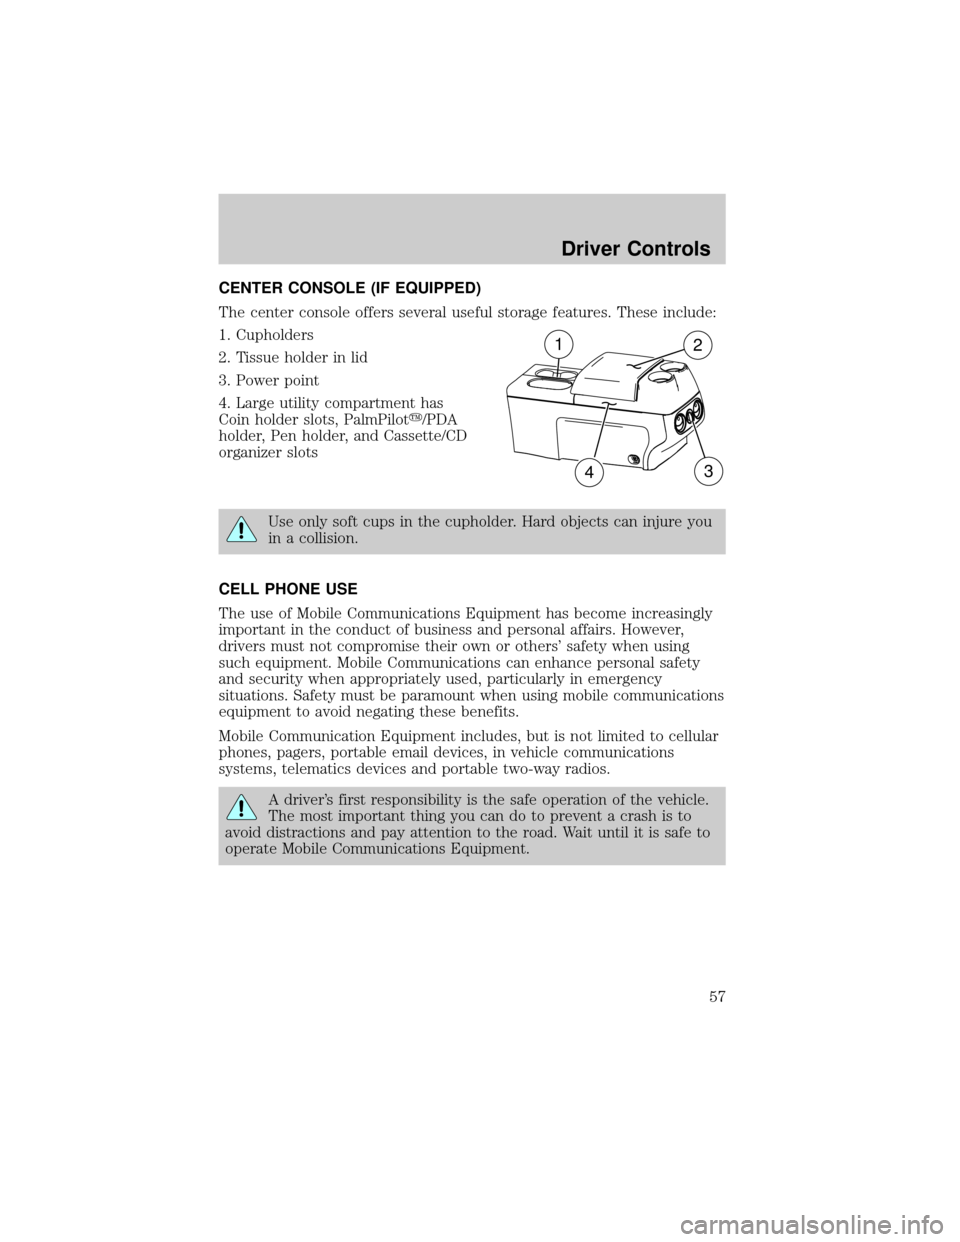
CENTER CONSOLE (IF EQUIPPED)
The center console offers several useful storage features. These include:
1. Cupholders
2. Tissue holder in lid
3. Power point
4. Large utility compartment has
Coin holder slots, PalmPiloty/PDA
holder, Pen holder, and Cassette/CD
organizer slots
Use only soft cups in the cupholder. Hard objects can injure you
in a collision.
CELL PHONE USE
The use of Mobile Communications Equipment has become increasingly
important in the conduct of business and personal affairs. However,
drivers must not compromise their own or others' safety when using
such equipment. Mobile Communications can enhance personal safety
and security when appropriately used, particularly in emergency
situations. Safety must be paramount when using mobile communications
equipment to avoid negating these benefits.
Mobile Communication Equipment includes, but is not limited to cellular
phones, pagers, portable email devices, in vehicle communications
systems, telematics devices and portable two-way radios.
A driver's first responsibility is the safe operation of the vehicle.
The most important thing you can do to prevent a crash is to
avoid distractions and pay attention to the road. Wait until it is safe to
operate Mobile Communications Equipment.
12
34
Driver Controls
57
Page 66 of 280

To vent the moon roof:Press and hold thecontrol.The moon
roof must be in the closed position in order to move it into the
vent position.To close, press and hold the
control until the glass
panel stops moving.
The moon roof has a built-in sliding shade that can be manually opened
or closed when the glass panel is shut. To close the shade, pull it toward
the front of the vehicle.
When closing the moon roof, you should verify that it is free of
obstructions and ensure that children and/or pets are not in the
proximity of the moon roof opening.
HOMELINKTWIRELESS CONTROL SYSTEM (IF EQUIPPED)
The HomeLinktWireless Control System, located on the driver's visor,
provides a convenient way to replace up to three hand-held transmitters
with a single built-in device. This feature will learn the radio frequency
codes of most current transmitters to operate garage doors, entry gate
operators, security systems, entry door locks, and home or office lighting.
When programming your HomeLinktWireless Control System to
a garage door or gate, be sure that people and objects are out of
the way to prevent potential harm or damage.
Do not use the HomeLinktWireless Control System with any garage
door opener that lacks safety stop and reverse features as required by
U.S. federal safety standards (this includes any garage door opener
model manufactured before April 1, 1982). A garage door which cannot
detect an object, signaling the door to stop and reverse, does not meet
current U.S. federal safety standards. For more information, contact
HomeLinktat:www.homelink.comor1±800±355±3515.
Retain the original transmitter for use in other vehicles as well as for
future programming procedures (i.e. new HomeLinktequipped vehicle
purchase). It is also suggested that upon the sale of the vehicle, the
programmed Homelinktbuttons be erased for security purposes, refer to
Programmingin this section.
Programming
Do not program HomeLinktwith the vehicle parked in the garage.
Note:Your vehicle may require the ignition switch to be turned to the
ACC position for programming and/or operation of the HomeLinkt.Itis
Driver Controls
66
Page 69 of 280

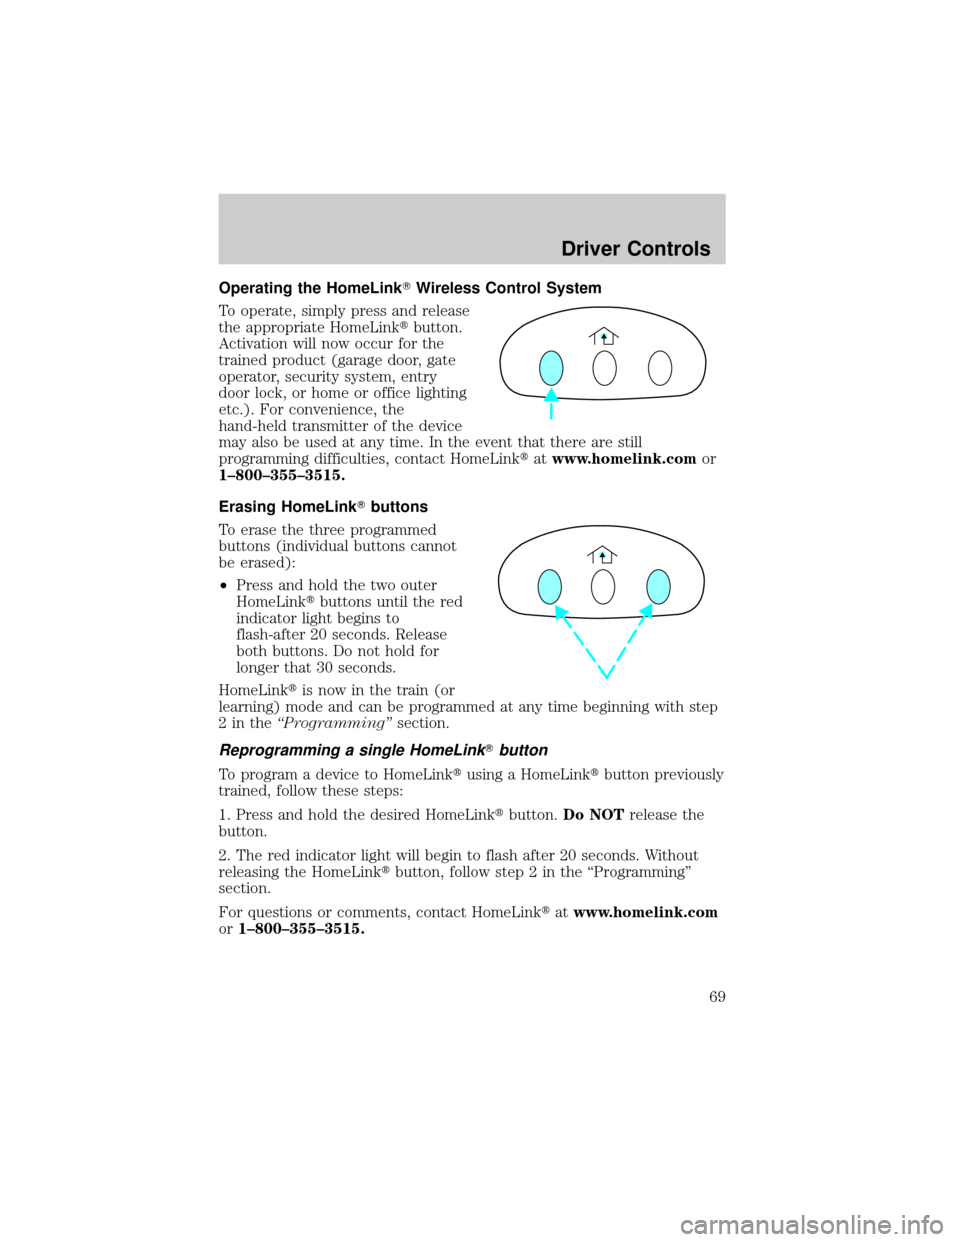
Operating the HomeLinkTWireless Control System
To operate, simply press and release
the appropriate HomeLinktbutton.
Activation will now occur for the
trained product (garage door, gate
operator, security system, entry
door lock, or home or office lighting
etc.). For convenience, the
hand-held transmitter of the device
may also be used at any time. In the event that there are still
programming difficulties, contact HomeLinktatwww.homelink.comor
1±800±355±3515.
Erasing HomeLinkTbuttons
To erase the three programmed
buttons (individual buttons cannot
be erased):
²Press and hold the two outer
HomeLinktbuttons until the red
indicator light begins to
flash-after 20 seconds. Release
both buttons. Do not hold for
longer that 30 seconds.
HomeLinktis now in the train (or
learning) mode and can be programmed at any time beginning with step
2intheªProgrammingºsection.
Reprogramming a single HomeLinkTbutton
To program a device to HomeLinktusing a HomeLinktbutton previously
trained, follow these steps:
1. Press and hold the desired HomeLinktbutton.Do NOTrelease the
button.
2. The red indicator light will begin to flash after 20 seconds. Without
releasing the HomeLinktbutton, follow step 2 in the ªProgrammingº
section.
For questions or comments, contact HomeLinktatwww.homelink.com
or1±800±355±3515.
Driver Controls
69
Page 81 of 280

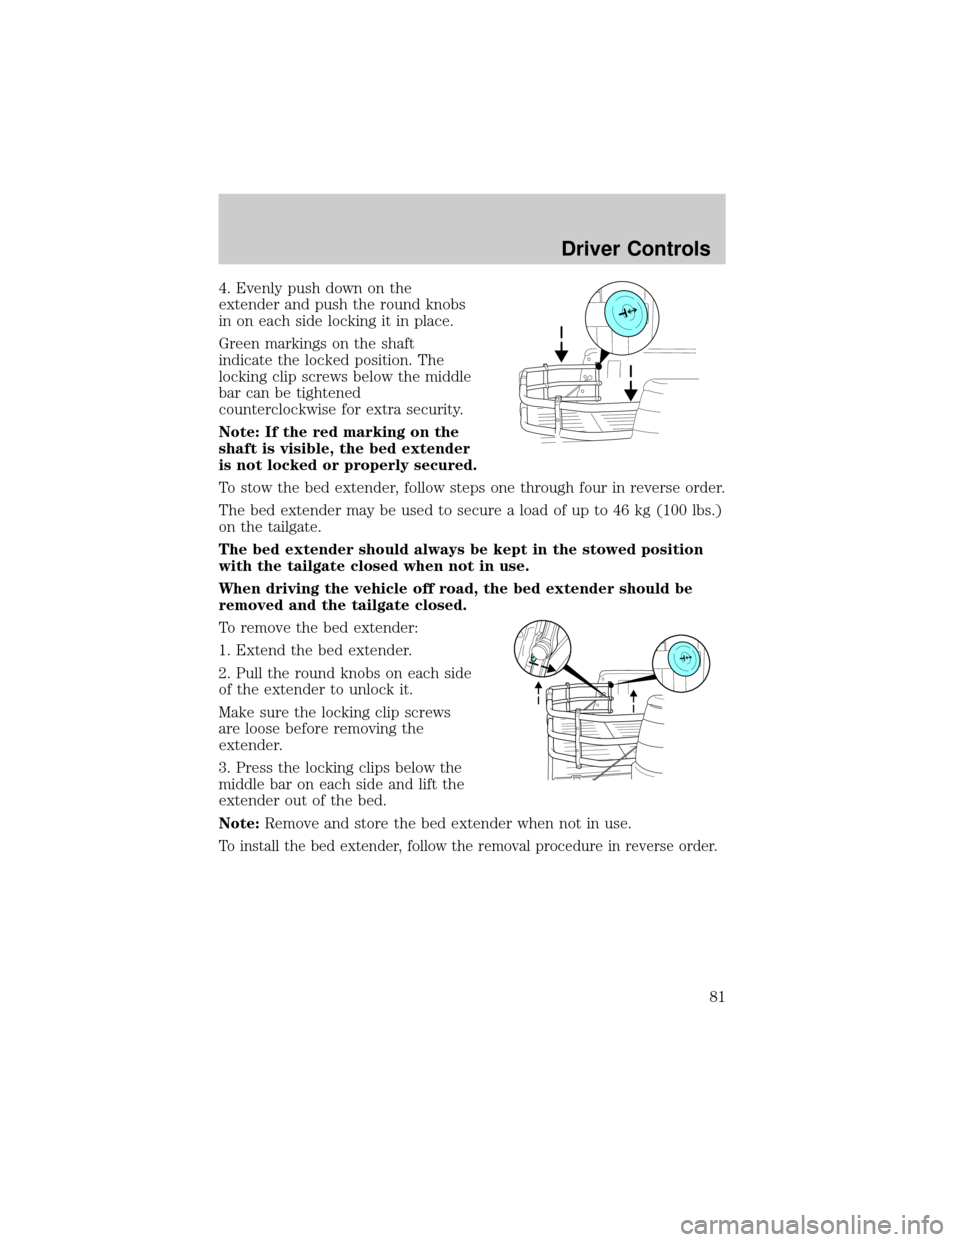
4. Evenly push down on the
extender and push the round knobs
in on each side locking it in place.
Green markings on the shaft
indicate the locked position. The
locking clip screws below the middle
bar can be tightened
counterclockwise for extra security.
Note: If the red marking on the
shaft is visible, the bed extender
is not locked or properly secured.
To stow the bed extender, follow steps one through four in reverse order.
The bed extender may be used to secure a load of up to 46 kg (100 lbs.)
on the tailgate.
The bed extender should always be kept in the stowed position
with the tailgate closed when not in use.
When driving the vehicle off road, the bed extender should be
removed and the tailgate closed.
To remove the bed extender:
1. Extend the bed extender.
2. Pull the round knobs on each side
of the extender to unlock it.
Make sure the locking clip screws
are loose before removing the
extender.
3. Press the locking clips below the
middle bar on each side and lift the
extender out of the bed.
Note:Remove and store the bed extender when not in use.
To install the bed extender, follow the removal procedure in reverse order.
Driver Controls
81
Page 82 of 280
KEYS
The key operates all locks on your vehicle. In case of loss, replacement
keys are available from your dealer.
You should always carry a second key with you in a safe place in case
you require it in an emergency.
Refer toSecuriLockyPassive Anti-Theft Systemfor more information.
POWER DOOR LOCKS (IF EQUIPPED)
Press control to unlock all vehicle doors.
Press control to lock all vehicle
doors.
Smart unlocking feature
The smart unlocking feature
prevents you from locking yourself
out of your vehicle.
With the key in any ignition
position:
²The driver's door will
automatically unlock if it is locked
by the driver's power lock control
while the driver's door is open.
The vehicle may still be locked with
the key in the ignition, and performing one of the following actions:
²Pressing the manual lock button on the door.
²Operating the remote entry transmitter.
²Operating the keyless entry keypad.
²Operating the driver's door with a key.
Locks and Security
Locks and Security
82
Page 83 of 280
Childproof door locks (if equipped)
When these locks are set, the rear
doors cannot be opened from the
inside. The rear doors can be
opened from the outside when the
doors are unlocked.
The childproof locks are located on
rear edge of each rear door and
must be set separately for each
door. Setting the lock for one door
will not automatically set the lock
for both doors.
Move lock control up to engage the
childproof lock. Move control down
to disengage childproof locks.
INTERIOR TONNEAU COVER RELEASE (IF EQUIPPED)
Your vehicle is equipped with a mechanical interior tonneau cover
release handle that provides a means of escape for children and adults in
the event they become locked inside the pickup box.
Adults are advised to familiarize themselves with the operation and
location of the release handle.
Locks and Security
83