2004 FORD F150 tailgate
[x] Cancel search: tailgatePage 1 of 280

Introduction 4
Instrument Cluster 10
Warning and control lights 10
Gauges 15
Entertainment Systems 18
AM/FM stereo 18
AM/FM stereo with CD 20
AM/FM stereo cassette with CD 23
AM/FM stereo with in-dash six CD 26
Climate Controls 32
Heater only 32
Manual heating and air conditioning 33
Electronic automatic temperature control 35
Rear window defroster 40
Lights 41
Headlamps 41
Turn signal control 45
Bulb replacement 47
Driver Controls 52
Windshield wiper/washer control 52
Steering wheel adjustment 53
Power windows 58
Mirrors 59
Speed control 61
Message center 70
Tailgate 79
Table of Contents
Table of Contents
1
Page 49 of 280

Replacing front parking lamp/turn signal/sidemarker bulbs
1. Make sure the headlamp control
is in the OFF position and open the
hood.
2. At the top and inboard side of the
headlamp, loosen the three retaining
screws.
3. Once the three retaining screws
have been removed, disengage the
tab at the top center of the
headlamp assembly by lifting it up.
4. Slide the headlamp assembly
forward disconnecting the snap
attachment at the fender and
disconnect the electrical connector
from the bulb by pulling rearward.
5. Remove bulb socket from the
parking lamp assembly by turning it
counterclockwise and then pull the
bulb straight out.
Install the new bulb(s) in reverse order.
Replacing tail/brake/turn signal/backup lamp bulbs
1. Make sure the headlamp control
is in the OFF position.
2. Open the tailgate to expose the
lamp assembly screws and remove
the two screws from the tail lamp
assembly.
Lights
49
Page 50 of 280

3. Carefully pull the lamp assembly
straight rearward from the tailgate
pillar to disengage two hidden
snap-in retainers. (Flare side tail
lamps are not equipped with snap-in
retainers.)
4. Remove bulb socket from the
lamp assembly by turning it
counterclockwise.
5. Pull bulb straight out of socket
and press in the new bulb.
Install the new bulb(s) in reverse order.
Replacing high-mount brake and cargo lamp bulbs
Make sure the headlamp control is
in the OFF position.
1. Remove the two screws and move
the lamp assembly away from the
vehicle to expose the bulb sockets.
2. Remove the bulb socket by
rotating counterclockwise and
pulling it out of the lamp assembly.
3. Pull the bulb straight out of the socket and push in the new bulb.
Install the new bulbs in reverse order.
Replacing foglamp bulbs (if equipped)
1. Make sure the headlamp control
is in the OFF position.
2. Remove the bulb socket from the
foglamp by turning
counterclockwise.
3. Disconnect the electrical
connector from the foglamp bulb.
Install the new bulb in reverse order.
Replacing exterior mounted mirror turn signal indicator lamp bulbs
For bulb replacement, see a dealer or qualified technician.
Lights
50
Page 79 of 280

4. Press the ODO reset button in
the cluster, hold for six seconds and
release. You will see that ZONE
appears in the instrument cluster
display.
5. Press and release the button until the desired zone number appears.
Note:The range of zone values are from 01 to 15 and ªwrapsº back to 01.
6. When you get to the desired ZONE number, hold the button down to
ªlock inº the new value.
The cluster display will return to the ªnormalº mode when the button
has not been pressed for 6 seconds.
Compass calibration adjustment
Perform this adjustment in an open area free from steel structures and
high voltage lines. For optimum calibration, turn off all electrical
accessories (heater/air conditioning, wipers, etc.) and make sure all
vehicle doors are shut.
1. Start the vehicle.
2. To enter the compass calibration
mode, press and hold the button for
greater than eight seconds. The
display will then show CAL in the display window.
3. Drive the vehicle slowly (less than 5 km/h [3 mph]) in circles until
CAL indicator turns off. As many as 5 complete circles may be required.
4. The compass is now calibrated.
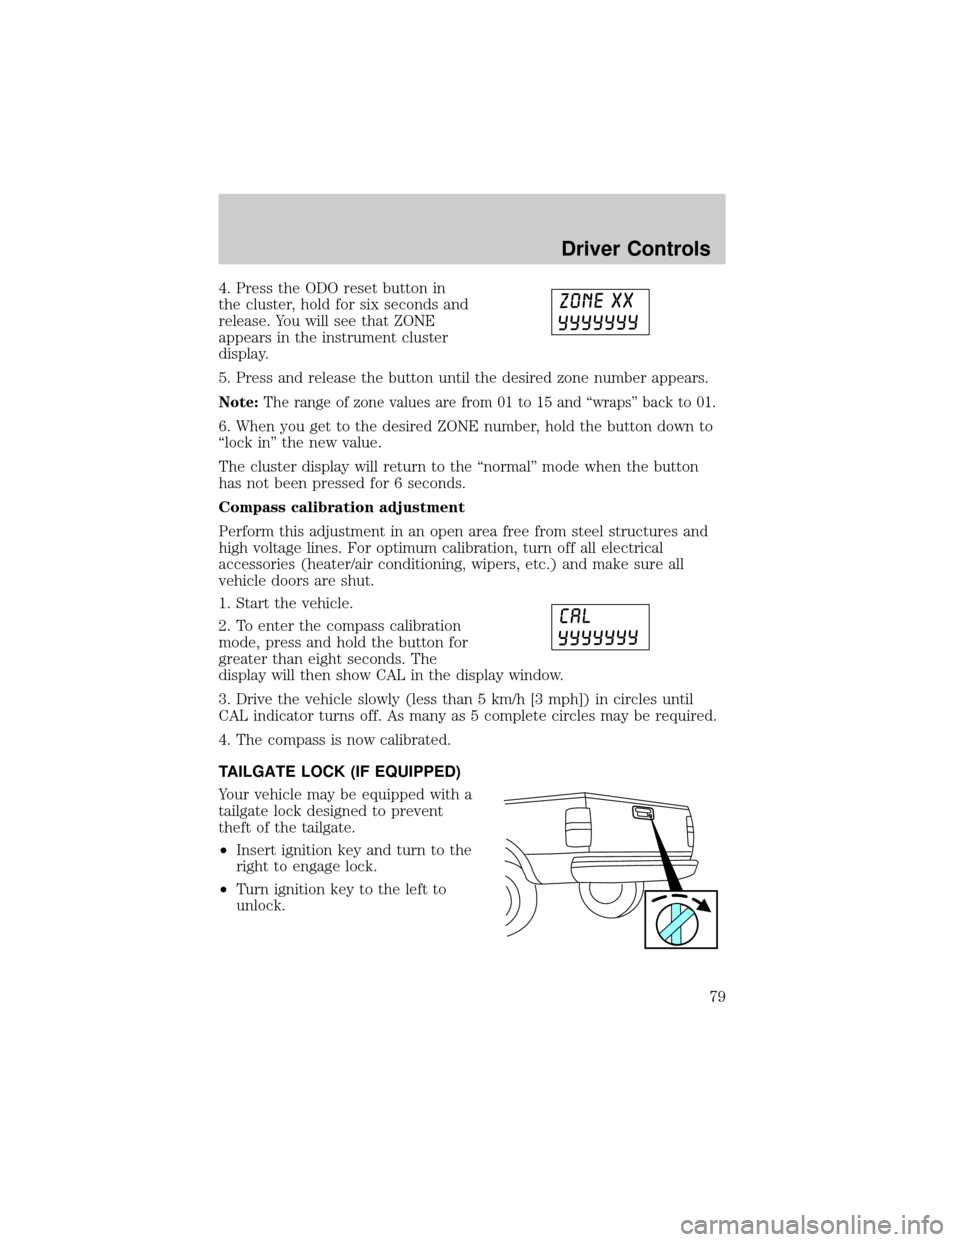
TAILGATE LOCK (IF EQUIPPED)
Your vehicle may be equipped with a
tailgate lock designed to prevent
theft of the tailgate.
²Insert ignition key and turn to the
right to engage lock.
²Turn ignition key to the left to
unlock.
Driver Controls
79
Page 80 of 280

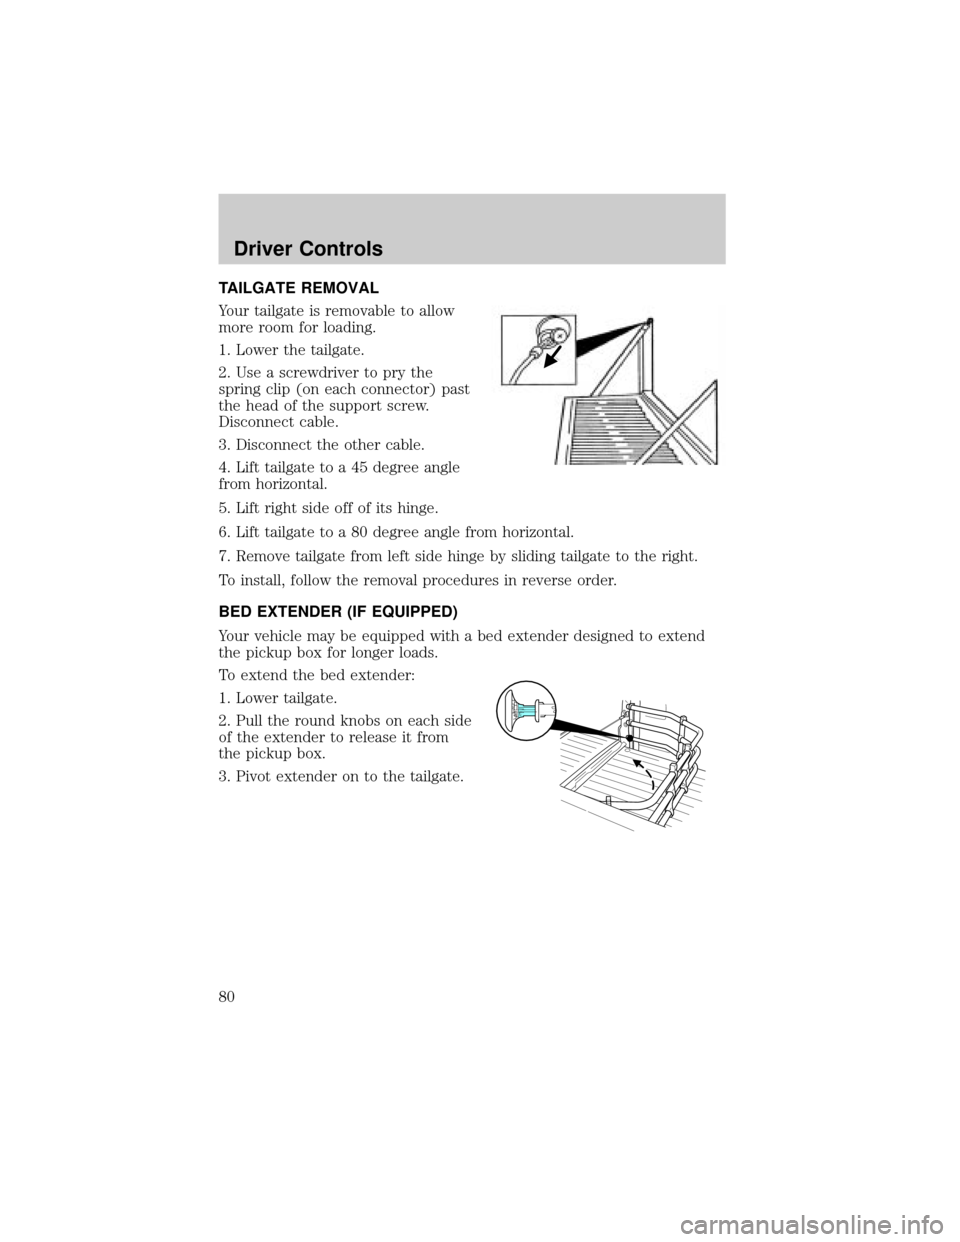
TAILGATE REMOVAL
Your tailgate is removable to allow
more room for loading.
1. Lower the tailgate.
2. Use a screwdriver to pry the
spring clip (on each connector) past
the head of the support screw.
Disconnect cable.
3. Disconnect the other cable.
4. Lift tailgate to a 45 degree angle
from horizontal.
5. Lift right side off of its hinge.
6. Lift tailgate to a 80 degree angle from horizontal.
7. Remove tailgate from left side hinge by sliding tailgate to the right.
To install, follow the removal procedures in reverse order.
BED EXTENDER (IF EQUIPPED)
Your vehicle may be equipped with a bed extender designed to extend
the pickup box for longer loads.
To extend the bed extender:
1. Lower tailgate.
2. Pull the round knobs on each side
of the extender to release it from
the pickup box.
3. Pivot extender on to the tailgate.
Driver Controls
80
Page 81 of 280

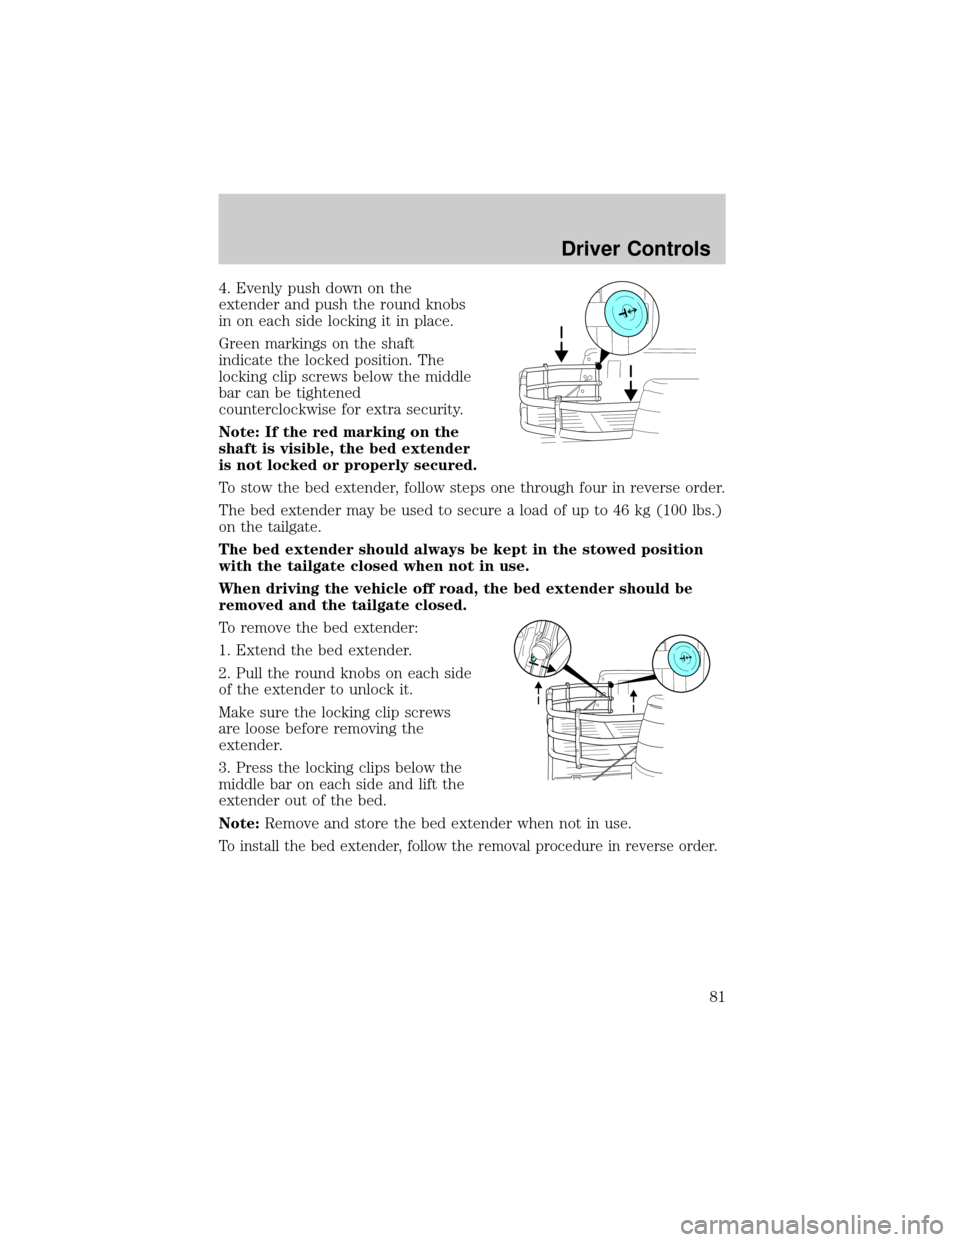
4. Evenly push down on the
extender and push the round knobs
in on each side locking it in place.
Green markings on the shaft
indicate the locked position. The
locking clip screws below the middle
bar can be tightened
counterclockwise for extra security.
Note: If the red marking on the
shaft is visible, the bed extender
is not locked or properly secured.
To stow the bed extender, follow steps one through four in reverse order.
The bed extender may be used to secure a load of up to 46 kg (100 lbs.)
on the tailgate.
The bed extender should always be kept in the stowed position
with the tailgate closed when not in use.
When driving the vehicle off road, the bed extender should be
removed and the tailgate closed.
To remove the bed extender:
1. Extend the bed extender.
2. Pull the round knobs on each side
of the extender to unlock it.
Make sure the locking clip screws
are loose before removing the
extender.
3. Press the locking clips below the
middle bar on each side and lift the
extender out of the bed.
Note:Remove and store the bed extender when not in use.
To install the bed extender, follow the removal procedure in reverse order.
Driver Controls
81
Page 158 of 280

To help avoid personal injury, always use caution when in
reverse and when using the RSS.
This system is not designed to prevent contact with small or
moving objects. The system is designed to provide a warning to
assist the driver in detecting large stationary objects to avoid damaging
the vehicle. The system may not detect smaller objects, particularly
those close to the ground.
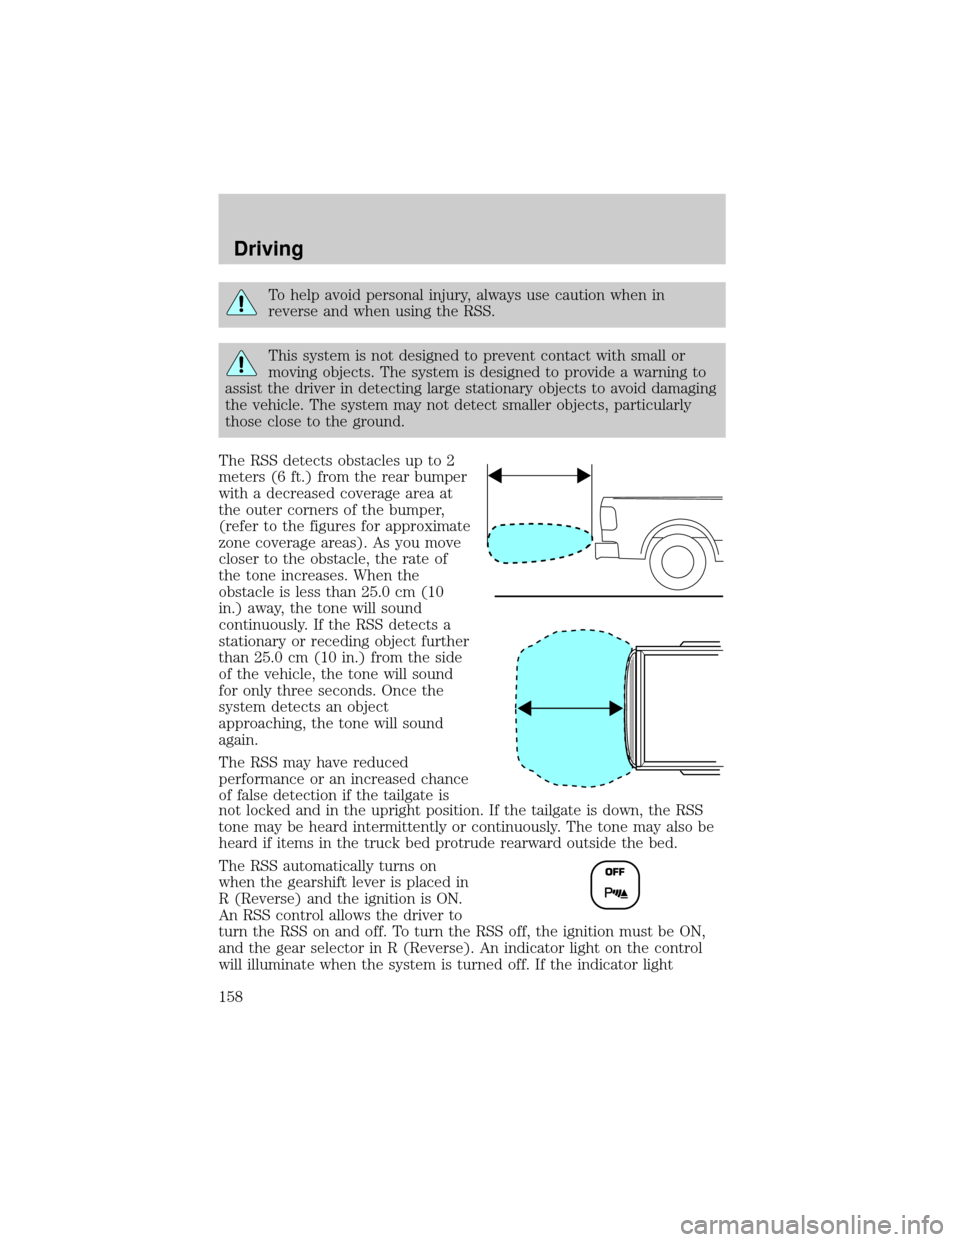
The RSS detects obstacles up to 2
meters (6 ft.) from the rear bumper
with a decreased coverage area at
the outer corners of the bumper,
(refer to the figures for approximate
zone coverage areas). As you move
closer to the obstacle, the rate of
the tone increases. When the
obstacle is less than 25.0 cm (10
in.) away, the tone will sound
continuously. If the RSS detects a
stationary or receding object further
than 25.0 cm (10 in.) from the side
of the vehicle, the tone will sound
for only three seconds. Once the
system detects an object
approaching, the tone will sound
again.
The RSS may have reduced
performance or an increased chance
of false detection if the tailgate is
not locked and in the upright position. If the tailgate is down, the RSS
tone may be heard intermittently or continuously. The tone may also be
heard if items in the truck bed protrude rearward outside the bed.
The RSS automatically turns on
when the gearshift lever is placed in
R (Reverse) and the ignition is ON.
An RSS control allows the driver to
turn the RSS on and off. To turn the RSS off, the ignition must be ON,
and the gear selector in R (Reverse). An indicator light on the control
will illuminate when the system is turned off. If the indicator light
Driving
158
Page 279 of 280

Specification chart,
lubricants ...........................261, 263
Speed control ..............................61
Starting your
vehicle ........................144±145, 148
jump starting ..........................201
Steering wheel
controls ......................................64
tilting .........................................53
T
Tailgate ..................................79±80
Temperature control
(see Climate control) .................32
Tilt steering wheel ......................53
Tires ...........................195, 253±254
changing ..................195±197, 201
checking the pressure ............254
replacing ..................................255
rotating ....................................255
snow tires and chains ............256
tire grades ...............................254
treadwear ................................253
Towing .......................................173
recreational towing .................182
trailer towing ..........................173
Traction-lok rear axle ...............151
Transfer case
fluid checking .........................250
Transmission .............................151brake-shift interlock
(BSI) ................................151±152
fluid, checking and adding
(automatic) .............................248
fluid, refill capacities ..............257
lubricant specifications ..261, 263
Trunk ...........................................83
Turn signal ..................................45
V
Vehicle dimensions ...........263, 268
Vehicle Identification Number
(VIN) ..........................................268
Vehicle loading ..........................171
camper bodies ........................206
Ventilating your vehicle ...........148
W
Warning lights (see Lights) .......10
Washer fluid ..............................226
Water, Driving through .............170
Windows
power .........................................58
power down back window .......58
Windshield washer fluid and
wipers ..........................................52
checking and adding fluid .....226
replacing wiper blades .............52
Index
279