Page 38 of 248
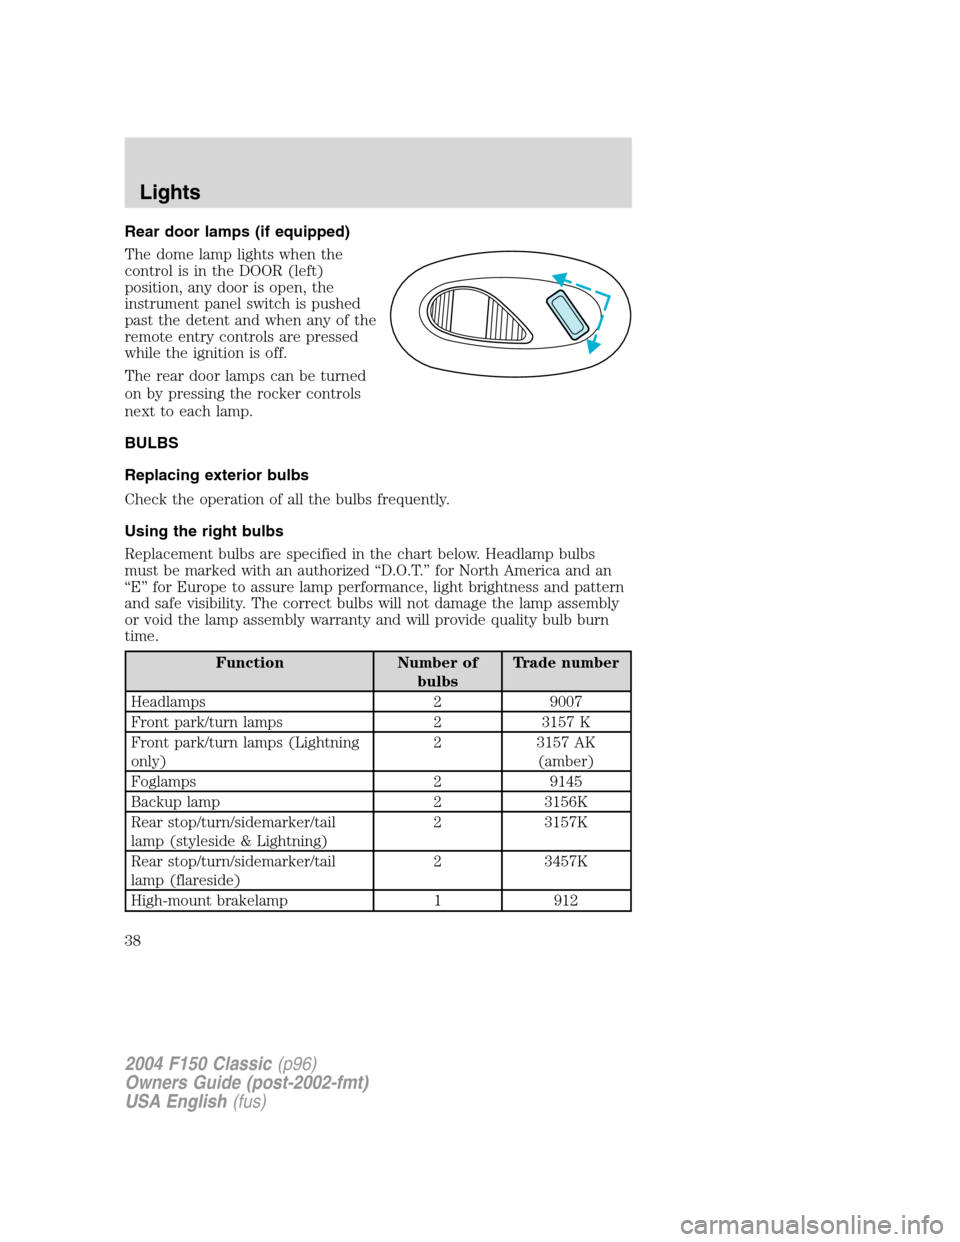
Rear door lamps (if equipped)
The dome lamp lights when the
control is in the DOOR (left)
position, any door is open, the
instrument panel switch is pushed
past the detent and when any of the
remote entry controls are pressed
while the ignition is off.
The rear door lamps can be turned
on by pressing the rocker controls
next to each lamp.
BULBS
Replacing exterior bulbs
Check the operation of all the bulbs frequently.
Using the right bulbs
Replacement bulbs are specified in the chart below. Headlamp bulbs
must be marked with an authorized“D.O.T.”for North America and an
“E”for Europe to assure lamp performance, light brightness and pattern
and safe visibility. The correct bulbs will not damage the lamp assembly
or void the lamp assembly warranty and will provide quality bulb burn
time.
Function Number of
bulbsTrade number
Headlamps 2 9007
Front park/turn lamps 2 3157 K
Front park/turn lamps (Lightning
only)2 3157 AK
(amber)
Foglamps 2 9145
Backup lamp 2 3156K
Rear stop/turn/sidemarker/tail
lamp (styleside & Lightning)2 3157K
Rear stop/turn/sidemarker/tail
lamp (flareside)2 3457K
High-mount brakelamp 1 912
2004 F150 Classic(p96)
Owners Guide (post-2002-fmt)
USA English(fus)
Lights
38
Page 39 of 248
Function Number of
bulbsTrade number
Cargo lamp 2 912
License plate lamp 2 194
Running board lamp (if equipped) 4 168
All replacement bulbs are clear in color except where noted.
To replace all instrument panel lights - see your dealer
Replacing headlamp bulbs
1. Make sure that the headlamp control is in the OFF position and open
the hood.
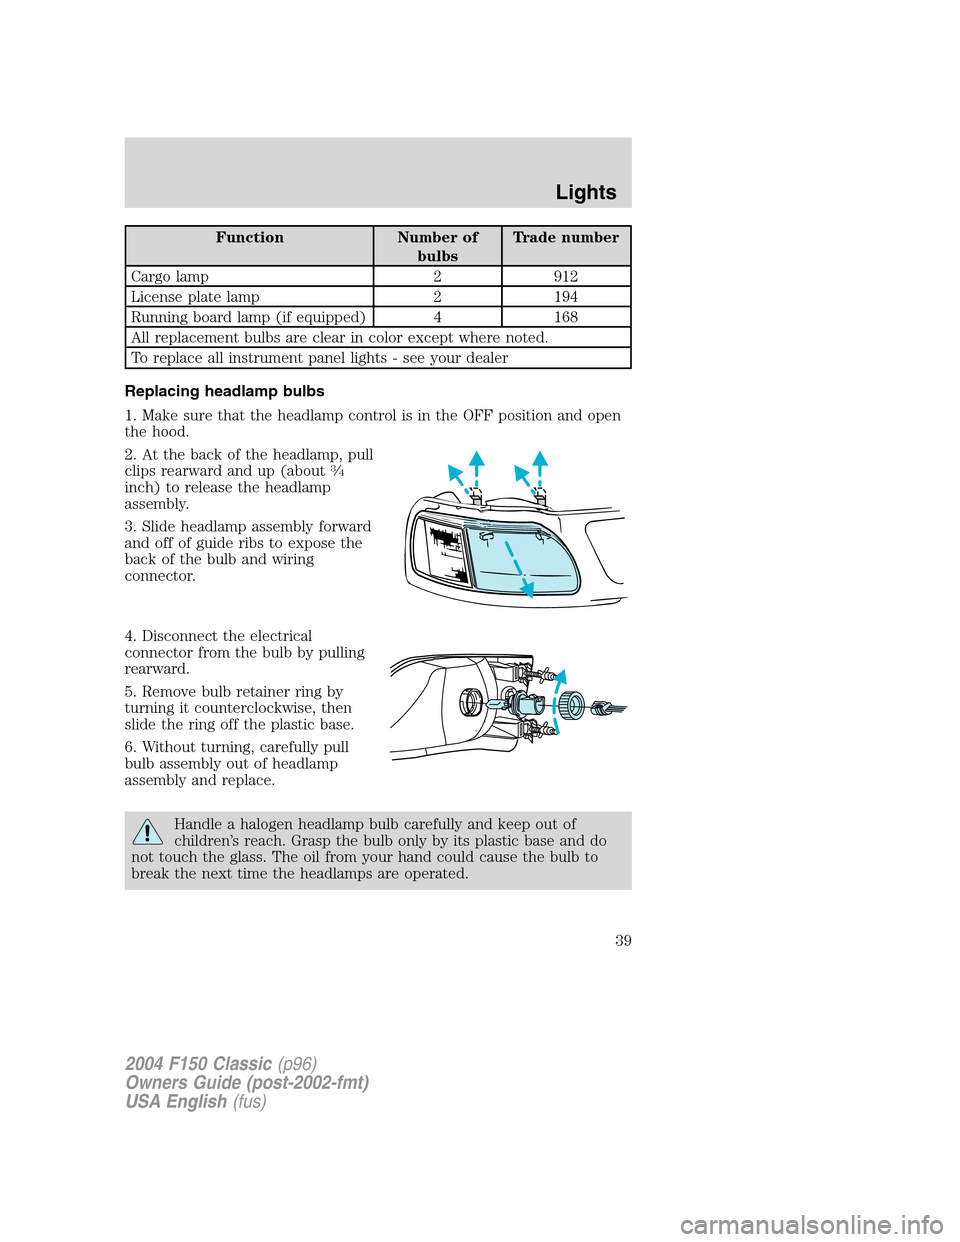
2. At the back of the headlamp, pull
clips rearward and up (about
3⁄4
inch) to release the headlamp
assembly.
3. Slide headlamp assembly forward
and off of guide ribs to expose the
back of the bulb and wiring
connector.
4. Disconnect the electrical
connector from the bulb by pulling
rearward.
5. Remove bulb retainer ring by
turning it counterclockwise, then
slide the ring off the plastic base.
6. Without turning, carefully pull
bulb assembly out of headlamp
assembly and replace.
Handle a halogen headlamp bulb carefully and keep out of
children’s reach. Grasp the bulb only by its plastic base and do
not touch the glass. The oil from your hand could cause the bulb to
break the next time the headlamps are operated.
2004 F150 Classic(p96)
Owners Guide (post-2002-fmt)
USA English(fus)
Lights
39
Page 40 of 248
7. Insert the glass end of the new bulb into the headlamp assembly.
When the grooves in the plastic base are aligned, push the bulb into the
lamp assembly until the plastic base contacts the rear of the lamp
assembly.
8. Install bulb retaining ring over the plastic base and lock the ring into
the socket by turning it clockwise until you feel a“stop.”
9. Connect the electrical connector into the plastic base until it“snaps.”
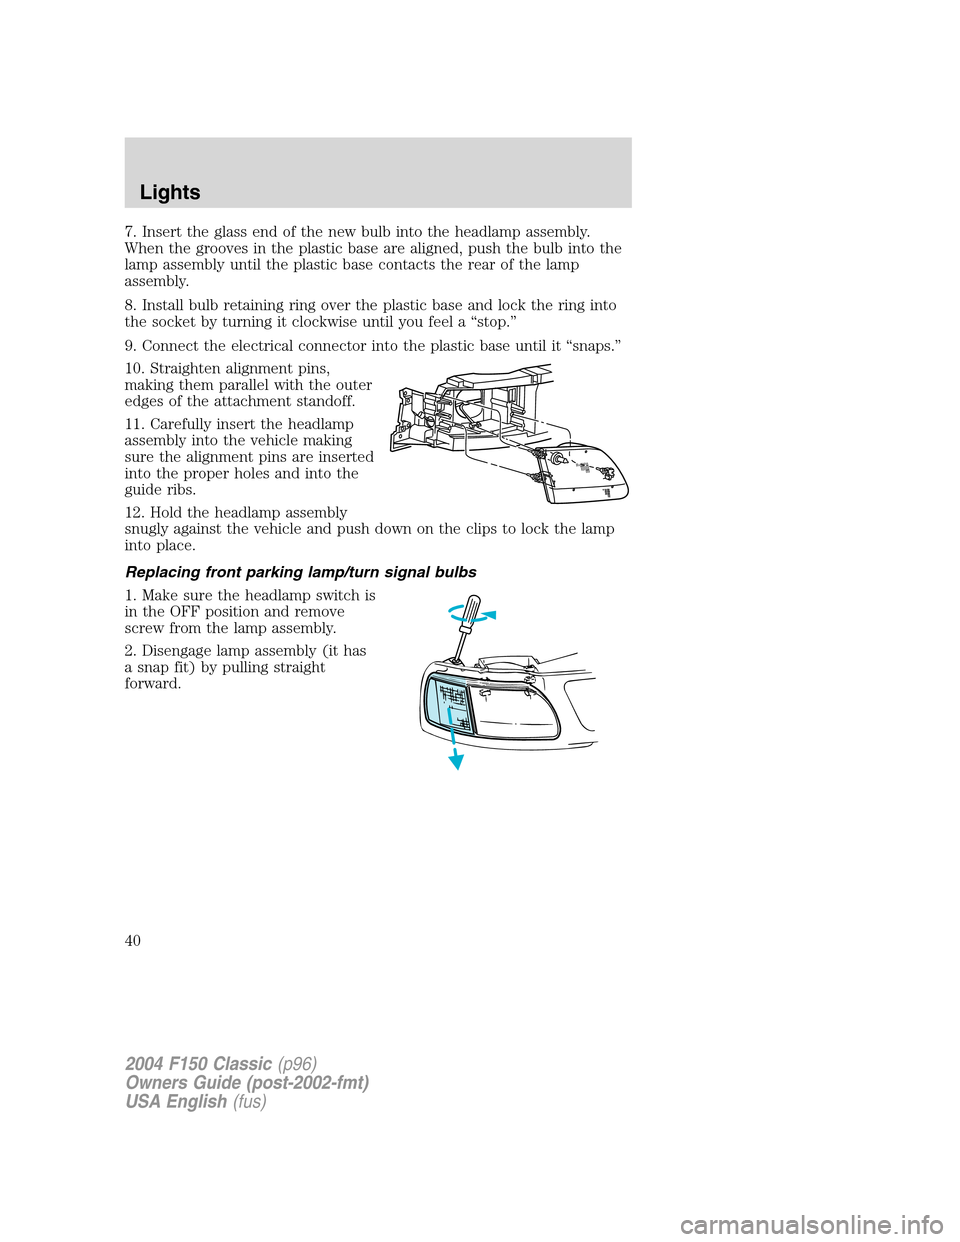
10. Straighten alignment pins,
making them parallel with the outer
edges of the attachment standoff.
11. Carefully insert the headlamp
assembly into the vehicle making
sure the alignment pins are inserted
into the proper holes and into the
guide ribs.
12. Hold the headlamp assembly
snugly against the vehicle and push down on the clips to lock the lamp
into place.
Replacing front parking lamp/turn signal bulbs
1. Make sure the headlamp switch is
in the OFF position and remove
screw from the lamp assembly.
2. Disengage lamp assembly (it has
a snap fit) by pulling straight
forward.
2004 F150 Classic(p96)
Owners Guide (post-2002-fmt)
USA English(fus)
Lights
40
Page 41 of 248
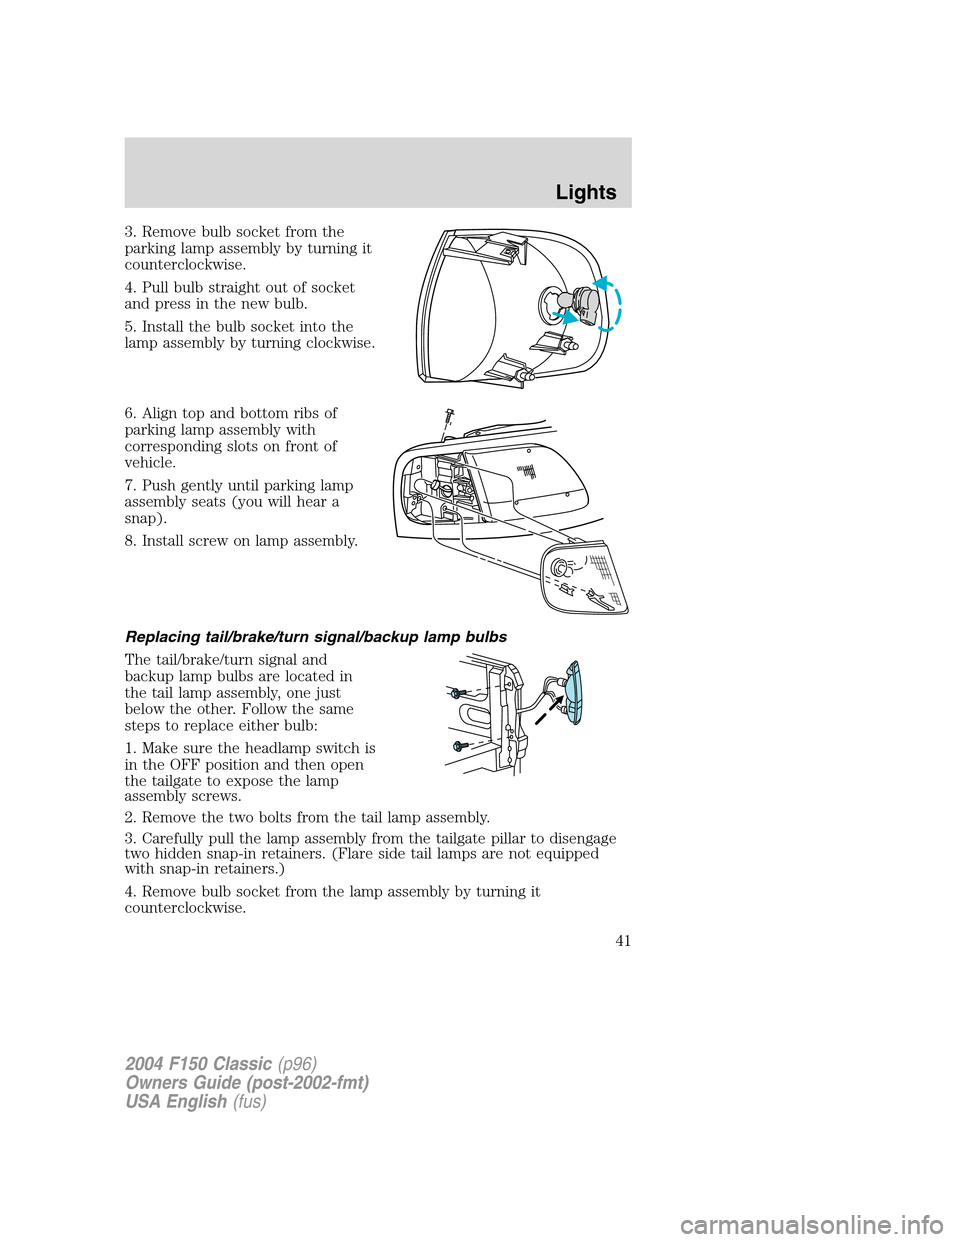
3. Remove bulb socket from the
parking lamp assembly by turning it
counterclockwise.
4. Pull bulb straight out of socket
and press in the new bulb.
5. Install the bulb socket into the
lamp assembly by turning clockwise.
6. Align top and bottom ribs of
parking lamp assembly with
corresponding slots on front of
vehicle.
7. Push gently until parking lamp
assembly seats (you will hear a
snap).
8. Install screw on lamp assembly.
Replacing tail/brake/turn signal/backup lamp bulbs
The tail/brake/turn signal and
backup lamp bulbs are located in
the tail lamp assembly, one just
below the other. Follow the same
steps to replace either bulb:
1. Make sure the headlamp switch is
in the OFF position and then open
the tailgate to expose the lamp
assembly screws.
2. Remove the two bolts from the tail lamp assembly.
3. Carefully pull the lamp assembly from the tailgate pillar to disengage
two hidden snap-in retainers. (Flare side tail lamps are not equipped
with snap-in retainers.)
4. Remove bulb socket from the lamp assembly by turning it
counterclockwise.
2004 F150 Classic(p96)
Owners Guide (post-2002-fmt)
USA English(fus)
Lights
41
Page 42 of 248
5. Pull bulb straight out of socket and press in the new bulb.
6. Install the bulb socket into the lamp assembly by turning clockwise.
7. Carefully install the tail lamp assembly on tailgate pillar snapping the
two snap-in retainers into place. (Flare side tail lamps do not snap into
place but have two tabs which fit into slots.)
8. Secure the tail lamp on the vehicle with two bolts.
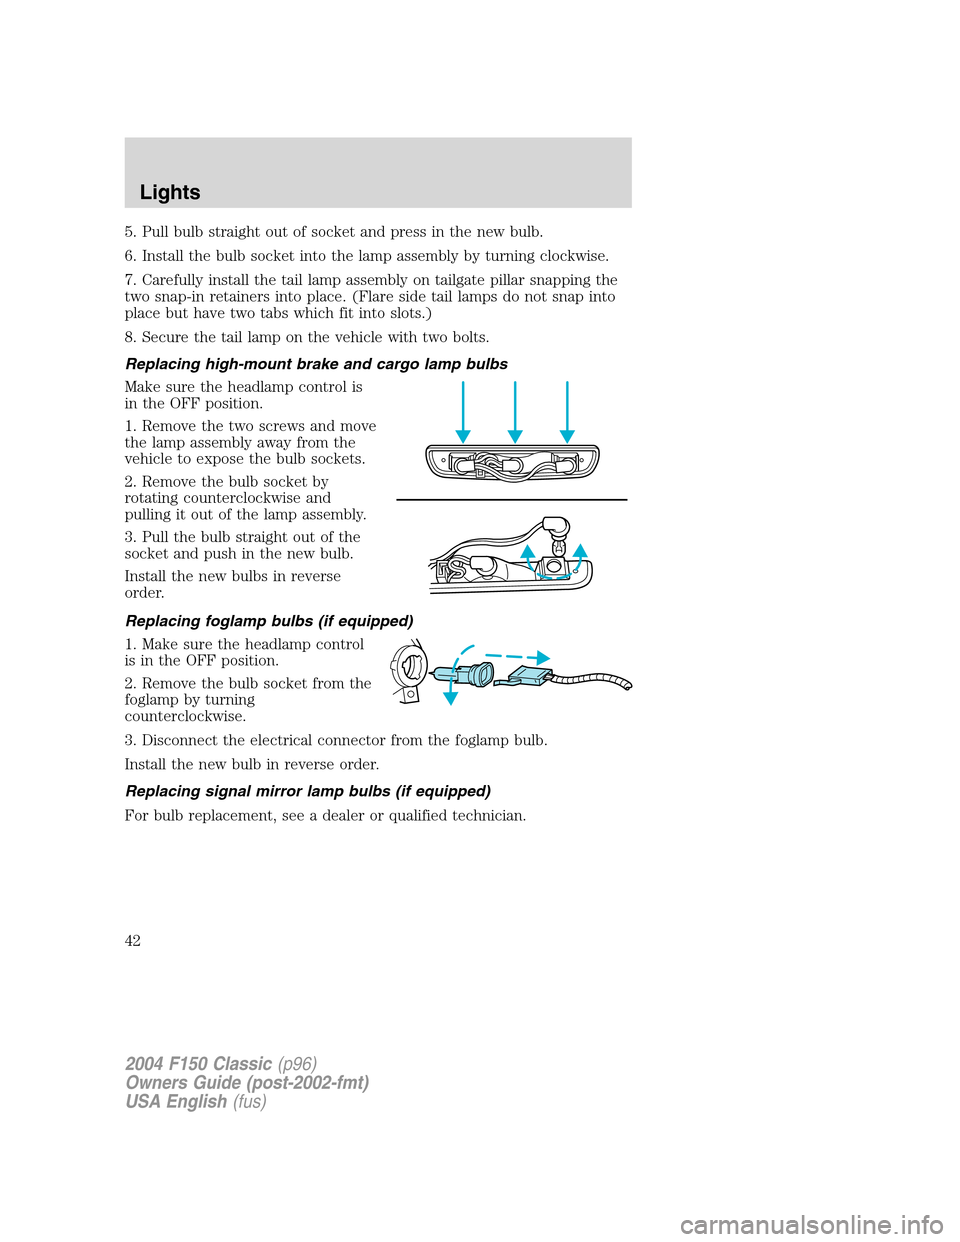
Replacing high-mount brake and cargo lamp bulbs
Make sure the headlamp control is
in the OFF position.
1. Remove the two screws and move
the lamp assembly away from the
vehicle to expose the bulb sockets.
2. Remove the bulb socket by
rotating counterclockwise and
pulling it out of the lamp assembly.
3. Pull the bulb straight out of the
socket and push in the new bulb.
Install the new bulbs in reverse
order.
Replacing foglamp bulbs (if equipped)
1. Make sure the headlamp control
is in the OFF position.
2. Remove the bulb socket from the
foglamp by turning
counterclockwise.
3. Disconnect the electrical connector from the foglamp bulb.
Install the new bulb in reverse order.
Replacing signal mirror lamp bulbs (if equipped)
For bulb replacement, see a dealer or qualified technician.
2004 F150 Classic(p96)
Owners Guide (post-2002-fmt)
USA English(fus)
Lights
42
Page 43 of 248
Replacing license plate lamp bulbs
The license plate bulbs are located
behind the rear bumper. To change
the license plate lamp bulbs:
1. Reach behind the rear bumper to
locate the bulb.
2. Twist the bulb socket
counterclockwise and carefully pull
to remove it from the lamp
assembly.
3. Pull out the old bulb from the
socket and push in the new bulb.
4. Install the bulb socket in lamp assembly by turning it clockwise.
Replacing running board lamp bulbs (if equipped)
The running board bulbs are located
behind the running board.
1. Reach behind the center bracket
of the running board to locate the
bulb.
2. Twist the bulb socket
counterclockwise and carefully pull
to remove it from the lamp
assembly.
3. Pull out the old bulb from the
socket and push in the new bulb.
Install the new bulb in reverse order.
2004 F150 Classic(p96)
Owners Guide (post-2002-fmt)
USA English(fus)
Lights
43
Page 59 of 248
10. The doors will lock, then unlock, to confirm that the programming
mode has been exited.
Illuminated entry
The interior lamps illuminate when the remote entry system is used to
unlock the door(s) or sound the personal alarm.
The illuminated entry system will turn off the interior lights if:
•the ignition switch is turned to the 4 (ON) position, or
•the vehicle is locked using the keyless entry keypad (if equipped),
•the remote transmitter lock control is pressed, or
•after 25 seconds of illumination.
The dimmer control mustnotbe set to the off position for the
illuminated entry system to operate.
The inside lights will not turn off if:
•they have been turned on with the dimmer control, or
•any door is open.
The battery saver will shut off the interior lamps 30 minutes after the
last door is closed, even if the dimmer control is on.
Autolock (if equipped)
This feature will automatically lock all the doors when:
•all the doors are closed,
•the ignition is in the 4 (ON) position,
•the gearshift lever is shifted into R (Reverse) or a forward gear and
•the brake pedal is released.
This feature will also automatically relock all the doors when:
•the ignition is running and any door is opened then closed, and
•you put the vehicle in motion by releasing the brake pedal.
Deactivating/activating the autolock feature
Before following the procedure, make sure that the ignition is in the 3
(OFF) position and all vehicle doors are closed.
You must complete Steps 1-7 within 30 seconds or the procedure will
have to be repeated. If the procedure needs to be repeated, you must
wait 30 seconds.
2004 F150 Classic(p96)
Owners Guide (post-2002-fmt)
USA English(fus)
Locks and Security
59
Page 85 of 248
internal injuries, particularly to occupants who are not properly
restrained or are otherwise out of position at the time of air bag
deployment. Thus, it is extremely important that occupants be properly
restrained as far away from the air bag module as possible while
maintaining vehicle control.
Several air bag system components get hot after inflation. Do not
touch them after inflation.
If the air bag has deployed,the air bag will not function
again and must be replaced immediately.If the air bag is not
replaced, the unrepaired area will increase the risk of injury in a
collision.
The SRS consists of:
•driver and passenger air bag modules (which include the inflators and
air bags),
•one or more impact and safing sensors, passenger air bag deactivation
switch and diagnostic monitor (RCM)
•a readiness light and tone,
•and the electrical wiring which connects the components.
The RCM (restraints control module) monitors its own internal circuits
and the supplemental air bag electrical system wiring (including the
passenger air bag deactivation switch, the impact sensors, the system
wiring, the air bag system readiness light, the air bag back up power and
the air bag ignitors).
Determining if the system is operational
The SRS uses readiness lights in the instrument cluster and the
passenger air bag deactivate switch or a tone to indicate the condition of
the system. Refer to theAir bag readinesssection in theInstrument
clusterchapter orPassenger air bag on/off switchsection in this
chapter. Routine maintenance of the air bag is not required.
A difficulty with the system is indicated by one or more of the following:
•The readiness lights will either
flash or stay lit.
•The readiness lights will not
illuminate immediately after
ignition is turned on.
2004 F150 Classic(p96)
Owners Guide (post-2002-fmt)
USA English(fus)
Seating and Safety Restraints
85