Page 108 of 344
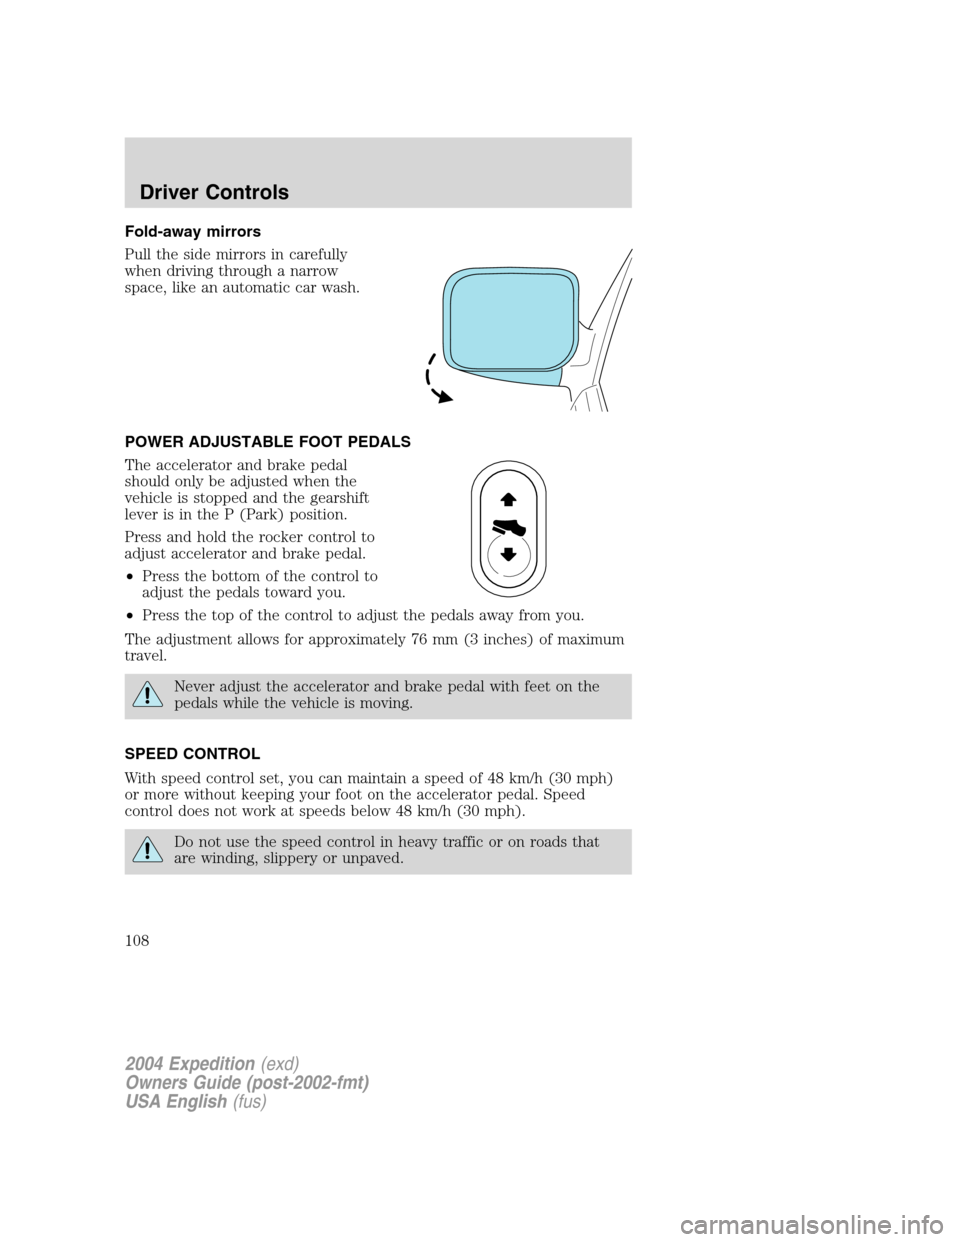
Fold-away mirrors
Pull the side mirrors in carefully
when driving through a narrow
space, like an automatic car wash.
POWER ADJUSTABLE FOOT PEDALS
The accelerator and brake pedal
should only be adjusted when the
vehicle is stopped and the gearshift
lever is in the P (Park) position.
Press and hold the rocker control to
adjust accelerator and brake pedal.
•Press the bottom of the control to
adjust the pedals toward you.
•Press the top of the control to adjust the pedals away from you.
The adjustment allows for approximately 76 mm (3 inches) of maximum
travel.
Never adjust the accelerator and brake pedal with feet on the
pedals while the vehicle is moving.
SPEED CONTROL
With speed control set, you can maintain a speed of 48 km/h (30 mph)
or more without keeping your foot on the accelerator pedal. Speed
control does not work at speeds below 48 km/h (30 mph).
Do not use the speed control in heavy traffic or on roads that
are winding, slippery or unpaved.
2004 Expedition(exd)
Owners Guide (post-2002-fmt)
USA English(fus)
Driver Controls
108
Page 131 of 344
Make sure the liftgate is closed to prevent exhaust fumes from
being drawn into the vehicle. If you must drive with the liftgate
open, keep the vents open so outside air comes into the vehicle.
LUGGAGE RACK
The rear cross-bar can be adjusted to fit the item being carried. The
front cross-bar does not move.
To adjust the luggage rack, push the
adjustment lever forward (toward
the front of the vehicle), then slide
the cross-bar forward and lock the
adjusting levers by pushing them
down (toward the back of the
vehicle). Pull the cross-bar rearward
to ensure that it is locked in place.
Load luggage at the front cross-bar and adjust the rear cross-bar as
necessary.
•Do not exceed 90.7 kg (200 lb) of luggage if the weight is placed
directly on the cross-bars.
•Do not exceed 68 kg (150 lb) if the weight is resting directly on the
roof.
Use the integrated tie down loops to secure the load.
2004 Expedition(exd)
Owners Guide (post-2002-fmt)
USA English(fus)
Driver Controls
131
Page 136 of 344
Replacing the battery
The remote entry transmitter uses one coin type three-volt lithium
battery CR2032 or equivalent. The typical operating range for your
remote entry transmitter is approximately 10 meters (33 feet). A
decrease in the operating range could be caused by:
•weather conditions,
•nearby radio towers,
•structures around the vehicle and
•other vehicles parked next to the vehicle.
To replace the battery:
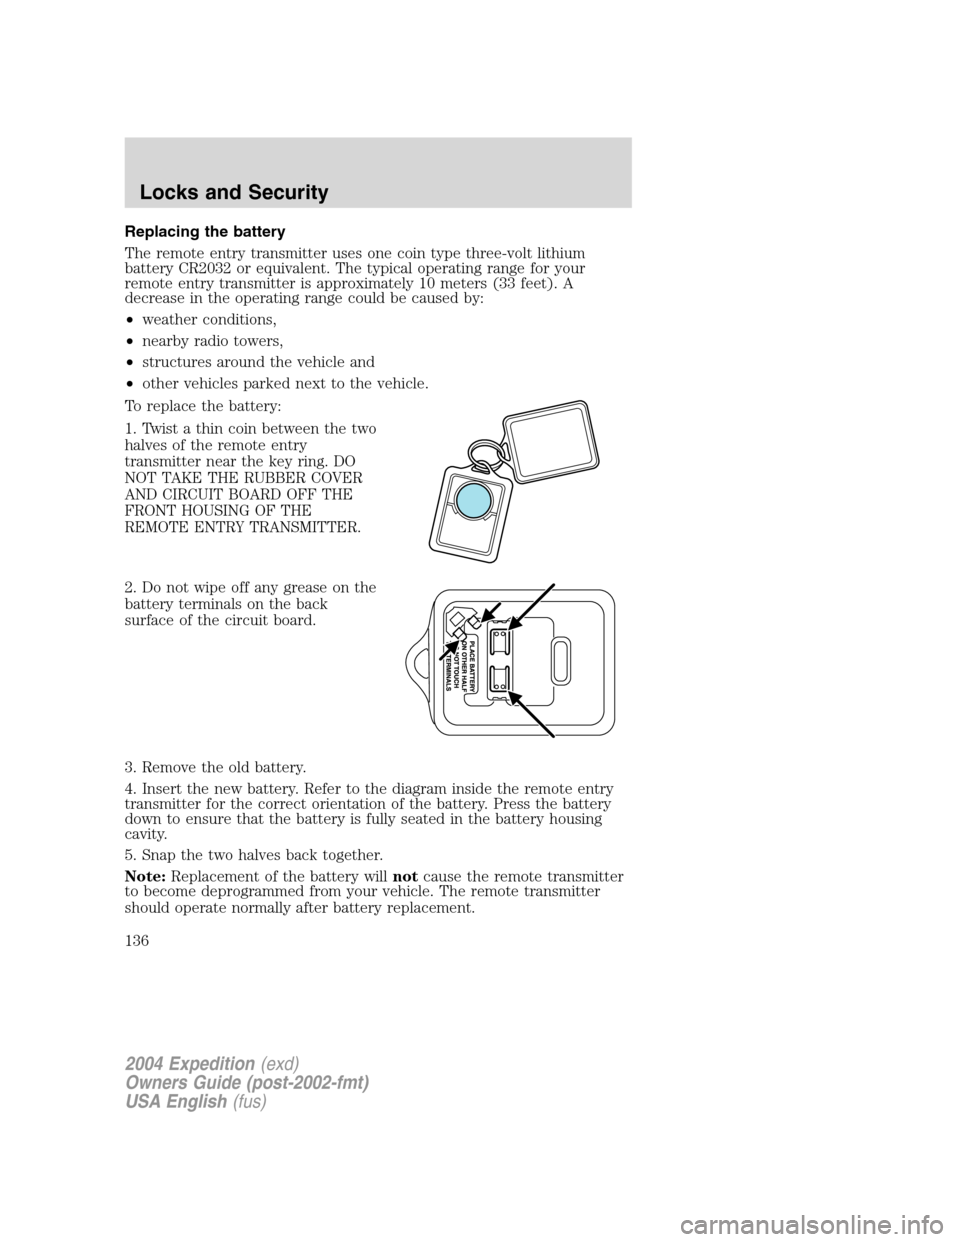
1. Twist a thin coin between the two
halves of the remote entry
transmitter near the key ring. DO
NOT TAKE THE RUBBER COVER
AND CIRCUIT BOARD OFF THE
FRONT HOUSING OF THE
REMOTE ENTRY TRANSMITTER.
2. Do not wipe off any grease on the
battery terminals on the back
surface of the circuit board.
3. Remove the old battery.
4. Insert the new battery. Refer to the diagram inside the remote entry
transmitter for the correct orientation of the battery. Press the battery
down to ensure that the battery is fully seated in the battery housing
cavity.
5. Snap the two halves back together.
Note:Replacement of the battery willnotcause the remote transmitter
to become deprogrammed from your vehicle. The remote transmitter
should operate normally after battery replacement.
2004 Expedition(exd)
Owners Guide (post-2002-fmt)
USA English(fus)
Locks and Security
136
Page 143 of 344
devices cannot damage thecoded key,but can cause a momentary“no
start”condition if they are too close to the key during engine start. If a
problem occurs, turn ignition OFF and restart the engine with all other
objects on the key ring held away from the ignition key. Check to make
sure thecoded keyis an approved Fordcoded key.
If your keys are lost or stolen you will need to do the following:
•Use your spare key to start the vehicle, or
•Have your vehicle towed to a dealership or a locksmith. The key codes
will need to be erased from your vehicle and new key codes will need
to be re-coded.
Replacing coded keys can be very costly and you may want to store an
extra programmed key away from the vehicle in a safe place to prevent
an unforeseen inconvenience.
The correctcoded keymust be used for your vehicle. The use of the
wrong type ofcoded keymay lead to a“no start”condition.
If an unprogrammed key is used in the ignition it will cause a“no
start”condition.
Programming spare keys
A maximum of eight keys can be coded to your vehicle. Only
SecuriLock�keys can be used. To program acoded keyyourself, you
will need two previously programmedcoded keys(keys that already
operate your vehicle’s engine) and the new unprogrammed key(s) readily
accessible for timely implementation of each step in the procedure.
If two previously programmed coded keys are not available, you must
bring your vehicle to your dealership to have the spare coded key(s)
programmed.
Please read and understand the entire procedure before you begin.
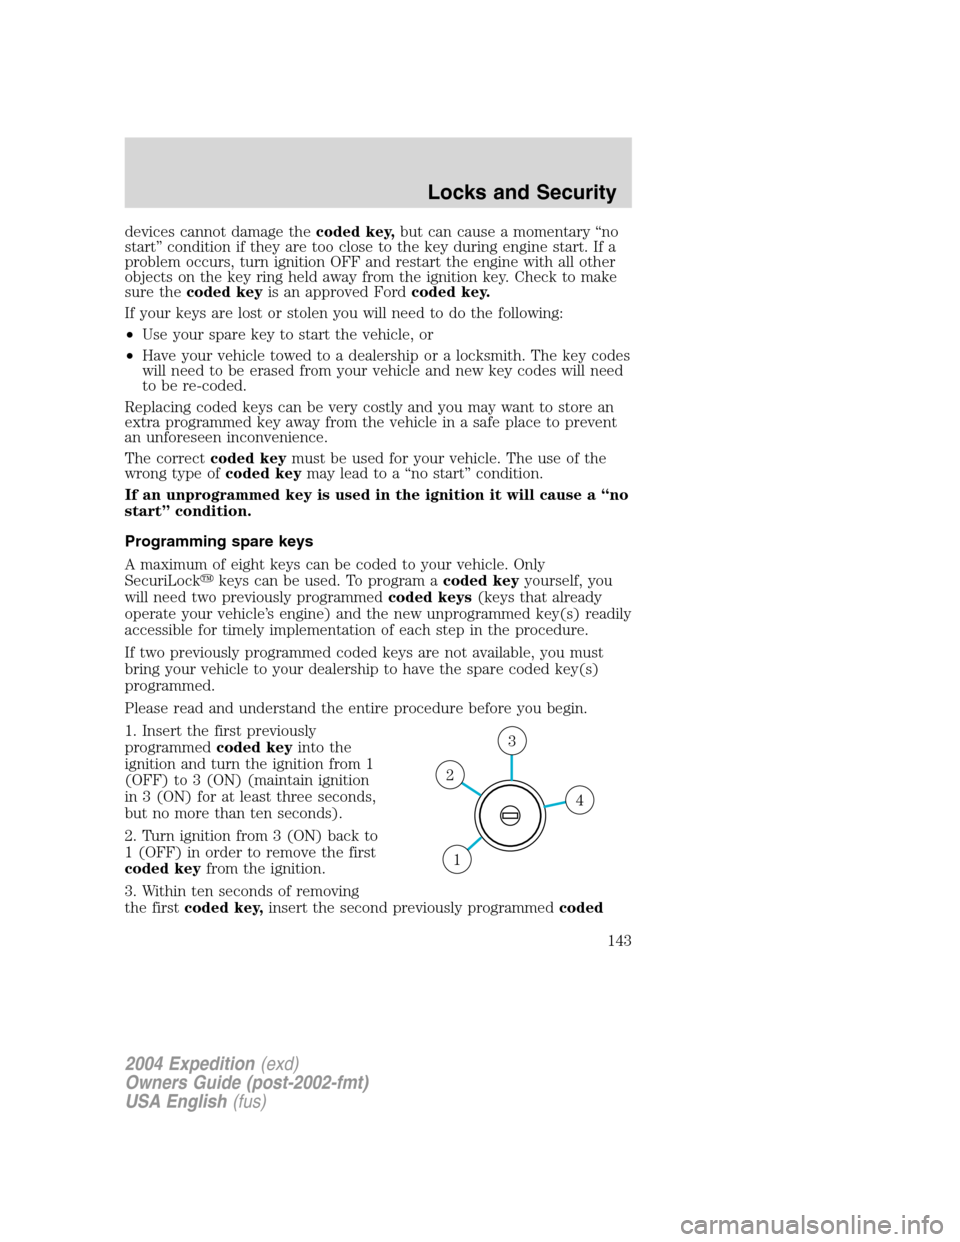
1. Insert the first previously
programmedcoded keyinto the
ignition and turn the ignition from 1
(OFF) to 3 (ON) (maintain ignition
in 3 (ON) for at least three seconds,
but no more than ten seconds).
2. Turn ignition from 3 (ON) back to
1 (OFF) in order to remove the first
coded keyfrom the ignition.
3. Within ten seconds of removing
the firstcoded key,insert the second previously programmedcoded
4
3
2
1
2004 Expedition(exd)
Owners Guide (post-2002-fmt)
USA English(fus)
Locks and Security
143
Page 176 of 344
Do not attempt to service, repair, or modify the air bag
supplemental restraint systems or its fuses. See your Ford or
Lincoln Mercury dealer.
The front passenger air bag is not designed to offer protection to
an occupant in the center front seating position.
Modifying or adding equipment to the front end of the vehicle
(including frame, bumper, front end body structure and tow
hooks) may affect the performance of the air bag system, increasing
the risk of injury. Do not modify the front end of the vehicle.
Additional equipment may affect the performance of the air bag
sensors increasing the risk of injury.
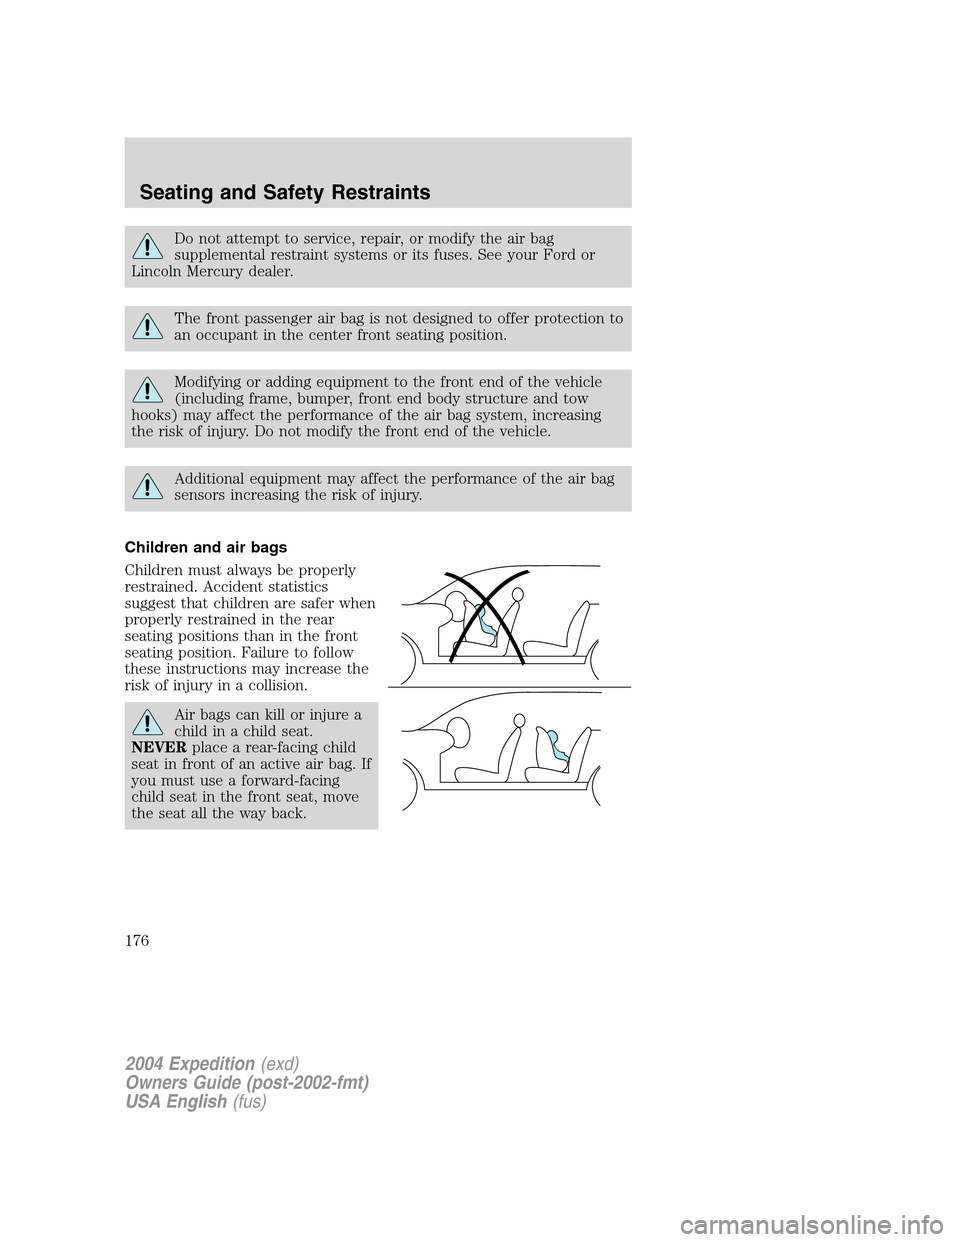
Children and air bags
Children must always be properly
restrained. Accident statistics
suggest that children are safer when
properly restrained in the rear
seating positions than in the front
seating position. Failure to follow
these instructions may increase the
risk of injury in a collision.
Air bags can kill or injure a
child in a child seat.
NEVERplace a rear-facing child
seat in front of an active air bag. If
you must use a forward-facing
child seat in the front seat, move
the seat all the way back.
2004 Expedition(exd)
Owners Guide (post-2002-fmt)
USA English(fus)
Seating and Safety Restraints
176
Page 185 of 344
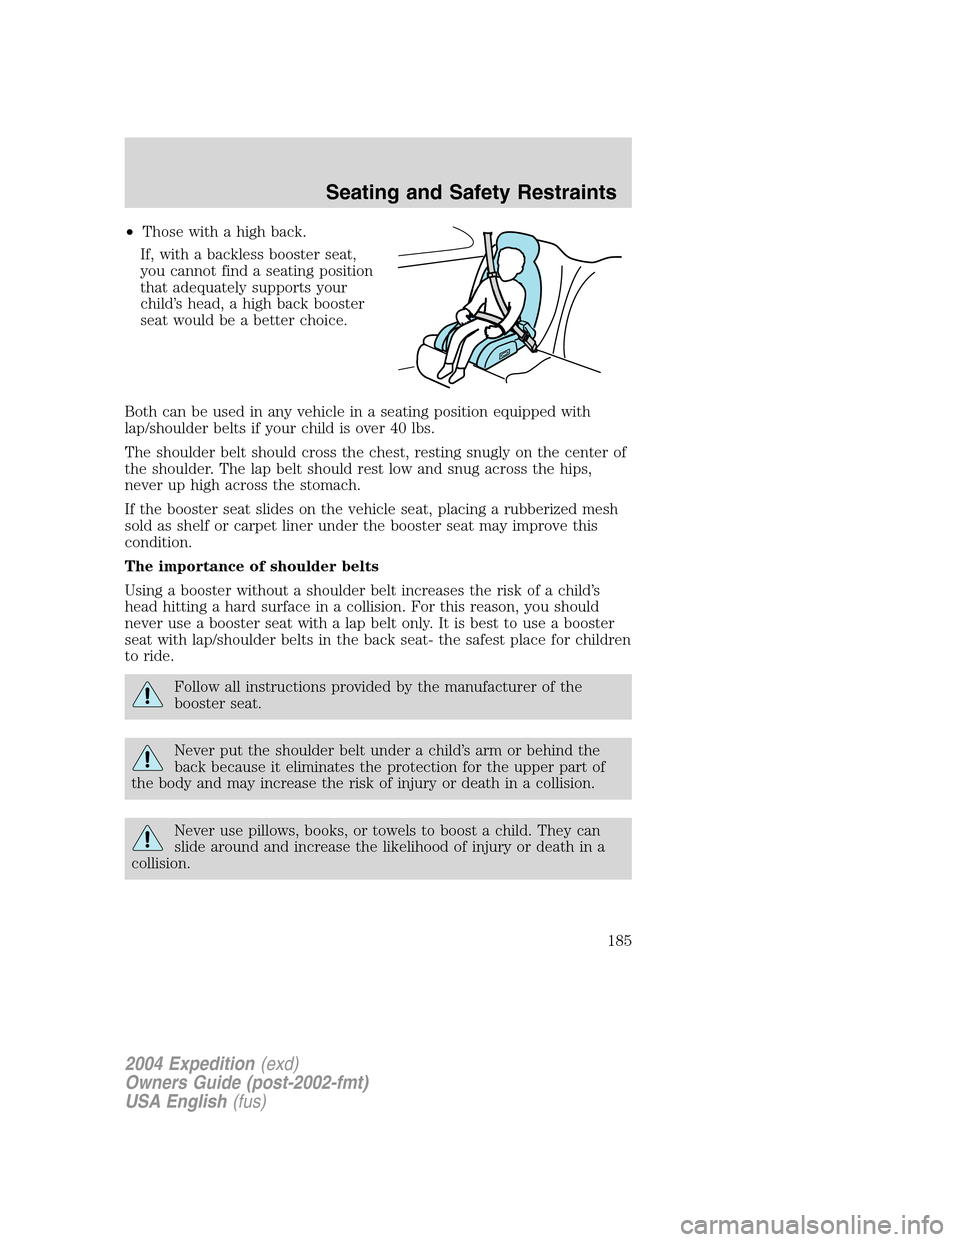
•Those with a high back.
If, with a backless booster seat,
you cannot find a seating position
that adequately supports your
child’s head, a high back booster
seat would be a better choice.
Both can be used in any vehicle in a seating position equipped with
lap/shoulder belts if your child is over 40 lbs.
The shoulder belt should cross the chest, resting snugly on the center of
the shoulder. The lap belt should rest low and snug across the hips,
never up high across the stomach.
If the booster seat slides on the vehicle seat, placing a rubberized mesh
sold as shelf or carpet liner under the booster seat may improve this
condition.
The importance of shoulder belts
Using a booster without a shoulder belt increases the risk of a child’s
head hitting a hard surface in a collision. For this reason, you should
never use a booster seat with a lap belt only. It is best to use a booster
seat with lap/shoulder belts in the back seat- the safest place for children
to ride.
Follow all instructions provided by the manufacturer of the
booster seat.
Never put the shoulder belt under a child’s arm or behind the
back because it eliminates the protection for the upper part of
the body and may increase the risk of injury or death in a collision.
Never use pillows, books, or towels to boost a child. They can
slide around and increase the likelihood of injury or death in a
collision.
2004 Expedition(exd)
Owners Guide (post-2002-fmt)
USA English(fus)
Seating and Safety Restraints
185
Page 189 of 344
4. Insert the belt tongue into the
proper buckle (the buckle closest to
the direction the tongue is coming
from) for that seating position until
you hear a snap and feel the latch
engage. Make sure the tongue is
latched securely by pulling on it.
5. To put the retractor in the
automatic locking mode, grasp the
shoulder portion of the belt and pull
downward until all of the belt is
pulled out and a click is heard.
6. Allow the belt to retract. The belt will click as it retracts to indicate it
is in the automatic locking mode.
7. Pull the lap belt portion across
the child seat toward the buckle and
pull up on the shoulder belt while
pushing down with your knee on the
child seat.
2004 Expedition(exd)
Owners Guide (post-2002-fmt)
USA English(fus)
Seating and Safety Restraints
189
Page 205 of 344
If a load is added to, or removed from the vehicle, the load leveling
feature of the air suspension system will adjust the suspension to keep
the vehicle at a constant level.
When exiting the vehicle, the air suspension will automatically lower the
vehicle to its lowest height to provide easier exit. You may hear a buzz or
click from the air suspension system when the ignition is turned off. The
air suspension system will stay active for 40 minutes after the ignition is
turned off to accommodate any load changes. (The air compressor may
run when the vehicle is off; this is normal.)
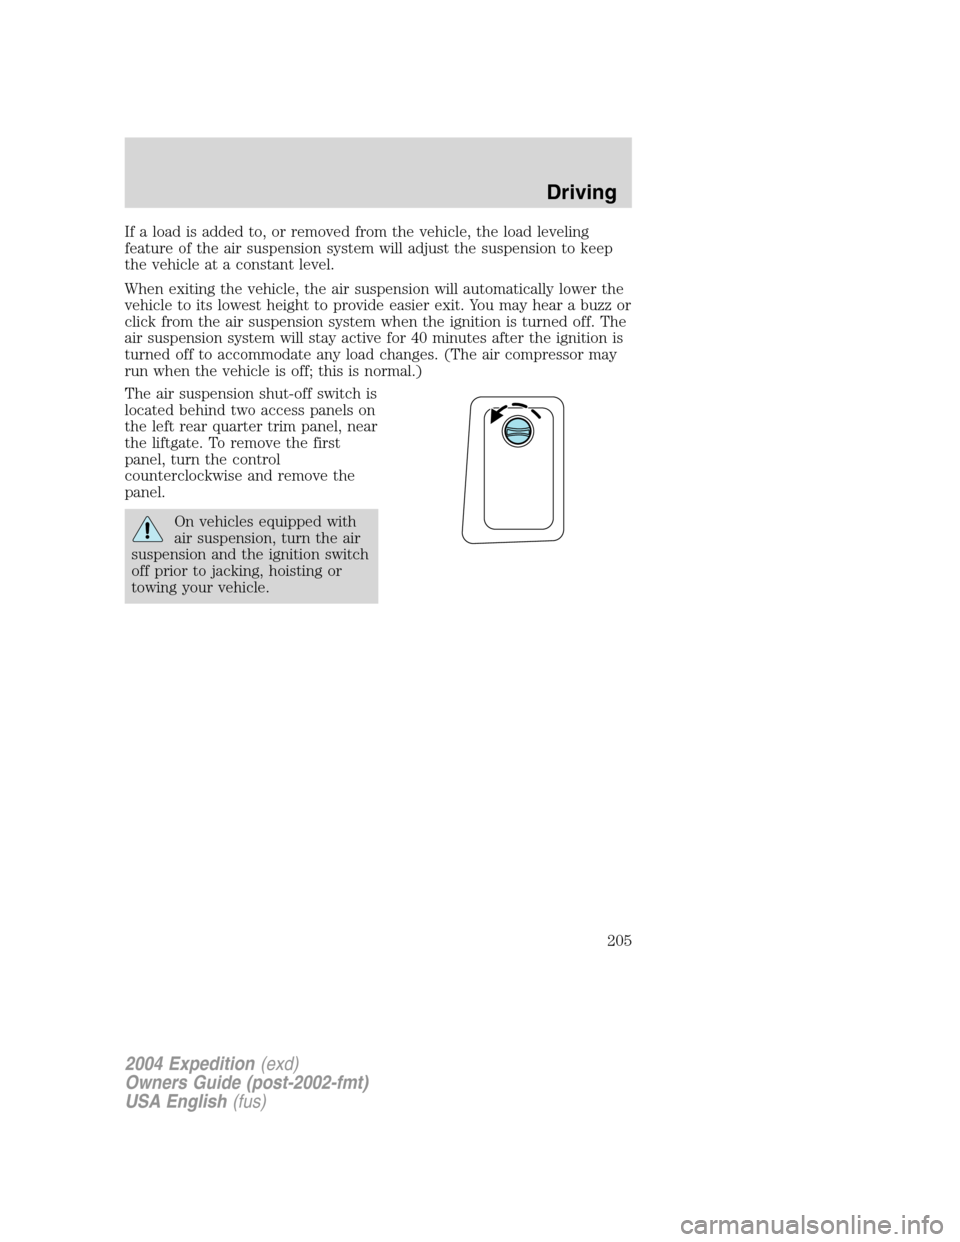
The air suspension shut-off switch is
located behind two access panels on
the left rear quarter trim panel, near
the liftgate. To remove the first
panel, turn the control
counterclockwise and remove the
panel.
On vehicles equipped with
air suspension, turn the air
suspension and the ignition switch
off prior to jacking, hoisting or
towing your vehicle.
2004 Expedition(exd)
Owners Guide (post-2002-fmt)
USA English(fus)
Driving
205