2004 DODGE DAKOTA oil
[x] Cancel search: oilPage 230 of 300

quality filters should be used to assure most efficient
service. Mopar Engine Oil Filters are a high quality oil
filter and are recommended.
Drive Belts Ð Check Condition and Tension
At the mileage indicated in the maintenance schedule, all
belts should be checked for condition and proper tension.
Improper belt tension can cause belt slippage and failure.
Belts should be inspected for evidence of cuts, cracks, or
glazing, and replaced if there is indication of damage
which could result in belt failure. If adjustment is re-
quired, see your authorized dealer for service. Low
generator belt tension can cause battery failure. A special
tool is required to properly measure tension and to
restore belt tension to factory specifications.
Also check belt routing to make sure there is no interfer-
ence between the belts and other engine components.
Spark Plugs
Spark plugs must fire properly to assure proper engine
performance and emission control. The plugs installed in
your vehicle should operate satisfactorily in normal
service for the mileage indicated in the MaintenanceChart. New plugs should be installed at this mileage. The
entire set should be replaced if there is any malfunction
due to a faulty spark plug. Check the Vehicle Emissions
Control Information label for the proper type of spark
plug for your vehicle.
CAUTION!
When replacing plugs, do not overtighten. You could
damage them and cause them to leak.
Ignition Cables
Replace the ignition cables at the mileage interval shown
in the maintenance charts.
Engine Air Cleaner Filter
Under normal driving conditions, replace the air filter at
the intervals shown on Schedule ªAº. If, however, you
drive the vehicle frequently under dusty or severe con-
ditions, the filter element should be inspected periodi-
cally and replaced if necessary at the intervals shown on
Schedule ªBº.
230 MAINTAINING YOUR VEHICLE
Page 235 of 300
Front Suspension Ball Joints
The ball joints and seals should be inspected whenever
the vehicle is serviced for other reasons. Damaged seals
should be replaced to prevent leakage or contamination
of the grease.
Steering Linkage
Whenever the vehicle is hoisted, all steering linkage
joints should be inspected for evidence of damage. Dam-
aged seals should be replaced to prevent leakage or
contamination of the grease.
Drive Shaft Constant Velocity Joints Ð 4X4
Models
All four-wheel drive models are equipped with four
constant velocity joints. Periodic lubrication of these
joints is not required. However, the joint boot should be
inspected for external leakage or damage periodically. If
external leakage or damage is evident, the joint boot and
grease should be replaced immediately. Continued op-
eration could result in failure of the joint due to water
and dirt contamination of the grease. This would require
complete replacement of the joint assembly. Refer to the
Service Manual for the detailed replacement procedure.
Body Lubrication
Locks and all body pivot points, including such items as
seat tracks, doors,liftgate and hood hinges, should be
lubricated periodically to assure quiet, easy operation
and to protect against rust and wear. Prior to the appli-
cation of any lubricant, the parts concerned should be
wiped clean to remove dust and grit; after lubricating
excess oil and grease should be removed. Particular
attention should also be given to hood latching compo-
nents to insure proper function. When performing other
underhood services, the hood latch, release mechanism
and safety catch should be cleaned and lubricated.
The external lock cylinders should be lubricated twice a
year, preferably in the fall and spring. Apply a small
amount of a high quality lubricant such as MopartLock
Cylinder Lubricant directly into the lock cylinder.
Windshield Wiper Blades
The rubber edges of the wiper blades and the windshield
should be cleaned periodically with a sponge or soft cloth
and a mild nonabrasive cleaner. This will remove accu-
mulations of salt or road film.
MAINTAINING YOUR VEHICLE 235
7
Page 236 of 300
Operation of the wipers on dry glass for long periods
may cause deterioration of the wiper blades. Always use
washer fluid when using the wipers to remove salt or dirt
from a dry windshield.
Avoid using the wiper blades to remove frost or ice from
the windshield. Keep the blade rubber out of contact with
petroleum products such as engine oil, gasoline, etc.
Windshield Washers
The fluid reservoir should be checked for fluid level at
regular intervals. When freezing weather is anticipated,
flush out the water in the reservoir by operating the
system. Fill the reservoir with windshield washer anti-
freeze (not radiator antifreeze), and operate the system
for a few seconds to flush out the residual water.
To prevent freeze-up of your windshield washer system
in cold weather, select a solution or mixture that meets or
exceeds the temperature range of your climate. This
rating information can be found on most washer fluid
containers.
WARNING!
Commercially available windshield washer solvents
are flammable. They could ignite and burn you. Care
must be exercised when filling or working around
the washer solution.
After the engine has warmed, operate the defroster for a
few minutes to reduce the possibility of smearing or
freezing the fluid on the cold windshield. Mopar All
Weather Windshield Washer Solution used with water as
directed on the container, aids cleaning action, reduces
freezing point to avoid line clogging, and is not harmful
to paint or trim.
Exhaust System
The best protection against carbon monoxide entry into
the vehicle body is a properly maintained engine exhaust
system.
236 MAINTAINING YOUR VEHICLE
Page 237 of 300
Whenever a change is noticed in the sound of the exhaust
system, when exhaust fumes can be detected inside the
vehicle, or when the underside or rear of the vehicle is
damaged, have a competent mechanic inspect the com-
plete exhaust system and adjacent body areas for broken,
damaged, deteriorated, or mispositioned parts. Open
seams or loose connections could permit exhaust fumes
to seep into the passenger compartment. In addition,
inspect the exhaust system each time the vehicle is raised
for lubrication or oil change. Replace as required.
WARNING!
Exhaust gases can injure or kill. They contain carbon
monoxide (CO) which is colorless and odorless.
Breathing it can make you unconscious and can
eventually poison you. To avoid breathing CO, fol-
low the preceding safety tips.
Cooling System
Inspection
Coolant protection checks should be made at every 12
months (before the onset of freezing weather, where
applicable). If coolant is dirty or rusty in appearance, the
system should be drained, flushed and refilled with fresh
coolant. Check face of radiator for any accumulation of
bugs, leaves, etc. If dirty, clean the radiator core by gently
spraying water from a garden hose at the back of the core.
Check the reserve tank tubing for condition and tightness
of connection at reserve tank and radiator. Inspect the
entire system for leaks.
With the engine at normal operating temperature (but
not running), check the coolant pressure cap for proper
vacuum sealing by draining a small amount of coolant
from the radiator drain cock. If the cap is sealing prop-
erly, the coolant will begin to drain from the reserve tank.
Do not remove the pressure cap when the cooling system
is hot.
MAINTAINING YOUR VEHICLE 237
7
Page 242 of 300

Insure nylon tubing in these areas has not melted or
collapsed.
Inspect all hose clamps and couplings to make sure they
are secure and no leaks are present.
NOTE:Fluids such as oil, power steering fluid, and
brake fluid are used during assembly plant operations to
ease the assembly of hoses to couplings. Therefore, oil
wetness at the hose-coupling area is not necessarily an
indication of leakage. Actual dripping of hot fluid when
systems are under pressure (during vehicle operation),
should be noted before hose is replaced based on leakage.
You are urged to use only manufacturer specified hoses
and clamps, or their equivalent in material and specifi-
cation, in any fuel system servicing. It is mandatory to
replace all clamps that have been loosened or removed
during service. Care should be taken in installing new
clamps to insure they are properly torqued.
Positive Crankcase Ventilation (PCV) Valve
Proper operation of the crankcase ventilation system
requires that the PCV valve be free of sticking or plug-
ging because of deposits. Deposits can accumulate in thePCV valve and passage with increasing mileage. Have
the PCV valve, hoses, and passages checked for proper
operation at the intervals specified. If the valve is
plugged or sticking, replace with a new valve.Do not
attempt to clean the oil PCV valve!Check ventilating
hose for indication of damage or plugging with deposits.
Replace if necessary.
242 MAINTAINING YOUR VEHICLE
Page 244 of 300
WARNING!
Use of brake fluid that may have a lower initial
boiling point, or is unidentified as to specifications,
may result in sudden brake failure during hard
prolonged braking. You could have an accident.
WARNING!
Overfilling the brake fluid reservoir can result in
spilling brake fluid on hot engine parts and the
brake fluid catching fire.
Use only brake fluid that has been in a tightly closed
container to avoid contamination from foreign matter or
moisture.
CAUTION!
Do not allow a petroleum-base fluid to contaminate
the brake fluid. Seal damage may result.
Brake Linings
Your vehicle is equipped with self-adjusting brakes. A
few brake applications while moving in reverse will
maintain your brakes at the specified adjustment. Adjust-
ment will continue until the brake linings are worn. To
avoid brake failure, brake pull or damage to drums,
inspect the brake linings as specified. If excessively worn,
the brake linings must be replaced.
Brake Hoses
Inspection should be performed whenever the brake
system is serviced or at intervals specified. Inspect hy-
draulic brake hoses for surface cracking, scuffing or worn
spots. If there is any evidence of cracking, scuffing, or
worn spots, the hose should be replaced immediately!
Eventual deterioration of the hose can take place with
possible burst failure.
244 MAINTAINING YOUR VEHICLE
Page 246 of 300
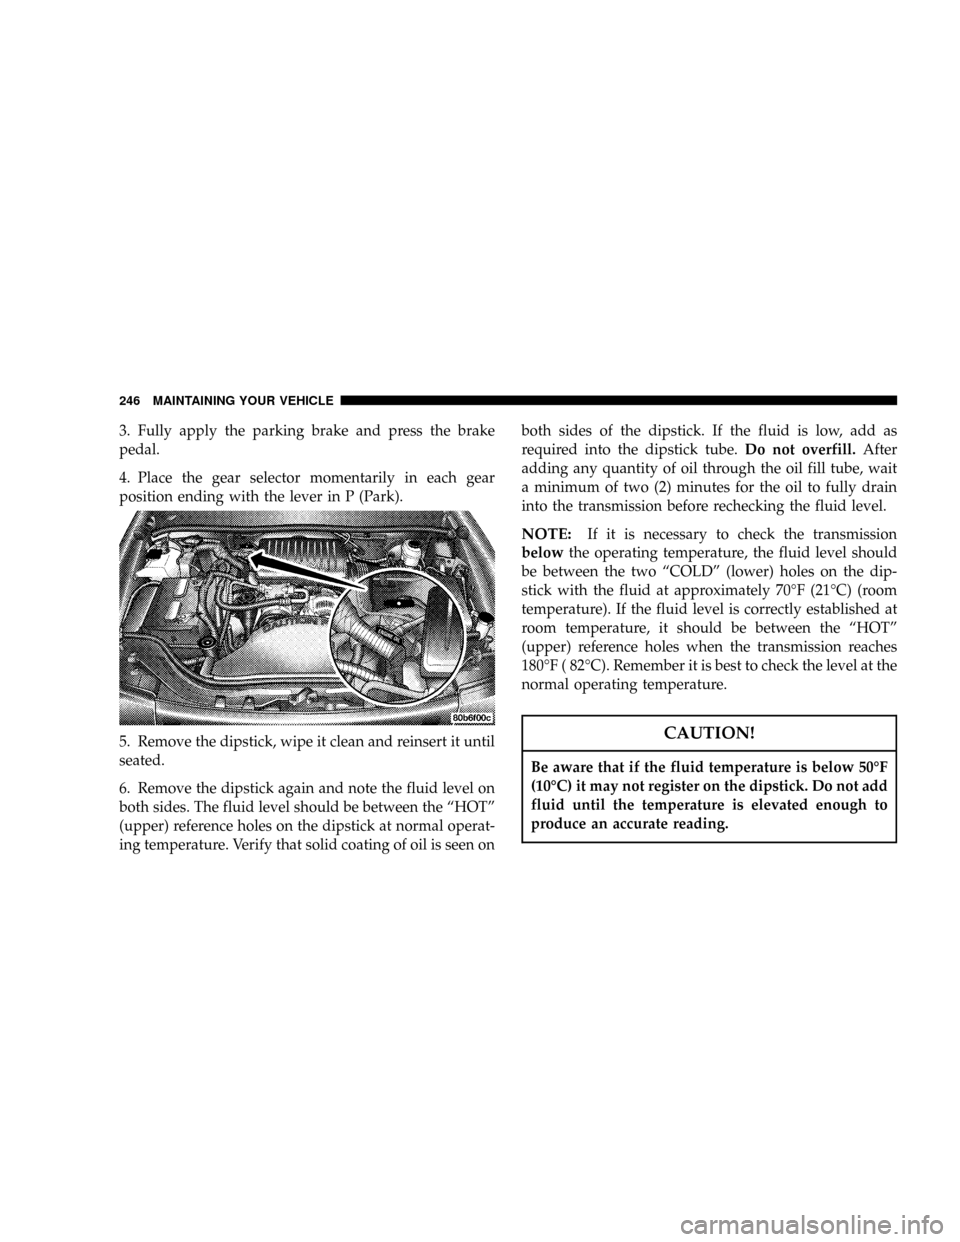
3. Fully apply the parking brake and press the brake
pedal.
4. Place the gear selector momentarily in each gear
position ending with the lever in P (Park).
5. Remove the dipstick, wipe it clean and reinsert it until
seated.
6. Remove the dipstick again and note the fluid level on
both sides. The fluid level should be between the ªHOTº
(upper) reference holes on the dipstick at normal operat-
ing temperature. Verify that solid coating of oil is seen onboth sides of the dipstick. If the fluid is low, add as
required into the dipstick tube.Do not overfill.After
adding any quantity of oil through the oil fill tube, wait
a minimum of two (2) minutes for the oil to fully drain
into the transmission before rechecking the fluid level.
NOTE:If it is necessary to check the transmission
belowthe operating temperature, the fluid level should
be between the two ªCOLDº (lower) holes on the dip-
stick with the fluid at approximately 70ÉF (21ÉC) (room
temperature). If the fluid level is correctly established at
room temperature, it should be between the ªHOTº
(upper) reference holes when the transmission reaches
180ÉF ( 82ÉC). Remember it is best to check the level at the
normal operating temperature.
CAUTION!
Be aware that if the fluid temperature is below 50ÉF
(10ÉC) it may not register on the dipstick. Do not add
fluid until the temperature is elevated enough to
produce an accurate reading.
246 MAINTAINING YOUR VEHICLE
Page 248 of 300

Transfer Case
Inspect the transfer case for fluid leaks. If a fluid leak is
evident the transfer case fluid level can be checked by
removing the filler plug located on the back side of the
transfer case. The fluid level should be at the bottom edge
of the filler plug hole when the vehicle is in a level
position.
The transfer case fluid should be drained and refilled at
the intervals specified.
Lubricant Selection
Refer to Recommended Fluids, Lubricants and Genuine
Parts for correct fluid type.
Axles
Refer to Recommended Fluids, Lubricants and Genuine
Parts for correct fluid type.
The manufacturer does not recommend regularly sched-
uled oil changes for axles in vehicles whose operation is
classified as normal truck service.
NOTE:The presence of water in the gear lubricant will
result in corrosion and possible failure of differential
components. Operation of the vehicle in water, as may beencountered in some off-highway types of service, will
require draining and refilling the axle to avoid damage.
Rear Axle
Limited-slip differentials require the use of Mopartlim-
ited slip additive. Refer to Recommended Fluids, Lubri-
cants and Genuine Parts for correct fluid type. This
should be added to the gear lubricant whenever a fluid
change is made, when equipped with a limited-slip
differential. Rear axle fluid level should be 1/49(6.35
mm) below filler plug hole for 8 1/4 axles and should be
5/89(16 mm) below filler plug hole for 9 1/49axles.
Front Axle
Front axle fluid level should be at the bottom of the filler
plug hole.
Selection of Lubricating Grease
The National Lubricating Grease Institute (NLGI) has
developed a symbol (Certification Mark) to aid the
vehicle owner in the proper selection of grease for chassis
components. This symbol, an example shown below, is
located on the grease container and identifies the appli-
cation and quality of the grease.
248 MAINTAINING YOUR VEHICLE