2004 CHEVROLET SILVERADO four wheel drive
[x] Cancel search: four wheel drivePage 215 of 584

A reading in the low pressure zone may be caused by a
dangerously low oil level or some other problem
causing low oil pressure. Check your oil as soon as
possible. SeeOil Pressure LowunderDIC Warnings
and Messages on page 3-64andEngine Oil on
page 5-20.
{CAUTION:
Do not keep driving if the oil pressure is low. If
you do, your engine can become so hot that it
catches �re. You or others could be burned.
Check your oil as soon as possible and have
your vehicle serviced.
Notice:Lack of proper engine oil maintenance may
damage the engine. The repairs would not be
covered by your warranty. Always follow the
maintenance schedule in this manual for changing
engine oil.
Cruise Control Light
The cruise light comes on
whenever you set your
cruise control. See “Cruise
Control” underTurn
Signal/Multifunction Lever
on page 3-7.
Four-Wheel-Drive Light
The four-wheel drive
indicator will light up when
you shift a manual
transfer case into
four-wheel drive and the
front axle engages.
Some delay between shifting and the indicator’s
lighting is normal.
SeeFour-Wheel Drive on page 2-36for
more information.
3-51
Page 218 of 584
C (Personalization):This button will change personal
options available on your vehicle.
D (Select):This button resets certain functions and
turns off or acknowledges messages on the DIC.
If your vehicle is not equipped with the DIC steering
wheel buttons you will not have all of the features listed
above, and you will turn off, or acknowledge DIC
messages by using the trip odometer reset stem located
on the instrument panel cluster.
DIC Operation and Displays
The DIC comes on when the ignition is on. After a short
delay the DIC will display the current driver (1 or 2)
and the information that was last displayed before the
engine was turned off.
If a problem is detected, a warning message will appear
on the display. Pressing any of the four buttons will
acknowledge (clear) most current warnings or service
messages. Some warnings that cannot be
acknowledged (cleared) are: ENGINE OVERHEATED,
OIL PRESSURE LOW, REDUCED ENGINE POWER,
TRANS HOT IDLE ENGINE. These warnings must
be dealt with immediately and therefore cannot
be cleared until the problem has been corrected.
The DIC has different modes which can be accessed by
pressing the four buttons on the DIC. These buttons are
trip information, fuel information, personalization and
select. The button functions are detailed in the following.
Trip Information Button
Press the trip information button to scroll through the
ODOMETER, PERSONAL TRIP ON/OFF, BUSINESS
TRIP ON/OFF, HOURMETER, ANNUAL LOG and
TIMER. If the personal trip and/or the business trip are
set to ON, you will also be able to scroll through
more messages. See “Personal Trip” and “Business
Trip” next for more information.
If your vehicle is not equipped with the DIC steering
wheel buttons you can select the trip information
by pressing the trip odometer reset stem on the
instrument panel cluster.
Personal Trip
Turn PERSONAL TRIP on or off by pressing the
select button. When it is on, you will also be able to
scroll through the following by pressing the trip
information button:
PERSONAL: XXXXXX.X MI — This shows the
current distance traveled since the last reset for the
personal trip odometer in either miles or kilometers.
PERSONAL: XXXX.X GAL — This shows the
amount of fuel used for the personal trip.
PERSONAL: XX.X MPG— This shows how
many miles per gallon of fuel your vehicle is getting
for the personal trip based on current and past
driving conditions.
3-54
Page 233 of 584
{CAUTION:
Your brake system may not be working
properly if the SERVICE BRAKE BOOSTER
message is displayed.
If the brake system warning light is also
on, you should have the vehicle towed for
service. See “Brake System Warning Light” in
the Index.
If the brake system warning light isn’t on, you
still have brakes, but the supplemental brake
assist system may not operate properly. In the
event of a vacuum loss, you may not have
vacuum power assist for braking. The brake
pedal will be harder to push and it will take
longer to stop. If you continue to drive with
this message displayed it can lead to a
crash. Have the brake system serviced as
soon as possible.
SERVICE 4 WHEEL STEER
If a problem occurs with the 4-wheel steer system, this
message will appear on the DIC. If this message
appears, stop as soon as possible, and turn off the
vehicle. Restart the vehicle and check for the message
on the DIC display. If the message is still displayed,
or appears again when you being driving, the four-wheel
steer system needs service.
SERVICE 4WD
If a problem occurs with the four-wheel drive system,
this message will appear on the DIC. If this message
appears, stop as soon as possible and turn off the
vehicle. Restart the vehicle and check for the message
on the DIC display. If the message is still displayed,
or appears again when you begin driving, the four wheel
drive system needs service.
SERVICE RIDE CONTROL
If a problem occurs with the suspension system, this
message will appear on the DIC. If this message
appears, stop and turn off the vehicle. Restart the
vehicle and check for the message on the DIC display.
If the message is still displayed, or appears again
when you begin driving, the air suspension system
needs service.
3-69
Page 315 of 584
Off-Road Driving
This off-road guide is for vehicles that have four-wheel
drive. Also, seeBraking on page 4-6. If your vehicle
is an SS Model or does not have four-wheel drive, you
should not drive off-road unless you are on a level,
solid surface. If your vehicle is equipped with 20-inch
tire/wheel assemblies, do not use your vehicle for
off-road driving. SeeTires on page 5-74.
Off-road driving can be great fun. But it does have
some de�nite hazards. The greatest of these is
the terrain itself.
“Off-roading” means you have left the great North
American road system behind. Traffic lanes are not
marked. Curves are not banked. There are no
road signs. Surfaces can be slippery, rough, uphill or
downhill. In short, you have gone right back to nature.
Off-road driving involves some new skills. And that
is why it is very important that you read this guide. You
will �nd many driving tips and suggestions. These
will help make your off-road driving safer and
more enjoyable.
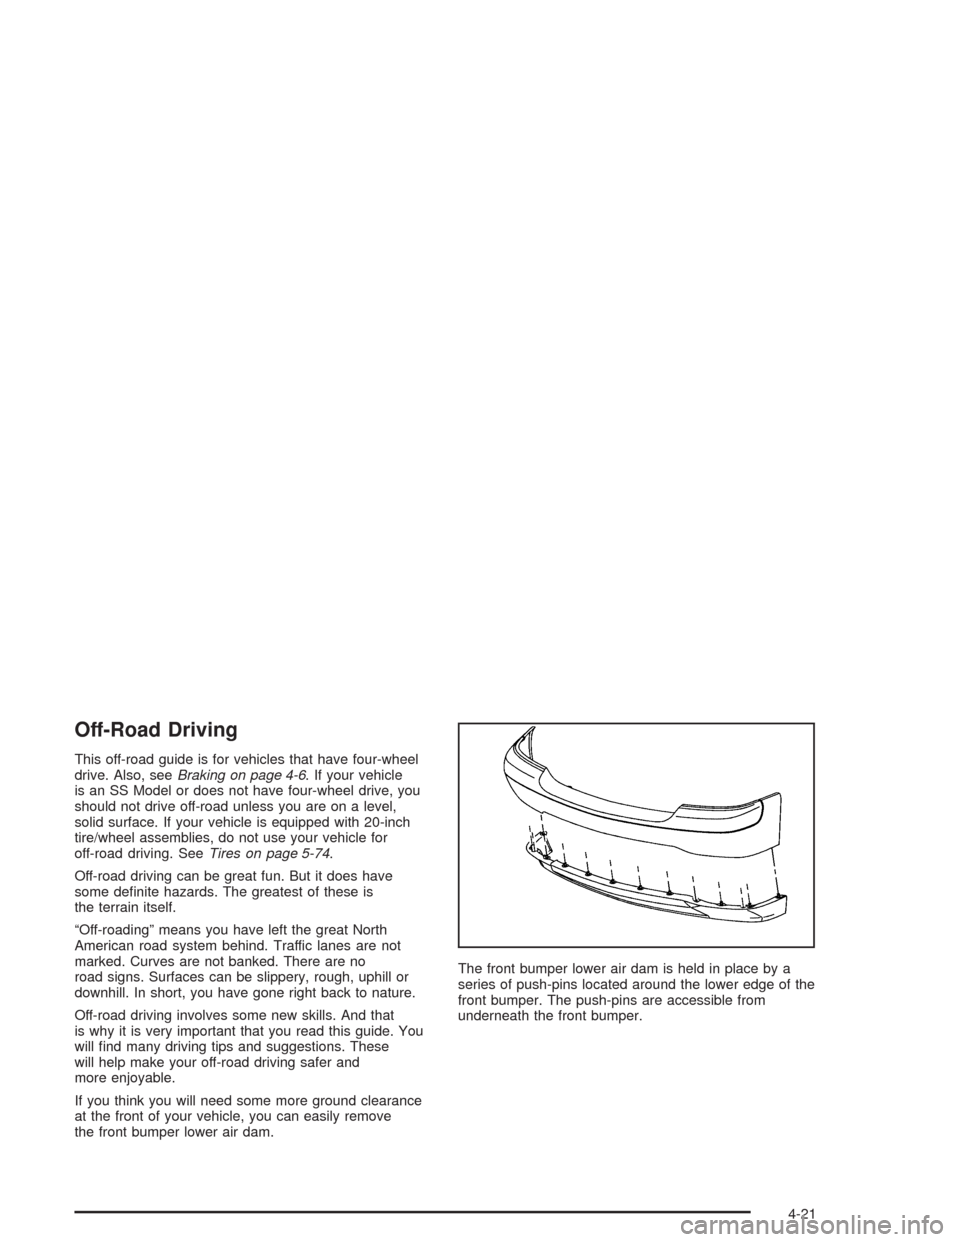
If you think you will need some more ground clearance
at the front of your vehicle, you can easily remove
the front bumper lower air dam.The front bumper lower air dam is held in place by a
series of push-pins located around the lower edge of the
front bumper. The push-pins are accessible from
underneath the front bumper.
4-21
Page 317 of 584
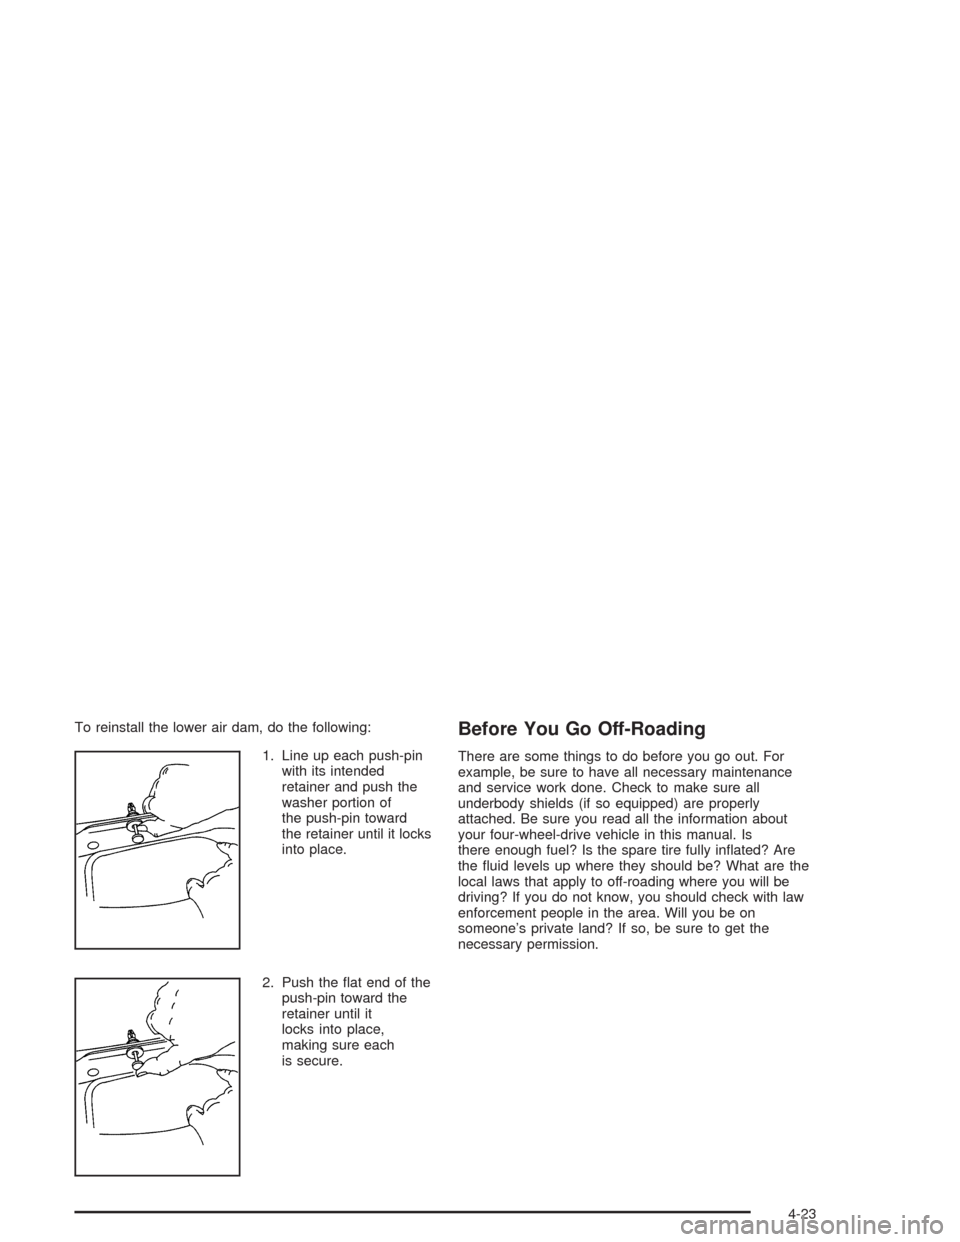
To reinstall the lower air dam, do the following:
1. Line up each push-pin
with its intended
retainer and push the
washer portion of
the push-pin toward
the retainer until it locks
into place.
2. Push the �at end of the
push-pin toward the
retainer until it
locks into place,
making sure each
is secure.Before You Go Off-Roading
There are some things to do before you go out. For
example, be sure to have all necessary maintenance
and service work done. Check to make sure all
underbody shields (if so equipped) are properly
attached. Be sure you read all the information about
your four-wheel-drive vehicle in this manual. Is
there enough fuel? Is the spare tire fully in�ated? Are
the �uid levels up where they should be? What are the
local laws that apply to off-roading where you will be
driving? If you do not know, you should check with law
enforcement people in the area. Will you be on
someone’s private land? If so, be sure to get the
necessary permission.
4-23
Page 345 of 584
Rocking Your Vehicle To Get It Out
First, turn your steering wheel left and right. That will
clear the area around your front wheels. If you have a
four-wheel-drive vehicle, shift into 4HI. If your vehicle
has the Traction Assist System, you should turn it off by
pressing the TAS on/off button. Then shift back and
forth between REVERSE (R) and a forward gear (or with
a manual transmission, between FIRST (1) or
SECOND (2) and REVERSE (R)), spinning the wheels
as little as possible. Release the accelerator pedal
while you shift, and press lightly on the accelerator pedal
when the transmission is in gear. By slowly spinning
your wheels in the forward and reverse directions, you
will cause a rocking motion that may free your
vehicle. If that does not get you out after a few tries,
you may need to be towed out. Or, unless you have the
SS Model, you can use your recovery hooks if your
vehicle has them. If you do need to be towed out, see
Towing Your Vehicle on page 4-52.
Using the Recovery Hooks
(Except SS Model)
Notice:SS Models have recovery hooks that are
concealed by the front bumper trim covering. Use of
the recovery hooks could cause damage to your
vehicle. If you have the SS Model, do not use
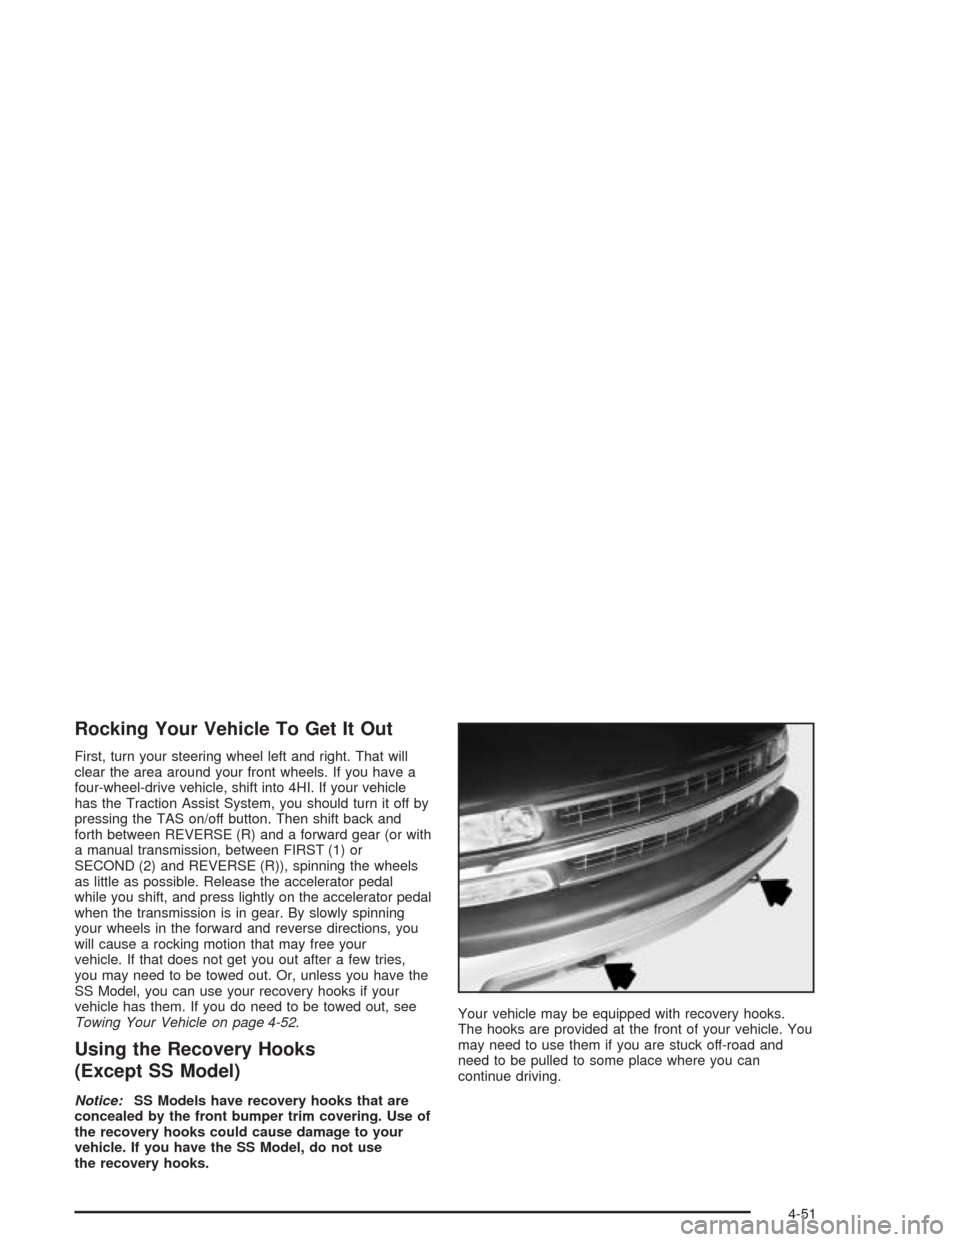
the recovery hooks.Your vehicle may be equipped with recovery hooks.
The hooks are provided at the front of your vehicle. You
may need to use them if you are stuck off-road and
need to be pulled to some place where you can
continue driving.
4-51
Page 347 of 584
Recreational Vehicle Towing
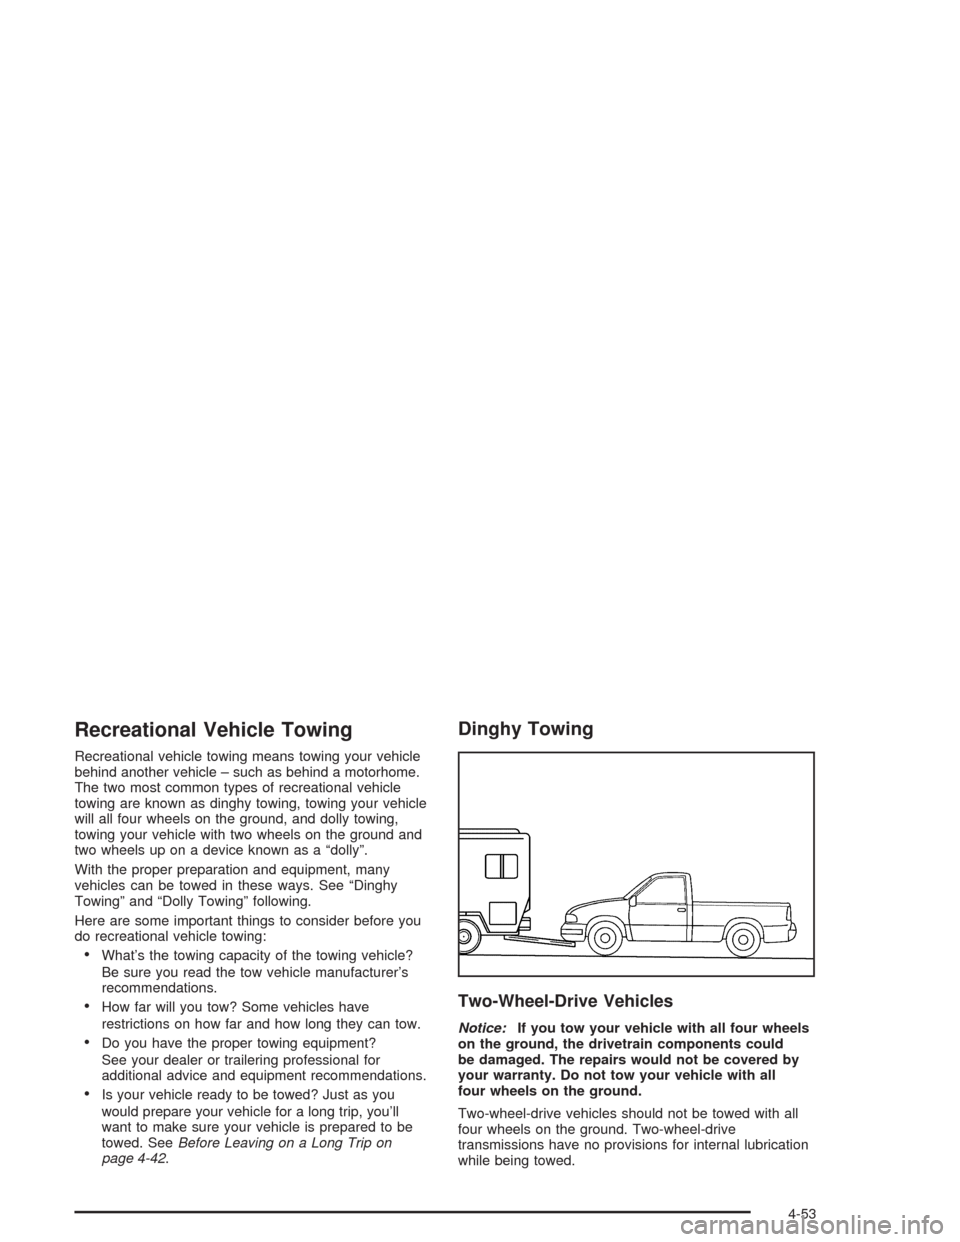
Recreational vehicle towing means towing your vehicle
behind another vehicle – such as behind a motorhome.
The two most common types of recreational vehicle
towing are known as dinghy towing, towing your vehicle
will all four wheels on the ground, and dolly towing,
towing your vehicle with two wheels on the ground and
two wheels up on a device known as a “dolly”.
With the proper preparation and equipment, many
vehicles can be towed in these ways. See “Dinghy
Towing” and “Dolly Towing” following.
Here are some important things to consider before you
do recreational vehicle towing:
What’s the towing capacity of the towing vehicle?
Be sure you read the tow vehicle manufacturer’s
recommendations.
How far will you tow? Some vehicles have
restrictions on how far and how long they can tow.
Do you have the proper towing equipment?
See your dealer or trailering professional for
additional advice and equipment recommendations.
Is your vehicle ready to be towed? Just as you
would prepare your vehicle for a long trip, you’ll
want to make sure your vehicle is prepared to be
towed. SeeBefore Leaving on a Long Trip on
page 4-42.
Dinghy Towing
Two-Wheel-Drive Vehicles
Notice:If you tow your vehicle with all four wheels
on the ground, the drivetrain components could
be damaged. The repairs would not be covered by
your warranty. Do not tow your vehicle with all
four wheels on the ground.
Two-wheel-drive vehicles should not be towed with all
four wheels on the ground. Two-wheel-drive
transmissions have no provisions for internal lubrication
while being towed.
4-53
Page 348 of 584
Four-Wheel-Drive Vehicles Equipped with
Transfer Case (NP1, NP2 and NP8) and
All-Wheel-Drive Vehicles
Notice:Towing an all-wheel-drive vehicle with all
four wheels on the ground, or even with only two of
its wheels on the ground, will damage drivetrain
components. Do not tow an all-wheel-drive vehicle if
any of its wheels will be on the ground.
If your vehicle is equipped with all-wheel-drive, and the
Silverado SS package, your vehicle was not designed
to be towed with any of its wheels on the ground. If your
vehicle must be towed, seeTowing Your Vehicle on
page 4-52.
For four-wheel-drive vehicles, use the following
procedure to tow your vehicle:
1. Shift an automatic transmission to PARK (P), or a
manual transmission to FIRST (1).
2. Turn the engine off, but leave the ignition on.
3. Firmly set the parking brake.
4. Securely attach the vehicle being towed to the
tow vehicle.
{CAUTION:
Shifting a four-wheel-drive vehicle’s transfer
case into NEUTRAL can cause your vehicle to
roll even if the transmission is in Park (P) for
an automatic transmission, or if your vehicle is
in gear, for a manual transmission. You or
others could be injured. Make sure the parking
brake is �rmly set before you shift the transfer
case to NEUTRAL.
5. Shift the transfer case to NEUTRAL. See
Four-Wheel Drive on page 2-36for the proper
procedure to select the neutral position for
your vehicle.
6. Release the parking brake only after the
vehicle being towed is �rmly attached to the
towing vehicle.
7. Turn the ignition off and leave the steering
column unlocked.
4-54