2004 CADILLAC SEVILLE air filter
[x] Cancel search: air filterPage 113 of 410
Instrument Panel Overview...............................3-4
Hazard Warning Flashers................................3-6
Other Warning Devices...................................3-7
Horn.............................................................3-7
Tilt Wheel.....................................................3-7
Turn Signal/Multifunction Lever.........................3-9
Exterior Lamps.............................................3-16
Interior Lamps..............................................3-22
Ultrasonic Rear Parking Assist (URPA)............3-24
Accessory Power Outlets...............................3-26
Ashtrays and Cigarette Lighter........................3-27
Climate Controls............................................3-28
Dual Climate Control System..........................3-28
Outlet Adjustment.........................................3-33
Rear Climate Control System.........................3-34
Passenger Compartment Air Filter...................3-35
Steering Wheel Climate Controls.....................3-36
Climate Controls Personalization.....................3-36
Warning Lights, Gages and Indicators.............3-37
Warning Lights, Gages, and Indicators.............3-37
Instrument Panel Cluster................................3-38
Speedometer and Odometer...........................3-39
Tachometer.................................................3-40
Safety Belt Reminder Light.............................3-41Air Bag Readiness Light................................3-41
Charging System Light..................................3-42
Brake System Warning and Parking Brake
Indicator Light...........................................3-43
Anti-Lock Brake System Warning Light.............3-44
Traction Control System (TCS) Warning Light......3-44
Engine Coolant Temperature Warning Light......3-45
Engine Coolant Temperature Gage..................3-45
Malfunction Indicator Lamp.............................3-46
Oil Pressure Light.........................................3-49
Security Light...............................................3-50
Fog Lamp Light............................................3-50
Lights On Reminder......................................3-50
Cruise Control Light......................................3-50
Fuel Gage...................................................3-51
Driver Information Center (DIC).......................3-52
DIC Controls and Displays.............................3-52
DIC Warnings and Messages.........................3-55
Climate Controls and Radio System
Personalization..........................................3-62
DIC Vehicle Personalization............................3-63
Trip Computer................................................3-74
Oil Life Indicator...........................................3-74
Section 3 Instrument Panel
3-1
Page 141 of 410
Do not cover the solar sensor located in the center of
the instrument panel, near the windshield. For more
information on the solar sensor, see “Sensors” later in
this section.
When your vehicle is first started, the display will show
the driver’s temperature setting, the fan speed and
the air delivery mode.
When the ENG/MET (English/metric) button on the
Driver Information Center (DIC) is pressed, the display
will show readings in Fahrenheit or Celsius. Use the
ENG/MET button to toggle between them.
Manual Operation
SMODET:Pressing the MODE switch and changing
the mode cancels automatic operation and places the
system in manual mode. Press AUTO to return to
automatic operation.
To change the current mode, select one of the following:
G(Vent):This mode directs air to the instrument
panel outlets.
+(Bi-Level):This mode directs approximately half of
the air to the instrument panel outlets, and then
directs most of the remaining air to the floor outlets.
Some air may be directed toward the windshield.
In automatic operation, cooler air is directed to the upper
outlets and warmer air to the floor outlets.
8(Floor):This mode directs most of the air to the
floor outlets with some air directed to the outboard
outlets (for the side windows) a little air directed to the
windshield.
The MODE switch can also be used to select the
floor/defog mode. Information on defogging and
defrosting can be found later in this section.
y9z(Fan):Press this switch to increase or
decrease the fan speed. Pressing this switch cancels
automatic operation and places the system in manual
mode. Press AUTO to return to automatic operation.
If the airflow seems low when the fan speed is at
the highest setting, the passenger compartment air filter
may need to be replaced. For more information, see
Passenger Compartment Air Filter on page 3-35
andScheduled Maintenance on page 6-4.
3-29
Page 145 of 410
Outlet Adjustment
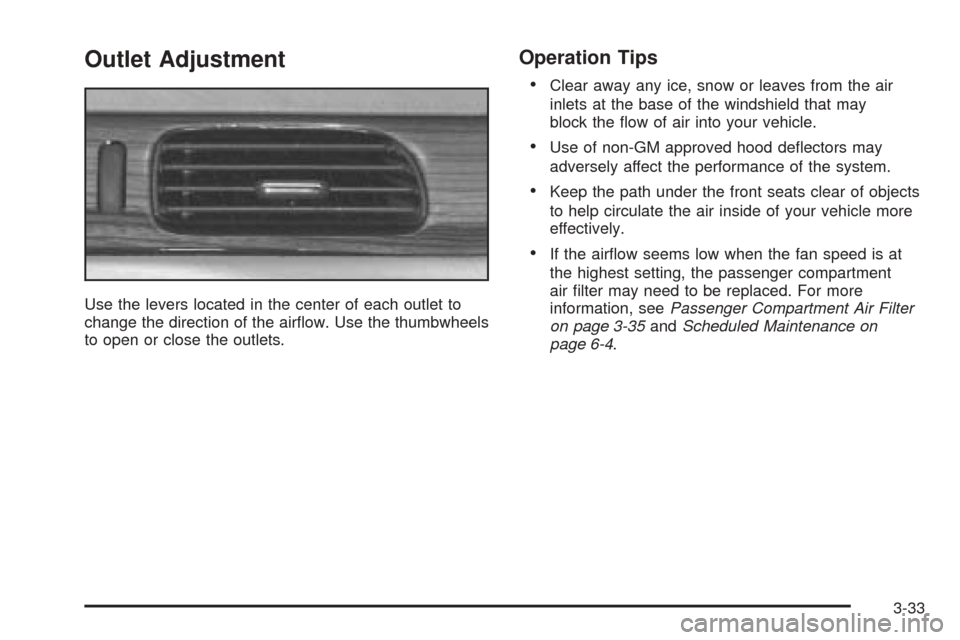
Use the levers located in the center of each outlet to
change the direction of the airflow. Use the thumbwheels
to open or close the outlets.
Operation Tips
•
Clear away any ice, snow or leaves from the air
inlets at the base of the windshield that may
block the flow of air into your vehicle.
•Use of non-GM approved hood deflectors may
adversely affect the performance of the system.
•Keep the path under the front seats clear of objects
to help circulate the air inside of your vehicle more
effectively.
•If the airflow seems low when the fan speed is at
the highest setting, the passenger compartment
air filter may need to be replaced. For more
information, seePassenger Compartment Air Filter
on page 3-35andScheduled Maintenance on
page 6-4.
3-33
Page 147 of 410
Passenger Compartment Air Filter
Passenger compartment air, both outside air and
recirculated air, is routed through a passenger
compartment filter. The filter removes certain
contaminants from the air, including pollen and dust
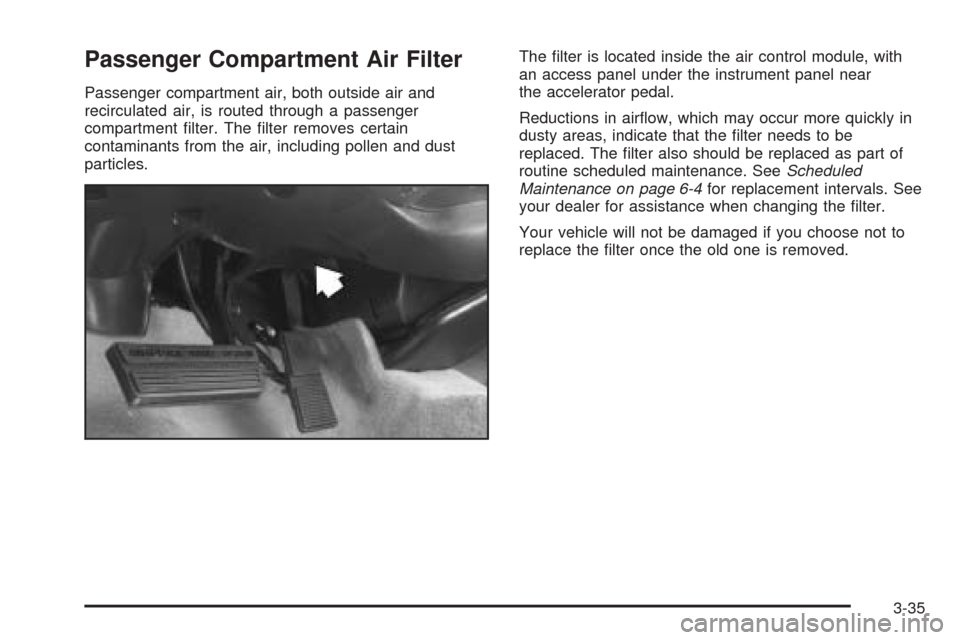
particles.The filter is located inside the air control module, with
an access panel under the instrument panel near
the accelerator pedal.
Reductions in airflow, which may occur more quickly in
dusty areas, indicate that the filter needs to be
replaced. The filter also should be replaced as part of
routine scheduled maintenance. SeeScheduled
Maintenance on page 6-4for replacement intervals. See
your dealer for assistance when changing the filter.
Your vehicle will not be damaged if you choose not to
replace the filter once the old one is removed.
3-35
Page 261 of 410
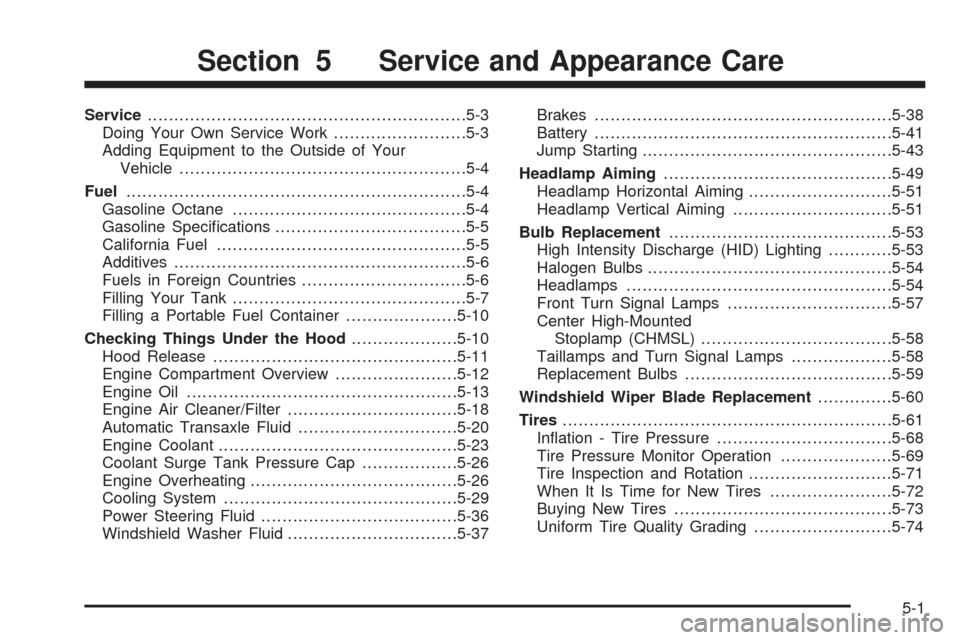
Service............................................................5-3
Doing Your Own Service Work.........................5-3
Adding Equipment to the Outside of Your
Vehicle......................................................5-4
Fuel................................................................5-4
Gasoline Octane............................................5-4
Gasoline Specifications....................................5-5
California Fuel...............................................5-5
Additives.......................................................5-6
Fuels in Foreign Countries...............................5-6
Filling Your Tank............................................5-7
Filling a Portable Fuel Container.....................5-10
Checking Things Under the Hood....................5-10
Hood Release..............................................5-11
Engine Compartment Overview.......................5-12
Engine Oil...................................................5-13
Engine Air Cleaner/Filter................................5-18
Automatic Transaxle Fluid..............................5-20
Engine Coolant.............................................5-23
Coolant Surge Tank Pressure Cap..................5-26
Engine Overheating.......................................5-26
Cooling System............................................5-29
Power Steering Fluid.....................................5-36
Windshield Washer Fluid................................5-37Brakes........................................................5-38
Battery........................................................5-41
Jump Starting...............................................5-43
Headlamp Aiming...........................................5-49
Headlamp Horizontal Aiming...........................5-51
Headlamp Vertical Aiming..............................5-51
Bulb Replacement..........................................5-53
High Intensity Discharge (HID) Lighting............5-53
Halogen Bulbs..............................................5-54
Headlamps..................................................5-54
Front Turn Signal Lamps...............................5-57
Center High-Mounted
Stoplamp (CHMSL)....................................5-58
Taillamps and Turn Signal Lamps...................5-58
Replacement Bulbs.......................................5-59
Windshield Wiper Blade Replacement..............5-60
Tires..............................................................5-61
Inflation - Tire Pressure.................................5-68
Tire Pressure Monitor Operation.....................5-69
Tire Inspection and Rotation...........................5-71
When It Is Time for New Tires.......................5-72
Buying New Tires.........................................5-73
Uniform Tire Quality Grading..........................5-74
Section 5 Service and Appearance Care
5-1
Page 273 of 410
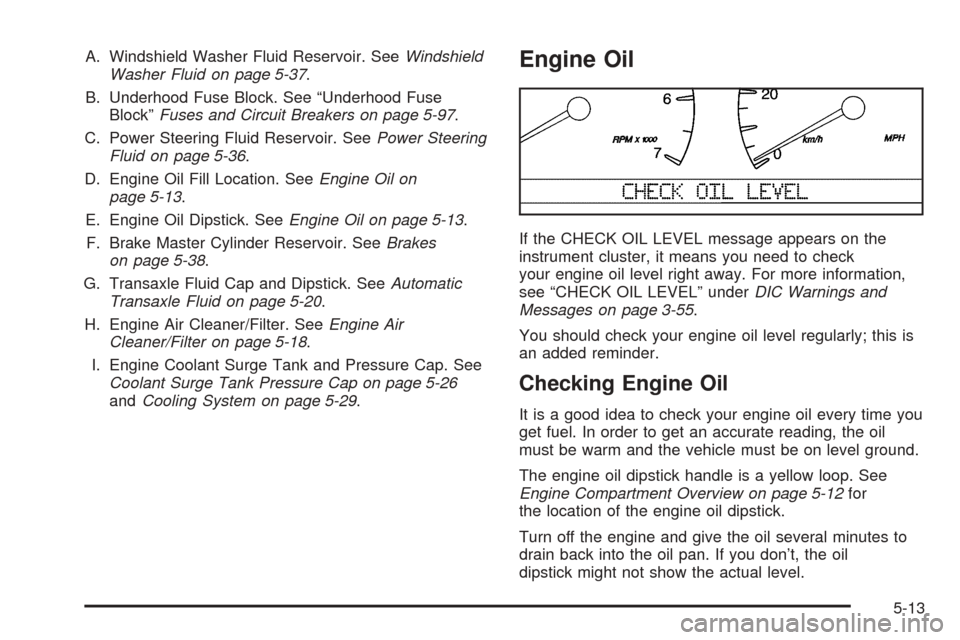
A. Windshield Washer Fluid Reservoir. SeeWindshield
Washer Fluid on page 5-37.
B. Underhood Fuse Block. See “Underhood Fuse
Block”Fuses and Circuit Breakers on page 5-97.
C. Power Steering Fluid Reservoir. SeePower Steering
Fluid on page 5-36.
D. Engine Oil Fill Location. SeeEngine Oil on
page 5-13.
E. Engine Oil Dipstick. SeeEngine Oil on page 5-13.
F. Brake Master Cylinder Reservoir. SeeBrakes
on page 5-38.
G. Transaxle Fluid Cap and Dipstick. SeeAutomatic
Transaxle Fluid on page 5-20.
H. Engine Air Cleaner/Filter. SeeEngine Air
Cleaner/Filter on page 5-18.
I. Engine Coolant Surge Tank and Pressure Cap. See
Coolant Surge Tank Pressure Cap on page 5-26
andCooling System on page 5-29.Engine Oil
If the CHECK OIL LEVEL message appears on the
instrument cluster, it means you need to check
your engine oil level right away. For more information,
see “CHECK OIL LEVEL” underDIC Warnings and
Messages on page 3-55.
You should check your engine oil level regularly; this is
an added reminder.
Checking Engine Oil
It is a good idea to check your engine oil every time you
get fuel. In order to get an accurate reading, the oil
must be warm and the vehicle must be on level ground.
The engine oil dipstick handle is a yellow loop. See
Engine Compartment Overview on page 5-12for
the location of the engine oil dipstick.
Turn off the engine and give the oil several minutes to
drain back into the oil pan. If you don’t, the oil
dipstick might not show the actual level.
5-13
Page 278 of 410
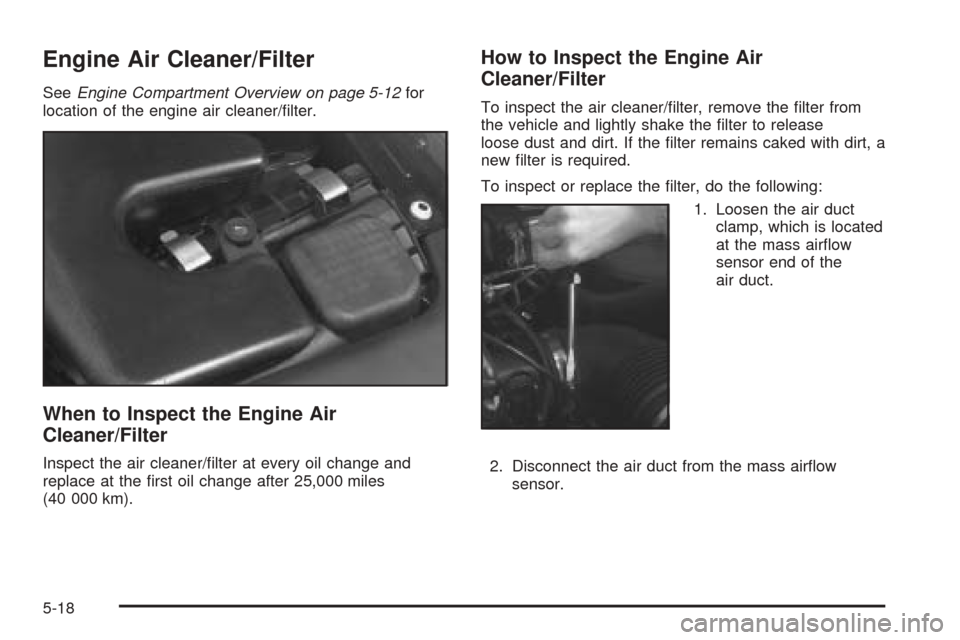
Engine Air Cleaner/Filter
SeeEngine Compartment Overview on page 5-12for
location of the engine air cleaner/filter.
When to Inspect the Engine Air
Cleaner/Filter
Inspect the air cleaner/filter at every oil change and
replace at the first oil change after 25,000 miles
(40 000 km).
How to Inspect the Engine Air
Cleaner/Filter
To inspect the air cleaner/filter, remove the filter from
the vehicle and lightly shake the filter to release
loose dust and dirt. If the filter remains caked with dirt, a
new filter is required.
To inspect or replace the filter, do the following:
1. Loosen the air duct
clamp, which is located
at the mass airflow
sensor end of the
air duct.
2. Disconnect the air duct from the mass airflow
sensor.
5-18
Page 364 of 410
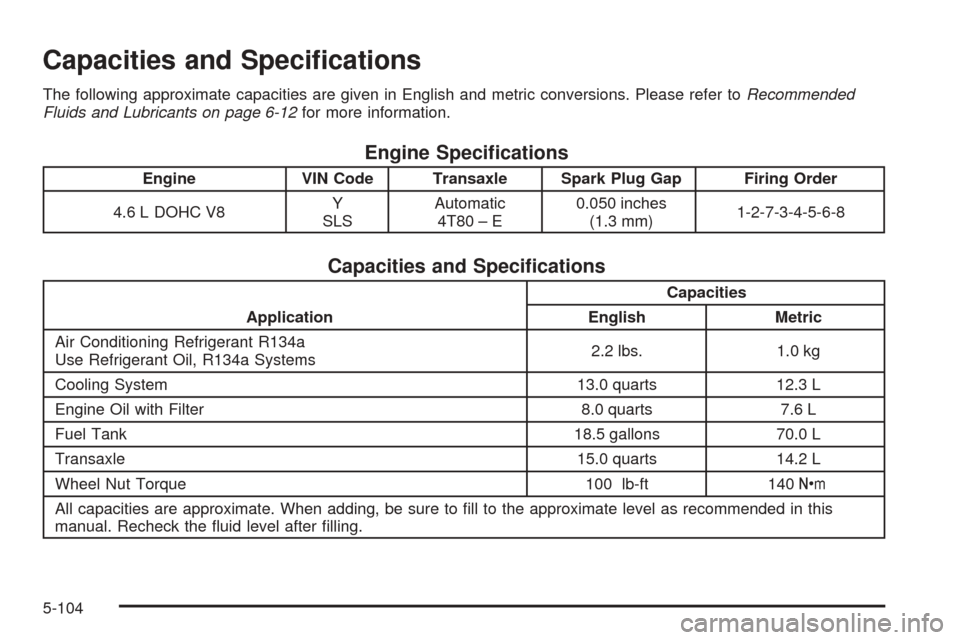
Capacities and Specifications
The following approximate capacities are given in English and metric conversions. Please refer toRecommended
Fluids and Lubricants on page 6-12for more information.
Engine Specifications
Engine VIN Code Transaxle Spark Plug Gap Firing Order
4.6 L DOHC V8Y
SLSAutomatic
4T80 – E0.050 inches
(1.3 mm)1-2-7-3-4-5-6-8
Capacities and Specifications
ApplicationCapacities
English Metric
Air Conditioning Refrigerant R134a
Use Refrigerant Oil, R134a Systems2.2 lbs. 1.0 kg
Cooling System 13.0 quarts 12.3 L
Engine Oil with Filter 8.0 quarts 7.6 L
Fuel Tank 18.5 gallons 70.0 L
Transaxle 15.0 quarts 14.2 L
Wheel Nut Torque 100 lb-ft 140Y
All capacities are approximate. When adding, be sure to fill to the approximate level as recommended in this
manual. Recheck the fluid level after filling.
5-104