2004 CADILLAC SEVILLE change time
[x] Cancel search: change timePage 224 of 410
Remember: Anti-lock does not change the time you
need to get your foot up to the brake pedal or always
decrease stopping distance. If you get too close to
the vehicle in front of you, you will not have time to apply
your brakes if that vehicle suddenly slows or stops.
Always leave enough room up ahead to stop, even
though you have anti-lock brakes.
Using Anti-Lock
Do not pump the brakes. Just hold the brake pedal
down firmly and let anti-lock work for you. You may hear
the anti-lock pump or motor operate, and feel the
brake pedal pulsate, but this is normal.
Braking in Emergencies
With anti-lock, you can steer and brake at the same
time. In many emergencies, steering can help you more
than even the very best braking.
Traction Control System (TCS)
Your vehicle has a traction control system that limits
wheel spin. This is especially useful in slippery
road conditions. The system operates only if it senses
that one or both of the front wheels are spinning or
beginning to lose traction. When this happens,
the system works the front brakes and reduces engine
power to limit wheel spin.
The TRACTION ENGAGED message will display on the
Driver Information Center when the traction control
system is limiting wheel spin. SeeDIC Warnings and
Messages on page 3-55. You may feel or hear the
system working, but this is normal.
If your vehicle is in cruise control when the traction
control system begins to limit wheel spin, the cruise
control will automatically disengage. When road
conditions allow you to safely use it again, you may
reengage the cruise control. See “Cruise Control” under
Turn Signal/Multifunction Lever on page 3-9.
4-8
Page 227 of 410
Try to adjust your speed so you can “drive” through the
curve. Maintain a reasonable, steady speed. Wait to
accelerate until you are out of the curve, and then
accelerate gently into the straightaway.
To help you steer in the direction you want to go, during
certain sharp or sudden cornering maneuvers, gear
selection is controlled. This will maximize the available
drive wheel torque and minimize the transaxle
response time and shift activity. During this kind of
maneuver, the transaxle shifts automatically as vehicle
speed changes.
Steering in Emergencies
There are times when steering can be more effective
than braking. For example, you come over a hill and find
a truck stopped in your lane, or a car suddenly pulls
out from nowhere, or a child darts out from between
parked cars and stops right in front of you. You
can avoid these problems by braking — if you can stop
in time. But sometimes you can not; there is not
room. That is the time for evasive action — steering
around the problem.
Your vehicle can perform very well in emergencies like
these. First apply your brakes.
SeeBraking on page 4-6. It is better to remove as much
speed as you can from a possible collision. Then
steer around the problem, to the left or right depending
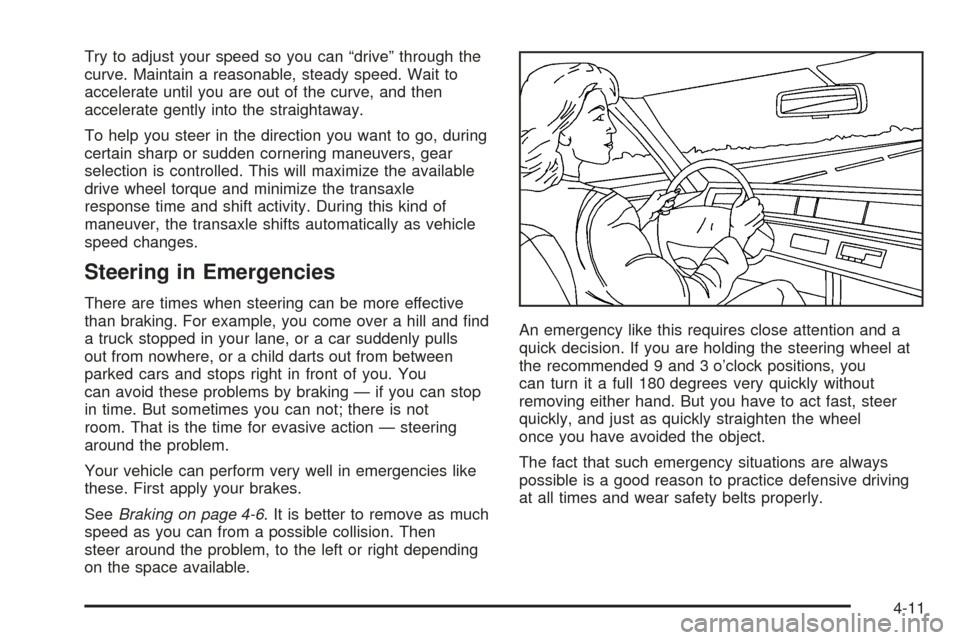
on the space available.An emergency like this requires close attention and a
quick decision. If you are holding the steering wheel at
the recommended 9 and 3 o’clock positions, you
can turn it a full 180 degrees very quickly without
removing either hand. But you have to act fast, steer
quickly, and just as quickly straighten the wheel
once you have avoided the object.
The fact that such emergency situations are always
possible is a good reason to practice defensive driving
at all times and wear safety belts properly.
4-11
Page 229 of 410
•Do not get too close to the vehicle you want to
pass while you are awaiting an opportunity. For one
thing, following too closely reduces your area of
vision, especially if you are following a larger
vehicle. Also, you will not have adequate space if
the vehicle ahead suddenly slows or stops.
Keep back a reasonable distance.
•When it looks like a chance to pass is coming up,
start to accelerate but stay in the right lane and do
not get too close. Time your move so you will be
increasing speed as the time comes to move into the
other lane. If the way is clear to pass, you will have a
“running start” that more than makes up for the
distance you would lose by dropping back. And if
something happens to cause you to cancel your
pass, you need only slow down and drop back again
and wait for another opportunity.
•If other vehicles are lined up to pass a slow vehicle,
wait your turn. But take care that someone is not
trying to pass you as you pull out to pass the slow
vehicle. Remember to glance over your shoulder and
check the blind spot.
•Check your mirrors, glance over your shoulder, and
start your left lane change signal before moving out
of the right lane to pass. When you are far enough
ahead of the passed vehicle to see its front in your
inside mirror, activate your right lane change signal
and move back into the right lane. (Remember that
your right outside mirror is convex. The vehicle you
just passed may seem to be farther away from you
than it really is.)
•Try not to pass more than one vehicle at a time on
two-lane roads. Reconsider before passing the next
vehicle.
•Do not overtake a slowly moving vehicle too rapidly.
Even though the brake lamps are not flashing, it may
be slowing down or starting to turn.
•If you are being passed, make it easy for the
following driver to get ahead of you. Perhaps you can
ease a little to the right.
4-13
Page 253 of 410
Towing a Trailer
{CAUTION:
If you do not use the correct equipment and
drive properly, you can lose control when you
pull a trailer. For example, if the trailer is too
heavy, the brakes may not work well — or even
at all. You and your passengers could be
seriously injured. You may also damage your
vehicle; the resulting repairs would not be
covered by your warranty. Pull a trailer only if
you have followed all the steps in this section.
Ask your dealer for advice and information
about towing a trailer with your vehicle.Your vehicle can tow a trailer if it is equipped with the
proper trailer towing equipment. To identify what
the vehicle trailering capacity is for your vehicle, you
should read the information inWeight of the Trailerthat
appears later in this section. But trailering is different
than just driving your vehicle by itself. Trailering means
changes in handling, durability and fuel economy.
Successful, safe trailering takes correct equipment, and
it has to be used properly.
That is the reason for this part. In it are many
time-tested, important trailering tips and safety rules.
Many of these are important for your safety and that of
your passengers. So please read this section carefully
before you pull a trailer.
Load-pulling components such as the engine, transaxle,
wheel assemblies and tires are forced to work harder
against the drag of the added weight. The engine
is required to operate at relatively higher speeds and
under greater loads, generating extra heat. What
is more, the trailer adds considerably to wind resistance,
increasing the pulling requirements.
4-37
Page 276 of 410
Notice:Use only engine oil identified as meeting
GM Standard GM6094M and showing the American
Petroleum Institute Certified For Gasoline Engines
starburst symbol. Failure to use the recommended
oil can result in engine damage not covered by
your warranty.
GM Goodwrench
®oil meets all the requirements for
your vehicle.
If you are in an area of extreme cold, where the
temperature falls below−20°F (−29°C), it is
recommended that you use either an SAE 5W-30
synthetic oil or an SAE 0W-30 oil. Both will provide
easier cold starting and better protection for your engine
at extremely low temperatures.
Engine Oil Additives
Do not add anything to your oil. The recommended oils
with the starburst symbol that meet GM Standard
GM6094M are all you will need for good performance
and engine protection.
When to Change Engine Oil
(GM Oil Life System)
Your vehicle has a computer system that lets you know
when to change the engine oil and filter. This is based on
engine revolutions and engine temperature, and not on
mileage. Based on driving conditions, the mileage at
which an oil change will be indicated can vary
considerably. For the oil life system to work properly, you
must reset the system every time the oil is changed.
When the system has calculated that oil life has been
diminished, it will indicate that an oil change is
necessary. A CHANGE ENGINE OIL message in the
Driver Information Center (DIC) will come on. Change
your oil as soon as possible within the next two
times you stop for fuel. It is possible that, if you are
driving under the best conditions, the oil life system may
not indicate that an oil change is necessary for over a
year. However, your engine oil and filter must be
changed at least once a year and at this time the system
must be reset. Your dealer has GM-trained people
who will perform this work using genuine GM parts and
reset the system. It is also important to check your
oil regularly and keep it at the proper level.
If the system is ever reset accidentally, you must
change your oil at 3,000 miles (5 000 km) since your
last oil change. Remember to reset the oil life system
whenever the oil is changed.
5-16
Page 277 of 410
How to Reset the CHANGE ENGINE OIL
Message
The GM Oil Life System calculates when to change
your engine oil and filter based on vehicle use. Anytime
your oil is changed, reset the system so it can
calculate when the next oil change is required. If a
situation occurs where you change your oil prior to a
CHANGE ENGINE OIL message in the Driver
Information Center (DIC) being turned on, reset
the system.
After the oil has been changed, the CHANGE ENGINE
OIL message must be reset. To reset the message,
do the following:
1. Turn the key to the ON position without starting the
engine.
2. Press the INFO button on the Driver Information
Center (DIC) until ENGINE OIL LIFE is displayed.
3. Press and hold the INFO RESET button until 100%
ENGINE OIL LIFE is displayed. This resets the oil
life indicator.
4. Turn the key to OFF.
If the CHANGE ENGINE OIL message comes back on
when you start your vehicle, the engine oil life system
has not reset. Repeat the procedure.The percentage of oil life remaining may be checked at
any time by pressing the INFO button until ENGINE
OIL LIFE is displayed on the DIC. For more information
on the oil life indicator, seeOil Life Indicator on
page 3-74.
What to Do with Used Oil
Used engine oil contains certain elements that may be
unhealthy for your skin and could even cause cancer.
Do not let used oil stay on your skin for very long. Clean
your skin and nails with soap and water, or a good
hand cleaner. Wash or properly dispose of clothing or
rags containing used engine oil. See the manufacturer’s
warnings about the use and disposal of oil products.
Used oil can be a threat to the environment. If you
change your own oil, be sure to drain all the oil from the
filter before disposal. Never dispose of oil by putting it
in the trash, pouring it on the ground, into sewers, or into
streams or bodies of water. Instead, recycle it by
taking it to a place that collects used oil. If you have a
problem properly disposing of your used oil, ask
your dealer, a service station or a local recycling center
for help.
5-17
Page 280 of 410
Follow these steps to reinstall the engine air
cleaner/filter assembly:
1. Slide the cover into the slots in the bottom of
the base.
2. Close the cover and make sure that both latches
are secure and fully engaged.
3. Reinstall the clean air duct over the mass airflow
sensor. Make sure that the duct is secure around
the entire outer edge of the sensor.
4. Tighten the air duct clamp.
{CAUTION:
Operating the engine with the air cleaner/filter off
can cause you or others to be burned. The air
cleaner not only cleans the air, it helps to stop
flame if the engine backfires. If it is not there and
the engine backfires, you could be burned. Do
not drive with it off, and be careful working on
the engine with the air cleaner/filter off.
Notice:If the air cleaner/filter is off, a backfire can
cause a damaging engine fire. And, dirt can
easily get into your engine, which will damage it.
Always have the air cleaner/filter in place when you
are driving.
Automatic Transaxle Fluid
When to Check and Change
A good time to check your automatic transaxle fluid
level is when the engine oil is changed.
Change both the fluid and filter every 50,000 miles
(83 000 km) if the vehicle is mainly driven under one or
more of these conditions:
•In heavy city traffic where the outside temperature
regularly reaches 90° F (32° C) or higher.
•In hilly or mountainous terrain.
•When doing frequent trailer towing.
•Uses such as found in taxi, police or delivery
service.
If you do not use your vehicle under any of these
conditions, the fluid and filter do not require change until
the message CHANGE TRANS FLUID appears on
the Driver Information Center.
SeeScheduled Maintenance on page 6-4.
5-20
Page 283 of 410
How to Add Fluid
Refer to the Maintenance Schedule to determine what
kind of transaxle fluid to use. SeeRecommended Fluids
and Lubricants on page 6-12.
If the fluid level is low, add only enough of the proper
fluid to bring the level into the cross-hatched area on the
dipstick.
1. Pull out the dipstick.
2. Using a long-neck funnel, add enough fluid at the
dipstick hole to bring it to the proper level.
It does not take much fluid, generally less than one
pint (0.5 L). Do not overfill.
Notice:Use of automatic transaxle fluid labeled
other than DEXRON
®-III may damage your vehicle,
and the damages may not be covered by your
warranty. Always use DEXRON
®-III labeled automatic
transaxle fluid.
3. After adding fluid, recheck the fluid level as
described underHow to Check.
4. When the correct fluid level is obtained, push the
dipstick back in all the way and turn the handle
clockwise. Reinstall the engine air cleaner/filter
assembly.
How to Reset the Transaxle Fluid
Change Indicator
Once the transaxle fluid has been changed, the
transaxle fluid change indicator must be reset. Use the
following steps to reset the indicator:
1. Press the INFO button on the Driver Information
Center (DIC) until TRANS FLUID LIFE is displayed.
2. Press and hold the INFO RESET button until 100%
is displayed.
The indicator is now reset. The percentage of transaxle
fluid life remaining may be checked at any time by
pressing the INFO button several times until the TRANS
FLUID LIFE message appears.
Engine Coolant
The cooling system in your vehicle is filled with
DEX-COOL®engine coolant. This coolant is designed
to remain in your vehicle for 5 years or 150,000 miles
(240 000 km), whichever occurs first, if you add
only DEX-COOL
®extended life coolant.
The following explains your cooling system and how to
add coolant when it is low. If you have a problem
with engine overheating, seeEngine Overheating on
page 5-26.
5-23