2004 CADILLAC SEVILLE horn
[x] Cancel search: hornPage 64 of 410
Remote Keyless Entry System
Operation
With this system you can lock and unlock your doors or
unlock your trunk from about 3 feet (1 m) up to 30 feet
(9 m) away using the remote keyless entry transmitter
supplied with your vehicle.
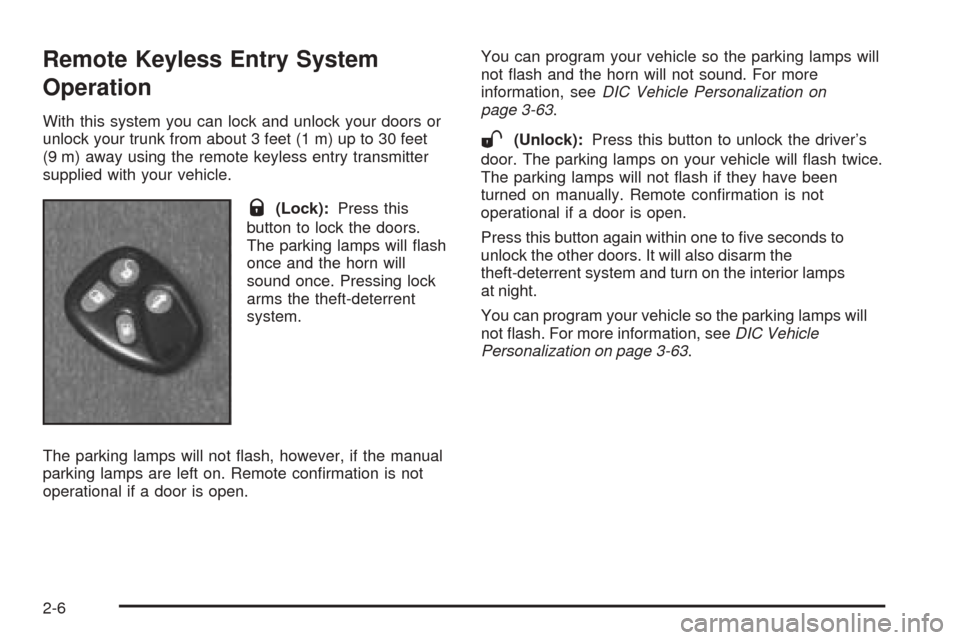
Q(Lock):Press this
button to lock the doors.
The parking lamps will flash
once and the horn will
sound once. Pressing lock
arms the theft-deterrent
system.
The parking lamps will not flash, however, if the manual
parking lamps are left on. Remote confirmation is not
operational if a door is open.You can program your vehicle so the parking lamps will
not flash and the horn will not sound. For more
information, seeDIC Vehicle Personalization on
page 3-63.
W(Unlock):Press this button to unlock the driver’s
door. The parking lamps on your vehicle will flash twice.
The parking lamps will not flash if they have been
turned on manually. Remote confirmation is not
operational if a door is open.
Press this button again within one to five seconds to
unlock the other doors. It will also disarm the
theft-deterrent system and turn on the interior lamps
at night.
You can program your vehicle so the parking lamps will
not flash. For more information, seeDIC Vehicle
Personalization on page 3-63.
2-6
Page 78 of 410
Theft-Deterrent Systems
Vehicle theft is a big business, especially in some cities.
Although your vehicle has a number of theft-deterrent
features, we know that nothing we put on it can make it
impossible to steal.
The SECURITY light is
located on the instrument
panel cluster.
If the ignition is off and any door is open, the SECURITY
light will flash, reminding you to arm the system.
To arm the system, do the following:
1. Open the door.
2. Lock the door using the power door lock switch with
the door open or the remote keyless entry
transmitter. The SECURITY light should come on
and stay on.
3. Close all the doors. The SECURITY light should go
off within approximately 30 seconds.If a door or a trunk is opened without a key or a remote
keyless entry transmitter, the horn will sound and the
lamps will flash for about 30 seconds.
Remember, the theft-deterrent system will not arm if you
lock the doors with a key or use the manual door
lock. It activates only if you use a power door lock with
the door open or the remote keyless entry transmitter.
To avoid activating the alarm by accident do the
following:
•The vehicle should be locked with the door key or
the manual door lock after the doors are closed if
you do not want to arm the theft-deterrent system.
•Always unlock a door with a key or use the remote
keyless entry transmitter. Pressing the unlock
button on the remote keyless entry transmitter
disables the theft-deterrent system. Unlocking a
door any other way will activate the alarm when a
door or the trunk is opened.
If you activate the alarm by accident, unlock the driver’s
door with your key. You can also turn off the alarm
by using the unlock button on the remote keyless entry
transmitter, or by starting the car with a valid key.
Changes or modifications made to this system by other
than an authorized service facility could void
authorization to use the theft system.
2-20
Page 79 of 410
Testing the Alarm
1. From inside the vehicle, roll down the window, then
get out of the vehicle, keeping the door open.
2. From outside of the vehicle, with the door open, lock
the vehicle using the power door lock or the remote
keyless entry transmitter and close the door. Wait 30
seconds until the SECURITY lamp goes off.
3. Reach in and unlock the door using the manual
lock and open the door. The horn will sound and
the hazard lights will flash.
You can turn off the alarm by unlocking the driver’s door
with your key, using the unlock button on the remote
keyless entry transmitter or by starting the car with
a valid key.
If the alarm does not sound when it should, check to
see if the horn works. The horn fuse may be blown. To
replace the fuse, seeFuses and Circuit Breakers on
page 5-97. If the fuse does not need to be replaced, you
may need to have your vehicle serviced.
To reduce the possibility of theft, always arm the
theft-deterrent system when leaving your vehicle.
Valet Lockout Switch
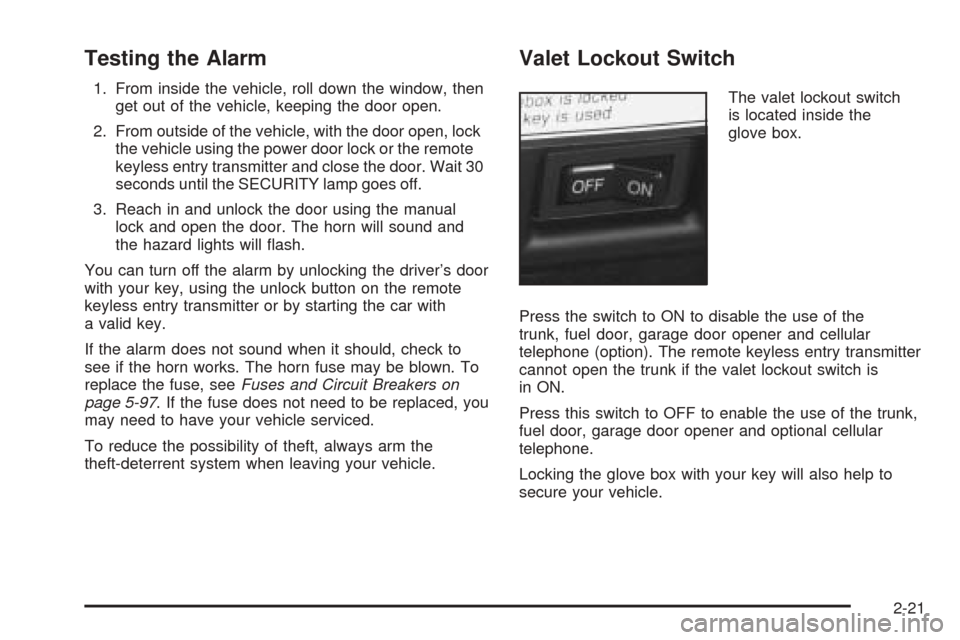
The valet lockout switch
is located inside the
glove box.
Press the switch to ON to disable the use of the
trunk, fuel door, garage door opener and cellular
telephone (option). The remote keyless entry transmitter
cannot open the trunk if the valet lockout switch is
in ON.
Press this switch to OFF to enable the use of the trunk,
fuel door, garage door opener and optional cellular
telephone.
Locking the glove box with your key will also help to
secure your vehicle.
2-21
Page 113 of 410
Instrument Panel Overview...............................3-4
Hazard Warning Flashers................................3-6
Other Warning Devices...................................3-7
Horn.............................................................3-7
Tilt Wheel.....................................................3-7
Turn Signal/Multifunction Lever.........................3-9
Exterior Lamps.............................................3-16
Interior Lamps..............................................3-22
Ultrasonic Rear Parking Assist (URPA)............3-24
Accessory Power Outlets...............................3-26
Ashtrays and Cigarette Lighter........................3-27
Climate Controls............................................3-28
Dual Climate Control System..........................3-28
Outlet Adjustment.........................................3-33
Rear Climate Control System.........................3-34
Passenger Compartment Air Filter...................3-35
Steering Wheel Climate Controls.....................3-36
Climate Controls Personalization.....................3-36
Warning Lights, Gages and Indicators.............3-37
Warning Lights, Gages, and Indicators.............3-37
Instrument Panel Cluster................................3-38
Speedometer and Odometer...........................3-39
Tachometer.................................................3-40
Safety Belt Reminder Light.............................3-41Air Bag Readiness Light................................3-41
Charging System Light..................................3-42
Brake System Warning and Parking Brake
Indicator Light...........................................3-43
Anti-Lock Brake System Warning Light.............3-44
Traction Control System (TCS) Warning Light......3-44
Engine Coolant Temperature Warning Light......3-45
Engine Coolant Temperature Gage..................3-45
Malfunction Indicator Lamp.............................3-46
Oil Pressure Light.........................................3-49
Security Light...............................................3-50
Fog Lamp Light............................................3-50
Lights On Reminder......................................3-50
Cruise Control Light......................................3-50
Fuel Gage...................................................3-51
Driver Information Center (DIC).......................3-52
DIC Controls and Displays.............................3-52
DIC Warnings and Messages.........................3-55
Climate Controls and Radio System
Personalization..........................................3-62
DIC Vehicle Personalization............................3-63
Trip Computer................................................3-74
Oil Life Indicator...........................................3-74
Section 3 Instrument Panel
3-1
Page 117 of 410
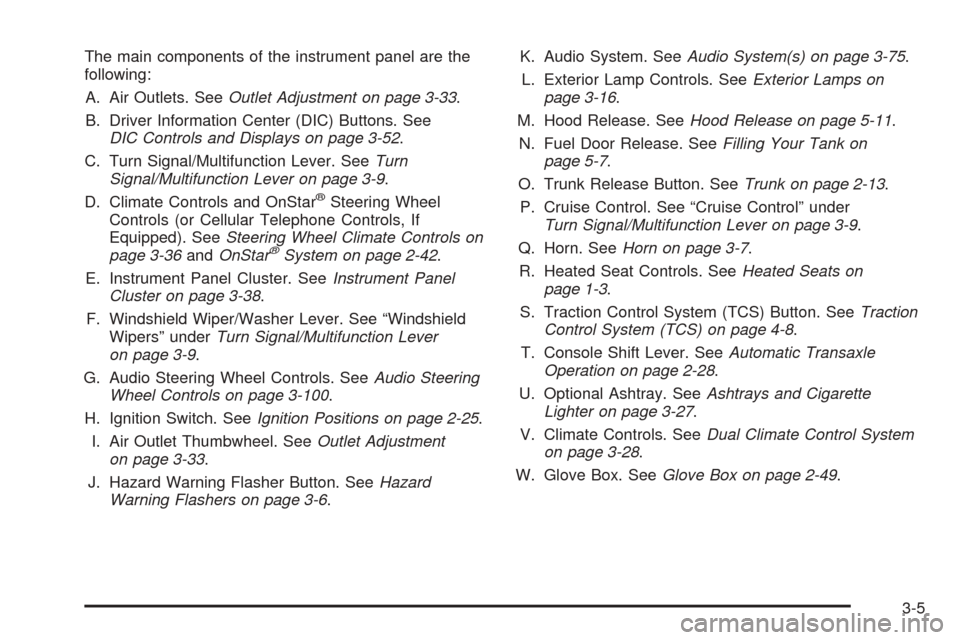
The main components of the instrument panel are the
following:
A. Air Outlets. SeeOutlet Adjustment on page 3-33.
B. Driver Information Center (DIC) Buttons. See
DIC Controls and Displays on page 3-52.
C. Turn Signal/Multifunction Lever. SeeTurn
Signal/Multifunction Lever on page 3-9.
D. Climate Controls and OnStar
®Steering Wheel
Controls (or Cellular Telephone Controls, If
Equipped). SeeSteering Wheel Climate Controls on
page 3-36andOnStar
®System on page 2-42.
E. Instrument Panel Cluster. SeeInstrument Panel
Cluster on page 3-38.
F. Windshield Wiper/Washer Lever. See “Windshield
Wipers” underTurn Signal/Multifunction Lever
on page 3-9.
G. Audio Steering Wheel Controls. SeeAudio Steering
Wheel Controls on page 3-100.
H. Ignition Switch. SeeIgnition Positions on page 2-25.
I. Air Outlet Thumbwheel. SeeOutlet Adjustment
on page 3-33.
J. Hazard Warning Flasher Button. SeeHazard
Warning Flashers on page 3-6.K. Audio System. SeeAudio System(s) on page 3-75.
L. Exterior Lamp Controls. SeeExterior Lamps on
page 3-16.
M. Hood Release. SeeHood Release on page 5-11.
N. Fuel Door Release. SeeFilling Your Tank on
page 5-7.
O. Trunk Release Button. SeeTrunk on page 2-13.
P. Cruise Control. See “Cruise Control” under
Turn Signal/Multifunction Lever on page 3-9.
Q. Horn. SeeHorn on page 3-7.
R. Heated Seat Controls. SeeHeated Seats on
page 1-3.
S. Traction Control System (TCS) Button. SeeTraction
Control System (TCS) on page 4-8.
T. Console Shift Lever. SeeAutomatic Transaxle
Operation on page 2-28.
U. Optional Ashtray. SeeAshtrays and Cigarette
Lighter on page 3-27.
V. Climate Controls. SeeDual Climate Control System
on page 3-28.
W. Glove Box. SeeGlove Box on page 2-49.
3-5
Page 119 of 410
Other Warning Devices
If you carry reflective triangles, you can set one up at
the side of the road about 300 feet (100 m) behind your
vehicle.
Horn
The horn can be sounded by pressing on the center of
the steering wheel pad.
Tilt Wheel
A tilt wheel allows you to adjust the steering wheel
before you drive. You can raise the steering wheel to
the highest level to give your legs more room when you
enter and exit the vehicle.
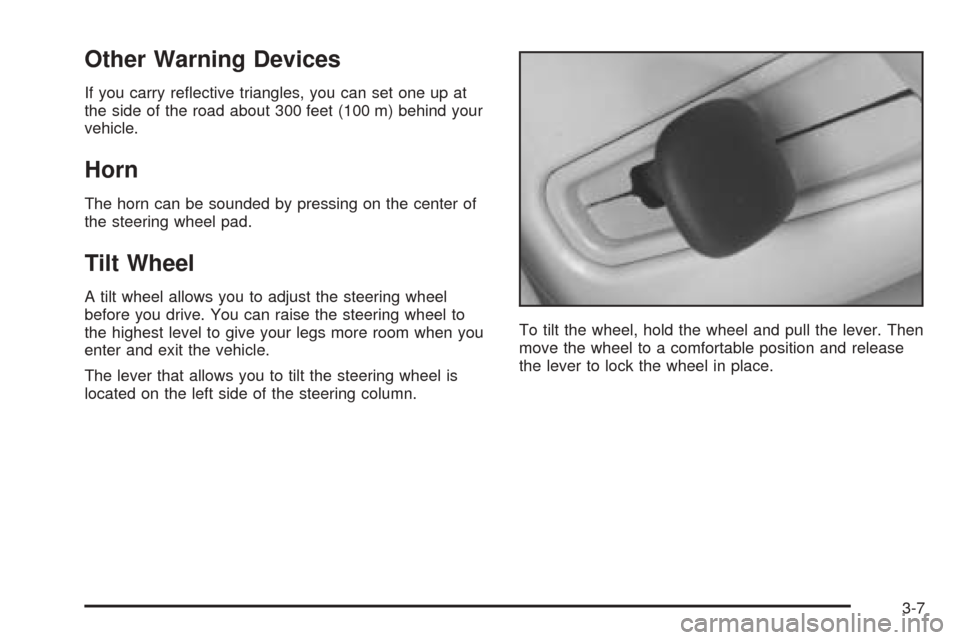
The lever that allows you to tilt the steering wheel is
located on the left side of the steering column.To tilt the wheel, hold the wheel and pull the lever. Then
move the wheel to a comfortable position and release
the lever to lock the wheel in place.
3-7
Page 180 of 410
Horn Sounds at Lock
This feature sounds the horn once when the remote
keyless entry transmitter is used to lock the vehicle. All
doors must be closed for this feature to work.
Programmable Modes
Mode 1:ON
Mode 2:OFF
Before your vehicle was shipped from the factory, it was
programmed to Mode 2. The mode to which the
vehicle was programmed may have been changed since
it left the factory. To determine the mode to which the
vehicle is programmed or to program the vehicle to
a different mode, do the following:
1. Enter FEATURE PROGRAMMING following the
instructions listed previously.
2. Press the down arrow on the INFO button until
HORN SOUNDS AT LOCK appears on the DIC
display.
3. To turn on the feature, press the ON/OFF button
until ON appears on the DIC display. To turn it off,
press the ON/OFF button until OFF appears on
the display.The mode you selected is now set. You can either exit
the programming mode by following the instructions
later in this section or program the next feature available
on your vehicle.
Exterior Lights at Unlock
This feature turns on the exterior lamps when the
remote keyless entry transmitter is used to unlock the
vehicle. The lamps will remain on for about 20 seconds
unless a door is opened, the ignition is turned to
ACCESSORY, ON or START or the remote keyless
entry transmitter is used to lock the vehicle.
Programmable Modes
Mode 1:ON
Mode 2:OFF
Before your vehicle was shipped from the factory, it was
programmed to Mode 1. The mode to which the
vehicle was programmed may have been changed since
it left the factory. To determine the mode to which the
vehicle is programmed or to program the vehicle to
a different mode, do the following:
1. Enter FEATURE PROGRAMMING following the
instructions listed previously.
2. Press the down arrow on the INFO button until EXT
LIGHTS AT UNLOCK appears on the DIC display.
3-68
Page 358 of 410
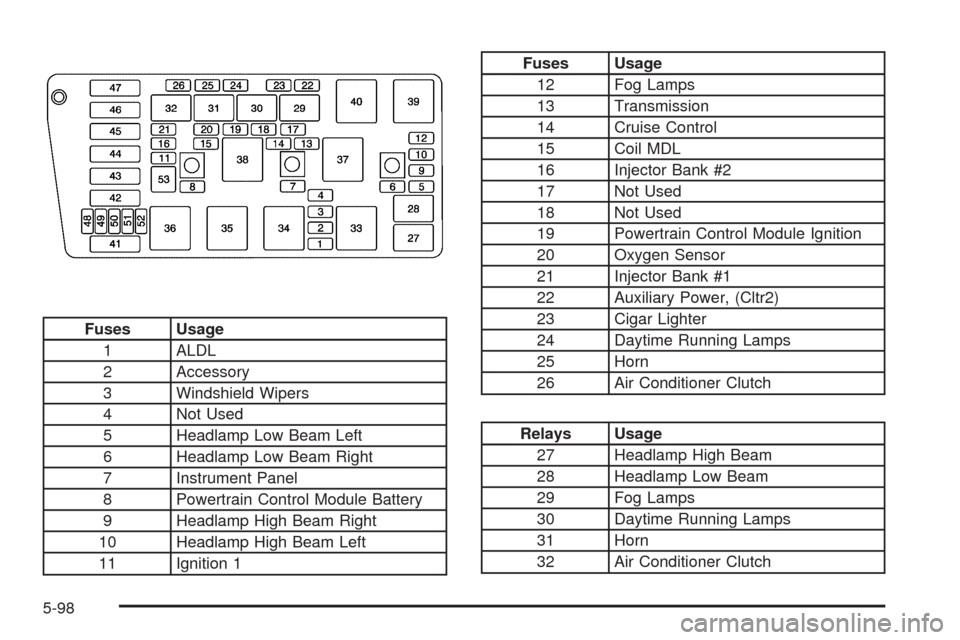
Fuses Usage
1 ALDL
2 Accessory
3 Windshield Wipers
4 Not Used
5 Headlamp Low Beam Left
6 Headlamp Low Beam Right
7 Instrument Panel
8 Powertrain Control Module Battery
9 Headlamp High Beam Right
10 Headlamp High Beam Left
11 Ignition 1
Fuses Usage
12 Fog Lamps
13 Transmission
14 Cruise Control
15 Coil MDL
16 Injector Bank #2
17 Not Used
18 Not Used
19 Powertrain Control Module Ignition
20 Oxygen Sensor
21 Injector Bank #1
22 Auxiliary Power, (Cltr2)
23 Cigar Lighter
24 Daytime Running Lamps
25 Horn
26 Air Conditioner Clutch
Relays Usage
27 Headlamp High Beam
28 Headlamp Low Beam
29 Fog Lamps
30 Daytime Running Lamps
31 Horn
32 Air Conditioner Clutch
5-98