2004 CADILLAC SEVILLE ECO mode
[x] Cancel search: ECO modePage 68 of 410
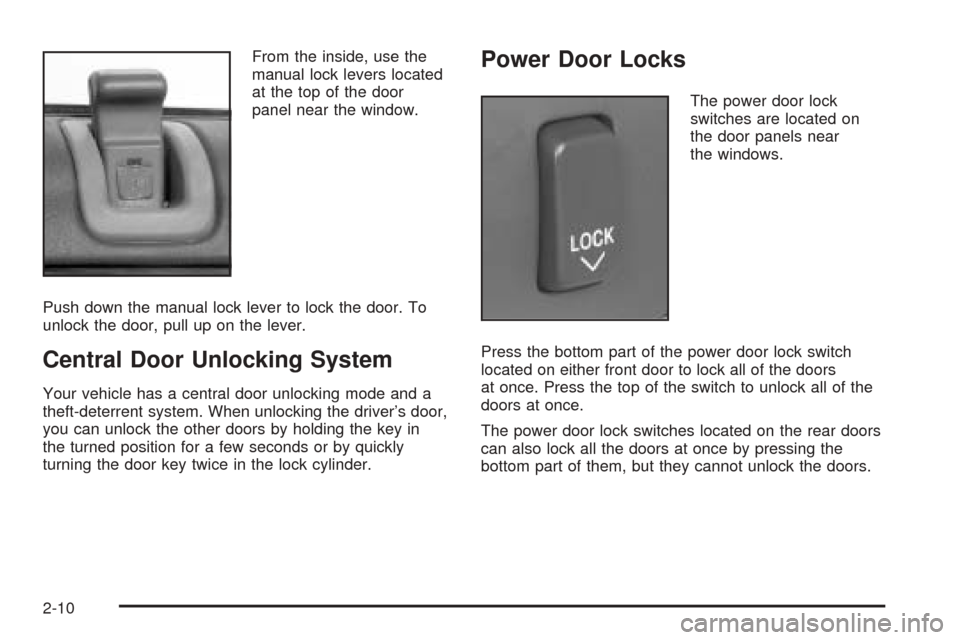
From the inside, use the
manual lock levers located
at the top of the door
panel near the window.
Push down the manual lock lever to lock the door. To
unlock the door, pull up on the lever.
Central Door Unlocking System
Your vehicle has a central door unlocking mode and a
theft-deterrent system. When unlocking the driver’s door,
you can unlock the other doors by holding the key in
the turned position for a few seconds or by quickly
turning the door key twice in the lock cylinder.
Power Door Locks
The power door lock
switches are located on
the door panels near
the windows.
Press the bottom part of the power door lock switch
located on either front door to lock all of the doors
at once. Press the top of the switch to unlock all of the
doors at once.
The power door lock switches located on the rear doors
can also lock all the doors at once by pressing the
bottom part of them, but they cannot unlock the doors.
2-10
Page 96 of 410
Automatic Dimming Rearview Mirror
with OnStar
®and Compass
Your vehicle may have an automatic dimming rearview
mirror with a compass display. The mirror also
contains OnStar
®controls. For more information see
OnStar®System on page 2-42.
The automatic dimming feature functions the same as
that of the automatic dimming rearview mirror without a
compass. SeeAutomatic Dimming Rearview Mirror
with OnStar
®on page 2-37.
The mirror also includes an eight-point compass display
in the upper right corner of the mirror face. When on,
the compass automatically calibrates as the vehicle
is driven.
Mirror Operation
O
(On/Off):Press and hold the button, located on the
lower left side of the mirror face, for about three
seconds to turn the automatic dimming feature on or off.
The indicator light will illuminate when this feature is
active. The automatic dimming feature is active
each time the vehicle is started.
Compass Operation
Press the on/off button once to turn the compass on
or off.
When the ignition and the compass feature are on, the
compass will show two character boxes for about
two seconds. After two seconds, the mirror will display
the compass heading.
Compass Calibration
If after two seconds, the display does not show a
compass heading (for example, N for North), there may
be a strong magnetic field interfering with the compass.
Such interference may be caused by a magnetic antenna
mount, magnetic note pad holder or a similar magnetic
item. If the letter C should ever appear in the compass
window, the compass may need calibration.
The mirror can be calibrated by driving the vehicle in
circles at 5 mph (8 km/h) or less until the display reads a
direction.
The compass can be placed in calibration mode
manually by pressing and holding the on/off button until
a C is shown in the compass display.
2-38
Page 103 of 410
If your vehicle is equipped with the HomeLink®
Transmitter, it complies with Part 15 of the FCC Rules.
Operation is subject to the following two conditions:
(1) this device may not cause harmful interference, and
(2) this device must accept any interference received,
including interference that may cause undesired
operation.
This device complies with RSS-210 of Industry Canada.
Operation is subject to the following two conditions:
(1) this device may not cause interference, and (2) this
device must accept any interference, including
interference that may cause undesired operation of the
device.
Changes and modifications to this system by other than
an authorized service facility could void authorization
to use this equipment.Programming the HomeLink®
Transmitter
Do not use the HomeLink®Transmitter with any garage
door opener that does not have the “stop and reverse”
feature. This includes any garage door opener model
manufactured before April 1, 1982. If you have a newer
garage door opener with rolling codes, please be
sure to follow steps 6 through 8 to complete the
programming of your HomeLink
®Transmitter.
Read the instructions completely before attempting to
program the HomeLink
®Transmitter. Because of
the steps involved, it may be helpful to have another
person available to assist you in programming the
transmitter.
Keep the original transmitter for use in other vehicles as
well as for future HomeLink
®programming. It is also
recommended that upon the sale of the vehicle,
the programmed HomeLink
®buttons should be erased
for security purposes. Refer to “Erasing HomeLink®
Buttons” or, for assistance, contact HomeLink®on the
internet at: www.homelink.com or by calling
1-800-355-3515.
2-45
Page 106 of 410
Using HomeLink®
Press and hold the appropriate HomeLink®button for at
least half of a second. The indicator light will come
on while the signal is being transmitted.
Erasing HomeLink®Buttons
To erase programming from the three buttons do the
following:
1. Press and hold down the two outside buttons until
the indicator light begins to flash, after 20 seconds.
2. Release both buttons. Do not hold for longer than
30 seconds.
HomeLink
®is now in the train (learning) mode and can
be programmed at any time beginning with Step 2
under “Programming HomeLink
®.”
Individual buttons can not be erased, but they can be
reprogrammed. See “Reprogramming a Single
HomeLink
®Button” next.
Reprogramming a Single HomeLink®
Button
To program a device to HomeLink®using a HomeLink®
button previously trained, follow these steps:
1. Press and hold the desired HomeLink
®button. Do
not release the button.
2. The indicator light will begin to flash after
20 seconds. While still holding the HomeLink
®
button, proceed with Step 2 under “Programming
HomeLink®.”
Resetting Defaults
To reset HomeLink®to default settings do the following:
1. Hold down the two outside buttons for about
20 seconds until the indicator light begins to flash.
2. Continue to hold both buttons until the HomeLink
®
indicator light turns off.
3. Release both buttons.
For questions or comments, contact HomeLink
®at
1-800-355-3515, or on the internet at
www.homelink.com.
2-48
Page 142 of 410
?(Recirculation):This mode keeps outside air
from coming in the vehicle. It can be used to prevent
outside air and odors from entering your vehicle or
to help heat or cool the air inside your vehicle more
quickly. Press this button to turn the recirculation mode
on or off. When the button is pressed, an indicator
light will come on. The air-conditioning compressor also
comes on.
TEMP (Driver’s Temperature Knob):Press this knob
to turn the climate control system on or off. Turn this
knob clockwise or counterclockwise to manually
increase or decrease the temperature inside your
vehicle.
TEMP (Passenger’s Temperature Knob):Press this
knob to turn the passengers’ climate control system
controls on or off. Turn this knob to manually increase
or decrease the temperature for the front passenger.
If the passenger’s climate controls are turned off,
the driver’s temperature knob will control the
temperature for the entire vehicle.
A/C (Air Conditioning):Press this button to override
the automatic system and turn the air-conditioning
system on or off. When in AUTO the air-conditioning
compressor will come on automatically, as necessary.On hot days, open the windows to let hot inside air
escape; then close them. This helps to reduce the time
it takes for your vehicle to cool down. It also helps
the system to operate more efficiently.
For quick cool down on hot days:
1. Select the vent mode.
2. Select the recirculation mode.
3. Select A/C.
4. Select the coolest temperature.
5. Select the highest fan speed.
6. Open all outlets.
Using these settings together for long periods of time
may cause the air inside your vehicle to become too dry.
To prevent this from happening, after the air in your
vehicle has cooled, turn the recirculation mode off.
The air-conditioning system removes moisture from the
air, so you may sometimes notice a small amount of
water dripping underneath your vehicle while idling
or after turning off the engine. This is normal.
If your vehicle has the memory option, it can be used to
recall your climate control settings. For more information,
seeClimate Controls Personalization on page 3-36.
3-30
Page 151 of 410
Speedometer and Odometer
The speedometer lets you see your speed in both
miles per hour (mph) and kilometers per hour (km/h).
The odometer shows how far your vehicle has
been driven, in either miles (used in the United States)
or kilometers (used in Canada).
You may wonder what happens if a vehicle has to have
a new odometer installed. The new one may read
the correct mileage. This is because your vehicle’s
computer has stored the mileage in memory.
Trip Odometers
The trip odometer can record the number of miles or
kilometers traveled for up to two trips.
The trip odometer button is
located to the left of the
steering wheel on the
instrument panel.
The two trip modes are indicated by Trip A and Trip B.
In order to change from one mode to the other,
press the A/B portion of the TRIP button.By pressing the bottom of this button, you can tell how
many miles have been recorded on either Trip A or
Trip B since you last set the odometer back to zero.
Press the RESET part of the button until zeros appear
to reset each trip mode.
If your vehicle is first sold in the United States, the trip
odometer will return to zero after 999.9 miles
(1 609 km). If your vehicle is first sold in Canada, the
trip odometer will return to zero after 1 999.9 km
(1,242 miles). The RESET TRIP A/B button only resets
the trip mode (A or B) that is being displayed. Each
trip mode must be reset individually.Display Mode
This button is located
between the RESET TRIP
A/B button and the
ENG/MET button to the left
of the steering wheel on
the instrument panel.
Press DSPL MODE to turn the backlighting and the
digital speed image on and off.
3-39
Page 166 of 410
MILES RANGE:This message shows about how many
miles you can drive without refilling your fuel tank.
Once the range drops below 40 miles (64 km) remaining,
the display will show LOW.
MPG INST (Instantaneous Miles per Gallon):This
message shows the instantaneous fuel economy which
varies with your driving conditions, such as acceleration,
braking and the grade of the road being traveled.
The INFO RESET button does not function in this mode.
BATTERY VOLTS:This message shows the current
battery voltage. If the voltage is normal the display
will show BATTERY VOLTS OK. If the voltage drops
below 10.5 volts, the display will show BATTERY
VOLTS LOW. If the voltage is above 16 volts, the
display will show BATTERY VOLTS HIGH. If the display
shows the high or low message, you will need to
have your battery checked. SeeDIC Warnings and
Messages on page 3-55for more information.LF-RF-LR-RR TIRE (If Equipped):On vehicles
equipped with the tire pressure monitor, this message
shows the tire pressure for each tire (left front, right
front, left rear and right rear). Pressing the INFO button
will scroll through the tire pressure for each of the
four tires, such as the following:
•34 PSI LF TIRE OK or
•234 kPa LF TIRE OK
If a tire pressure is below 25 PSI (172 kPa) or above
38 PSI (265 kPa), the message will appear as shown
above except it will show TIRE LOW or TIRE HIGH as
appropriate. If desired, the tire pressure information
can be programmed not to appear when using the INFO
button to scroll through the DIC displays. SeeDIC
Vehicle Personalization on page 3-63.
If a low or high tire pressure is detected by the system
while driving, a CHECK TIRE PRESSURE message
will appear in the display. If this occurs, press the INFO
button to scroll to the tire(s) with a low or high
pressure condition. SeeDIC Warnings and Messages
on page 3-55for more information.
ENG/MET (English/Metric):Press this button to
display information in the English (miles) or metric
(kilometers) system.
3-54
Page 180 of 410
Horn Sounds at Lock
This feature sounds the horn once when the remote
keyless entry transmitter is used to lock the vehicle. All
doors must be closed for this feature to work.
Programmable Modes
Mode 1:ON
Mode 2:OFF
Before your vehicle was shipped from the factory, it was
programmed to Mode 2. The mode to which the
vehicle was programmed may have been changed since
it left the factory. To determine the mode to which the
vehicle is programmed or to program the vehicle to
a different mode, do the following:
1. Enter FEATURE PROGRAMMING following the
instructions listed previously.
2. Press the down arrow on the INFO button until
HORN SOUNDS AT LOCK appears on the DIC
display.
3. To turn on the feature, press the ON/OFF button
until ON appears on the DIC display. To turn it off,
press the ON/OFF button until OFF appears on
the display.The mode you selected is now set. You can either exit
the programming mode by following the instructions
later in this section or program the next feature available
on your vehicle.
Exterior Lights at Unlock
This feature turns on the exterior lamps when the
remote keyless entry transmitter is used to unlock the
vehicle. The lamps will remain on for about 20 seconds
unless a door is opened, the ignition is turned to
ACCESSORY, ON or START or the remote keyless
entry transmitter is used to lock the vehicle.
Programmable Modes
Mode 1:ON
Mode 2:OFF
Before your vehicle was shipped from the factory, it was
programmed to Mode 1. The mode to which the
vehicle was programmed may have been changed since
it left the factory. To determine the mode to which the
vehicle is programmed or to program the vehicle to
a different mode, do the following:
1. Enter FEATURE PROGRAMMING following the
instructions listed previously.
2. Press the down arrow on the INFO button until EXT
LIGHTS AT UNLOCK appears on the DIC display.
3-68