Page 5 of 162
i3Introduction
Maintenance .................. 83
Toolkit ........................... 85
Engine oil ...................... 86
Coolant ......................... 88
Brakes ........................... 89
Clutch ........................... 93
Wheels .......................... 94
Front-wheel stand ....... 103
Rear wheel stand ........ 104
Bulbs ........................... 105
Jump starting .............. 111
Battery ........................ 112
Splash guard ............... 116
Care .............................. 117
Cleaning and care ..... 118
Laying up .................... 120
Restoring to use .......... 121
Technical data ............. 123
Bolt connections ......... 124
Tyre pressures .......... 126
Engine ......................... 127
Power transmission ..... 128
Frame and
suspension .................. 129Wheels and tyres ......... 131
Fuel and lubricants ...... 132
Electrical system.......... 135
Dimensions and
weights ........................ 137
Riding specifications ... 138
Service .......................... 139
BMW Motorrad
service ........................ 140
Confirmation of
maintenance work ...... 143
Confirmation of
service ........................ 147
Index ........................... 149
Page 11 of 162
19Overview
General view, left side1Vertical aim adjustment
(
b 38) beneath instrument
cluster
2Clutch fluid reservoir
(b 93)
3Adjusting the rear spring
preload (
b 43)
4Helmet holder (
b 41)
under seat
5Seat lock (
b 40)
beneath rear light
6Rear shock absorber
adjustment (b 44)
7Power socket (b 74)
8Coolant filler aperture
(
b 88)
Page 38 of 162
Operation336
» Hour display 2 starts to flash.
• Press button1 briefly.
» The hours are incremented
upwards with every touch.
• Press button1 for longer
than 2 seconds.
»Minute display 3 starts to
flash.
• Press button1 briefly.
» The minutes are incre-
mented upwards with every
touch.
• Press button1 for longer
than 2 seconds.
» Adjustment completed.
Handlebar leversAdjusting the clutch lever
Adjusting the clutch lever
while the motorcycle is
being ridden can lead to acci-
dents. Adjust the clutch lever
only when the motorcycle is
stationary.c
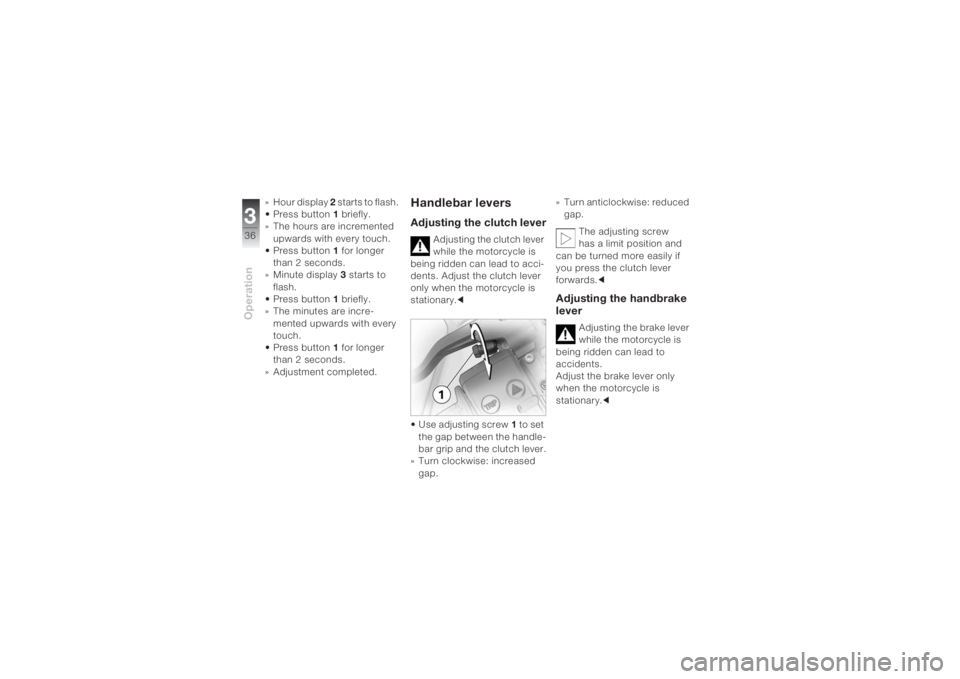
• Use adjusting screw1 to set
the gap between the handle-
bar grip and the clutch lever.
» Turn clockwise: increased
gap.» Turn anticlockwise: reduced
gap.
The adjusting screw
has a limit position and
can be turned more easily if
you press the clutch lever
forwards.c
Adjusting the handbrake
lever
Adjusting the brake lever
while the motorcycle is
being ridden can lead to
accidents.
Adjust the brake lever only
when the motorcycle is
stationary.c
Page 39 of 162
337Operation
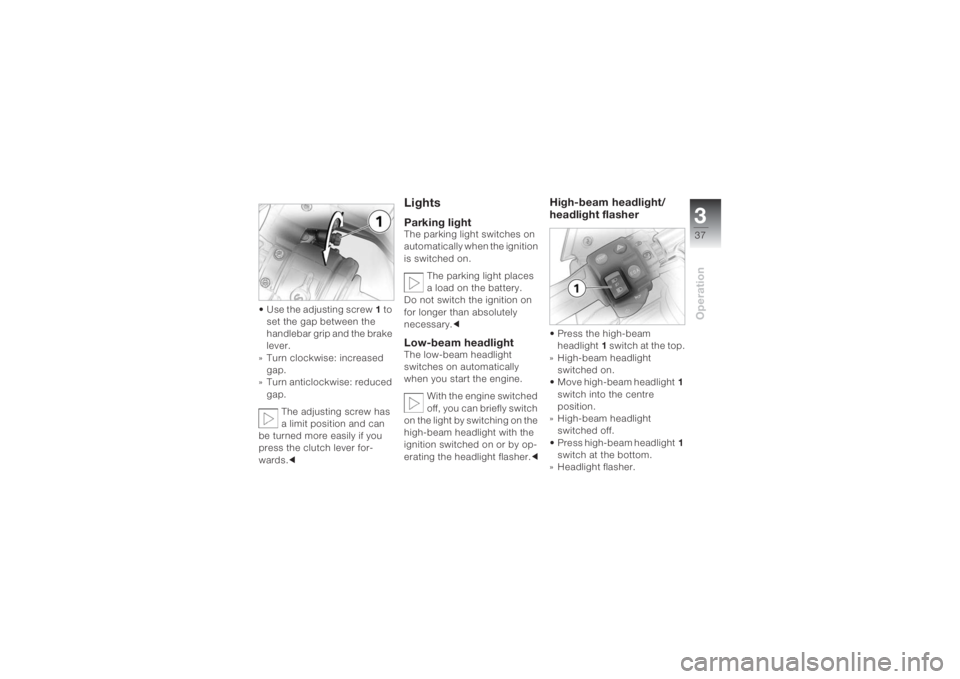
• Use the adjusting screw1 to
set the gap between the
handlebar grip and the brake
lever.
» Turn clockwise: increased
gap.
» Turn anticlockwise: reduced
gap.
The adjusting screw has
a limit position and can
be turned more easily if you
press the clutch lever for-
wards.c
LightsParking lightThe parking light switches on
automatically when the ignition
is switched on.
The parking light places
a load on the battery.
Do not switch the ignition on
for longer than absolutely
necessary.cLow-beam headlight The low-beam headlight
switches on automatically
when you start the engine.
With the engine switched
off, you can briefly switch
on the light by switching on the
high-beam headlight with the
ignition switched on or by op-
erating the headlight flasher.c
High-beam headlight/
headlight flasher • Press the high-beam
headlight1 s w i t c h a t t h e t o p .
» High-beam headlight
switched on.
• Move high-beam headlight1
switch into the centre
position.
» High-beam headlight
switched off.
• Press high-beam headlight1
switch at the bottom.
» Headlight flasher.
Page 54 of 162
Riding452
Safety checkPrior to every journeyUse the following checklist to
check important functions,
settings and wear limits before
starting to ride. Checklist–Brakes (
b 93)
– Brake fluid level (
b 91)
– Clutch function (b 93)
– Clutch fluid level (b 93)
– Warning and telltale lights
(
b 18)
– Shock absorber setting
(b 44, 46) and spring
preload (
b 47)
–Rims (
b 94), tread depth
(
b 94) and tyre pressure
(b 47)
– Load, gross weight (
b 137)
– Secure luggage systemAt regular intervals:
– Engine oil level (every time
you refuel) (
b 86)
– Brake pads (every second/
third time you refuel)
(
b 90, 91)
Making your first tripSafe handling of your
motorcycleEach motorcycle has its 'own
life' that you have to get used
to:
– Acceleration capability
– Road holding
– Cornering characteristics
–Braking power
The engine also has to be
run in during the first 1,000 km
(b 58).You will find information on
BMW Integral ABS from
(
b 69) onwards.
BMW Integral ABS incor-
porates braking power
assistance, so that braking
power is significantly higher
than with conventional brake
systems. Especially when
cornering, unintentionally hard
braking can lead to dangerous
situations.
Practice braking with
BMW Integral ABS in safe
situations.c
Page 57 of 162
455Riding
positions. Before conclusion
of the self-diagnosis, only
residual braking function
(b 71) is available.
• Release the brake lever.
• Switch on the ignition.
Phase 1
General warning light
lights up.
ABS warning light flashes
4 times per second.
Self-diagnosis is carried out.
Phase 2
ABS warning light flashes
once per second.
Self-diagnosis is complete. The warning light goes out
after completion of the start-
ing-off test (
b 58).
If the ignition is switched
on with the brake lever
operated and then the engine
is started and the motorcycle
moves off immediately, the
BMW Integral ABS is still in the
residual braking function
(
b 71). The self-diagnosis is
carried out as soon as the
brake lever is released com-
pletely for the first time. During
this period, neither the ABS
function nor the braking power
assistance is available.
When you start the engine,
wait until the ABS self-diagno-
sis has been carried out.cStarting on gradients:
Switch on the ignition
with the gear engaged, clutch
lever released and brake lever
released. Then press the
brake, press the clutch and
start the engine.c
Side-standIf the side stand is extended
and a gear is engaged, you
cannot start the motorcycle.
If the motorcycle has been
started in neutral and a gear is
then engaged while the side
stand is extended, the engine
switches off.
Page 58 of 162
Riding456
Manual gearboxThe motorcycle can be started
in the neutral position or with a
gear engaged and the clutch
pressed. Only press the clutch
after switching on the ignition.
In the neutral position, the
"neutral" telltale light lights up
in green and the gear display
in the multifunction display
shows 0.Starting
Do not turn the throttle
twistgrip when starting
the engine. At ambient tem-
peratures below 0 °C, disen-
gage the clutch after switching
on the ignition.c• Press starter button1.
» The engine starts.
• Observe warning and infor-
mation displays (
b 18-28).
The start attempt is auto-
matically interrupted if
the battery voltage is too low.
Prior to renewed starting
attempts, charge the battery
or obtain starting assistance
(
b 111).cHigh engine speeds with
a cold engine could lead
to increased engine wear.
Avoid high engine speeds
when the engine is cold.c
If you are unable to start
the engine, the following
troubleshooting chart can
provide assistance.c
Page 59 of 162
457Riding
Troubleshooting chartFault: Engine does not start or only starts with difficulty.
Possible cause Remedy see pageKill switch activated Kill switch in operating position (
b 53)
Side stand extended and gear
engagedRetract the side stand fully (b 63)
Gear engaged, clutch not
disengagedPlace the gearbox in neutral or press the
clutch(b 56)
Clutch operated with ignition
switched offSwitch on the ignition first, then operate
the clutch(b 53, 56)
No fuel in tank Refuel (b 67)
Battery not adequately charged Recharge the battery (b 113)