2004 BMW 645CI COUPE&CONVERTIBLE sensor
[x] Cancel search: sensorPage 13 of 216
At a glance
11Reference
Controls
Driving tips
Communications
Navigation
Entertainment
Mobility
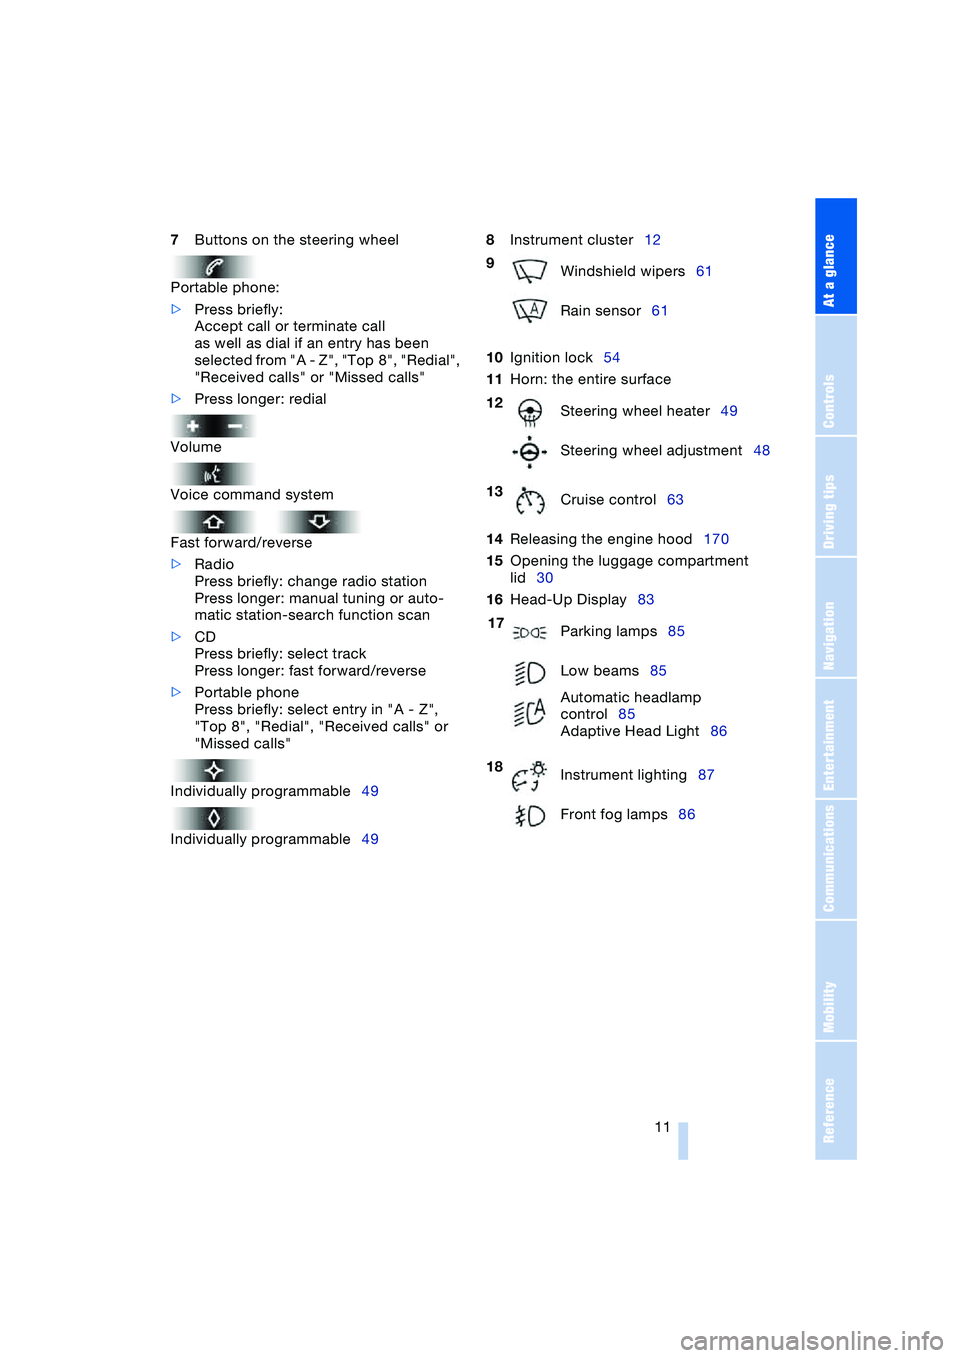
7Buttons on the steering wheel
Portable phone:
>Press briefly:
Accept call or terminate call
as well as dial if an entry has been
selected from "A - Z", "Top 8", "Redial",
"Received calls" or "Missed calls"
>Press longer: redial
Volume
Voice command system
Fast forward/reverse
>Radio
Press briefly: change radio station
Press longer: manual tuning or auto-
matic station-search function scan
>CD
Press briefly: select track
Press longer: fast forward/reverse
>Portable phone
Press briefly: select entry in "A - Z",
"Top 8", "Redial", "Received calls" or
"Missed calls"
Individually programmable49
Individually programmable498Instrument cluster12
10Ignition lock54
11Horn: the entire surface
14Releasing the engine hood170
15Opening the luggage compartment
lid30
16Head-Up Display83
9
Windshield wipers61
Rain sensor61
12
Steering wheel heater49
Steering wheel adjustment48
13
Cruise control63
17
Parking lamps85
Low beams85
Automatic headlamp
control85
Adaptive Head Light86
18
Instrument lighting87
Front fog lamps86
Page 34 of 216
Opening and closing
32 If special circumstances should make it
absolutely necessary to operate the vehicle
with the lid open:
1.Coupe: close both windows as well as
the glass roof
Convertible: with closed top, close all
windows
2.Adjust the automatic climate control to
supply a high air volume, refer to
page 89.
Luggage compartment
There are four lashing eyes on the inner
corners of the luggage compartment for
securing luggage nets or securing straps to
fix luggage in position.
Also refer to Cargo loading, page 104.
Convertible: increasing luggage
compartment capacity
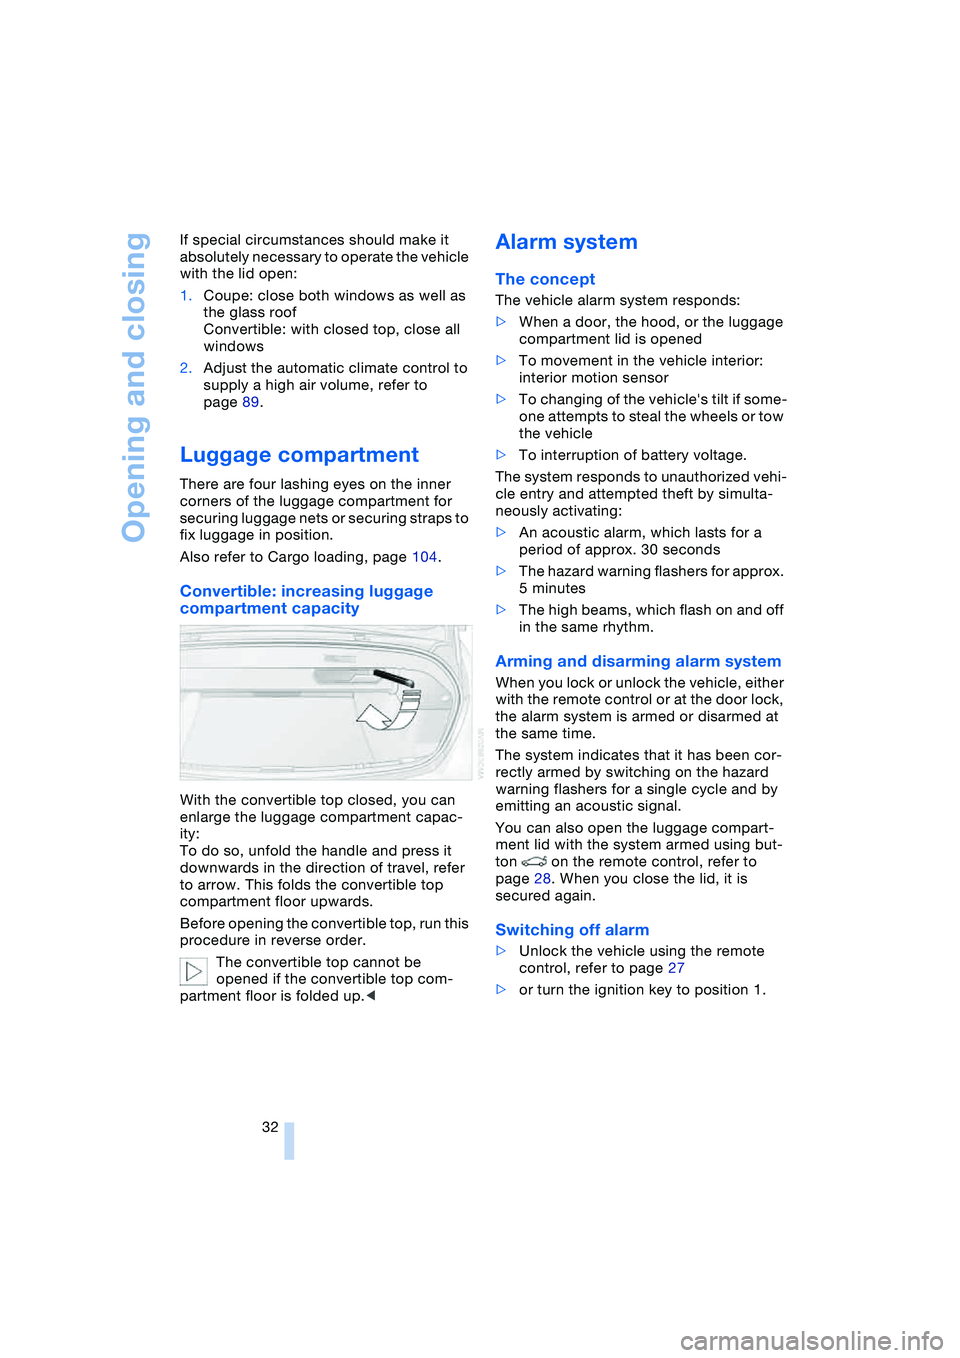
With the convertible top closed, you can
enlarge the luggage compartment capac-
ity:
To do so, unfold the handle and press it
downwards in the direction of travel, refer
to arrow. This folds the convertible top
compartment floor upwards.
Before opening the convertible top, run this
procedure in reverse order.
The convertible top cannot be
opened if the convertible top com-
partment floor is folded up.<
Alarm system
The concept
The vehicle alarm system responds:
>When a door, the hood, or the luggage
compartment lid is opened
>To movement in the vehicle interior:
interior motion sensor
>To changing of the vehicle's tilt if some-
one attempts to steal the wheels or tow
the vehicle
>To interruption of battery voltage.
The system responds to unauthorized vehi-
cle entry and attempted theft by simulta-
neously activating:
>An acoustic alarm, which lasts for a
period of approx. 30 seconds
>The hazard warning flashers for approx.
5 minutes
>The high beams, which flash on and off
in the same rhythm.
Arming and disarming alarm system
When you lock or unlock the vehicle, either
with the remote control or at the door lock,
the alarm system is armed or disarmed at
the same time.
The system indicates that it has been cor-
rectly armed by switching on the hazard
warning flashers for a single cycle and by
emitting an acoustic signal.
You can also open the luggage compart-
ment lid with the system armed using but-
ton on the remote control, refer to
page 28. When you close the lid, it is
secured again.
Switching off alarm
>Unlock the vehicle using the remote
control, refer to page 27
>or turn the ignition key to position 1.
Page 35 of 216
Controls
33Reference
At a glance
Driving tips
Communications
Navigation
Entertainment
Mobility
Indicator lamp displays
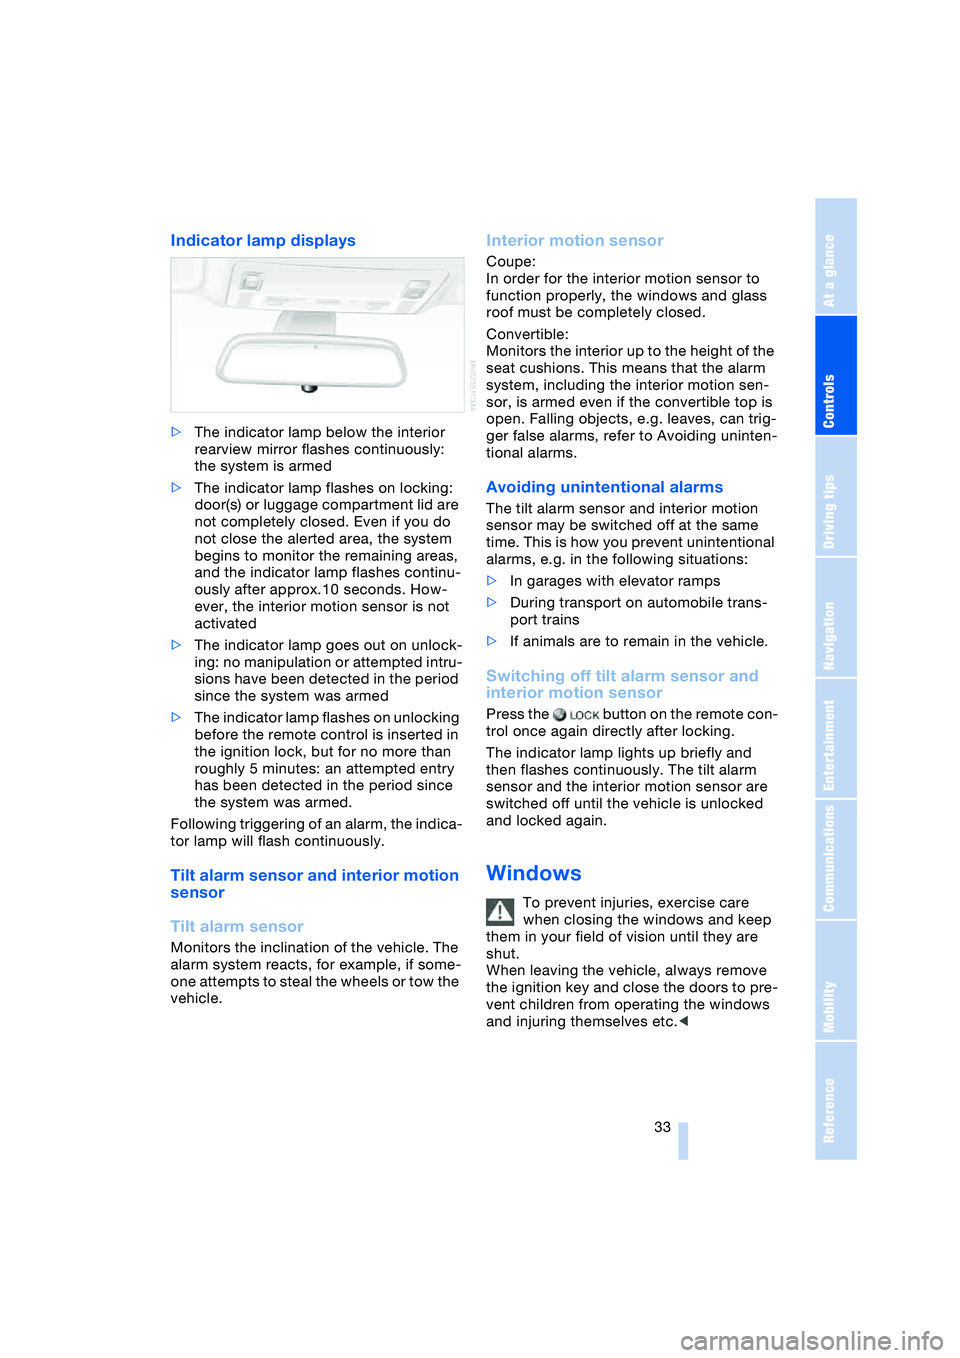
>The indicator lamp below the interior
rearview mirror flashes continuously:
the system is armed
>The indicator lamp flashes on locking:
door(s) or luggage compartment lid are
not completely closed. Even if you do
not close the alerted area, the system
begins to monitor the remaining areas,
and the indicator lamp flashes continu-
ously after approx.10 seconds. How-
ever, the interior motion sensor is not
activated
>The indicator lamp goes out on unlock-
ing: no manipulation or attempted intru-
sions have been detected in the period
since the system was armed
>The indicator lamp flashes on unlocking
before the remote control is inserted in
the ignition lock, but for no more than
roughly 5 minutes: an attempted entry
has been detected in the period since
the system was armed.
Following triggering of an alarm, the indica-
tor lamp will flash continuously.
Tilt alarm sensor and interior motion
sensor
Tilt alarm sensor
Monitors the inclination of the vehicle. The
alarm system reacts, for example, if some-
one attempts to steal the wheels or tow the
vehicle.
Interior motion sensor
Coupe:
In order for the interior motion sensor to
function properly, the windows and glass
roof must be completely closed.
Convertible:
Monitors the interior up to the height of the
seat cushions. This means that the alarm
system, including the interior motion sen-
sor, is armed even if the convertible top is
open. Falling objects, e.g. leaves, can trig-
ger false alarms, refer to Avoiding uninten-
tional alarms.
Avoiding unintentional alarms
The tilt alarm sensor and interior motion
sensor may be switched off at the same
time. This is how you prevent unintentional
alarms, e.g. in the following situations:
>In garages with elevator ramps
>During transport on automobile trans-
port trains
>If animals are to remain in the vehicle.
Switching off tilt alarm sensor and
interior motion sensor
Press the button on the remote con-
trol once again directly after locking.
The indicator lamp lights up briefly and
then flashes continuously. The tilt alarm
sensor and the interior motion sensor are
switched off until the vehicle is unlocked
and locked again.
Windows
To prevent injuries, exercise care
when closing the windows and keep
them in your field of vision until they are
shut.
When leaving the vehicle, always remove
the ignition key and close the doors to pre-
vent children from operating the windows
and injuring themselves etc.<
Page 63 of 216
Controls
61Reference
At a glance
Driving tips
Communications
Navigation
Entertainment
Mobility
Triple turn signal activation is acti-
vated.
Wiper system
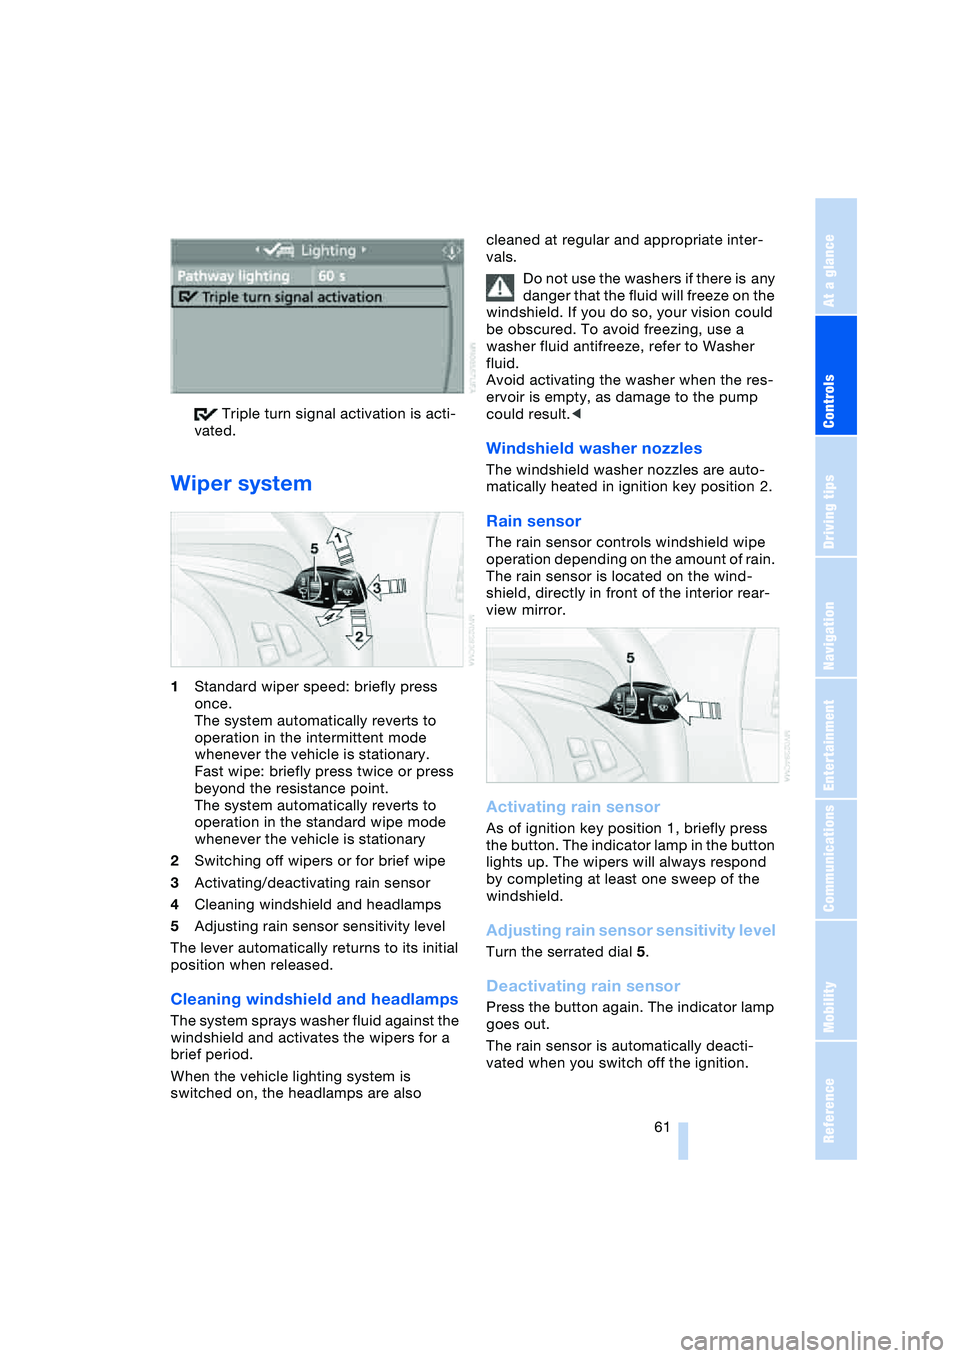
1Standard wiper speed: briefly press
once.
The system automatically reverts to
operation in the intermittent mode
whenever the vehicle is stationary.
Fast wipe: briefly press twice or press
beyond the resistance point.
The system automatically reverts to
operation in the standard wipe mode
whenever the vehicle is stationary
2Switching off wipers or for brief wipe
3Activating/deactivating rain sensor
4Cleaning windshield and headlamps
5Adjusting rain sensor sensitivity level
The lever automatically returns to its initial
position when released.
Cleaning windshield and headlamps
The system sprays washer fluid against the
windshield and activates the wipers for a
brief period.
When the vehicle lighting system is
switched on, the headlamps are also cleaned at regular and appropriate inter-
vals.
Do not use the washers if there is any
danger that the fluid will freeze on the
windshield. If you do so, your vision could
be obscured. To avoid freezing, use a
washer fluid antifreeze, refer to Washer
fluid.
Avoid activating the washer when the res-
ervoir is empty, as damage to the pump
could result.<
Windshield washer nozzles
The windshield washer nozzles are auto-
matically heated in ignition key position 2.
Rain sensor
The rain sensor controls windshield wipe
operation depending on the amount of rain.
The rain sensor is located on the wind-
shield, directly in front of the interior rear-
view mirror.
Activating rain sensor
As of ignition key position 1, briefly press
the button. The indicator lamp in the button
lights up. The wipers will always respond
by completing at least one sweep of the
windshield.
Adjusting rain sensor sensitivity level
Turn the serrated dial 5.
Deactivating rain sensor
Press the button again. The indicator lamp
goes out.
The rain sensor is automatically deacti-
vated when you switch off the ignition.
Page 64 of 216
Driving
62 Deactivate the rain sensor when
passing through an automatic car
wash. Failure to do so could result in dam-
age caused by undesired wiper activa-
tion.<
Washer fluid
Washer fluid antifreeze is flammable.
Always keep it well away from sparks
and open flames, and store it in tightly
closed containers well out of the reach of
children. Always observe the instructions
for use provided on the containers.<
Washer fluid reservoir
Capacity approx. 5.3 US quarts/5 liters
Fill with water and – if required – with a
washer antifreeze, according to manufac-
turer's recommendations.
In order to keep to the mixture ratio,
mix the washer fluid before filling.<
Cruise control
The concept
The cruise control is available for use at
speeds of approx. 20 mph/30 km/h and
higher. The vehicle maintains and stores
the speed that you set using the lever
mounted on the steering column.
Do not use the cruise control when
driving on winding roads, in heavy
traffic or in poor road conditions – e.g.
snow, rain, ice, loose road surface – that do
not permit a constant speed.<
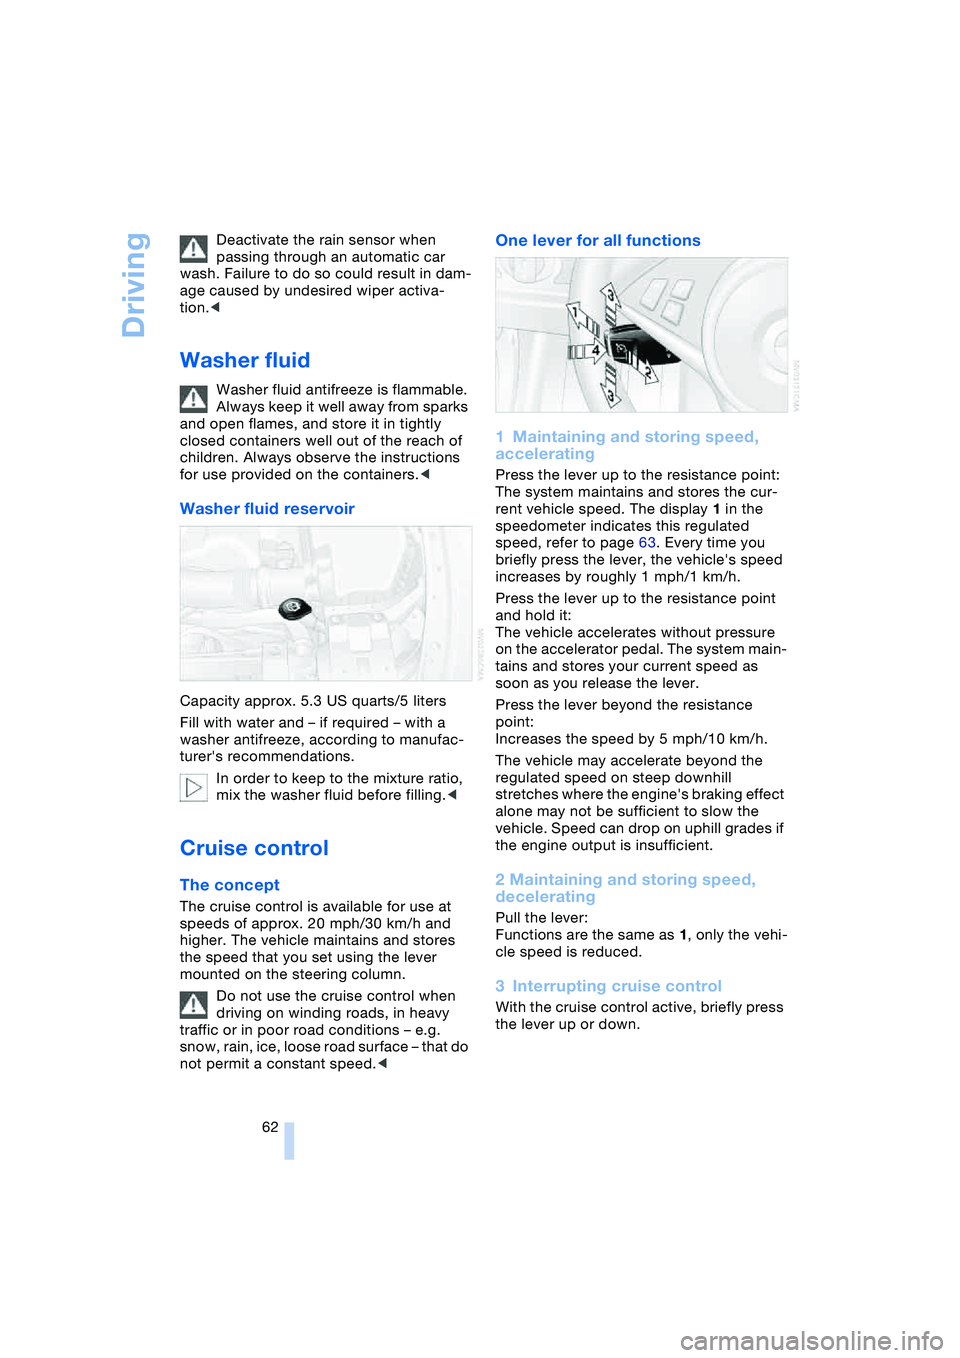
One lever for all functions
1Maintaining and storing speed,
accelerating
Press the lever up to the resistance point:
The system maintains and stores the cur-
rent vehicle speed. The display 1 in the
speedometer indicates this regulated
speed, refer to page 63. Every time you
briefly press the lever, the vehicle's speed
increases by roughly 1 mph/1 km/h.
Press the lever up to the resistance point
and hold it:
The vehicle accelerates without pressure
on the accelerator pedal. The system main-
tains and stores your current speed as
soon as you release the lever.
Press the lever beyond the resistance
point:
Increases the speed by 5 mph/10 km/h.
The vehicle may accelerate beyond the
regulated speed on steep downhill
stretches where the engine's braking effect
alone may not be sufficient to slow the
vehicle. Speed can drop on uphill grades if
the engine output is insufficient.
2 Maintaining and storing speed,
decelerating
Pull the lever:
Functions are the same as 1, only the vehi-
cle speed is reduced.
3Interrupting cruise control
With the cruise control active, briefly press
the lever up or down.
Page 77 of 216

Controls
75Reference
At a glance
Driving tips
Communications
Navigation
Entertainment
Mobility
Technology for comfort, convenience
and safety
PDC Park Distance Control*
The concept
The PDC assists you when you are parking.
Signal tones and a visual display
* indicate
the current distance to an object behind or
in front of your vehicle. To measure the dis-
tance, there are four ultrasonic sensors in
each bumper. The sensors at the front and
at the two rear corners have a range of
approx. 20 in/50 cm; the rear middle sen-
sors have approx. 5 ft/1.50 m.
PDC is a parking aid that can indicate
objects when they are approached
slowly, as is usually the case when parking.
Avoid approaching an object at high speed,
as otherwise the physical circumstances
would mean that the system warning was
too late.<
Automatic mode
In ignition key position 2, the system auto-
matically assumes operational status after
a few seconds each time you engage
reverse gear or selector-lever position R.
Wait this short period before driving.<
The system is automatically deacti-
vated once the vehicle travels approx.
165 ft/50 m or exceeds a speed of roughly
20 mph/30 km/h; the indicator lamp goes
out. You can reactivate the system manu-
ally as needed.
Manual mode
With the ignition key in position 2, press the
button; the indicator lamp lights up.
Deactivating manual mode
Press the button again; the indicator lamp
goes out.
Signal tones
The signal indicating the distance to the
nearest obstacle is directional. Thus, an
object detected to the left rear of the vehi-
cle will be indicated by a signal tone from
the left rear speaker, etc. As the distance
between vehicle and object decreases, the
intervals between the tones become
shorter. The signal tone becomes continu-
ous once the distance to the nearest object
falls to below roughly 1 ft/30 cm.
The warning signal is canceled after
approx. 3 seconds if you are moving paral-
lel to a wall.
Malfunctions
The indicator lamp within the button
flashes and a message appears on the
Control Display. PDC has failed. Switch off
PDC. Have the system checked.
As a preventive measure, keep the sensors
clean and free of ice or snow in order to
ensure that they will continue to operate
effectively.
PDC with visual warning*
You also enjoy the option of having the sys-
tem show distances to objects on the Con-
trol Display. The Control Display will also
Page 78 of 216
Technology for comfort, convenience and safety
76 indicate the presence of objects in green
before they are close enough to generate a
signal tone.
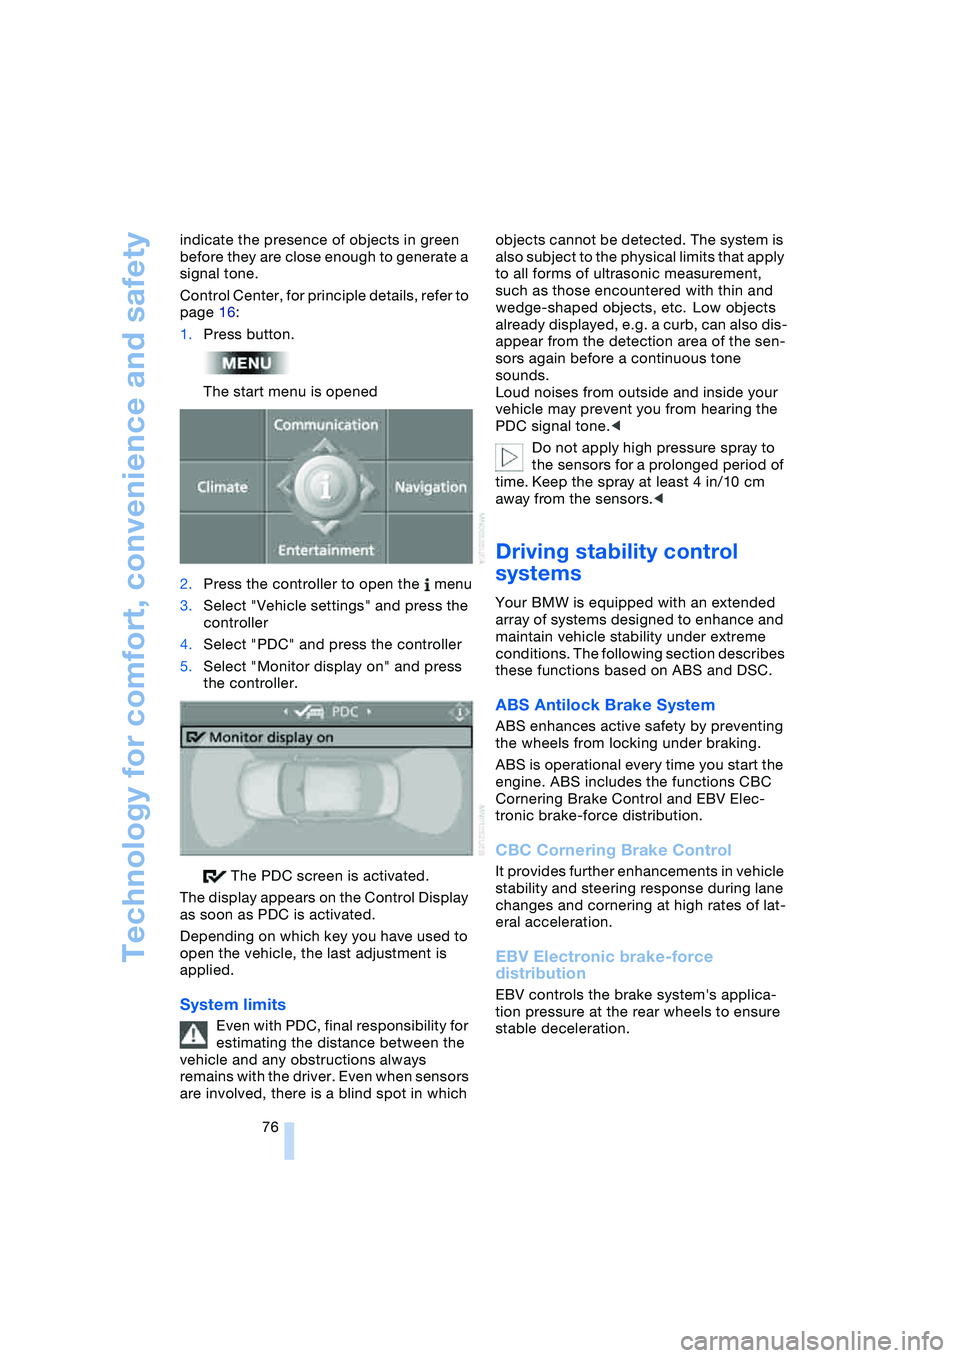
Control Center, for principle details, refer to
page 16:
1.Press button.
The start menu is opened
2.Press the controller to open the menu
3.Select "Vehicle settings" and press the
controller
4.Select "PDC" and press the controller
5.Select "Monitor display on" and press
the controller.
The PDC screen is activated.
The display appears on the Control Display
as soon as PDC is activated.
Depending on which key you have used to
open the vehicle, the last adjustment is
applied.
System limits
Even with PDC, final responsibility for
estimating the distance between the
vehicle and any obstructions always
remains with the driver. Even when sensors
are involved, there is a blind spot in which objects cannot be detected. The system is
also subject to the physical limits that apply
to all forms of ultrasonic measurement,
such as those encountered with thin and
wedge-shaped objects, etc. Low objects
already displayed, e.g. a curb, can also dis-
appear from the detection area of the sen-
sors again before a continuous tone
sounds.
Loud noises from outside and inside your
vehicle may prevent you from hearing the
PDC signal tone.<
Do not apply high pressure spray to
the sensors for a prolonged period of
time. Keep the spray at least 4 in/10 cm
away from the sensors.<
Driving stability control
systems
Your BMW is equipped with an extended
array of systems designed to enhance and
maintain vehicle stability under extreme
conditions. The following section describes
these functions based on ABS and DSC.
ABS Antilock Brake System
ABS enhances active safety by preventing
the wheels from locking under braking.
ABS is operational every time you start the
engine. ABS includes the functions CBC
Cornering Brake Control and EBV Elec-
tronic brake-force distribution.
CBC Cornering Brake Control
It provides further enhancements in vehicle
stability and steering response during lane
changes and cornering at high rates of lat-
eral acceleration.
EBV Electronic brake-force
distribution
EBV controls the brake system's applica-
tion pressure at the rear wheels to ensure
stable deceleration.
Page 91 of 216
Controls
89Reference
At a glance
Driving tips
Communications
Navigation
Entertainment
Mobility
14Indicator lamp for independent ventila-
tion
>Activation time set:
The indicator lamp comes on
>Independent ventilation switched on:
The indicator lamp flashes
15Rear window defroster
16Air grill for interior temperature sensor –
please keep clear and unobstructed
All other setting options for the automatic
climate control can be found at "Climate"
and in the menu on the Control Display,
refer to pages 90 and 91.
The current setting for air distribution is dis-
played on the Control Display.
A congenial climate
To use the automatic function, press the
AUTO button. Select an interior tempera-
ture you find pleasant.
The following section contains more
detailed information on the available set-
ting options.
The cooling function is only possible with
the engine running.
AUTO program
The AUTO program adjusts the
air distribution to the wind-
shield and side windows,
towards the upper body and footwell as
well as the air volume, while also using your
preselected temperature setting as the
basis for adjusting the interior climate to
adapt to external seasonal influences.
The cooling function comes on automati-
cally when you select the AUTO program.
At the same time, a condensation sensor
controls the program in such a way that
window condensation is prevented as far
as possible.
Temperature adjustment
The figures on the display pro-
vide a general indication of inte-
rior temperature. A pleasant
adjustment is 727/226.
When you start the vehicle, this system ensures that the selected tempera-
ture is achieved as quickly as possible. It
then maintains this temperature, regard-
less of the season.
Defrosting windows and removing
condensation
This program quickly removes
ice and condensation from the
windshield and front side win-
dows.
Adjusting air volume manually
You can adjust the air volume
by turning. You can reactivate
the automatic mode for the air
volume with the AUTO button.
Switching cooling function on and off
manually
The cooling function cools and
dehumidifies the incoming air
before also reheating it as
required, according to the temperature set-
ting. Depending on the weather, the wind-
shield may fog over briefly when the engine
is started.
The cooling function comes on automati-
cally when you select the AUTO program.
Maximum cooling
This program quickly provides
maximum cooling.
The system switches to the
recirculated-air mode and the
air flows at maximum air volume only from
the vent outlets for the upper body area.
For this reason you should ensure that
these vent outlets are open before select-
ing this program.
AUC Automatic recirculated-air
control
You can respond to unpleasant
odors or pollutants in the imme-
diate environment by tempo-
rarily suspending the supply of outside air.
The system then recirculates the air cur-